DIY Tall Planters to Fill up that Blank Outdoor Wall!
There is a big stucco wall on our upper deck, and since the day we moved in, I’ve been thinking about what to do with it. I knew I didn’t want to hang art out there. Paintings belong inside a house, in my opinion! What I really wanted was a wall full of vines.
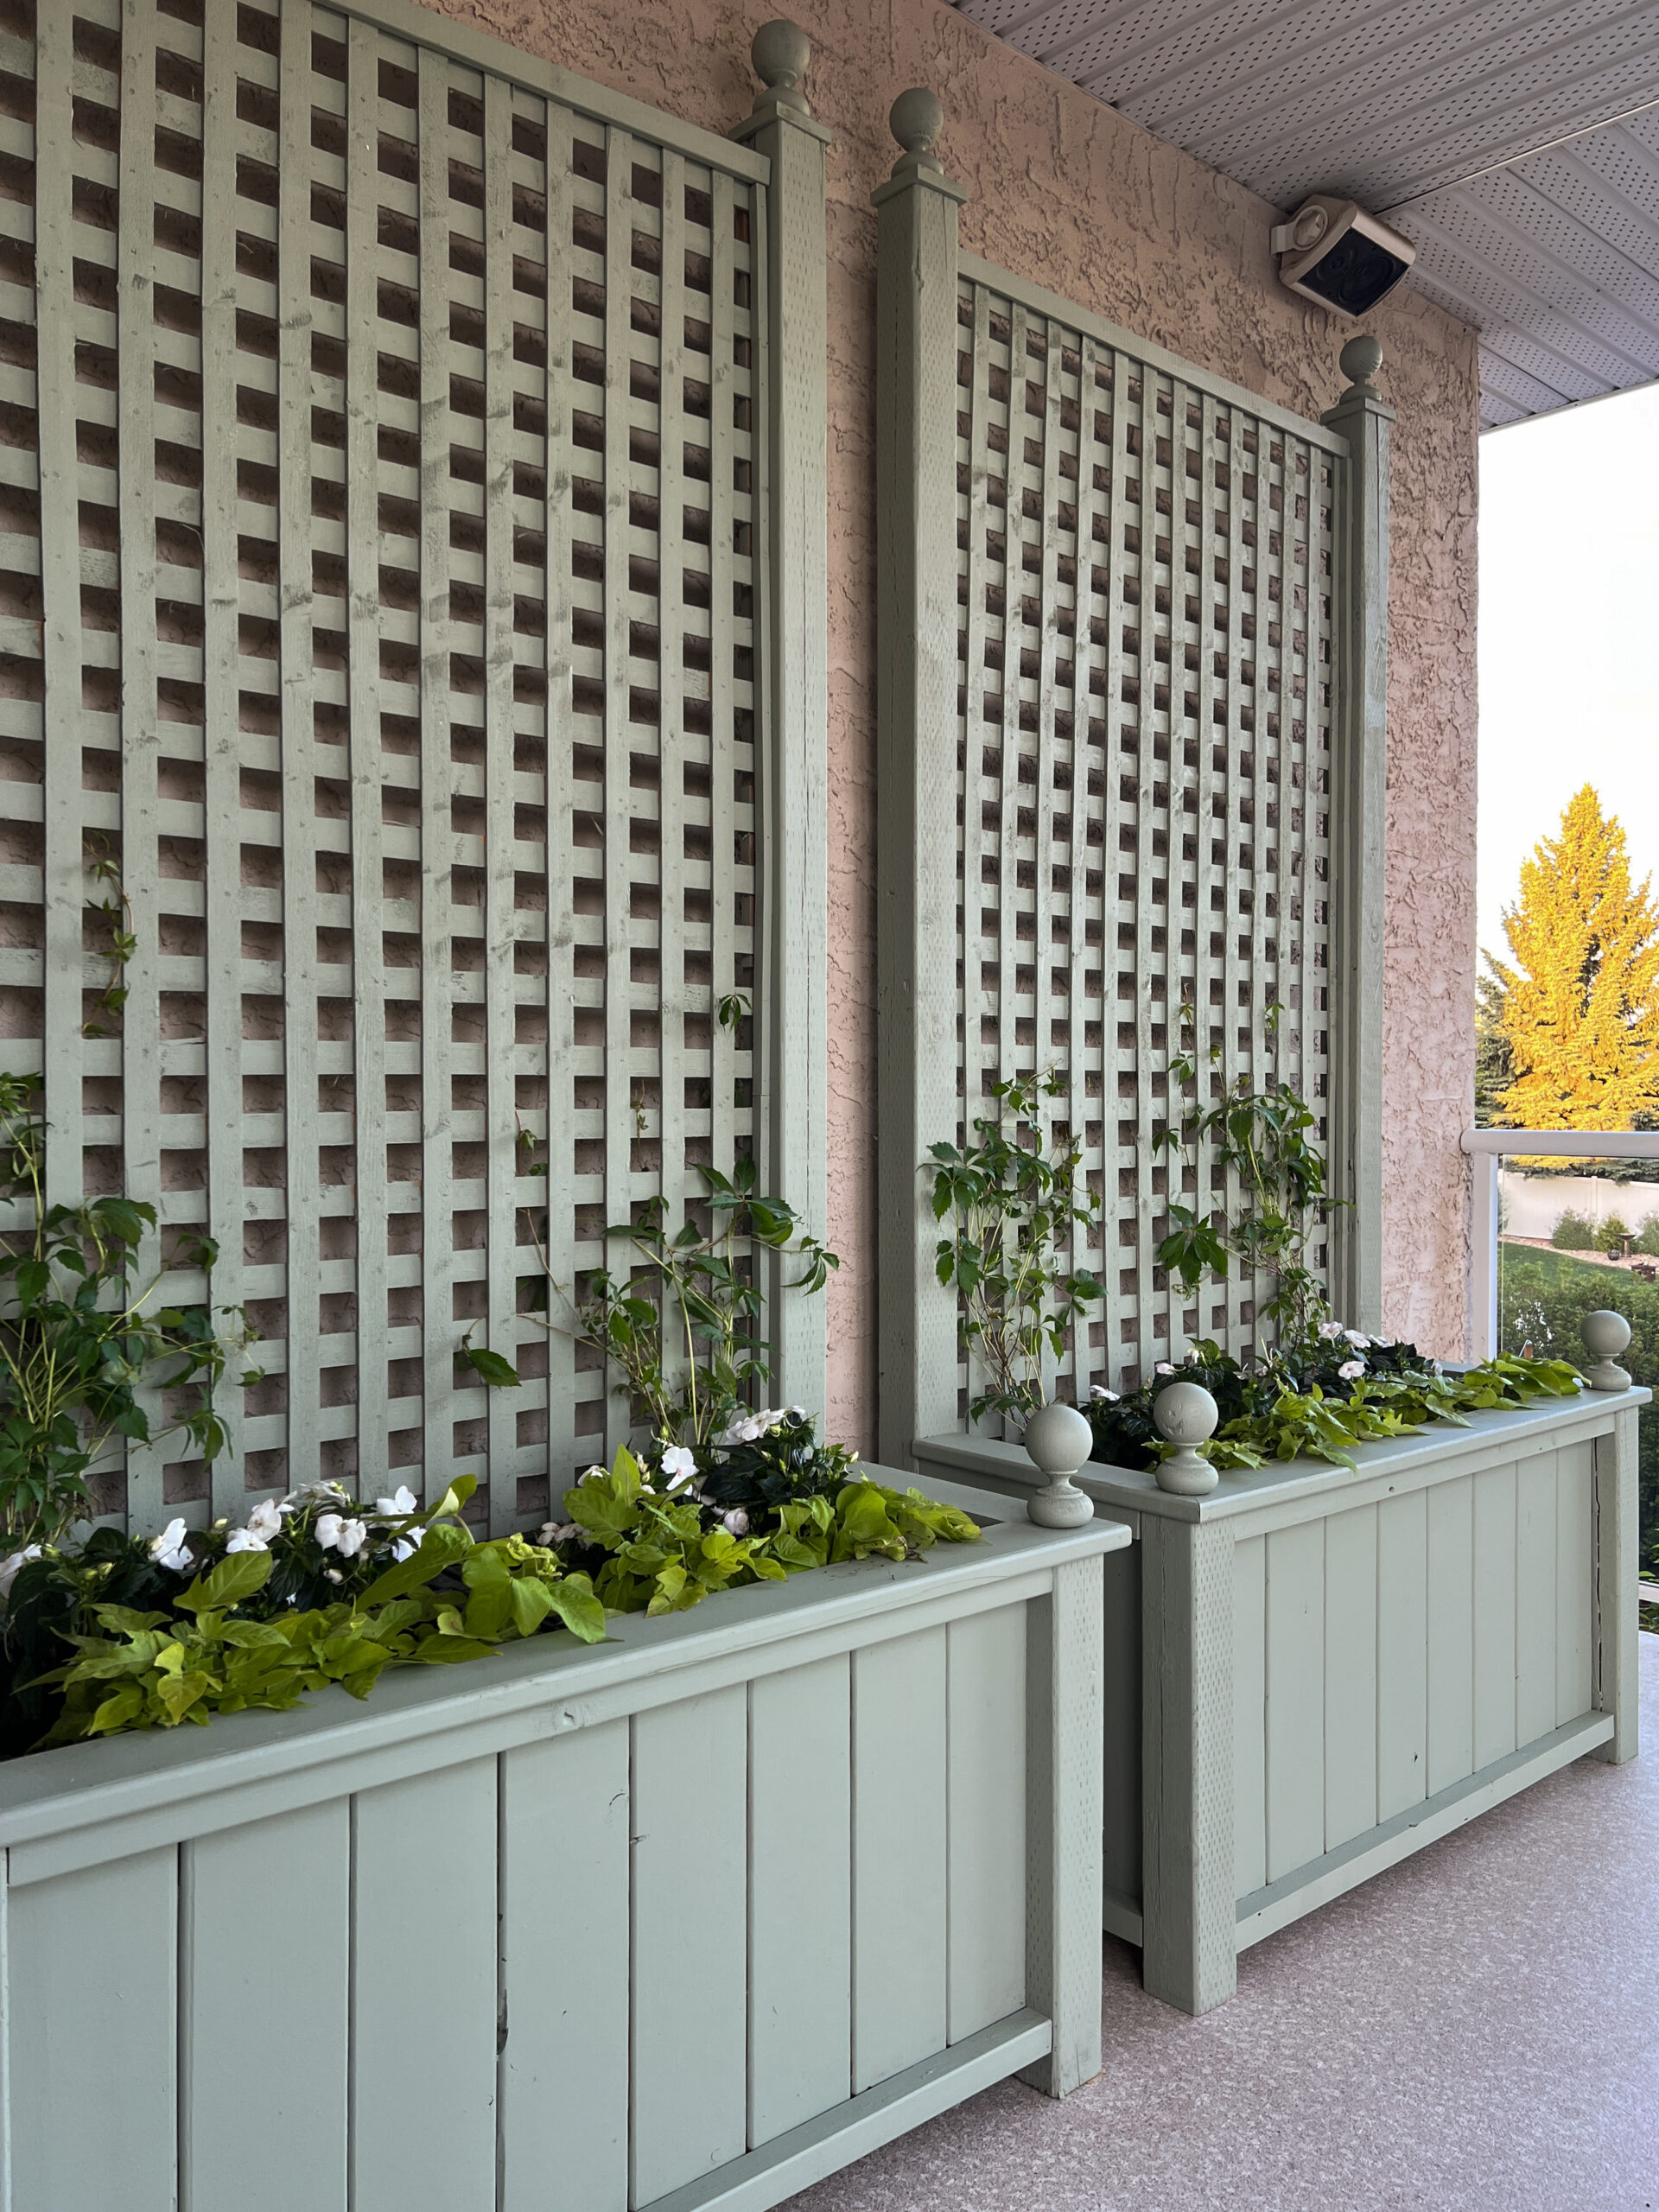
To do that, I needed something at the base of the wall to plant them in. I had trouble finding tall planters that filled up the wall as much as I was envisioning, so I made my own DIY tall planters! I made two of them to fill the wall completely. It was a cheap and easy DIY, our favourite kind! Let me show you how I did it.
This post may contain affiliate links. That means if you purchase anything from these links I earn a small commission, at no extra cost to you! This helps support my blog, so thank you!
What you will for this tall planter DIY
Supplies
- Exterior paint (I used Jungle Camouflage by Behr)
- Two large totes (I used these from Home Depot Canada)
- 4×4 posts
- 2x4s
- 2x2s
- Deck boards
- Lattice
- Climbing plants of your choice (I planted Virginia Creeper)
- Exterior screws
- Brad nails
- Nailing strips
- Fence finials
Tools
- Pocket hole screw jig(mine is a Kreg jig)
- Brad nailer
- Paint brushes/ rollers (or sprayer)
- Level
- Track saw or circular saw
- Drill
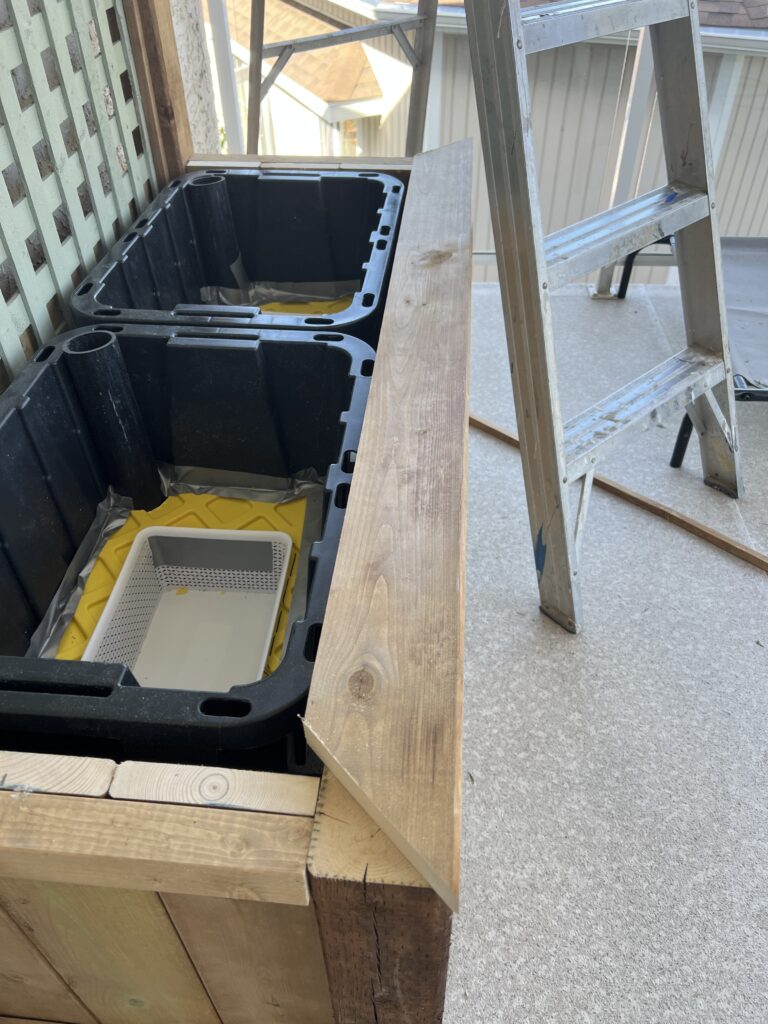
I decided I wanted to make each planter large enough to hold two storage totes. If you use the same totes I did, you can use the same dimensions. Otherwise, make adjustments as needed to fit whatever insert you will be using to hold your soil and plants.
Build the Frame of the DIY Tall Planter
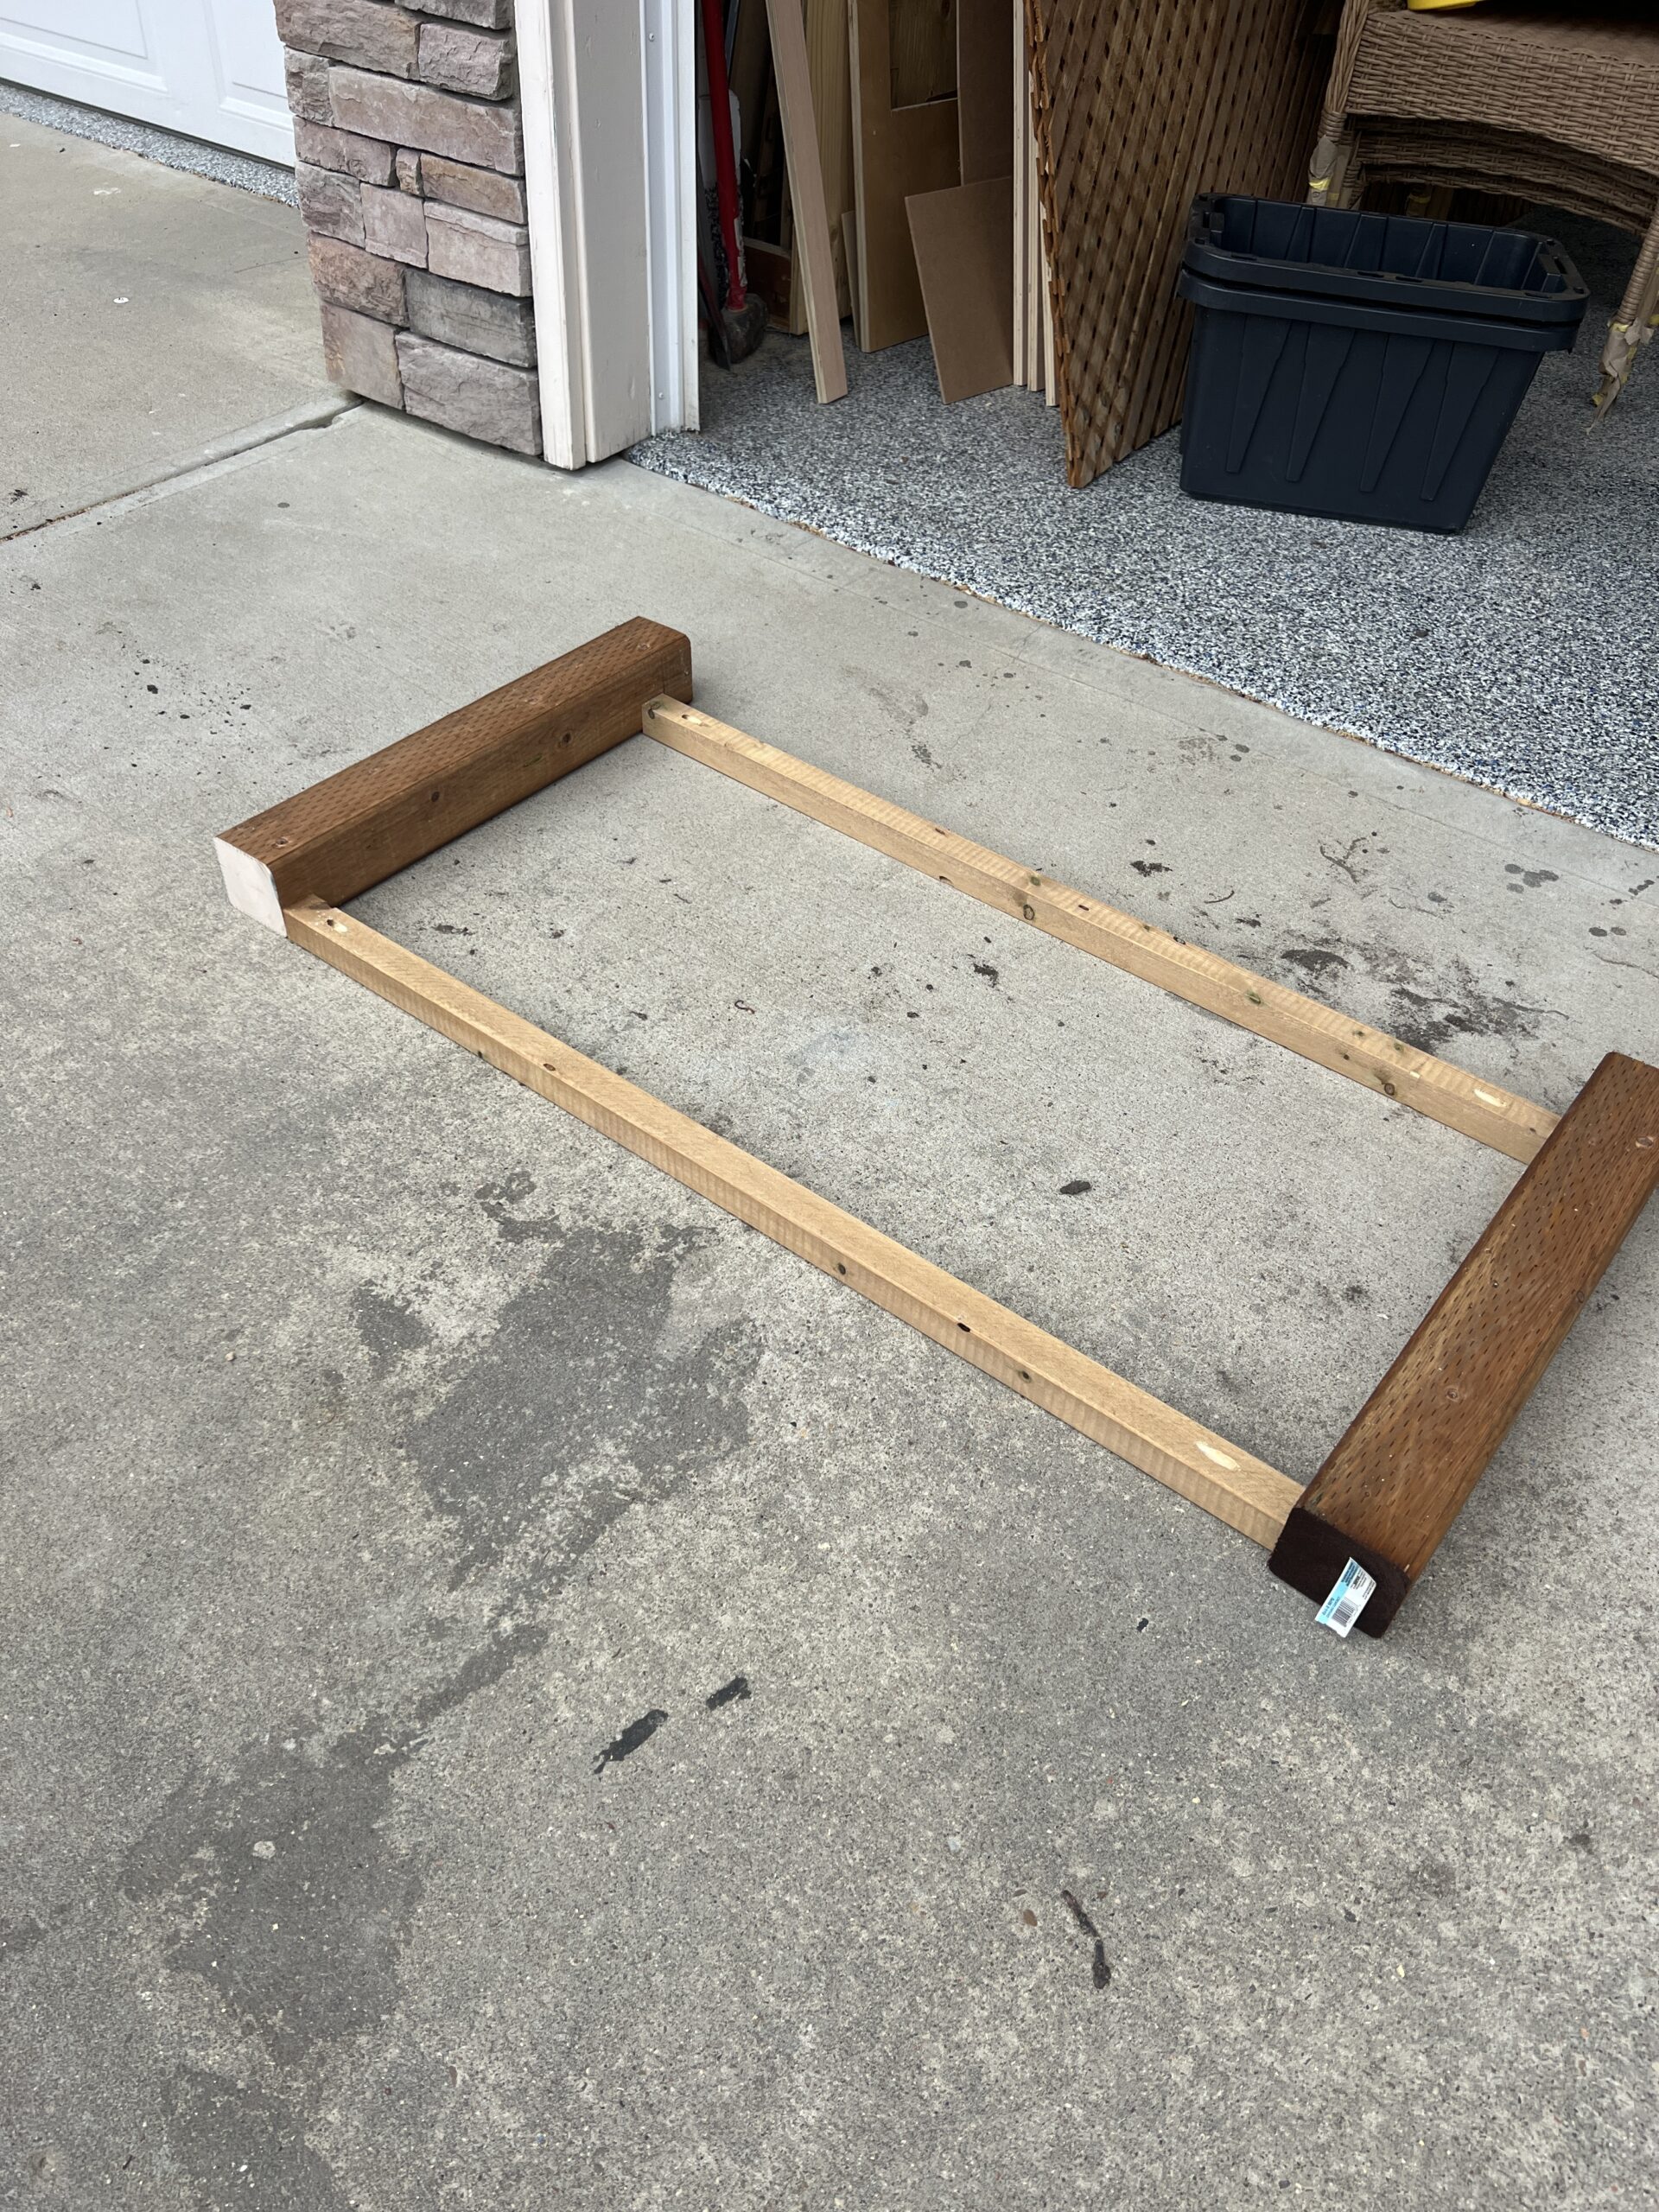
The first thing I did was connect the two long 4×4 posts with 2x4s. I cut the 2x4s to 43.5″ long and added two pocket holes to each one. Then I used the pocket holes and pocket screws to connect them.
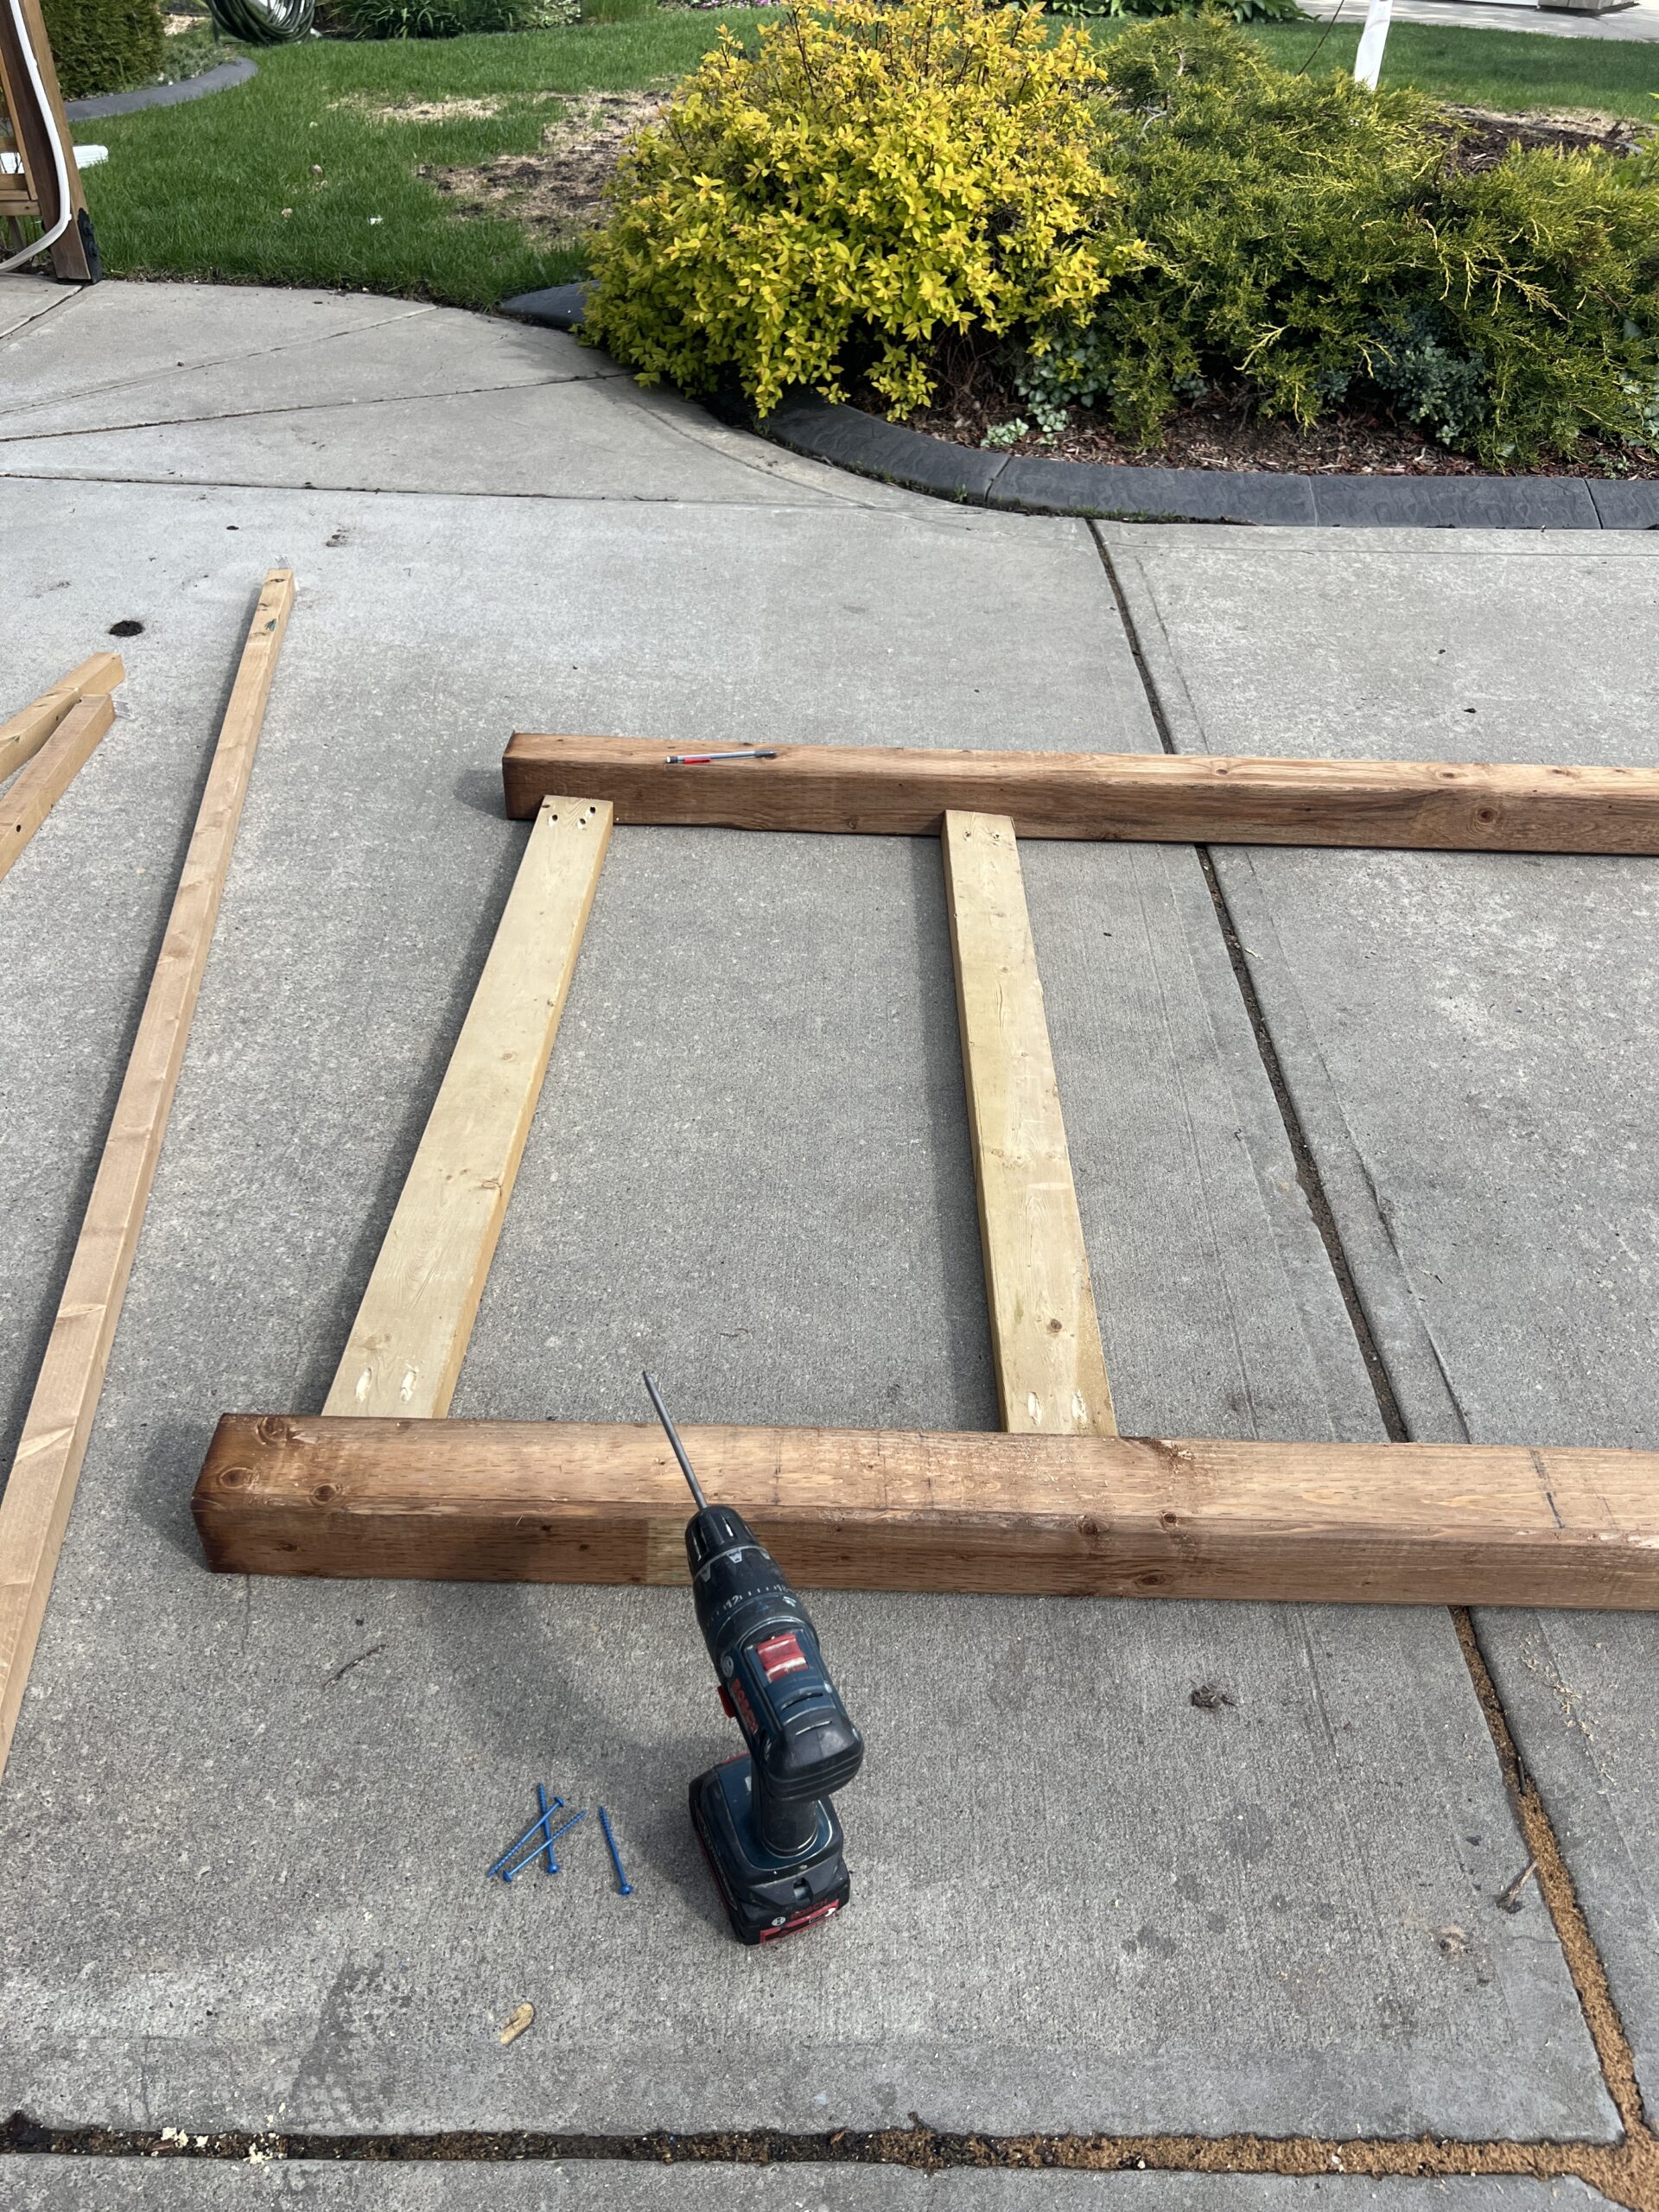
I placed the bottom one about 3″ above the bottom of the 4×4, and the top one I placed so that the top of it was 24″ from the bottom of the 4×4. These don’t show in the finished planter, so their spacing does not matter much!
Build the front of the planter frame
Next, I cut a 4×4 board down so that I had two 24″ pieces.
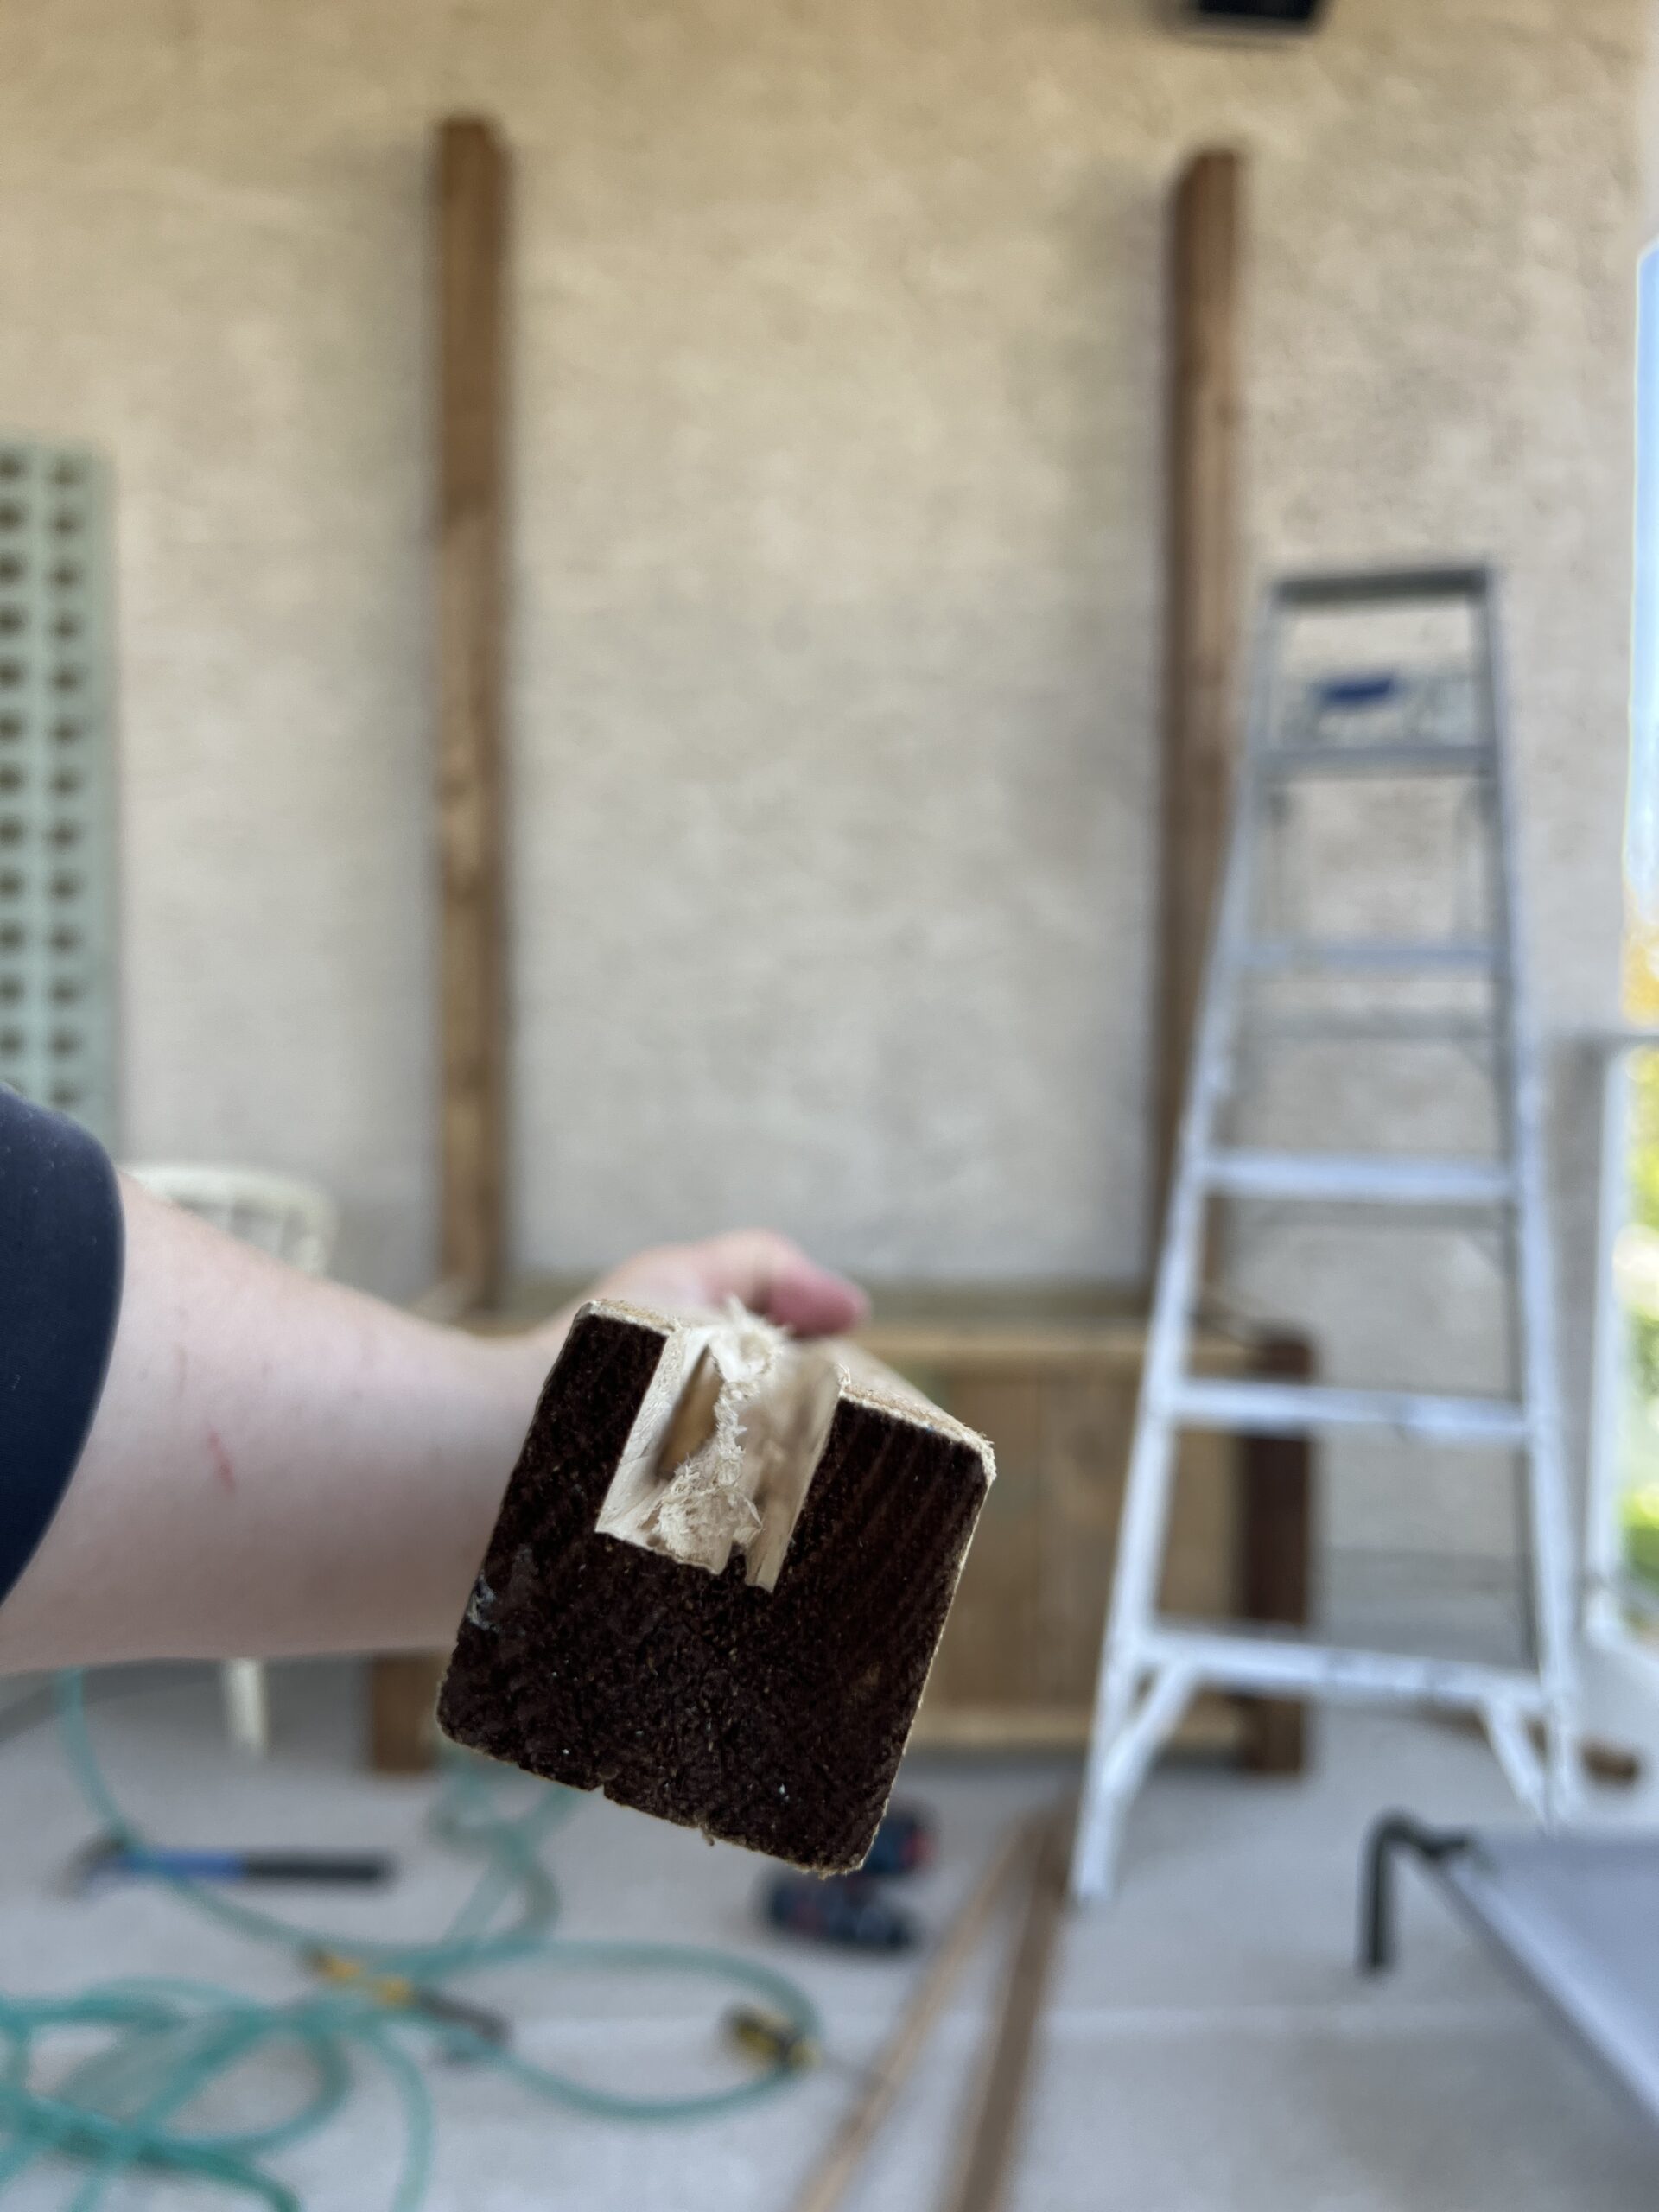
Then, I cut two 2x2s to 43.5″ long and added pocket holes to the ends of those as well. I was only able to get one pocket hole in each of the 2x2s, but that is enough, as it becomes much more stable once you add the deck boards.
Two 2x2s were attached to the short 4x4s to create the front of the planter. The bottom 2×2 is 2″ from the end of the 4×4 to the underside of the 2×2, and the top one is 22.5″ to the underside.
Next, build the sides.
I cut four 16″ lengths of 2x2s and added a pocket hole to each end.
I then added some 16″ 2x2s to the short 4x4s to create the sides of the planter. This made a U-shape, two on one side and two on the opposite side.
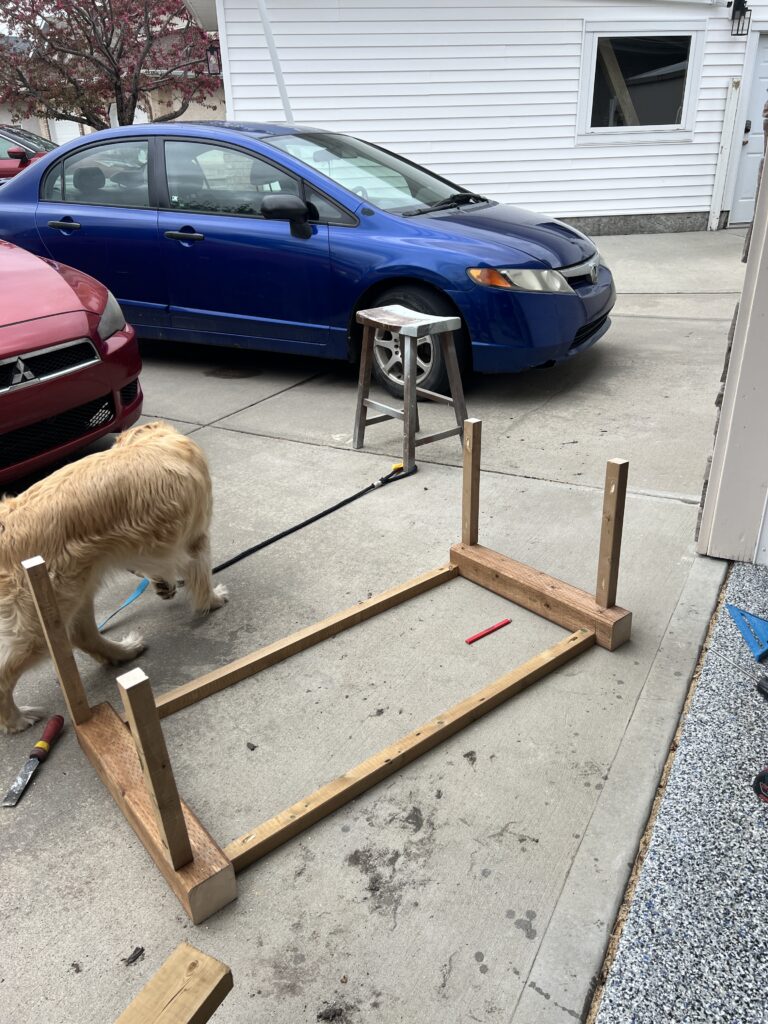
Before finishing the assembly of the planter, I decided to move it into place on my deck. It’s a tall planter box, and I was worried that it would be hard to move once it was finished!

Finally, I added the U-shaped front piece to the back, and the frame of the planter was complete.
Add the Slats for the DIY Tall Planter
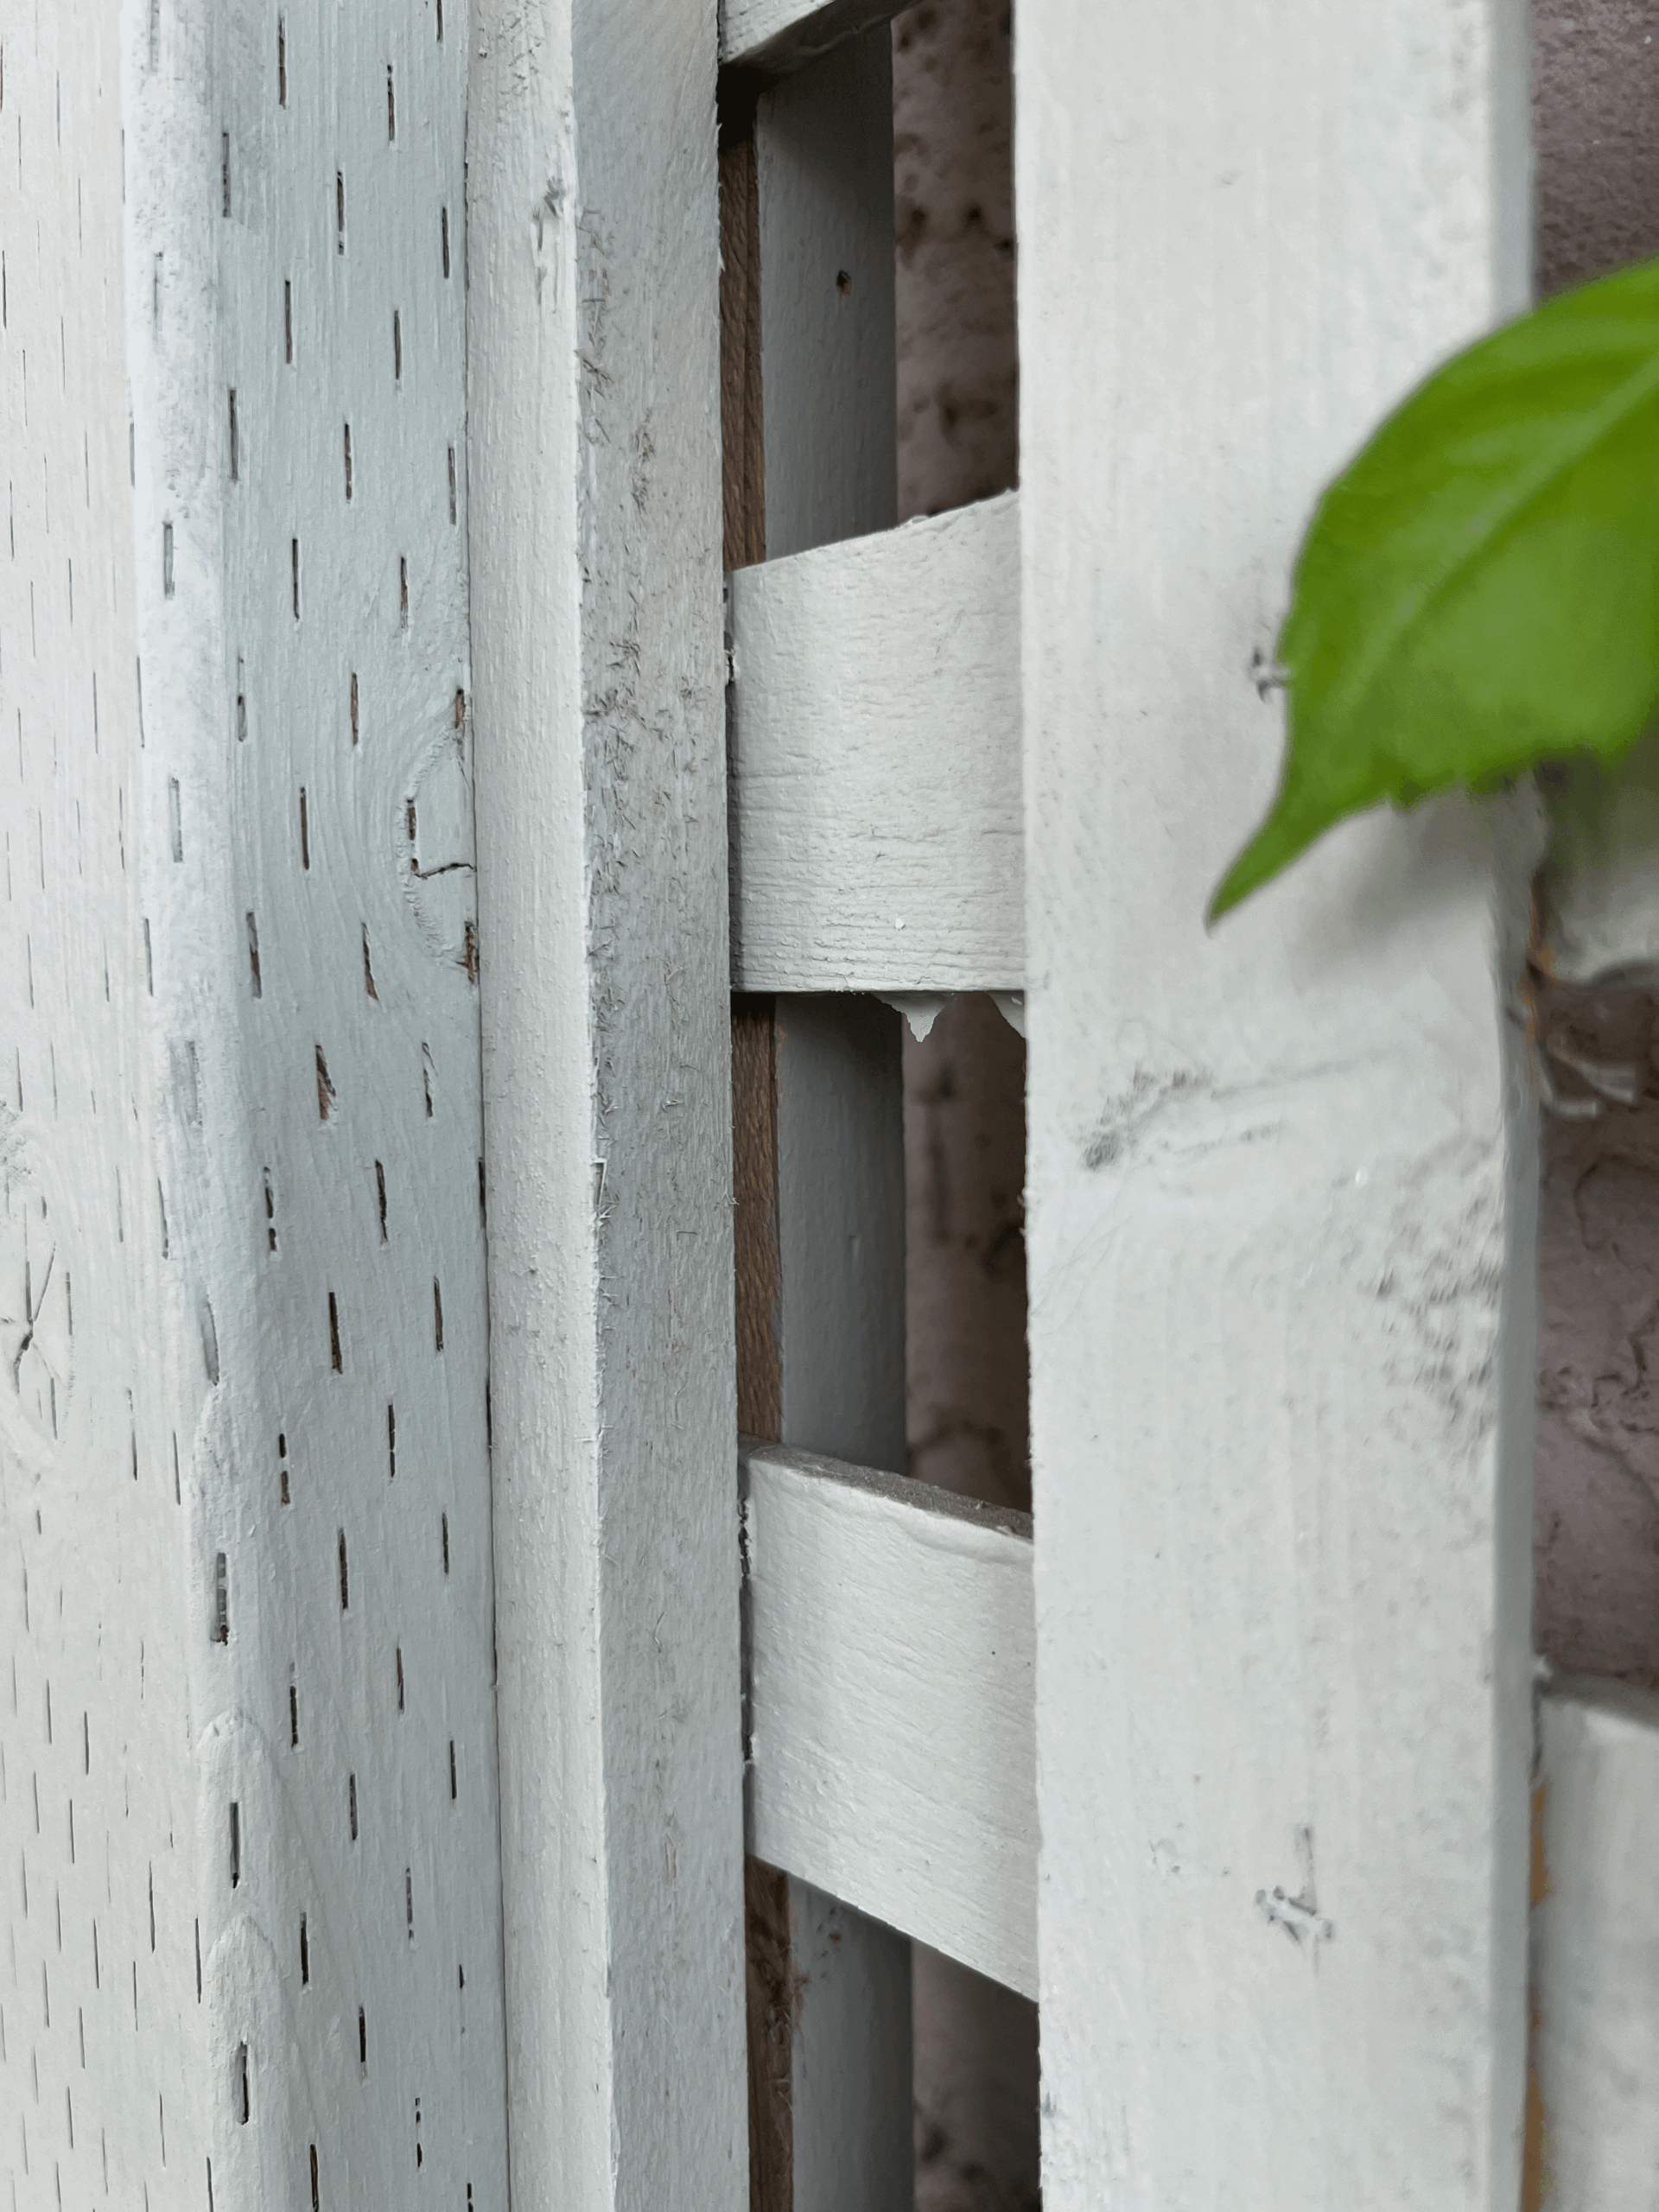
For the slats, I chose to use deck boards because I liked the shape of them (they have a bit of a curved, smoothed edge). You could also use fence boards for this. They would work well and would be a bit cheaper, too!
Find the center and space evenly
I figured out that I would need about eight boards to span the long side. I marked the center of the front of the planter and placed the first board on one side of the center line so I could be sure the boards would be evenly spaced.
Then, I lined the top of the board up with the top of the 2×2 and used a level to get the first one straight. I attached the deck board to the 2×2 using a brad nail gun, putting three or four nails in each board.
Once the first one was in and level, I added the next board, and butted them tight together, moving my way out from the middle.
The last two did not fit exactly, so I measured and marked those ones and ripped them down on the table saw to the width needed.
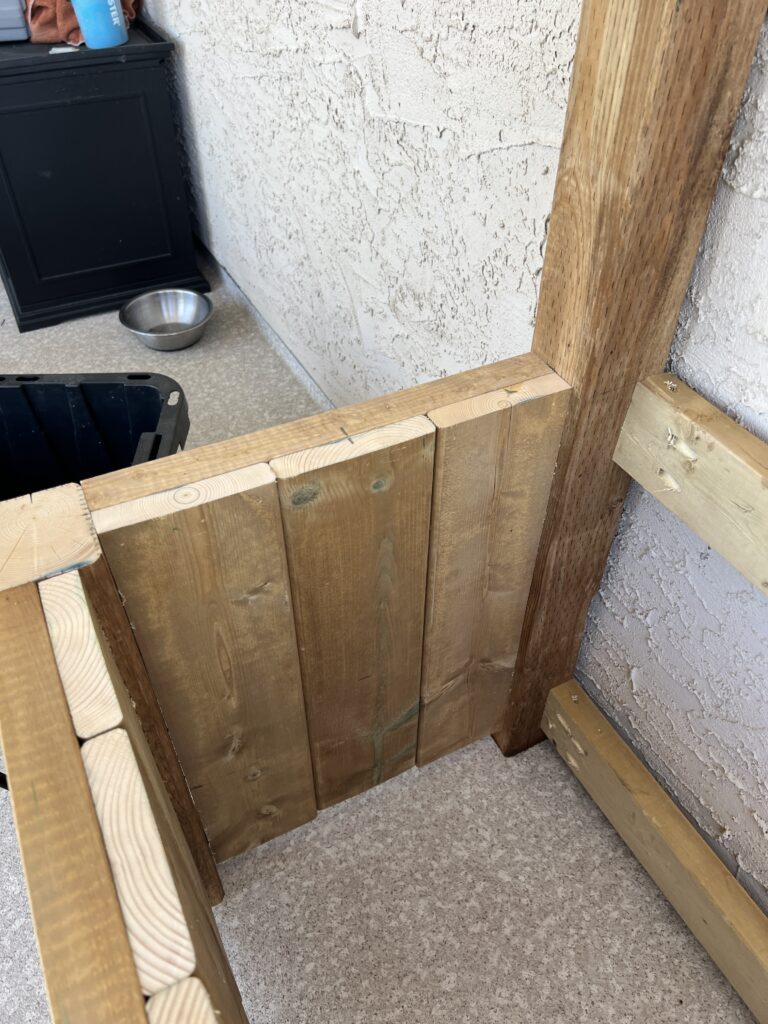
I repeated this process for the side slats.
I originally planned to put them at the back as well, but I soon realized that this would be a waste of wood since this part will not be seen. If your planters are up against a wall like mine are, you can do the same!
If your planter is going to “float” and have an exposed back, you will want to add boards there as well and make sure everything is finished off nicely.
Add the Bottom
The bottom will hold up the totes filled with dirt and plants, so I wanted to make sure it was strong and secure. I started by adding a 2×2 across the front and back. Then, I used some exterior screws and toenailed through the 2×2 into the corner 4×4 post. Then, I added nails all along the 2×2 into the slats at the front, so this part of the frame had lots of support.

The 2×2 along the back I attached to the 4x4s by installing screws on an angle. It still didn’t seem like enough support, so I added an additional support at the middle of that 2×2 so it could rest on the ground.
Next, I added 2x2s all along the length of the front and back to create bottom slats as a base for the totes to sit on.

This was the hardest part of the project, as I had a hard time figuring out where to put the bottom so that my totes ended up flush with the finished top! If you are using the same totes as I did, the bottom 2×2 measures 9″ from the ground. Once you add the second 2×2 and the totes, the totes will be at just the right height.
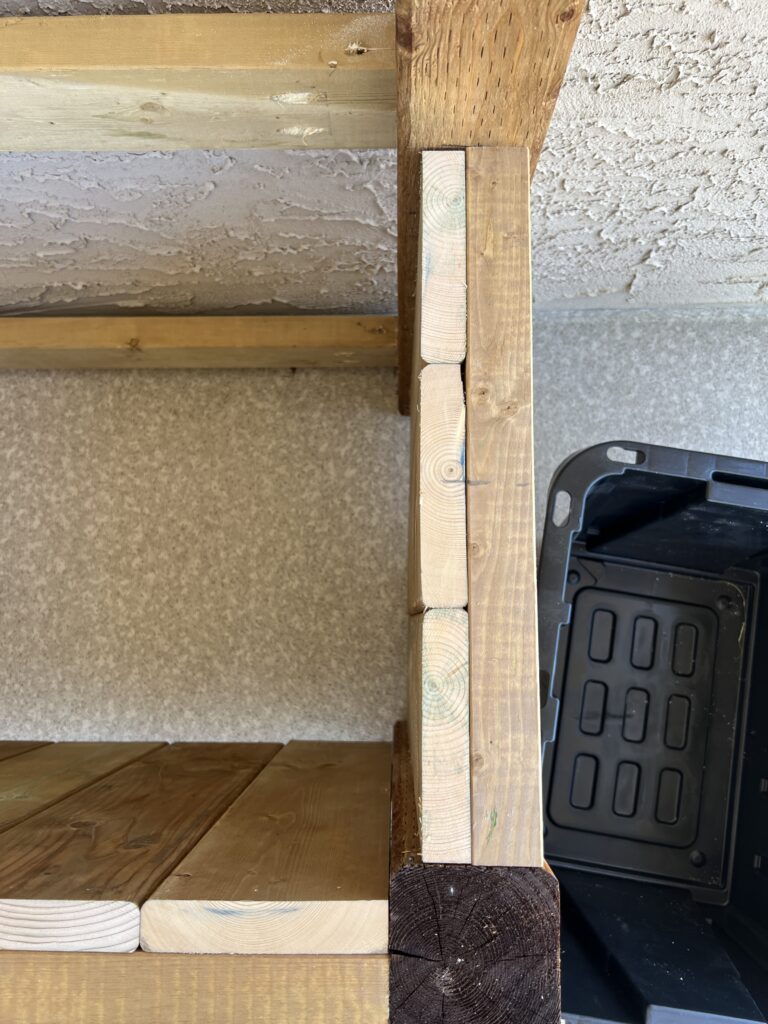
Add the Lattice for the DIY Tall Planter
I cut my lattice down to fit inside the two tall 4x4s on the back using my track saw. If you don’t have a track saw, you can use a circular saw with a guide. I cut mine to 43.5″ wide x 78″ tall.
A painting lesson learned
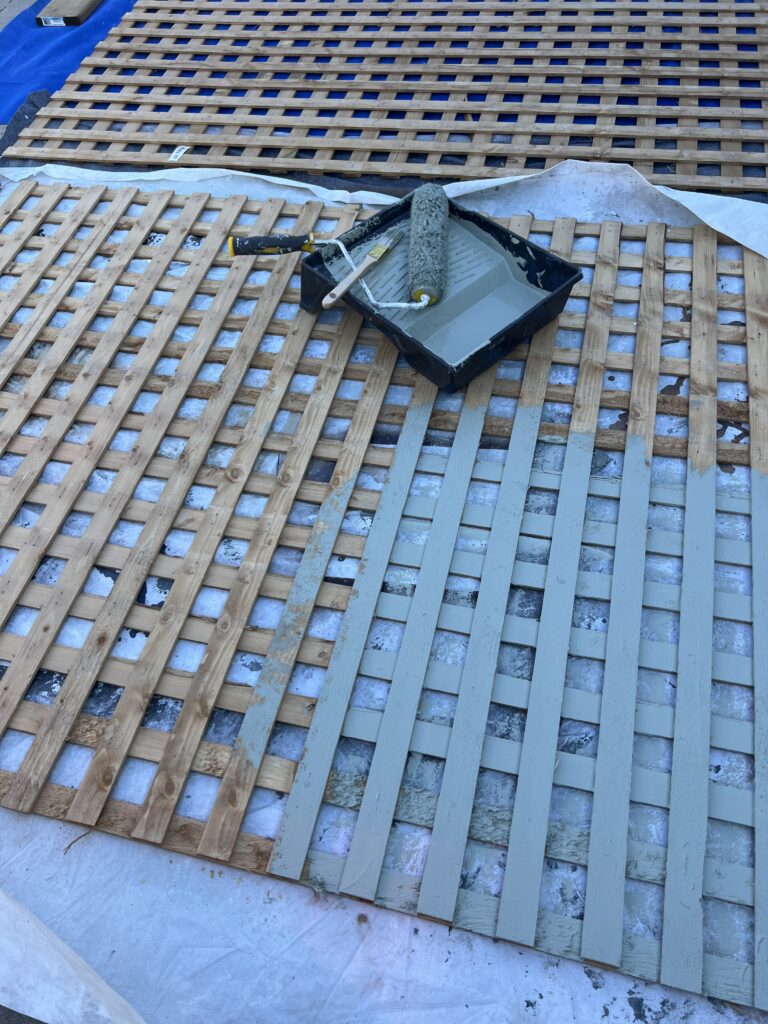
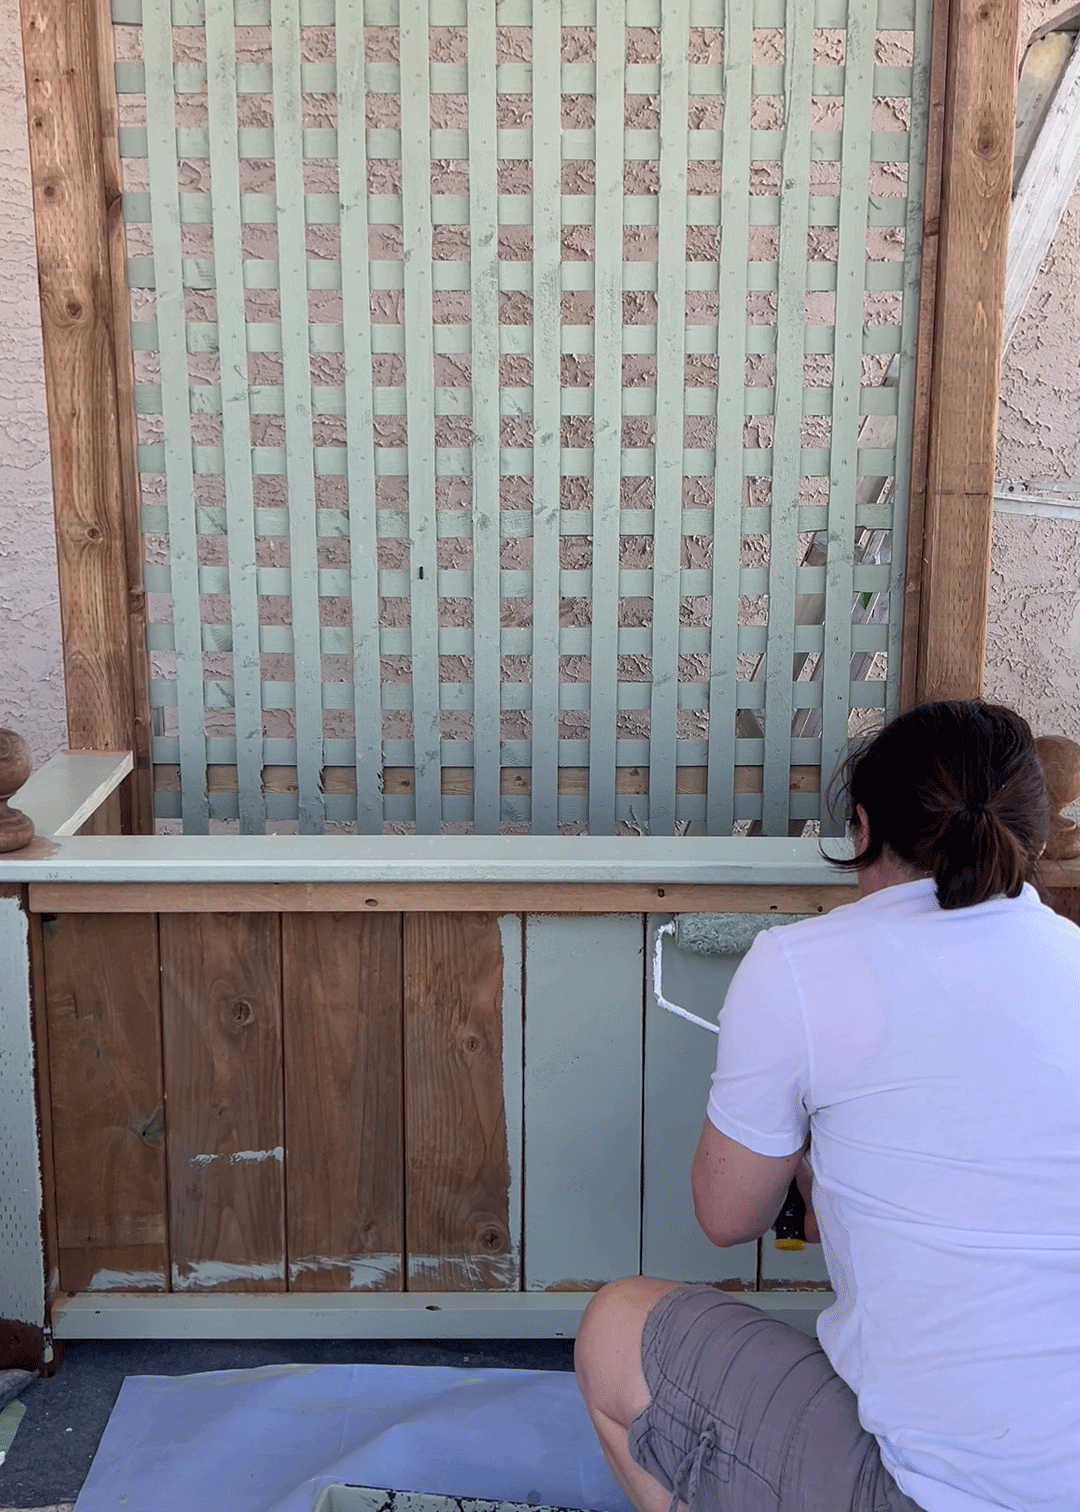
I decided to lay the lattice on the driveway to paint. I only bought a small can of paint and thought it would be OK to use a roller. If I was going to do this again, I would absolutely use a paint sprayer or exterior spray paint. Rolling the lattice was probably the hardest part of this whole project!
Add nailing strips to secure the lattice
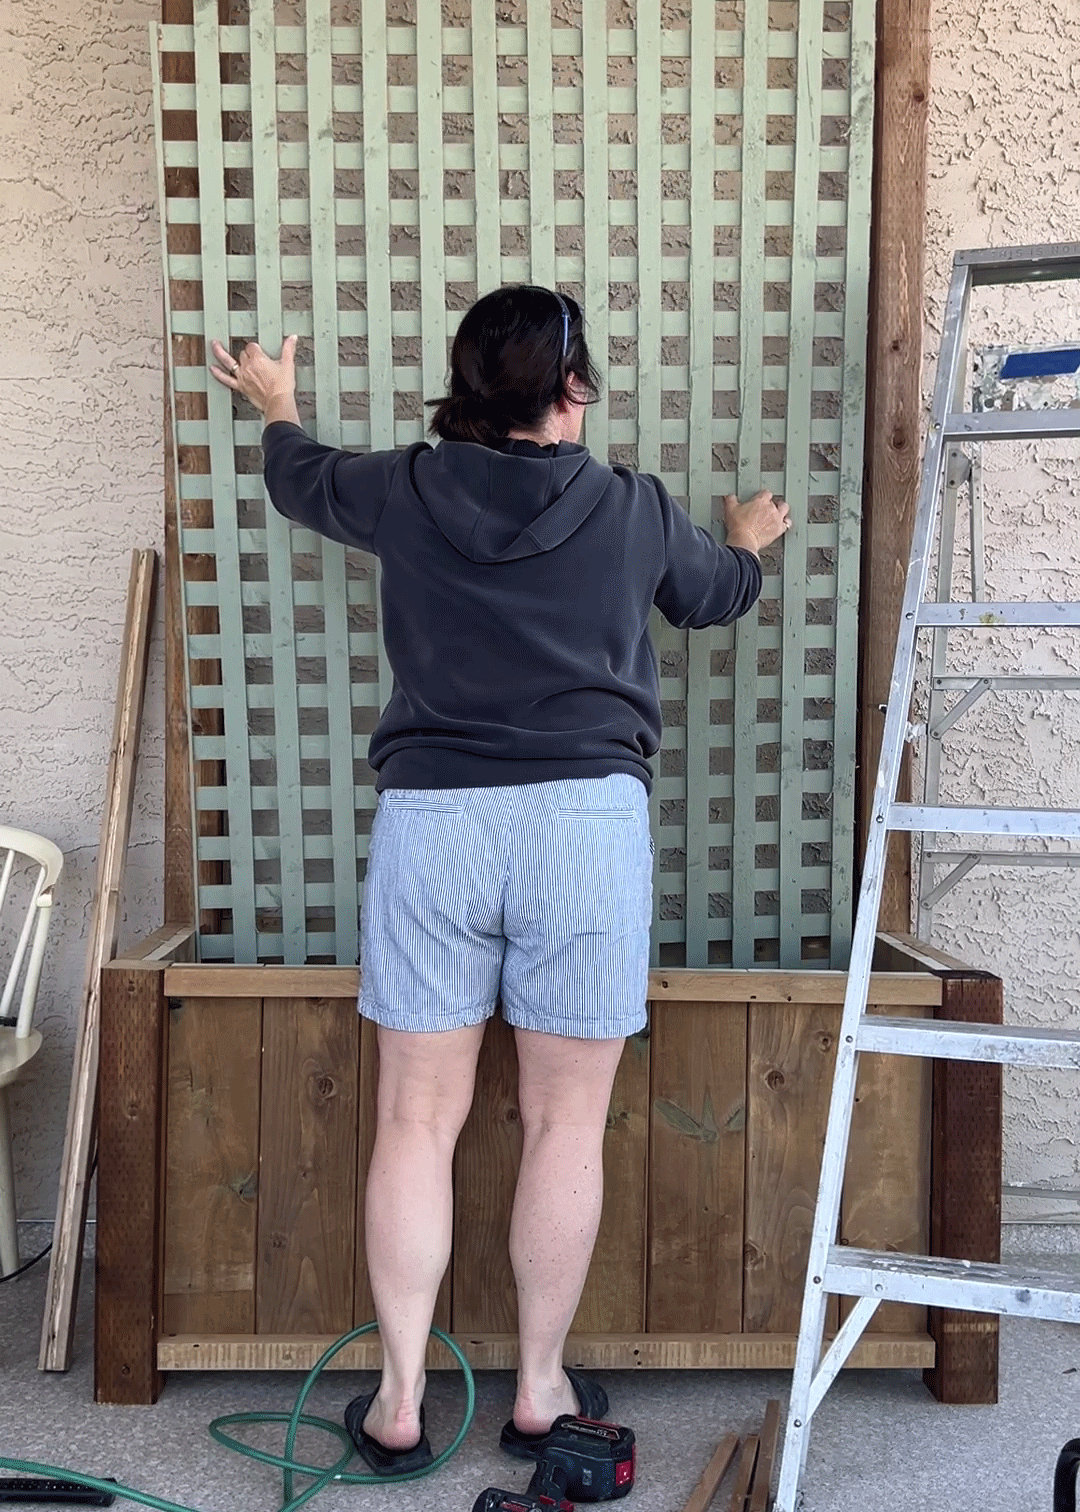
I tacked some nailing strips to the long 4x4s on the planter to add at the top to hold the lattice in place. I eyeballed the placement so the lattice would be roughly in the middle of the 4×4. I used my brad nailer for this job.
Once the back-nailing strips were in place, I decided to add an extra top piece to span across the top of the planter. I cut a groove out of it with my table saw so that the lattice would slide right inside the groove. If you don’t have a table saw, you could also just add a 2×2 across the top, the same way you added the rest, using pocket holes. And then, use the nailing strips on the top the same way you did on the sides.
I added the 2×2 to the top of the lattice and fit that into place, using brad nails to hold the lattice to the nailing strips. I also used brad nails to hold the top 2×2 in place. I had to get someone to hold the lattice while I did a bunch of nailing. Definitely a two-person job!
Once the lattice was secure, I added a final nailing strip to the front to cover the edge and give it a finished look. The lattice is now sandwiched between the two nailing strips.
Finishing Touches
I took some deck boards and cut them on an angle using a miter saw to finish the top edge off and cover the exposed deck boards.
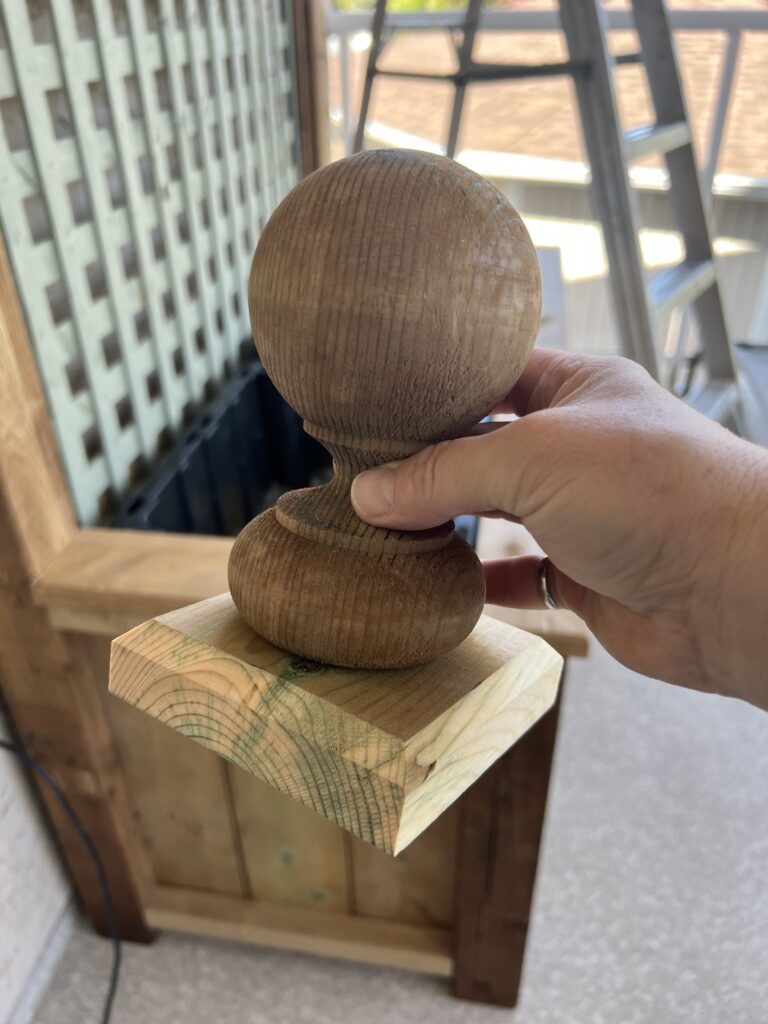
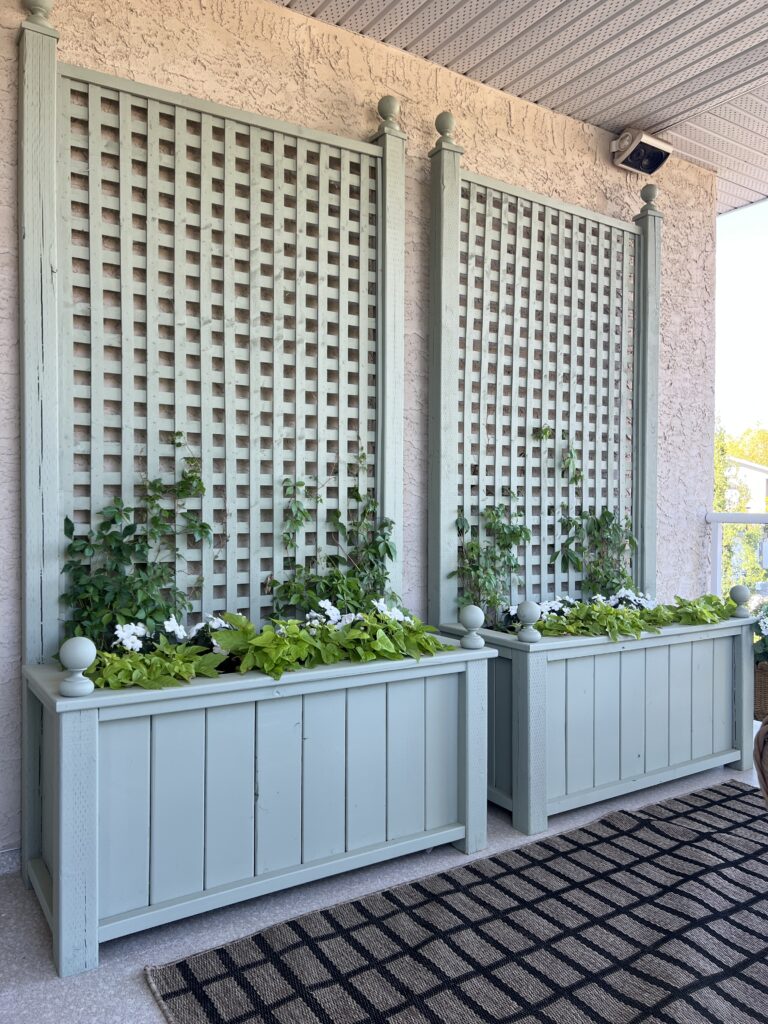
I also bought some fence finials from Home Depot to dress up the final look of my tall wood planters. SO glad I did this. I think they really elevate the look!
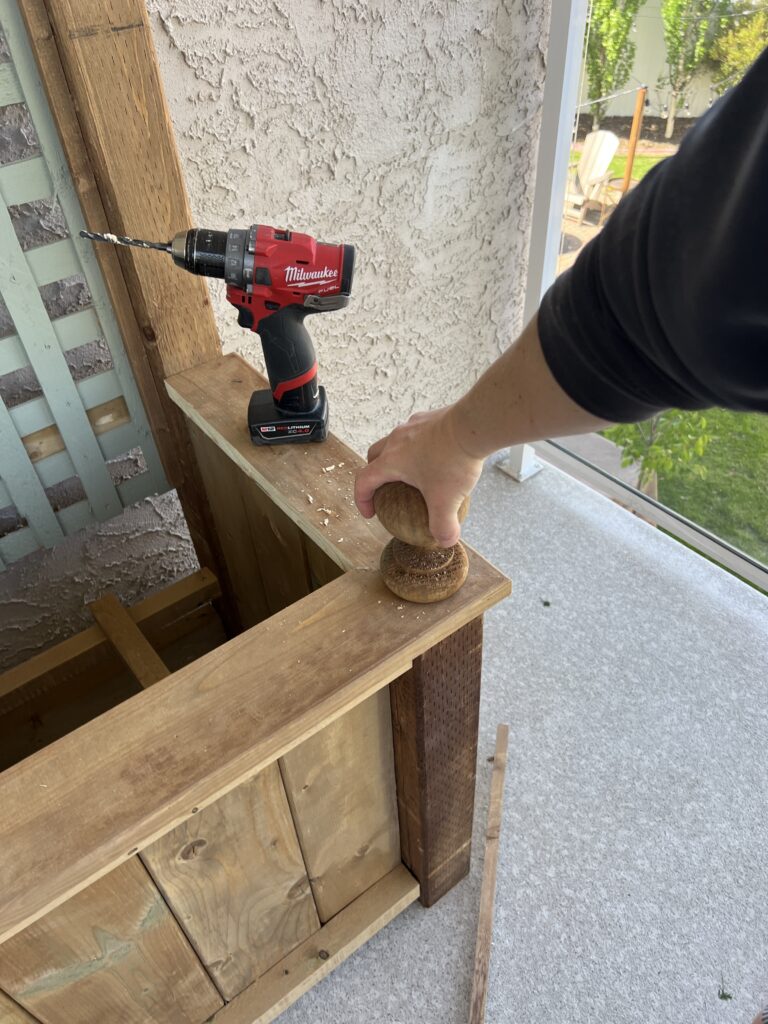
I added one finial to each of the front corners of the tall outdoor planters by drilling a pilot hole and screwing them in (they come with screws on the bottom).
I considered buying some post caps and combining them with the finials. But they were about $8 each, and I thought that was ridiculous for something so simple! Instead, I took some of my leftover deck boards and cut them into a square, and then shaped the edges using my miter saw and made my own post caps!
I put the post caps and the finials on the top of the long 4×4 posts. The first thing I did was drill pilot holes through the post caps I made and then I screwed the finials to the caps. I used brad nails to nail the caps to the tops of the posts.
Finally, I painted the planters with my outdoor paint. I love the soft green colour. It really pops against the darker green plants!
Filling up the DIY Tall Planter
I decided to make my totes self-watering (you can see how I did that on Instagram!) When this was finished, I filled them with dirt and some Virginia creeper to climb my lattice!
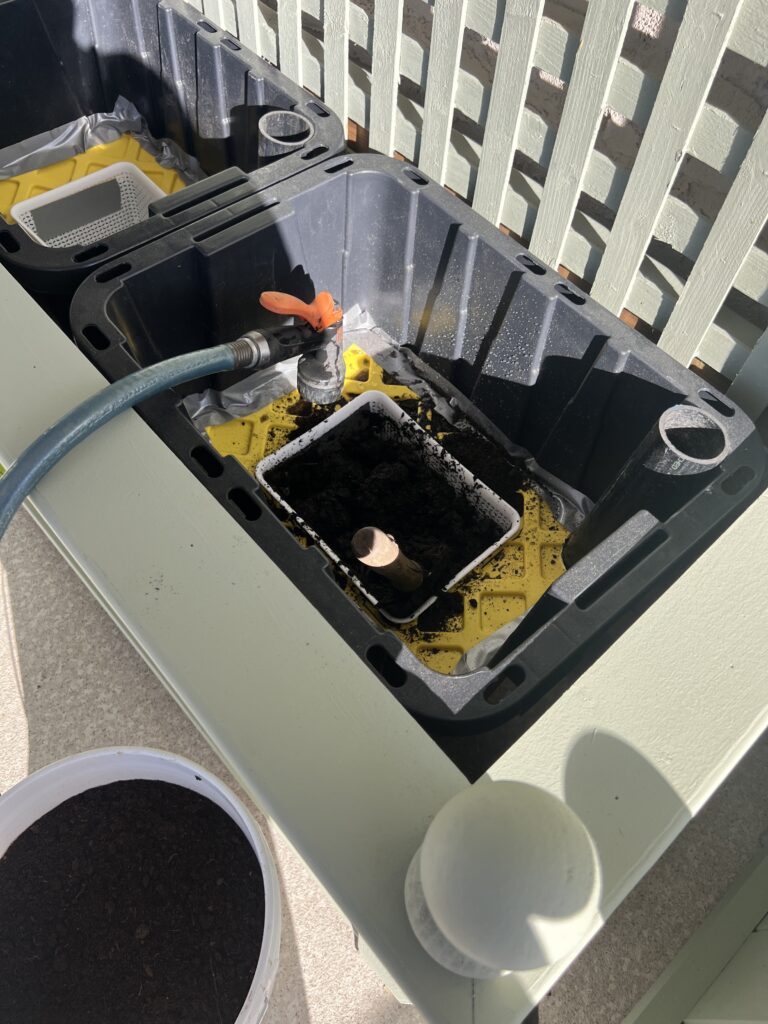
If you aren’t going to make your totes self-watering, you can fill them with dirt and water them the normal way. Just make sure you drill some drainage holes in the bottom of the totes! (I don’t know much about gardening, but I do know that much!)

You could also use these new planters as garden beds or whatever you would like to put inside the planter. If growing green things aren’t your thing, faux shrubs and flowers would be beautiful too!
The Final Product
This was my first outdoor project of the year, and it really was an easy DIY! You could adjust it as you want to make the size you need to fit your space. I love that I only needed basic tools to make it happen.
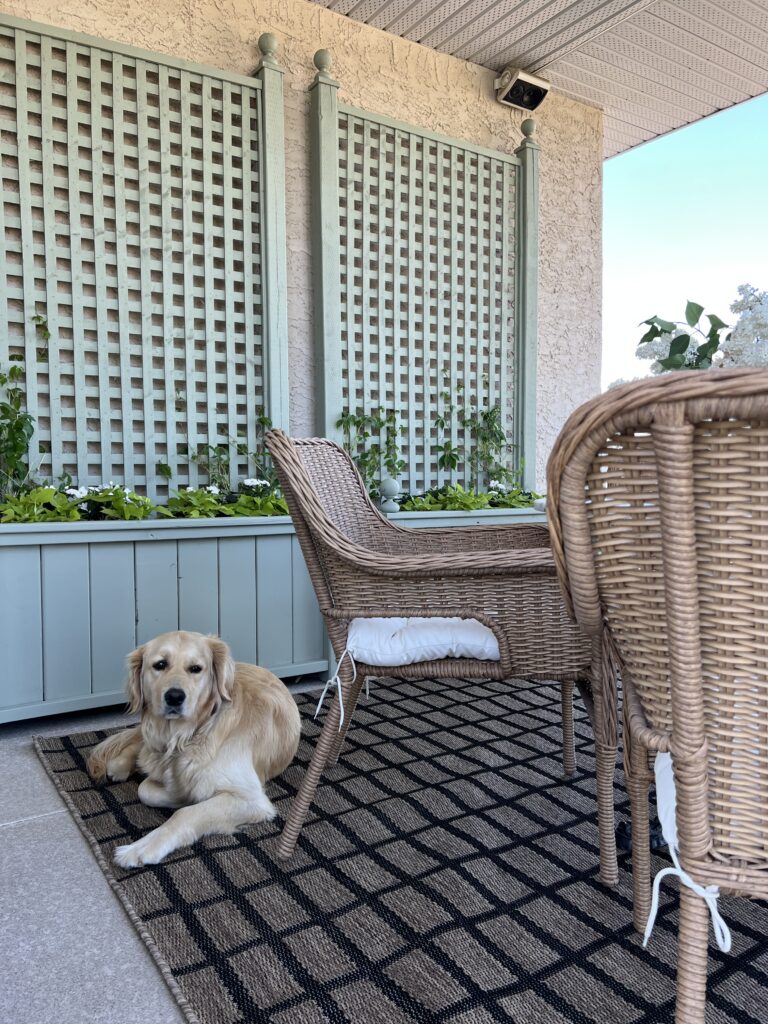
Once my planter was done, I set up a little dining area using a marble table I found on Facebook Marketplace, some wicker chairs from Home Depot, and an outdoor rug. I have never been happy with how my patio looked, and it turns out that the first step in creating a beautiful outdoor space is adding plants! Who knew?
Would you try this DIY in your own space? Let me know in the comments!