
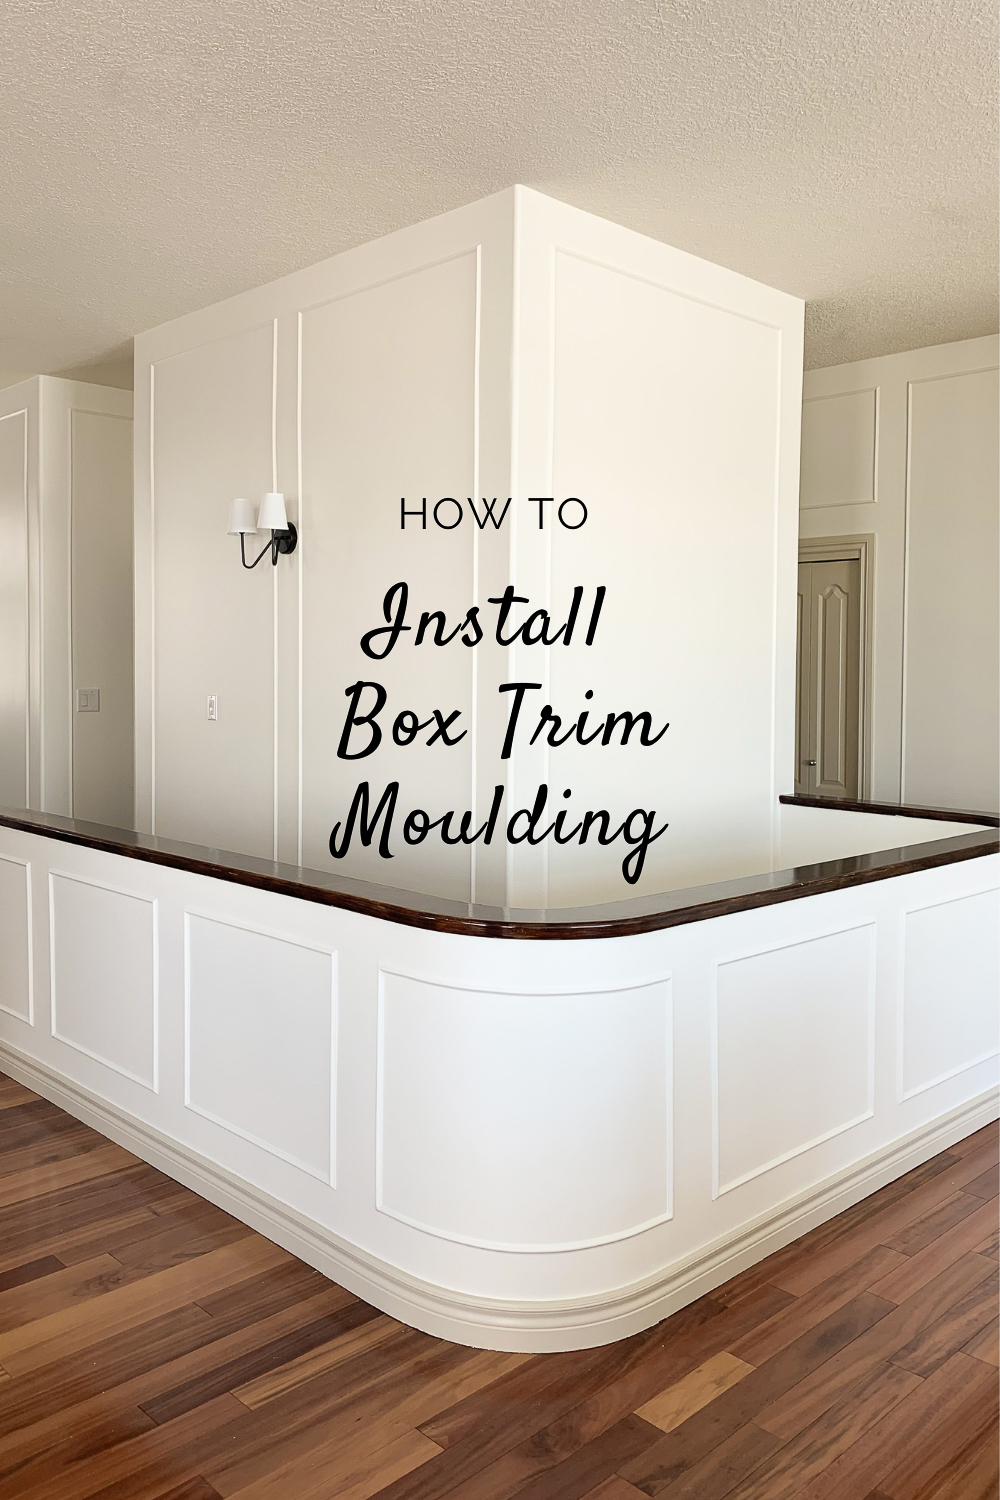
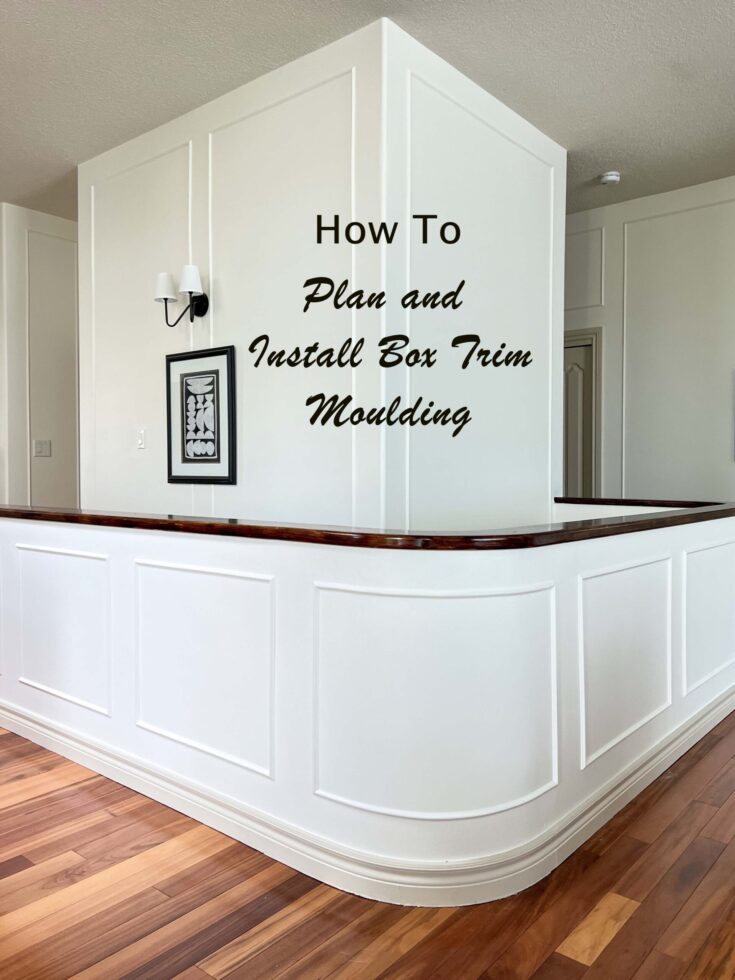
How to Plan and Install Box Trim Moulding
Whenever I show a photo with our box trim moulding on Instagram, I get questions about it. How do you attach it? How did you figure out the spacing? Is it hard to do? I decided it was high time I dedicated a post to how to plan and install box trim moulding! I mean, I’m not an EXPERT, but I counted 55 of these boxes in this house alone that I have installed and so maybe that makes me an expert now? I certainly have figured out the way that works for me! So read on to find out how to plan and install box trim moulding, and DIY it yourself!
This post may contain affiliate links. That means if you purchase anything from these links I earn a small commission, at no extra cost to you! This helps support my blog, so thank you!
Types of Moulding
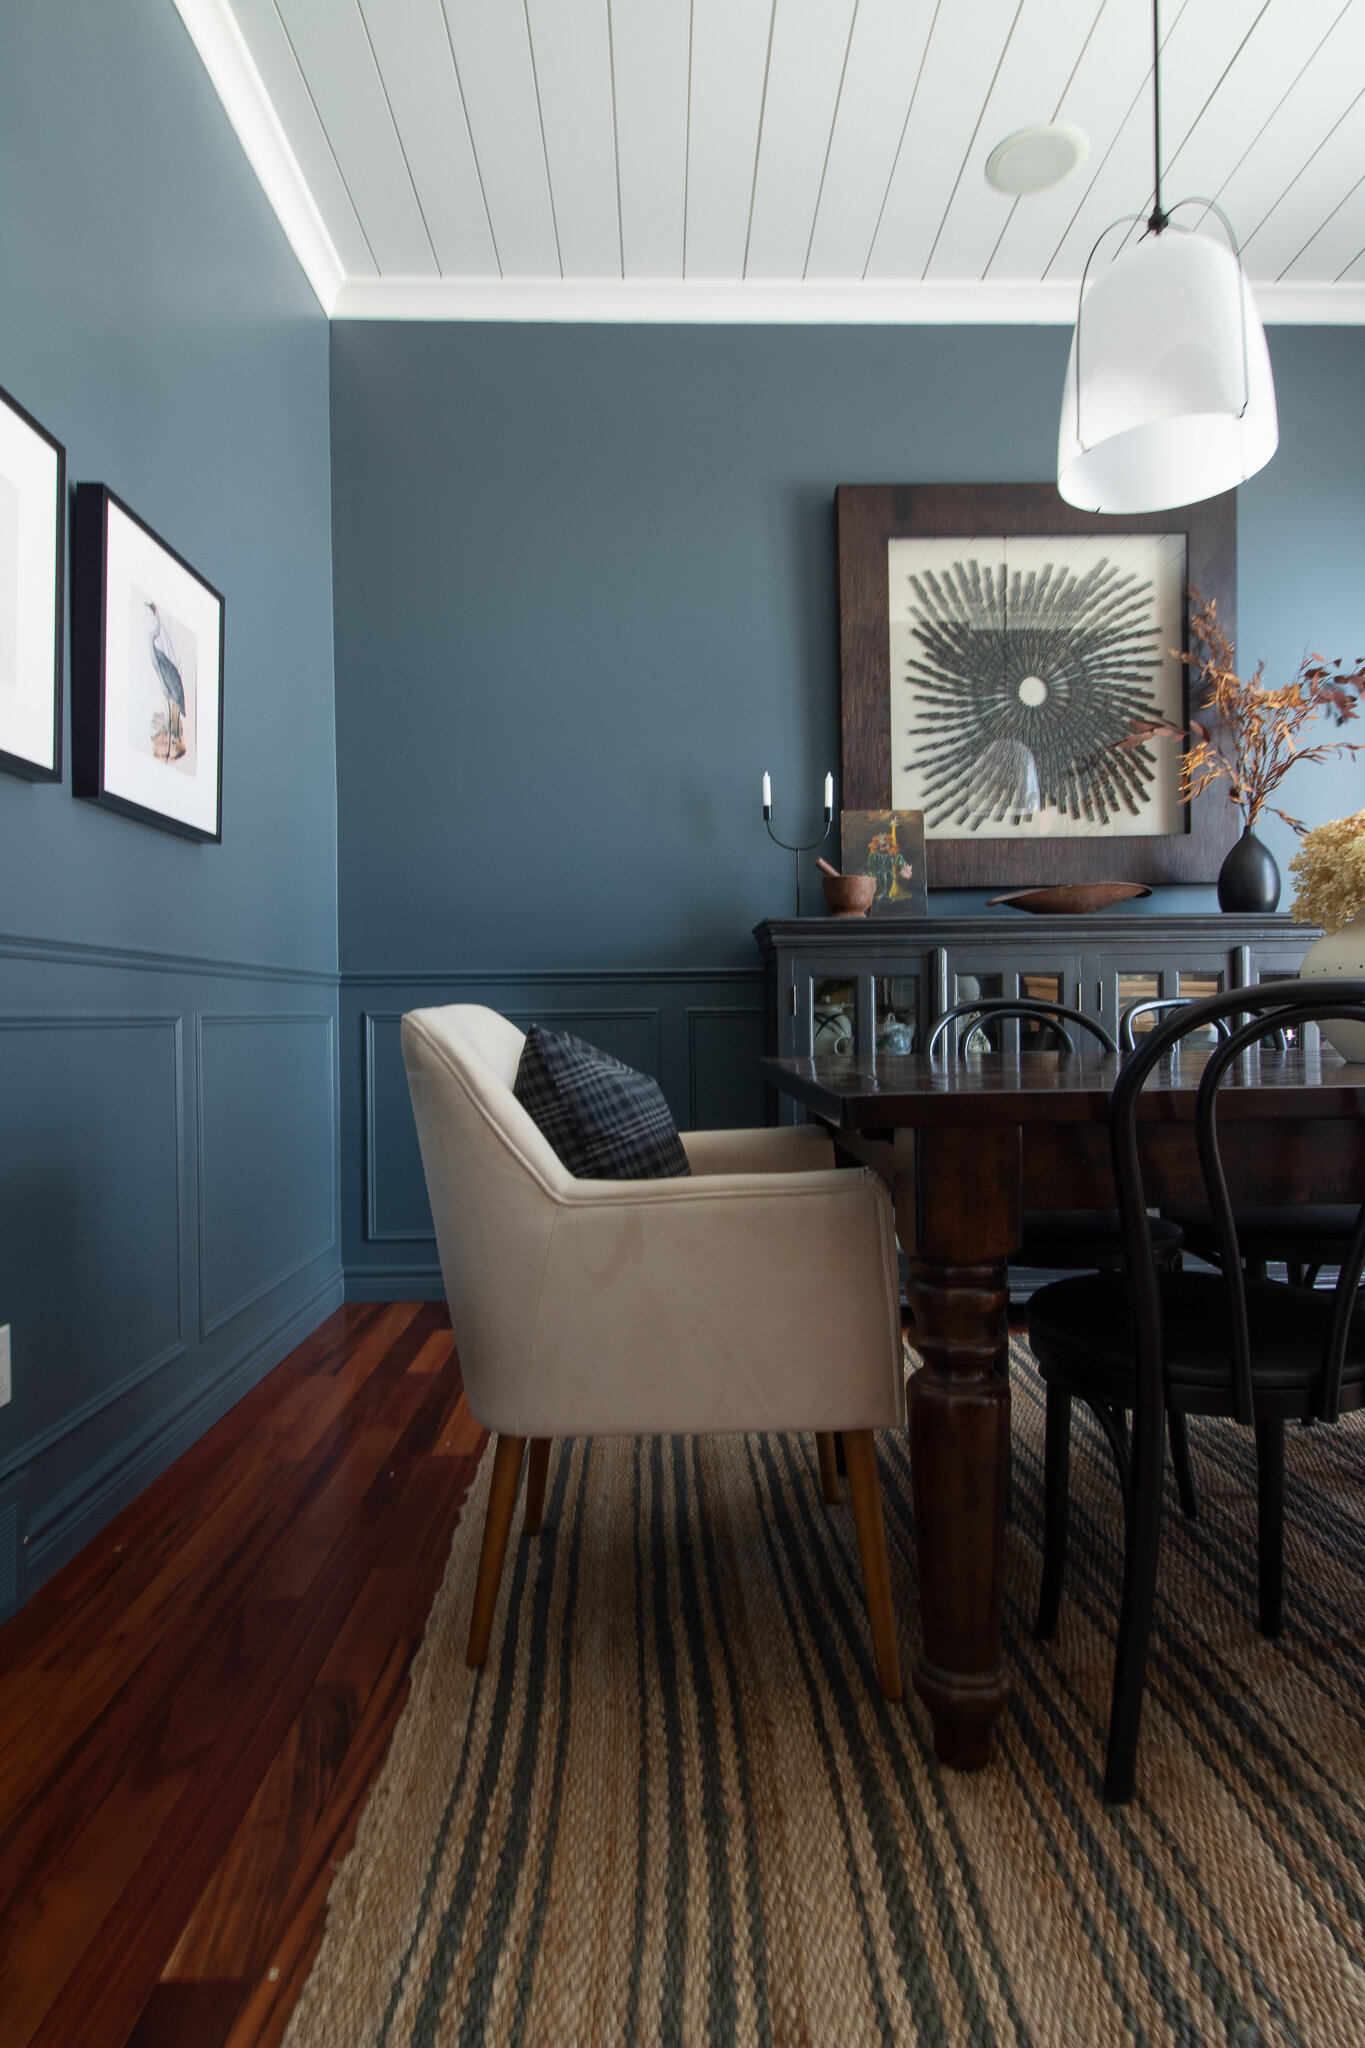
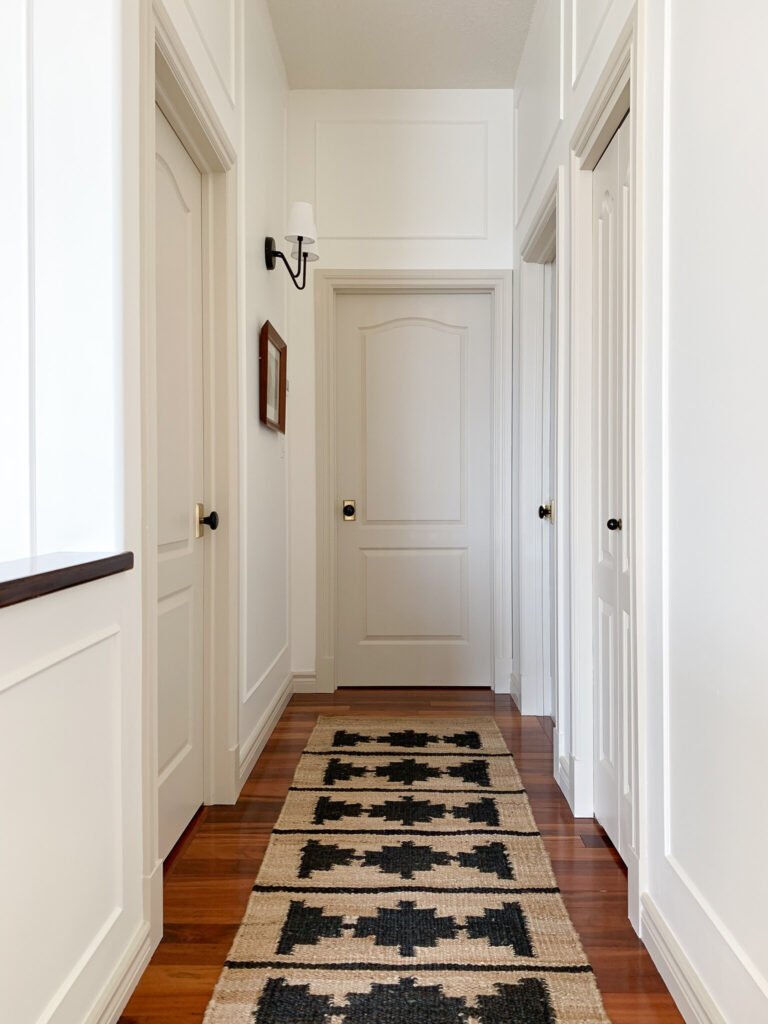
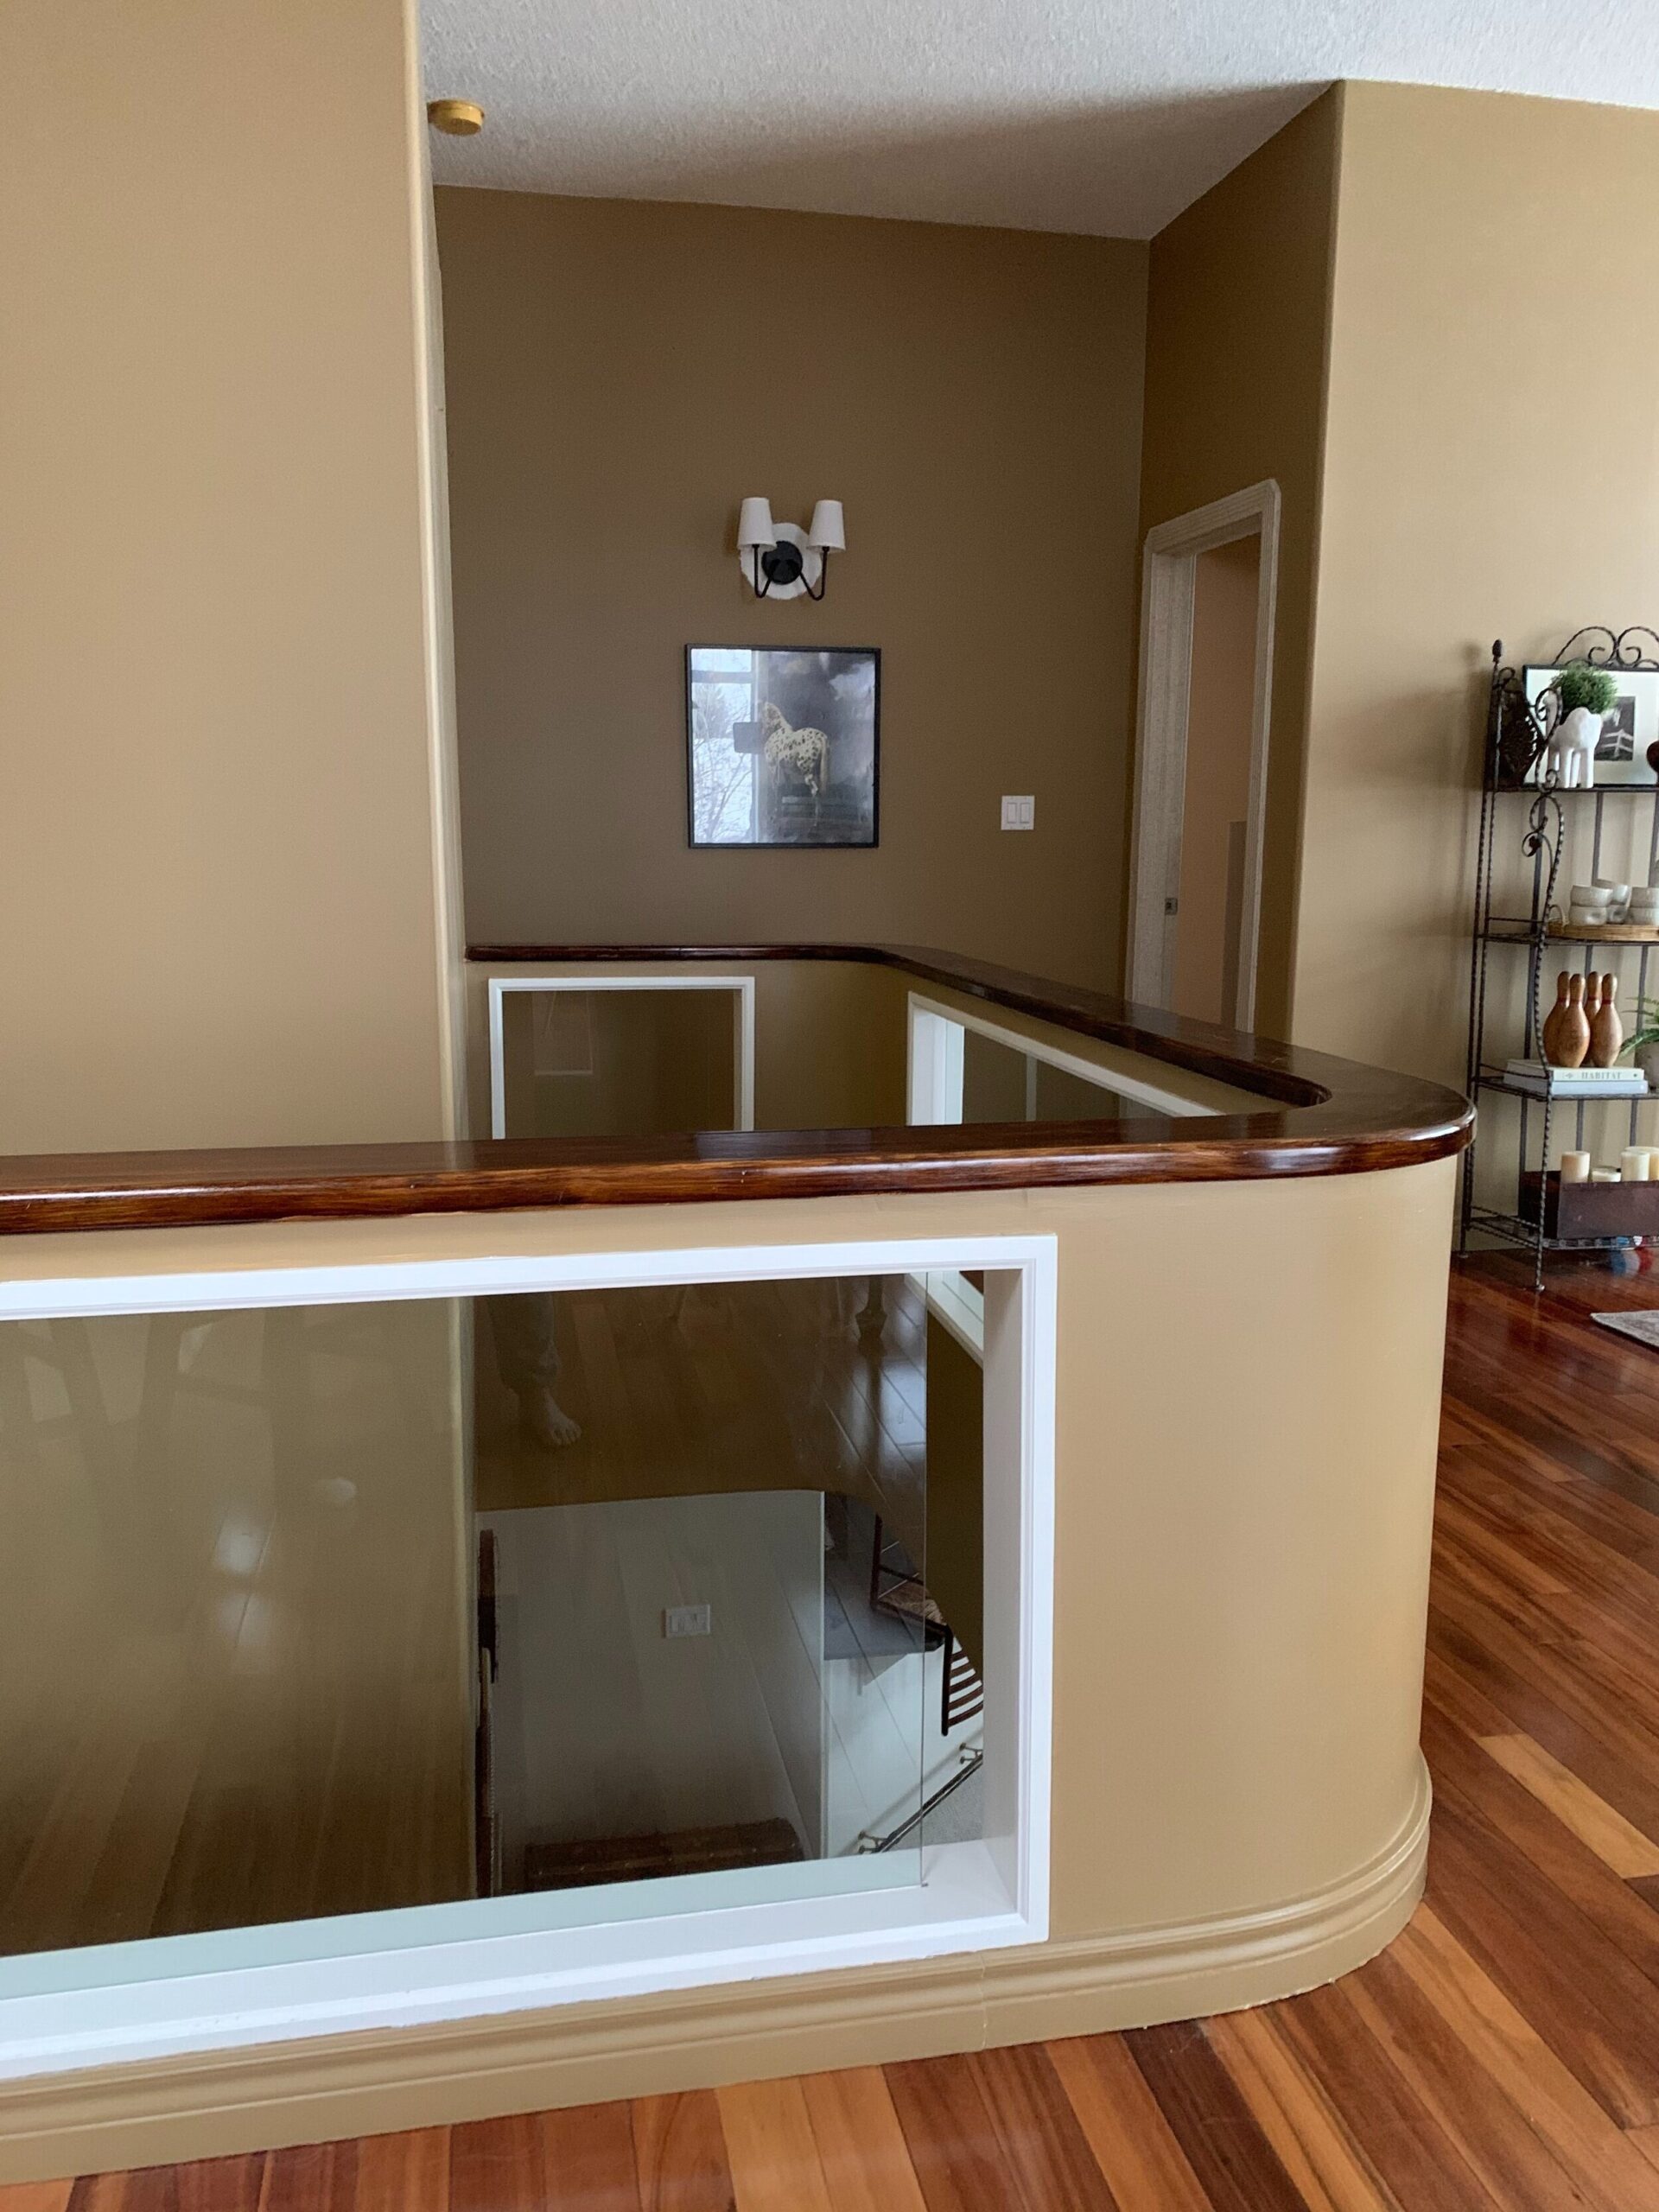
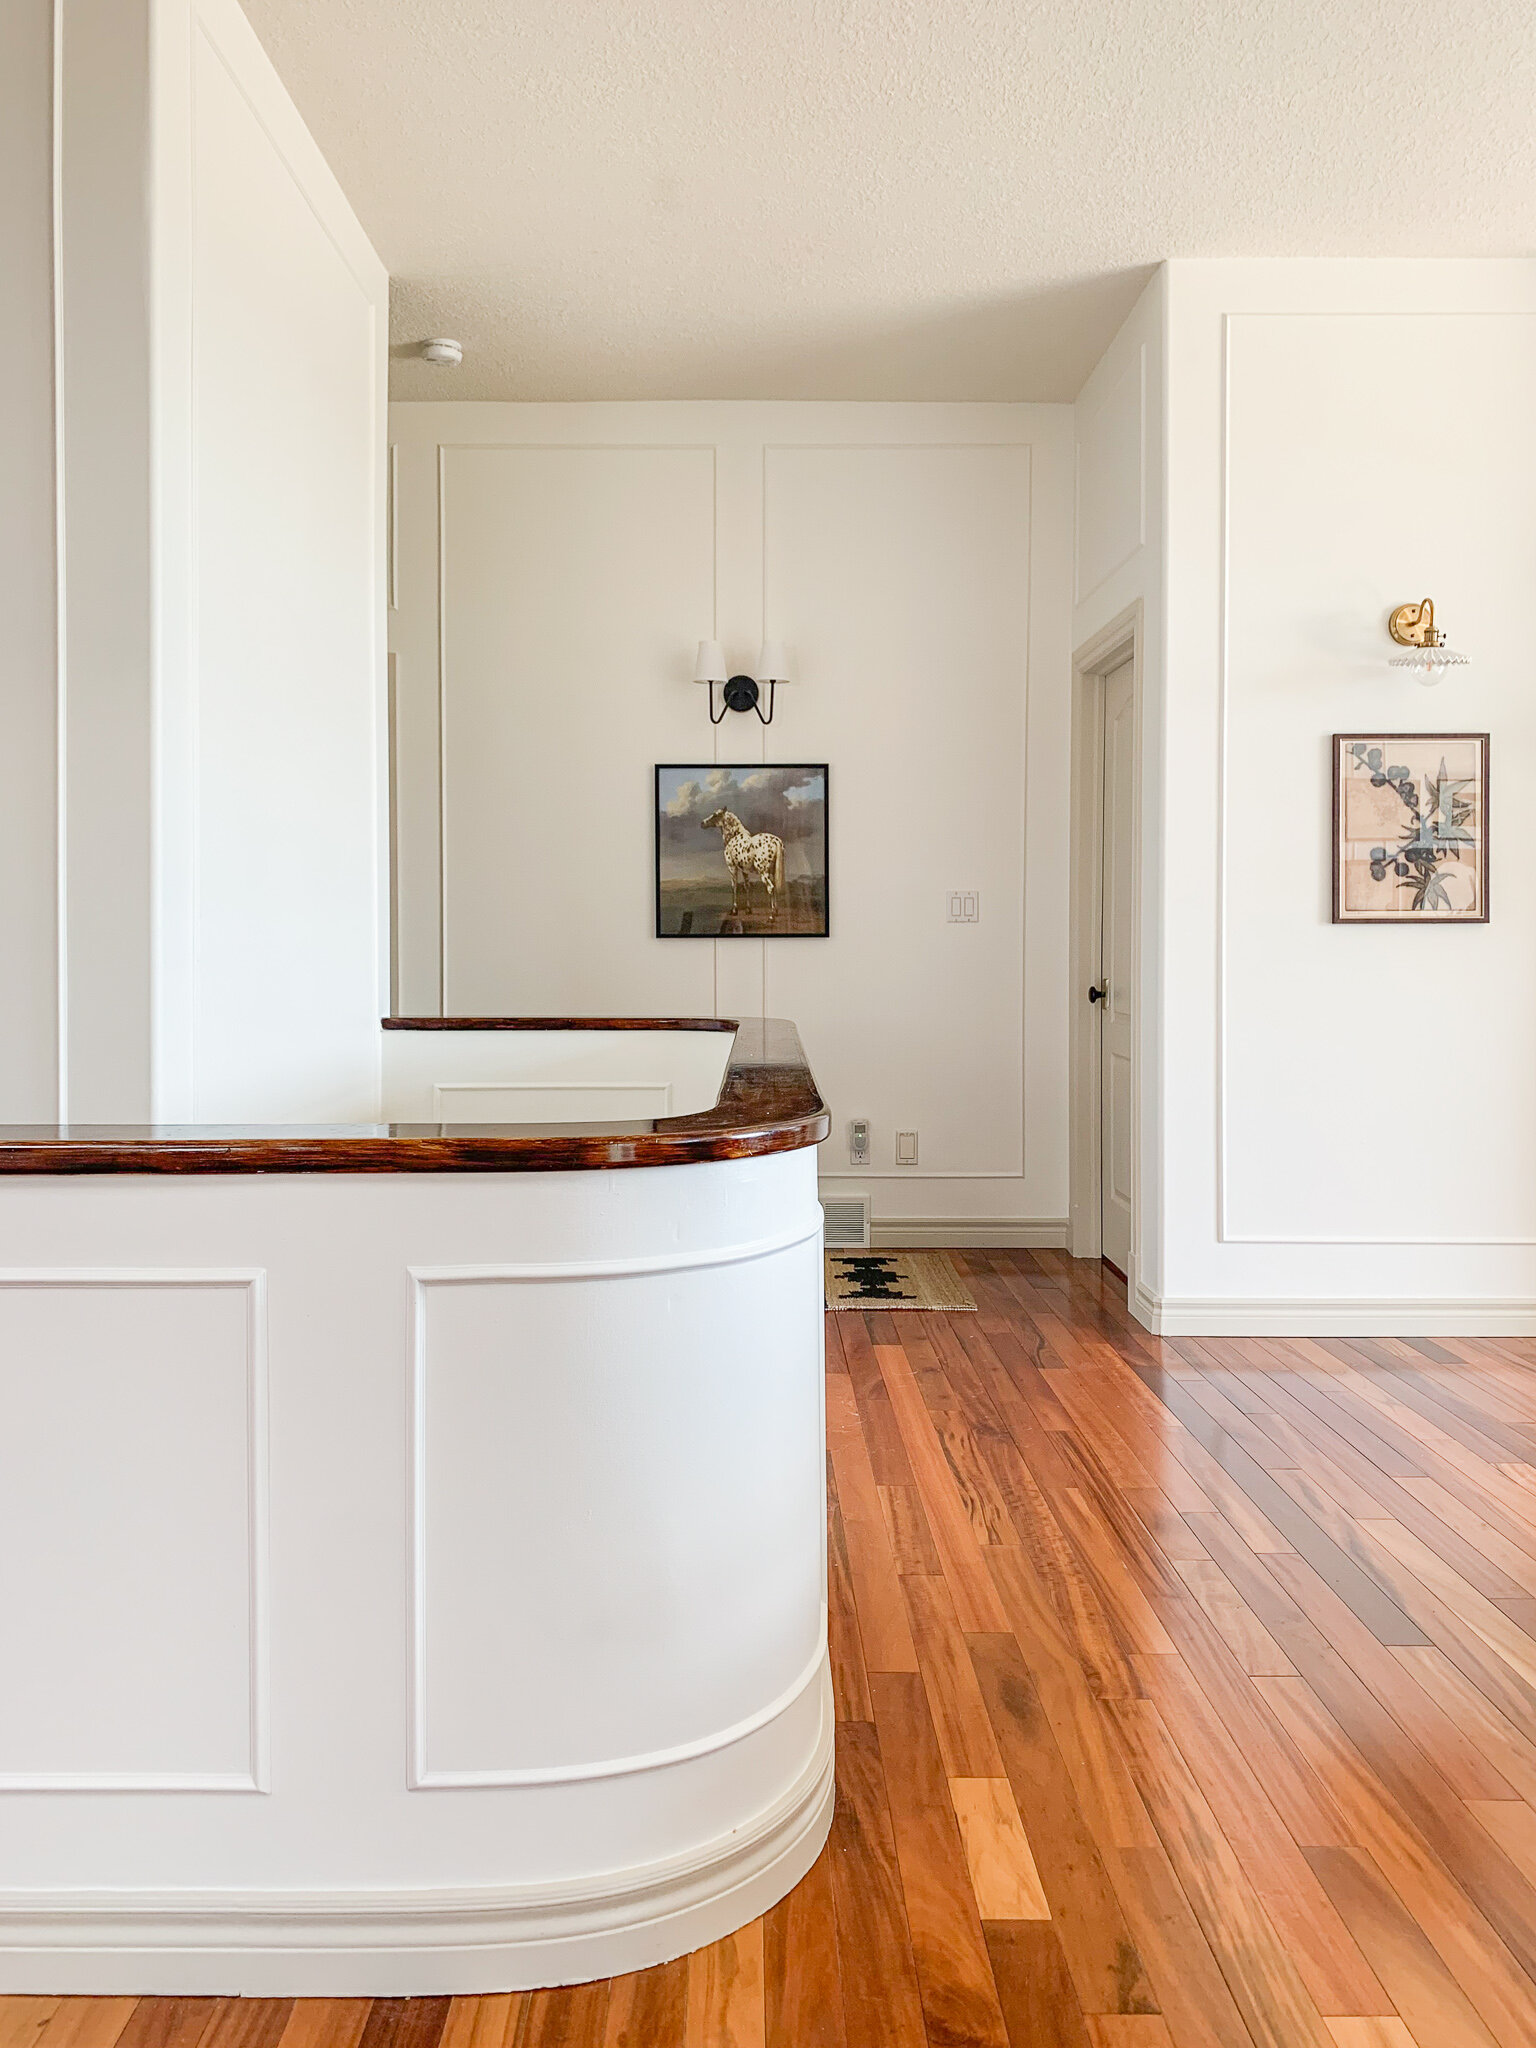
The success of any moulding project has everything to do with planning. What size moulding do you want? Do you want single large boxes like mine, or boxes only on the lower part of the wall like wainscoting (like my Dining Room), or several up the wall? The options are truly endless and I suggest that you start with a Pinterest board, saving what you like. Keep in mind that the more built-up it is (more layers of trim, more boxes) the more formal it looks. The simpler it is, the more casual (in my opinion). Also, the more layers and more boxes, the more work (and money) it is too, so if you have a huge area consider that as well! In my home, I added box trim moulding in the whole main area of my house, so I decided to keep things simpler and stick with single large boxes to reduce the visual clutter and cut down on the total cost and work involved (but spoiler…. it was still quite a bit of work!)
In my space, I wanted the added detail but since it’s such a huge open area, I thought that having multiple boxes would be a bit overwhelming and busy, so I opted for large, floor-to-ceiling boxes. I chose a very small profile moulding as well; I found that when I was looking at moulding images, I preferred the look of the more delicate moulding for these large boxes. I used this profile from Alexandria Mouldings, found at my local Windsor Plywood.
How to Plan your Boxtrim Moulding
One of the biggest questions I am asked about installing box trim is about how to plan your box trim moulding? Once the spacing is decided, it is time to plan the boxes on each wall:
Start with the largest wall and decide the spacing and layout of that wall first. An odd number looks better generally, but sometimes with the layout of the room or wall, an even number is required. Don’t sweat that too much. I started with the wall behind my couch and decided that I wanted three boxes. I taped that out to get a visual.
Decide on the spacing of the boxes. For my 10’ ceilings I thought that I needed the boxes to be at least 6” apart. For a shorter room, I would probably do something a little less, like 4 – 5”. This spacing you will use for EVERY box you do – this will be the distance from the top of the baseboard to the bottom of the box, from the ceiling to the top of the box, between adjacent boxes and from boxes to a corner. No matter the box size, you should maintain that spacing.
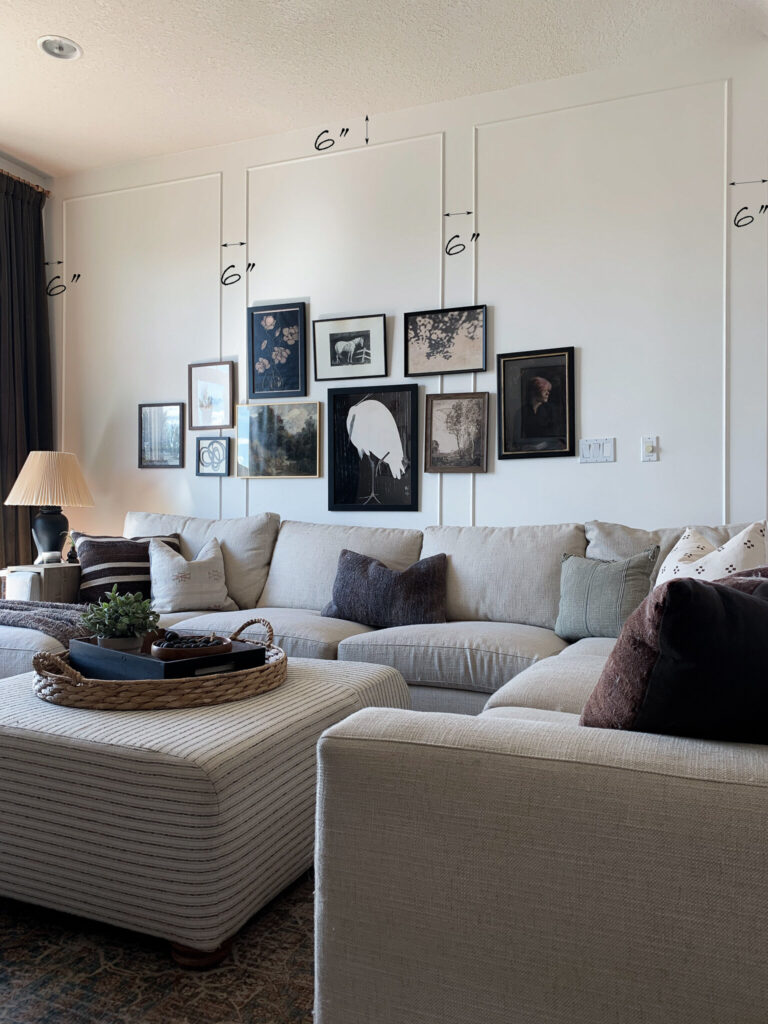
Once you have the box layout figured out for your longest wall, determine the box size. For my couch wall, my box width was 46”.
Use this box size as a guide for laying out adjacent walls. This is important to note: YOUR BOX SIZES WILL NOT BE THE SAME. With different-sized walls all over, it is impossible to make them the same, so don’t even try! Instead, look at each wall (maintaining that original spacing (6” in my case)), and with the first wall box size as a guide, choose the number of boxes based on which layout will give you the box size that is as close as possible to your original.
Here is an example: My original wall has 46” wide boxes. Now I have another wall that is 96” wide, in total. If I include 3 boxes on this wall the size would be 96” – (6”spacing x 4 spaces (two between the three boxes and one on each end)) divided by 3 boxes = 24 inches wide boxes. If I did 2 boxes, the spacing would be 96” – (6” spacing x 3 spaces) divided by 2 boxes = 39 inch wide boxes. In this case, I would choose 2 boxes because that is as close as I can get to the original box size of 46”. (Conversely, one box would be 84” which would be even further from the goal width of 46”).
Some walls are narrow and you can only do one skinny box. So just do one skinny box! I promise it looks good! Just maintain that 6” spacing.
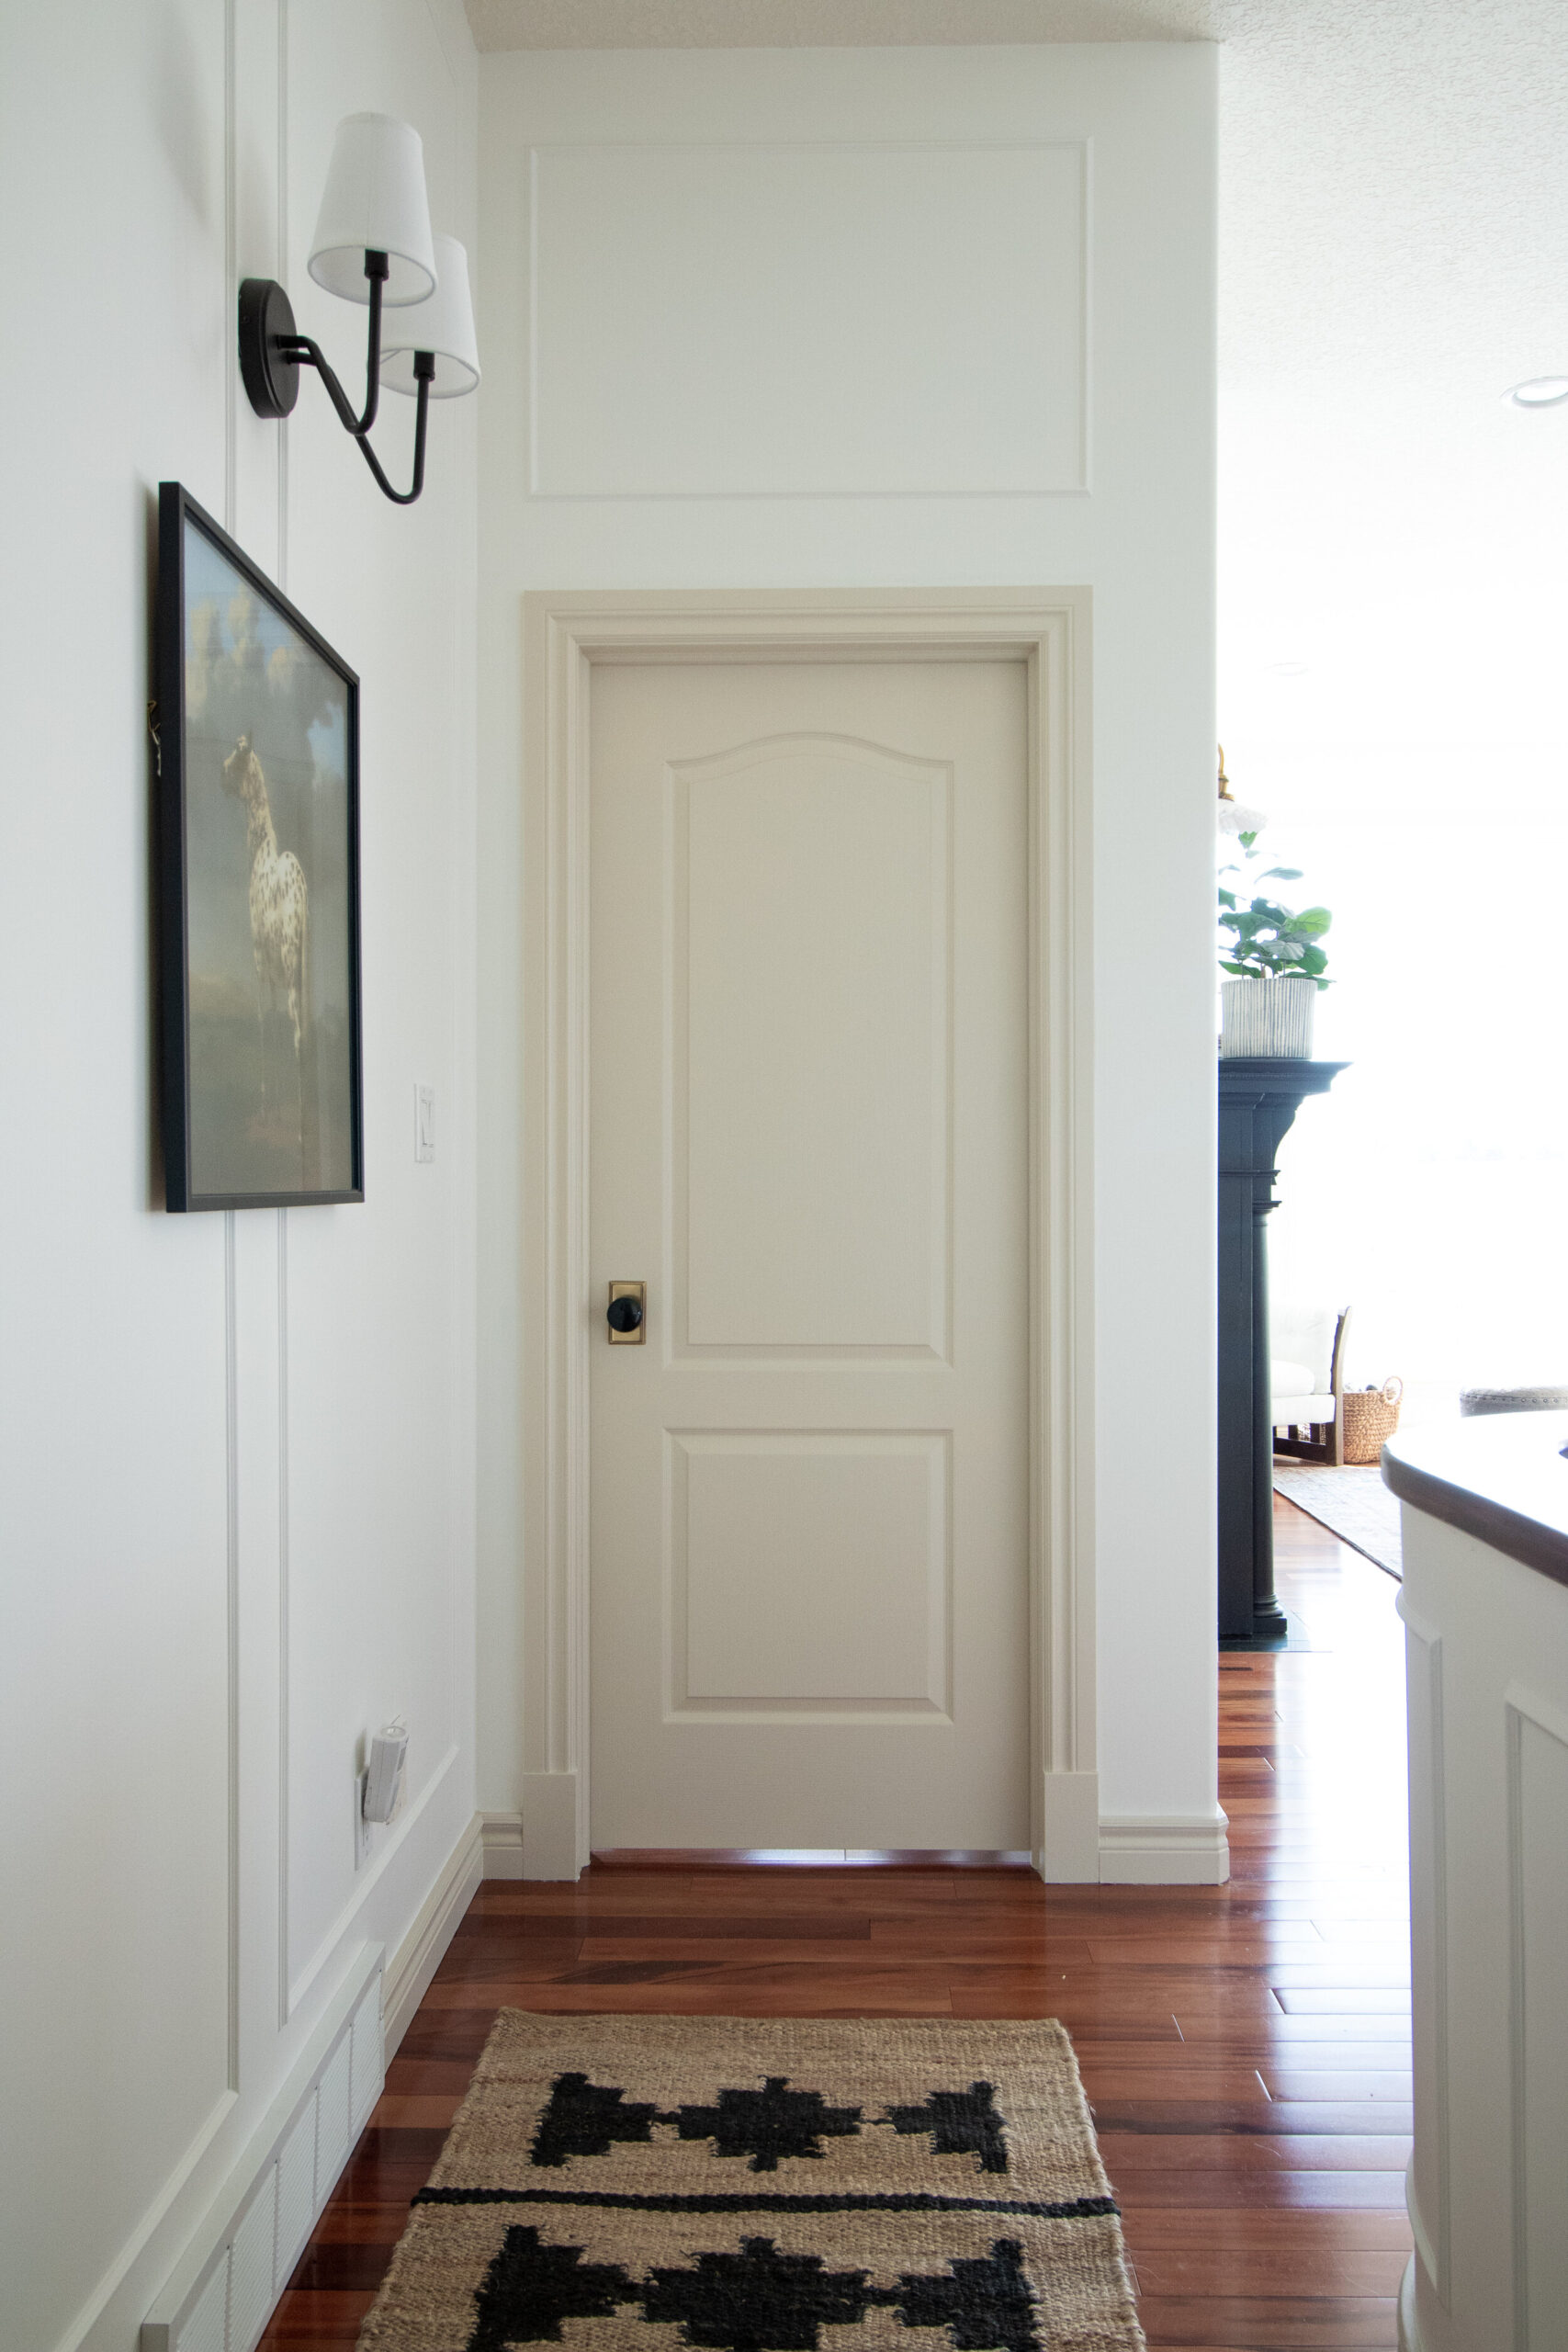
I also opted to place a box inline with door trim, even when my doors were a little off-centre. I taped out a few different ways and that’s what looked best!
There are always going to be weird exceptions you have to make for odd walls or door placements (see below), and in my experience, just grab some tape and tape out a few options and see what looks the best. At the end of the day, the eye does not notice all the oddities, I promise!
Mark It Out
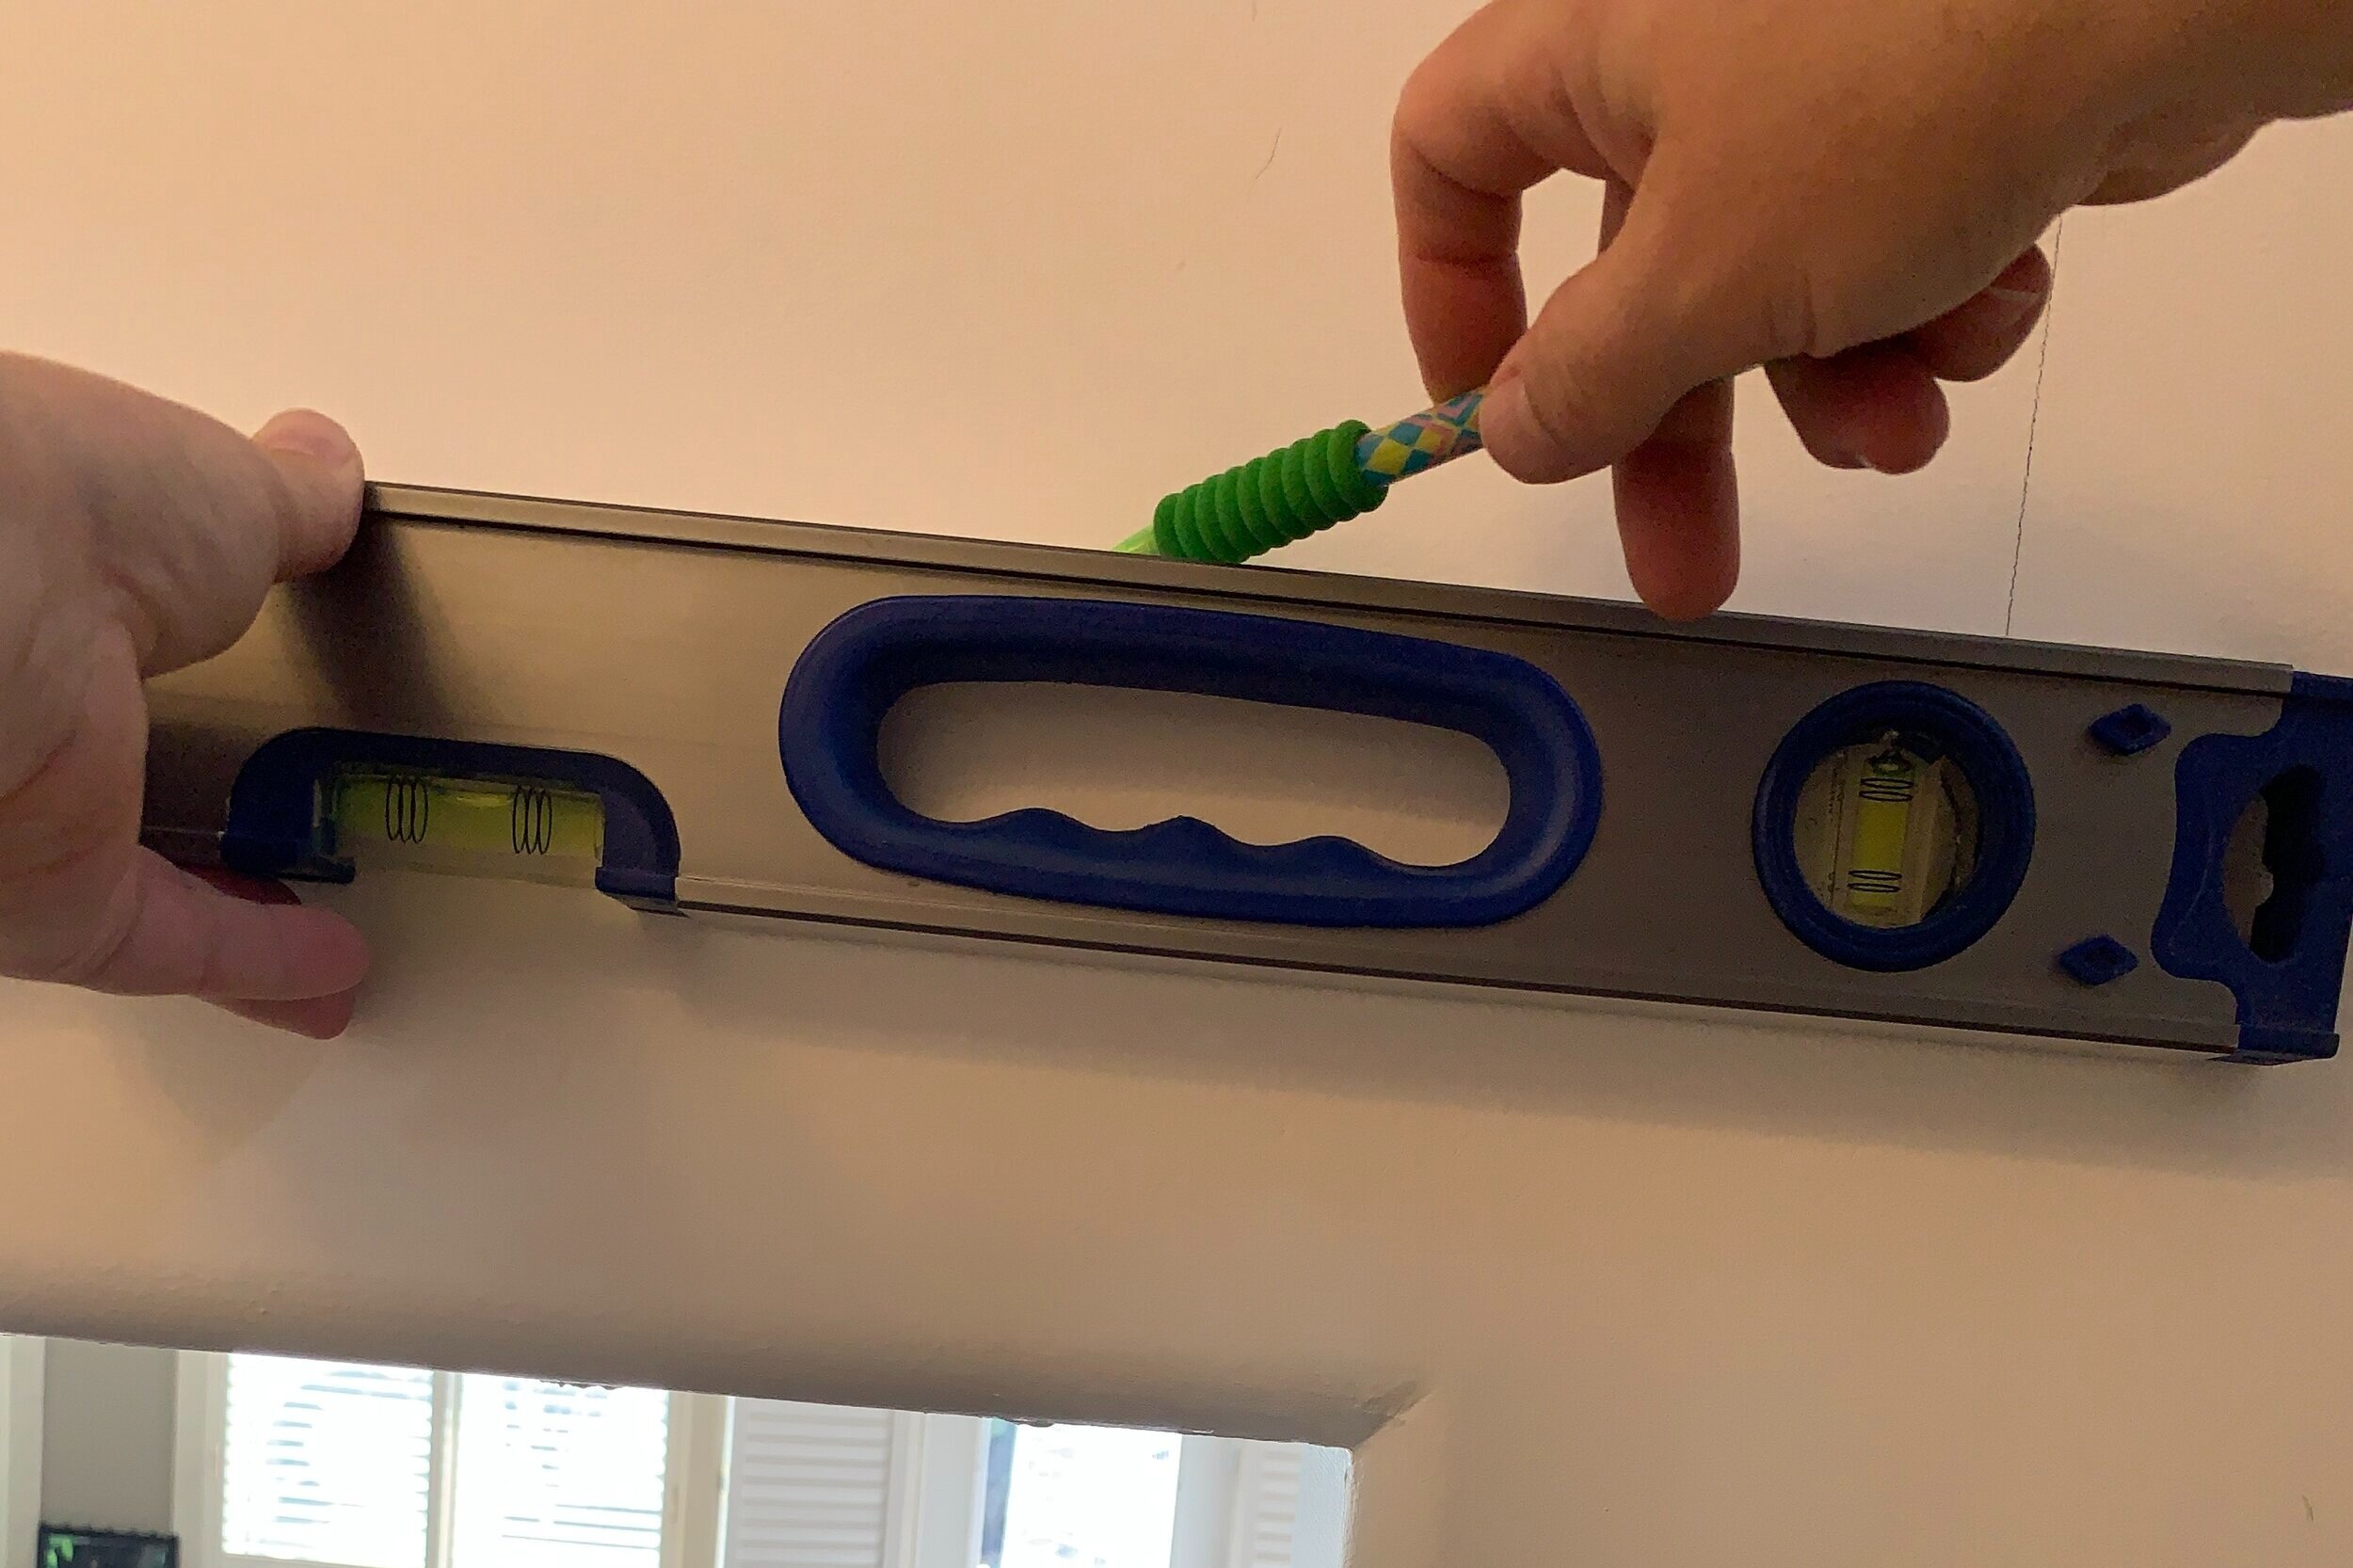
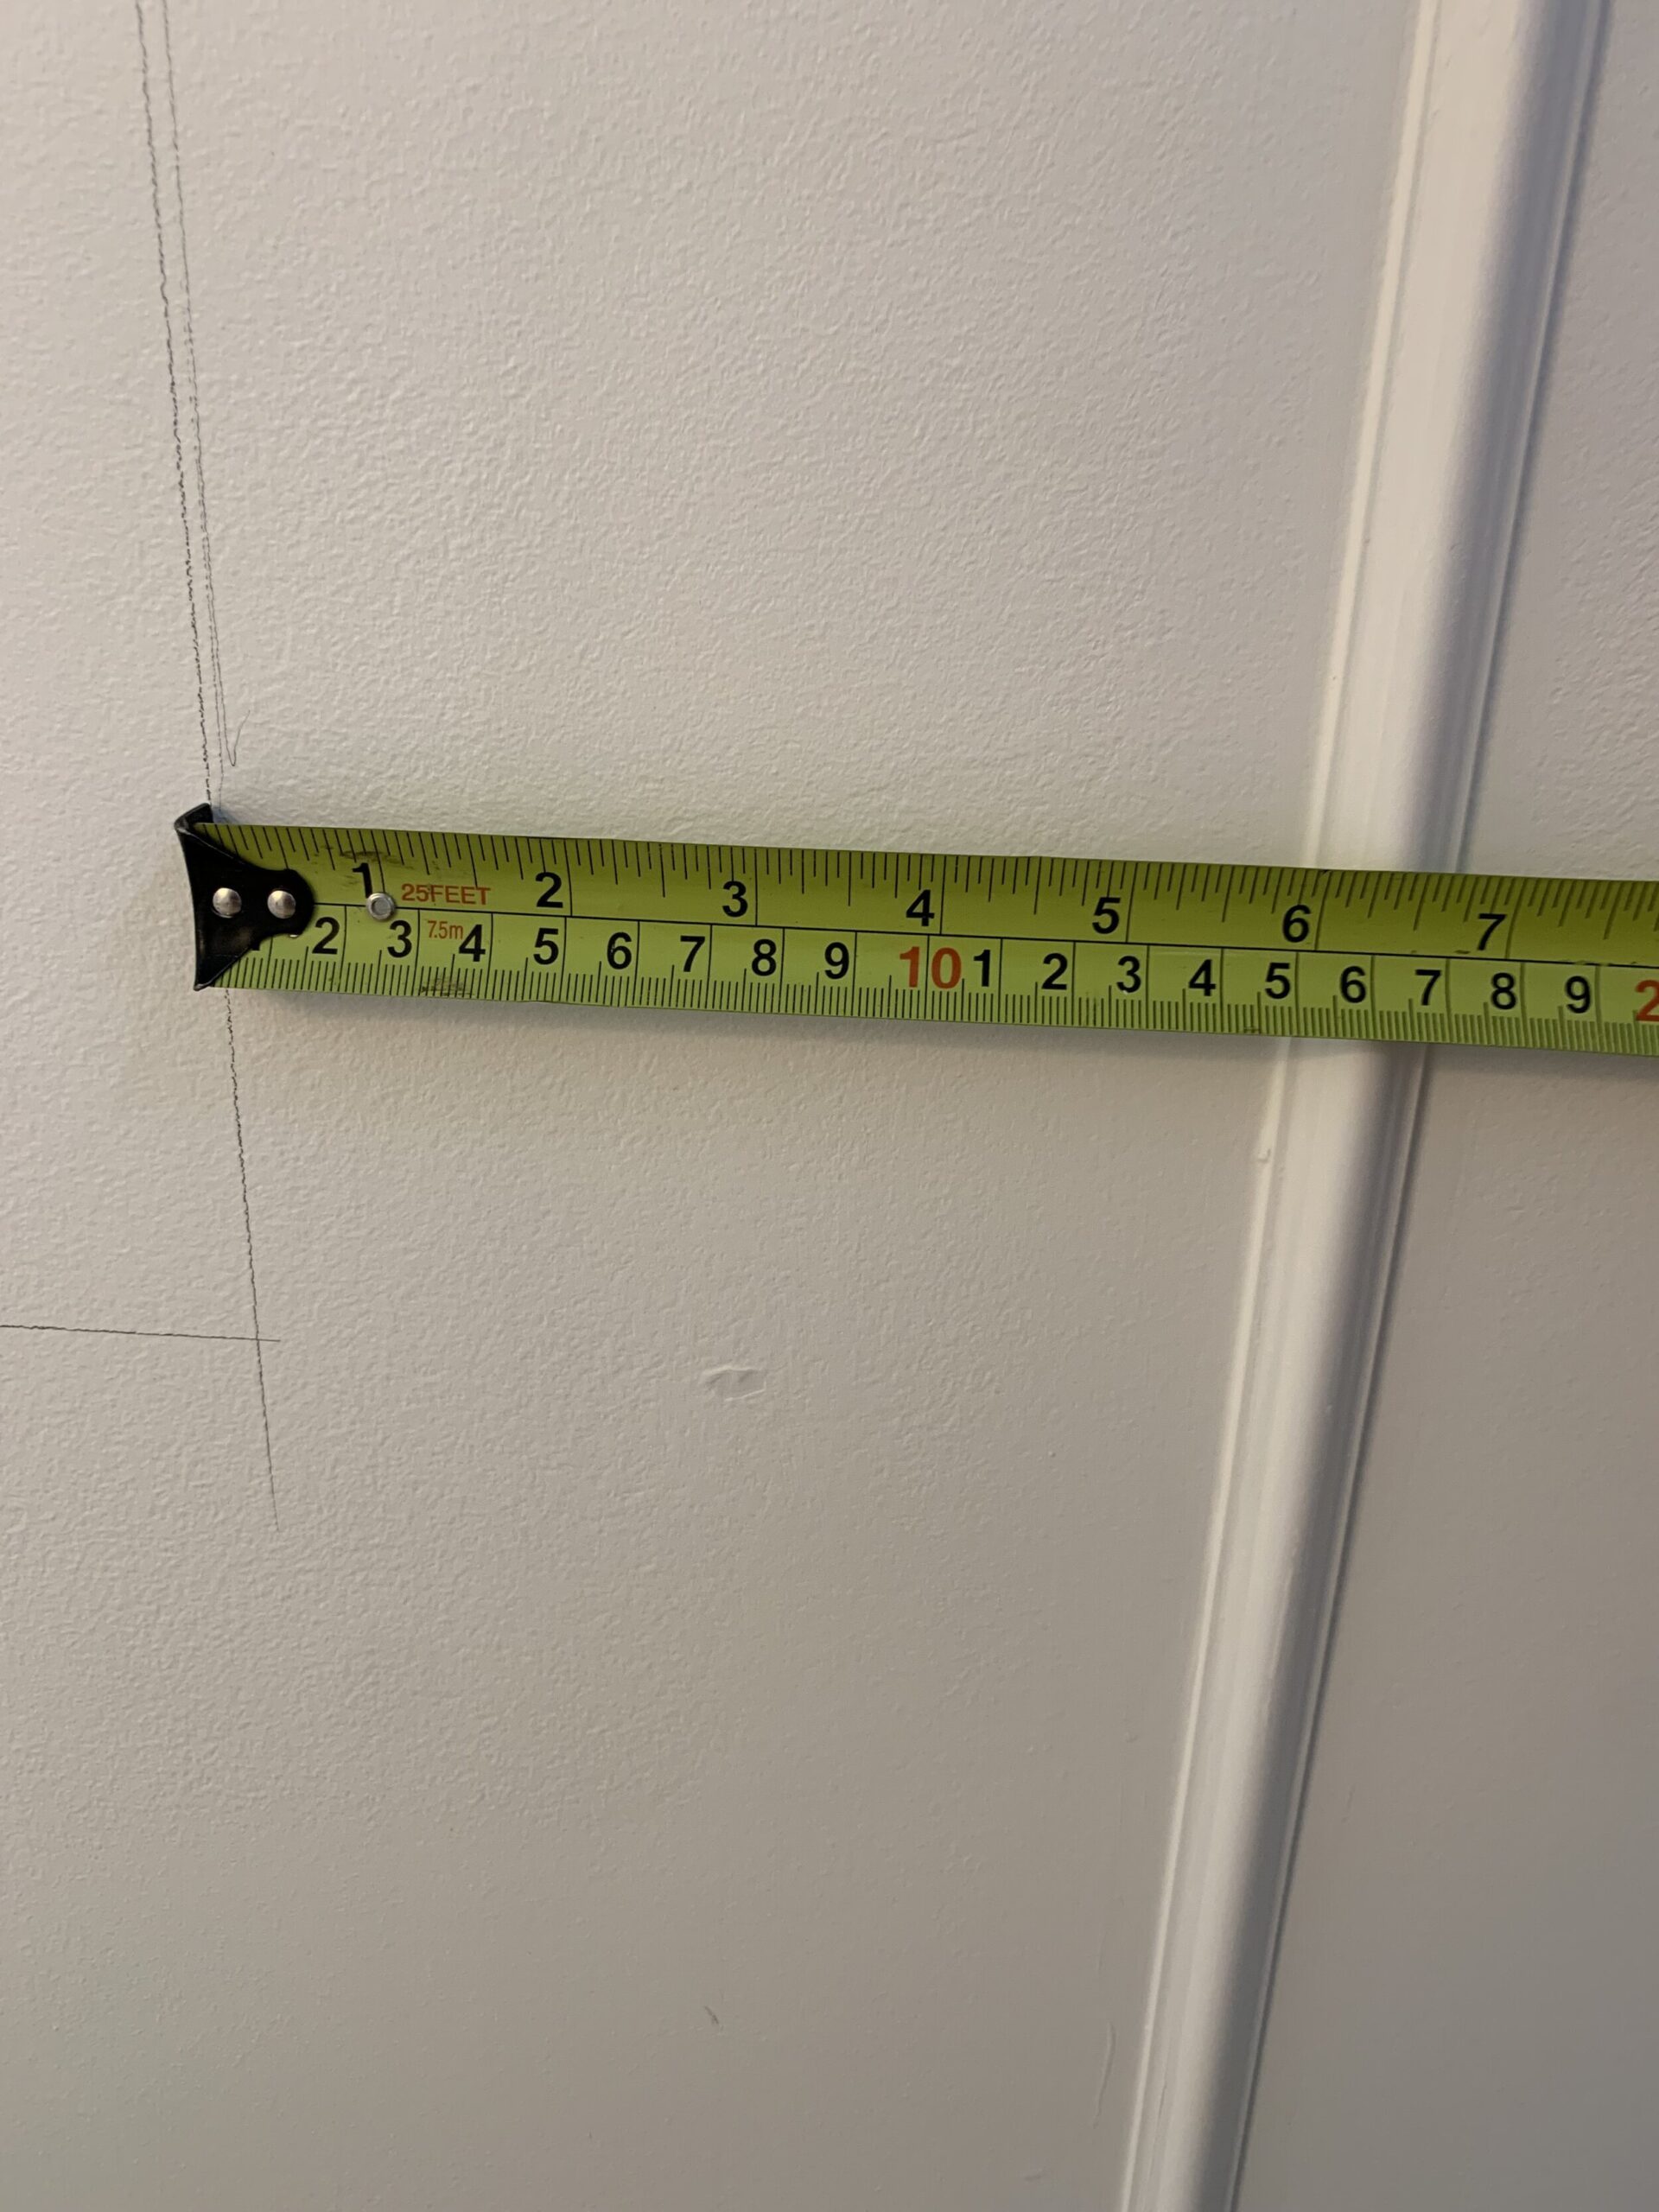
Now, this step is optional but I feel like it makes the cutting and installing of the boxes much quicker and easier so I do recommend it. I drew with a pencil each and every box on the wall. I used a level, and maintained the 6” spacing. Tip: your floors/ceiling are not likely level, so choose a spot to mark the 6” spacing and use a level to mark out the boxes rather than following the line of a crooked ceiling or floor. This will help when you install the boxes, so your corners stay nice and tight and your boxes perfectly square.
Measure and Cut
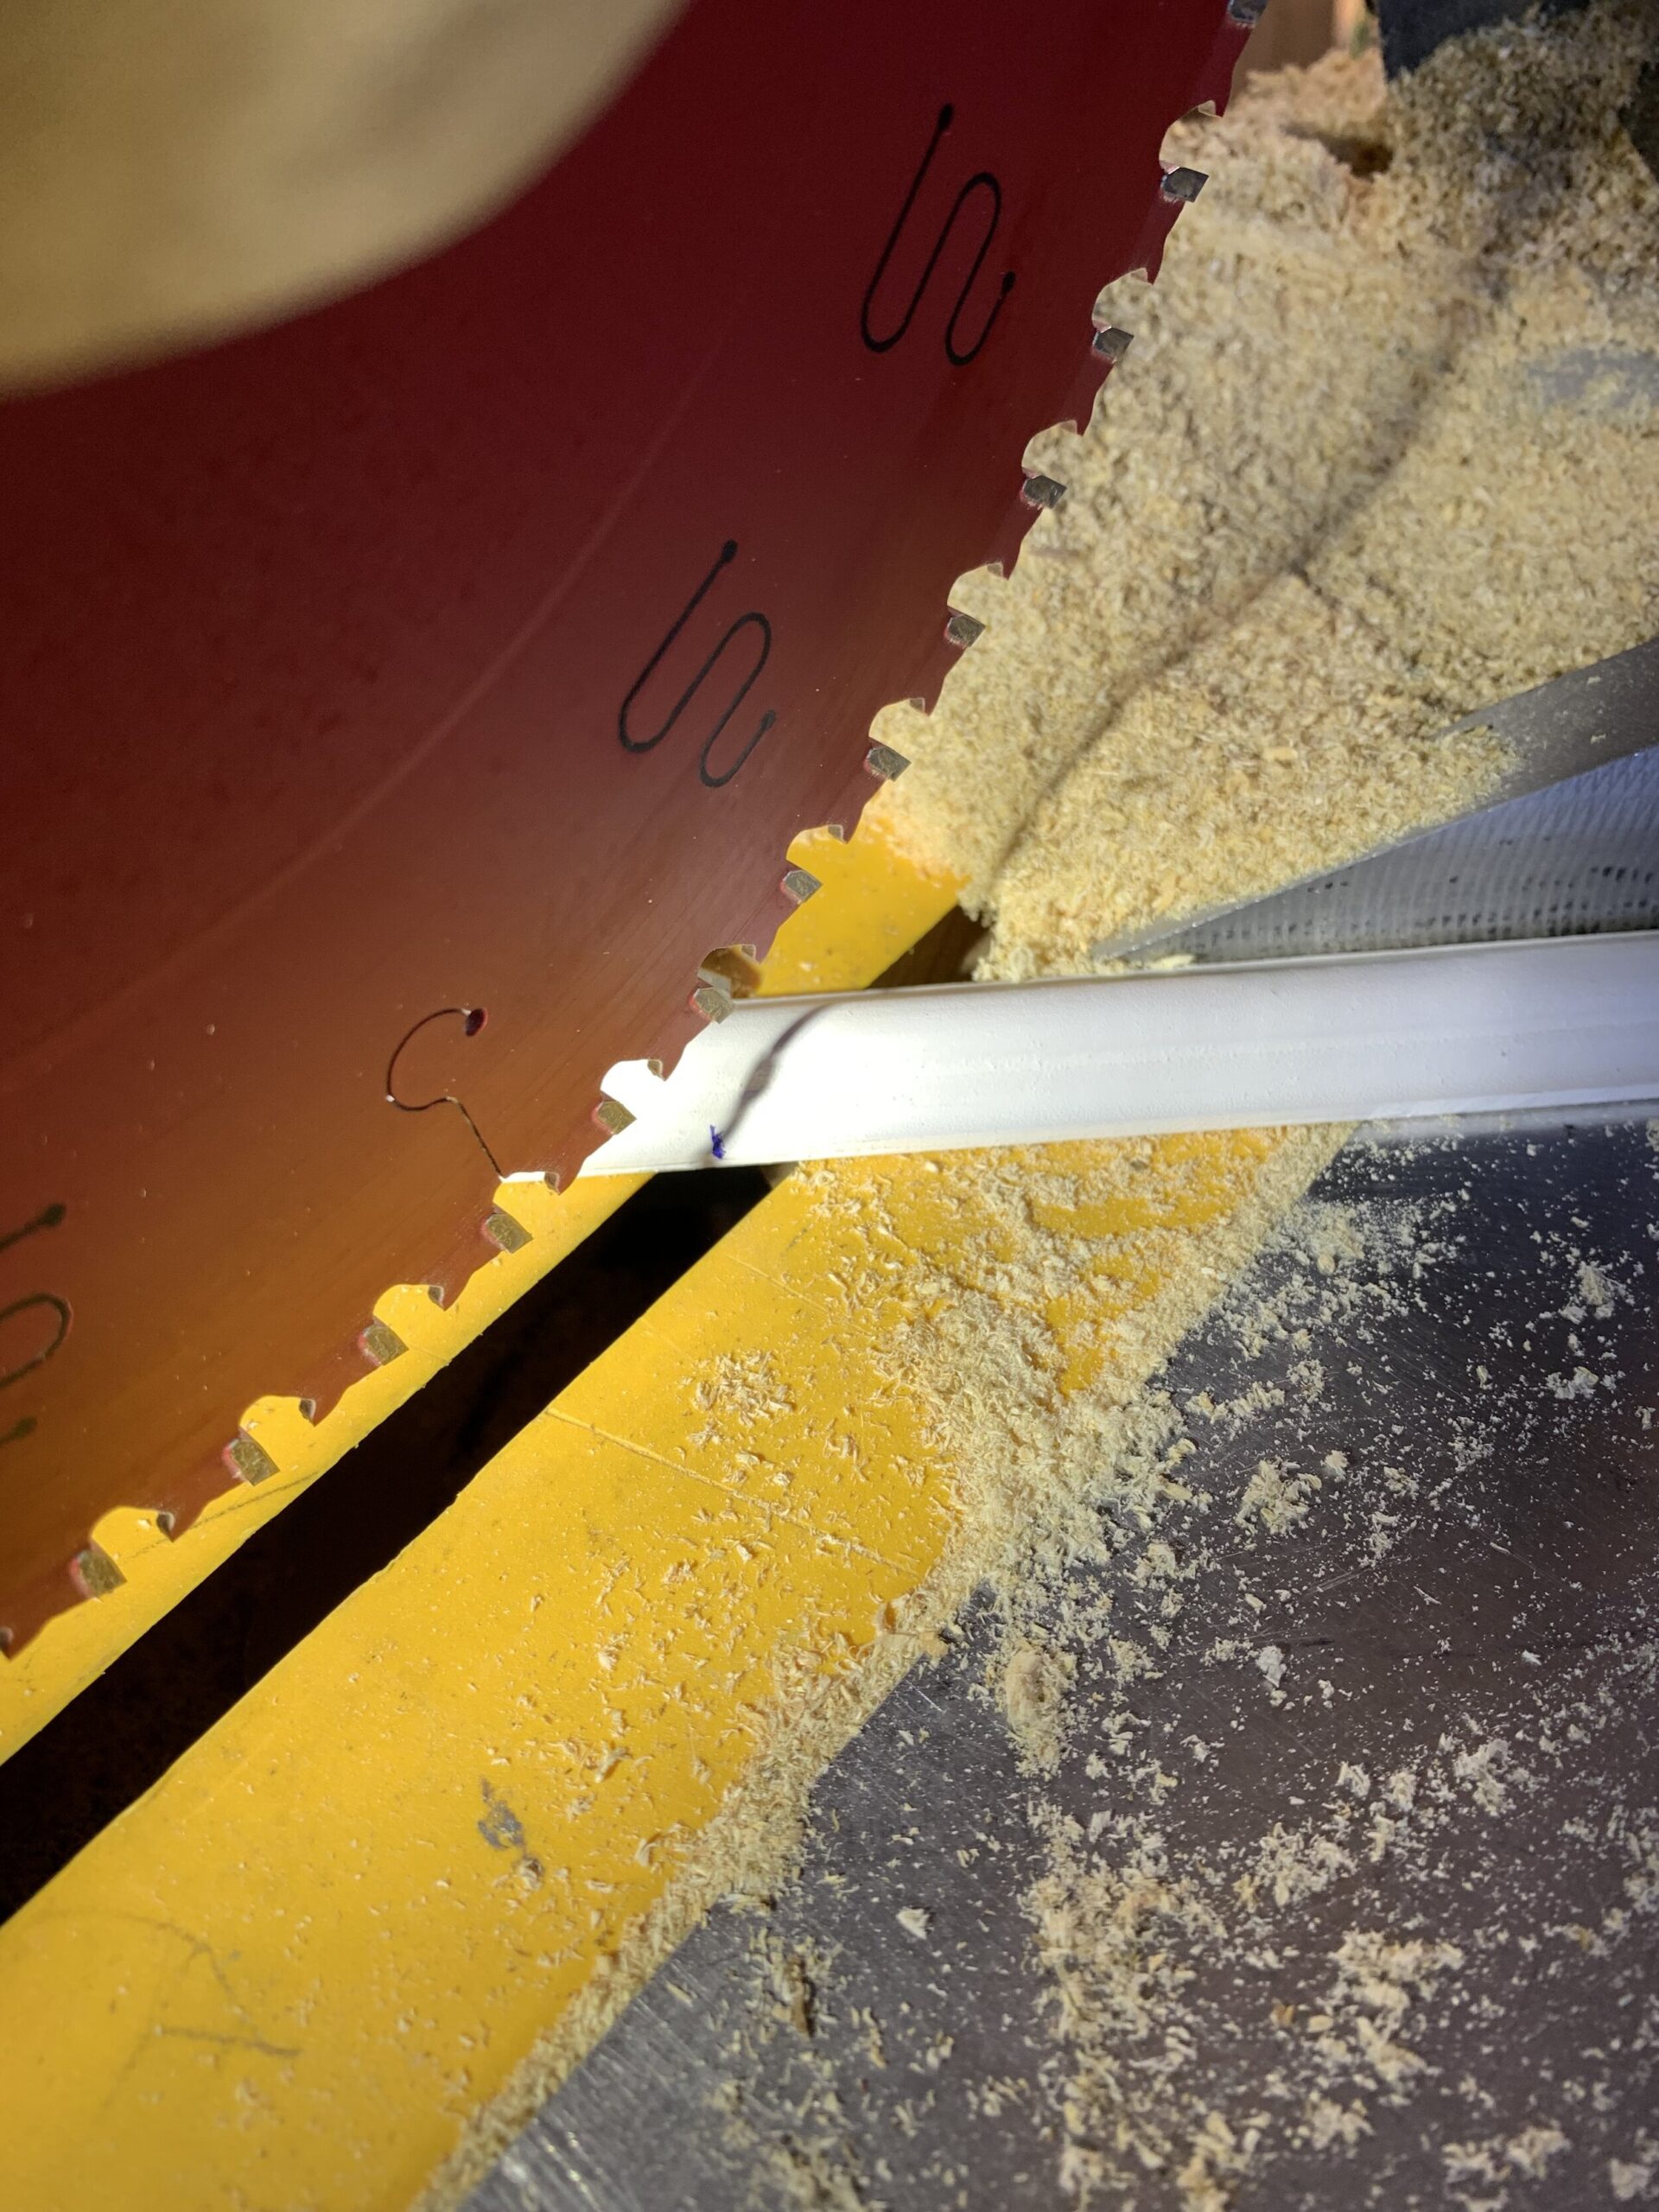
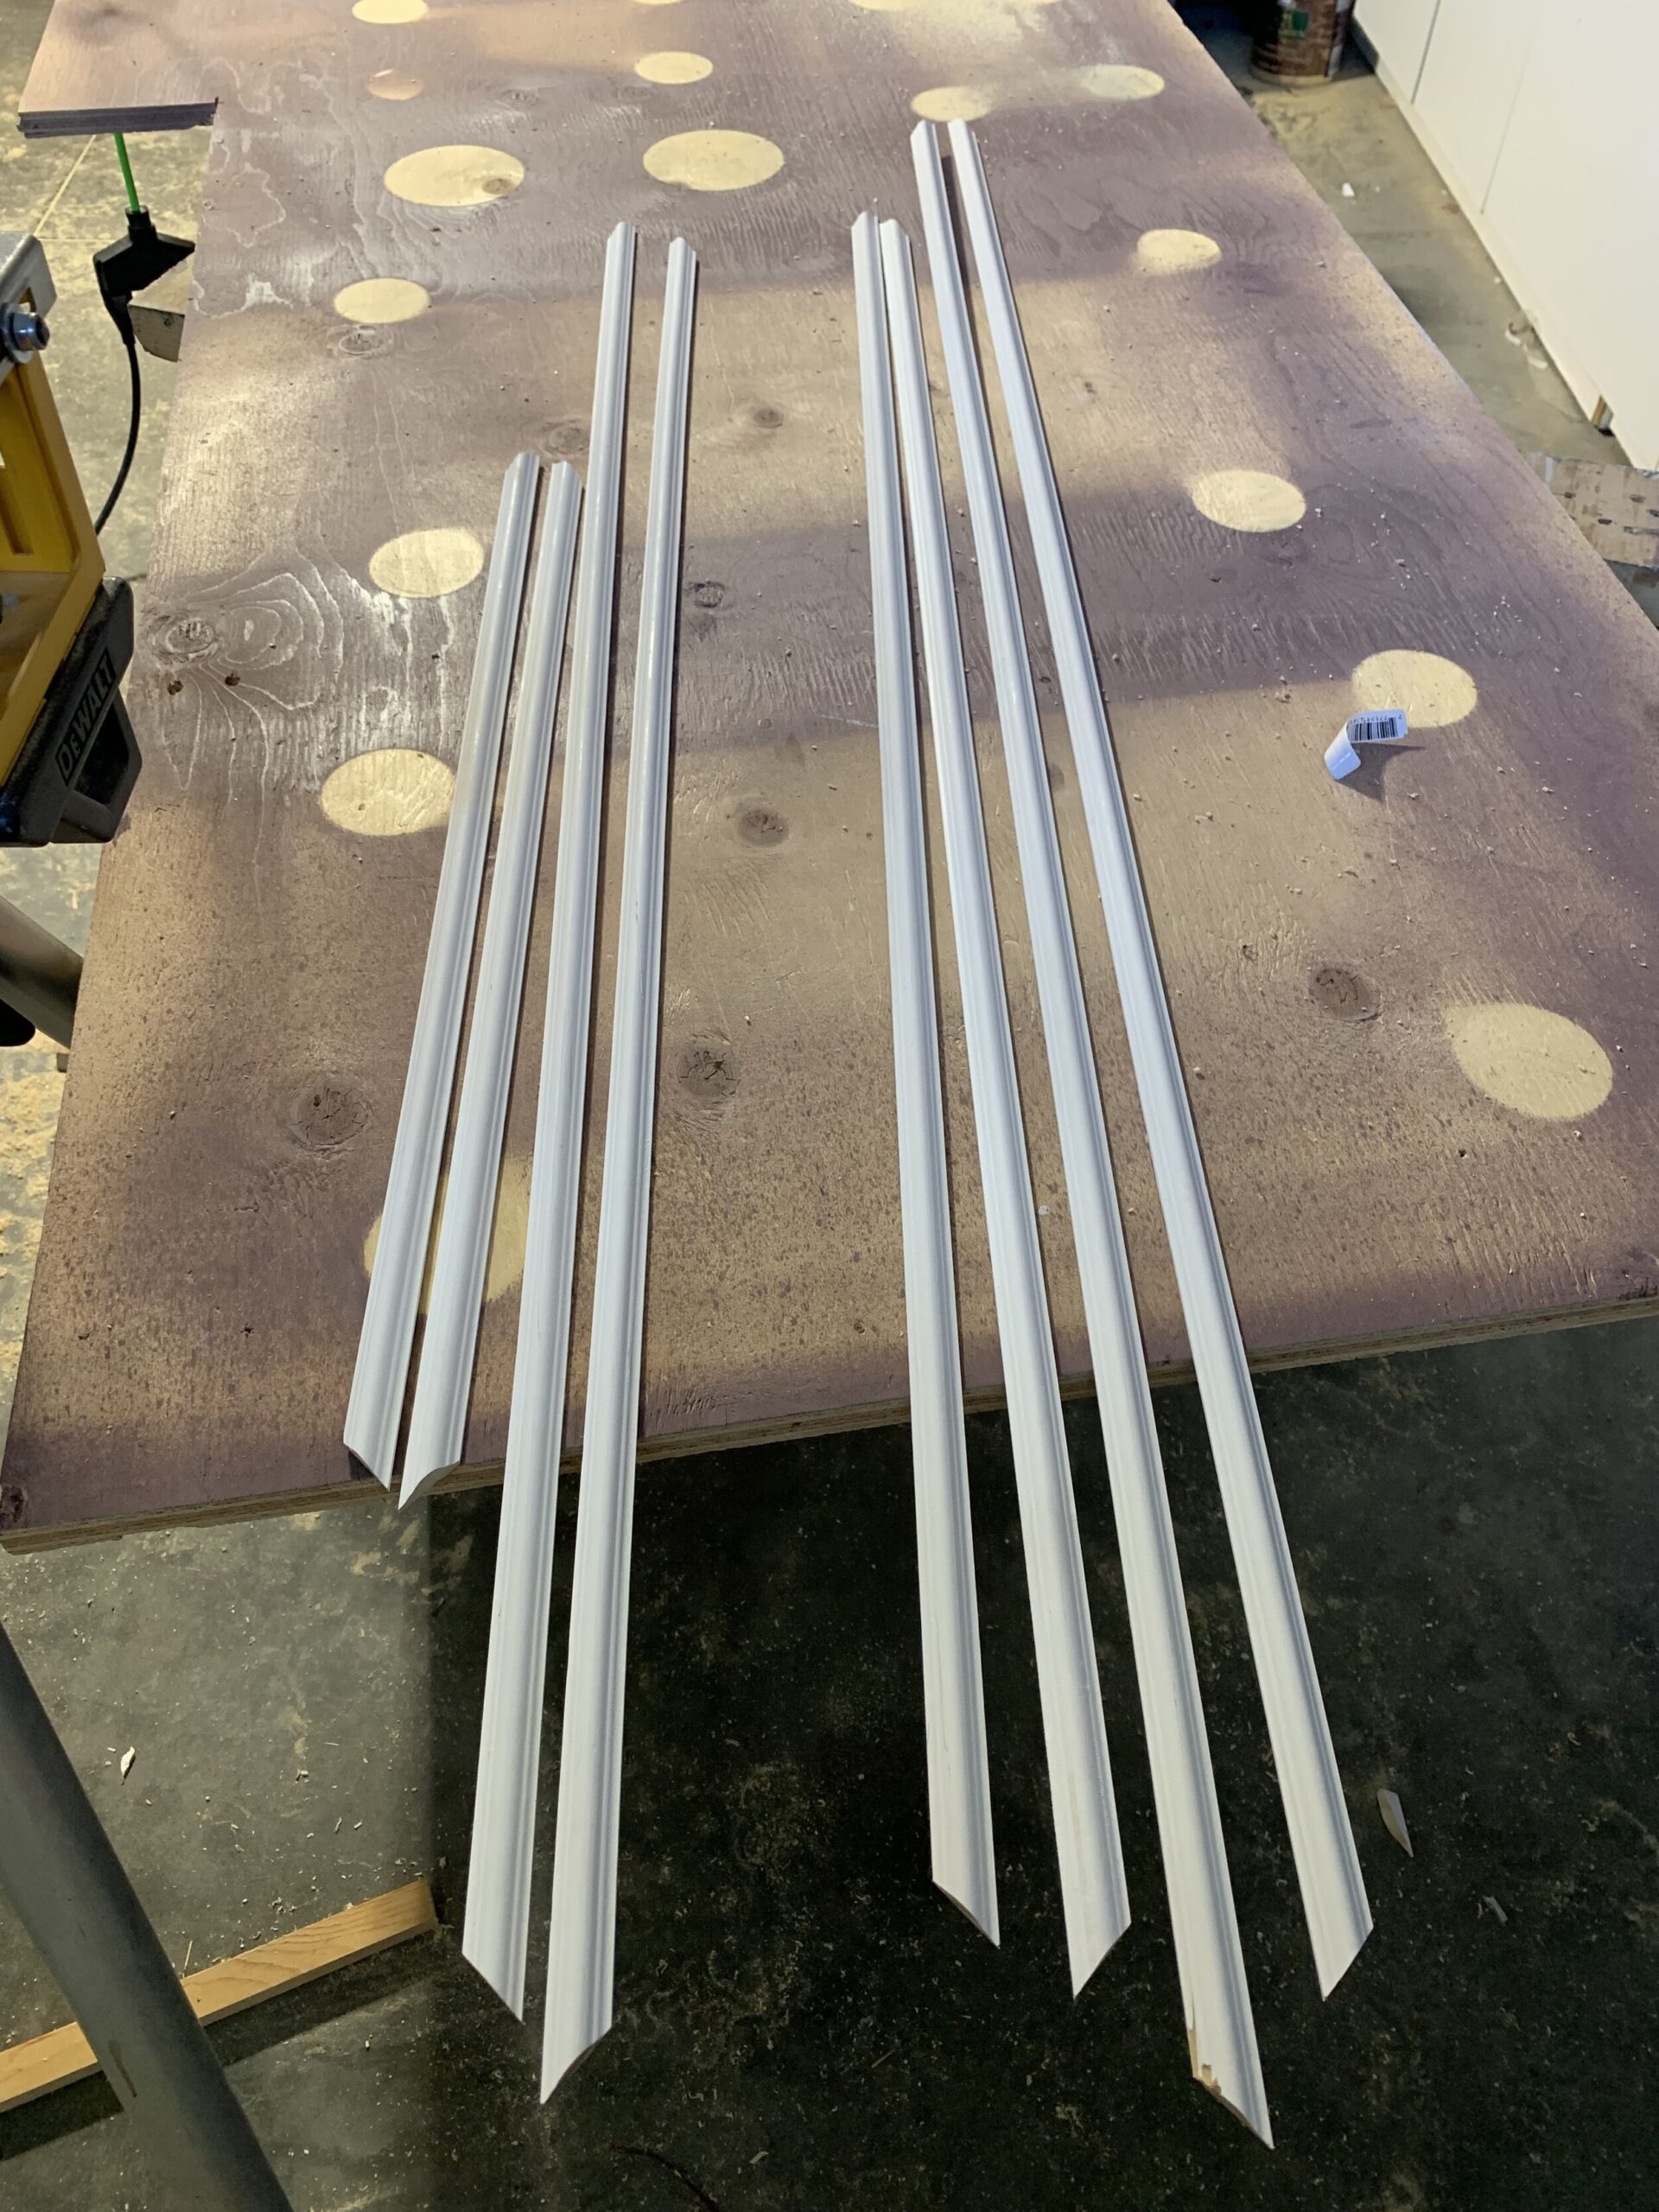
Now that you have marked all the boxes on the wall, the rest is easy. Measure the length of each side and cut the trim, using a 45 degree mitre cut. The measurement you take on the wall is the “long side” of the mitre cut. For perfectly square boxes, you should have two exact same measurements for sides and two exact same measurements for the top and bottom pieces.
How to Install the Box Trim Moulding
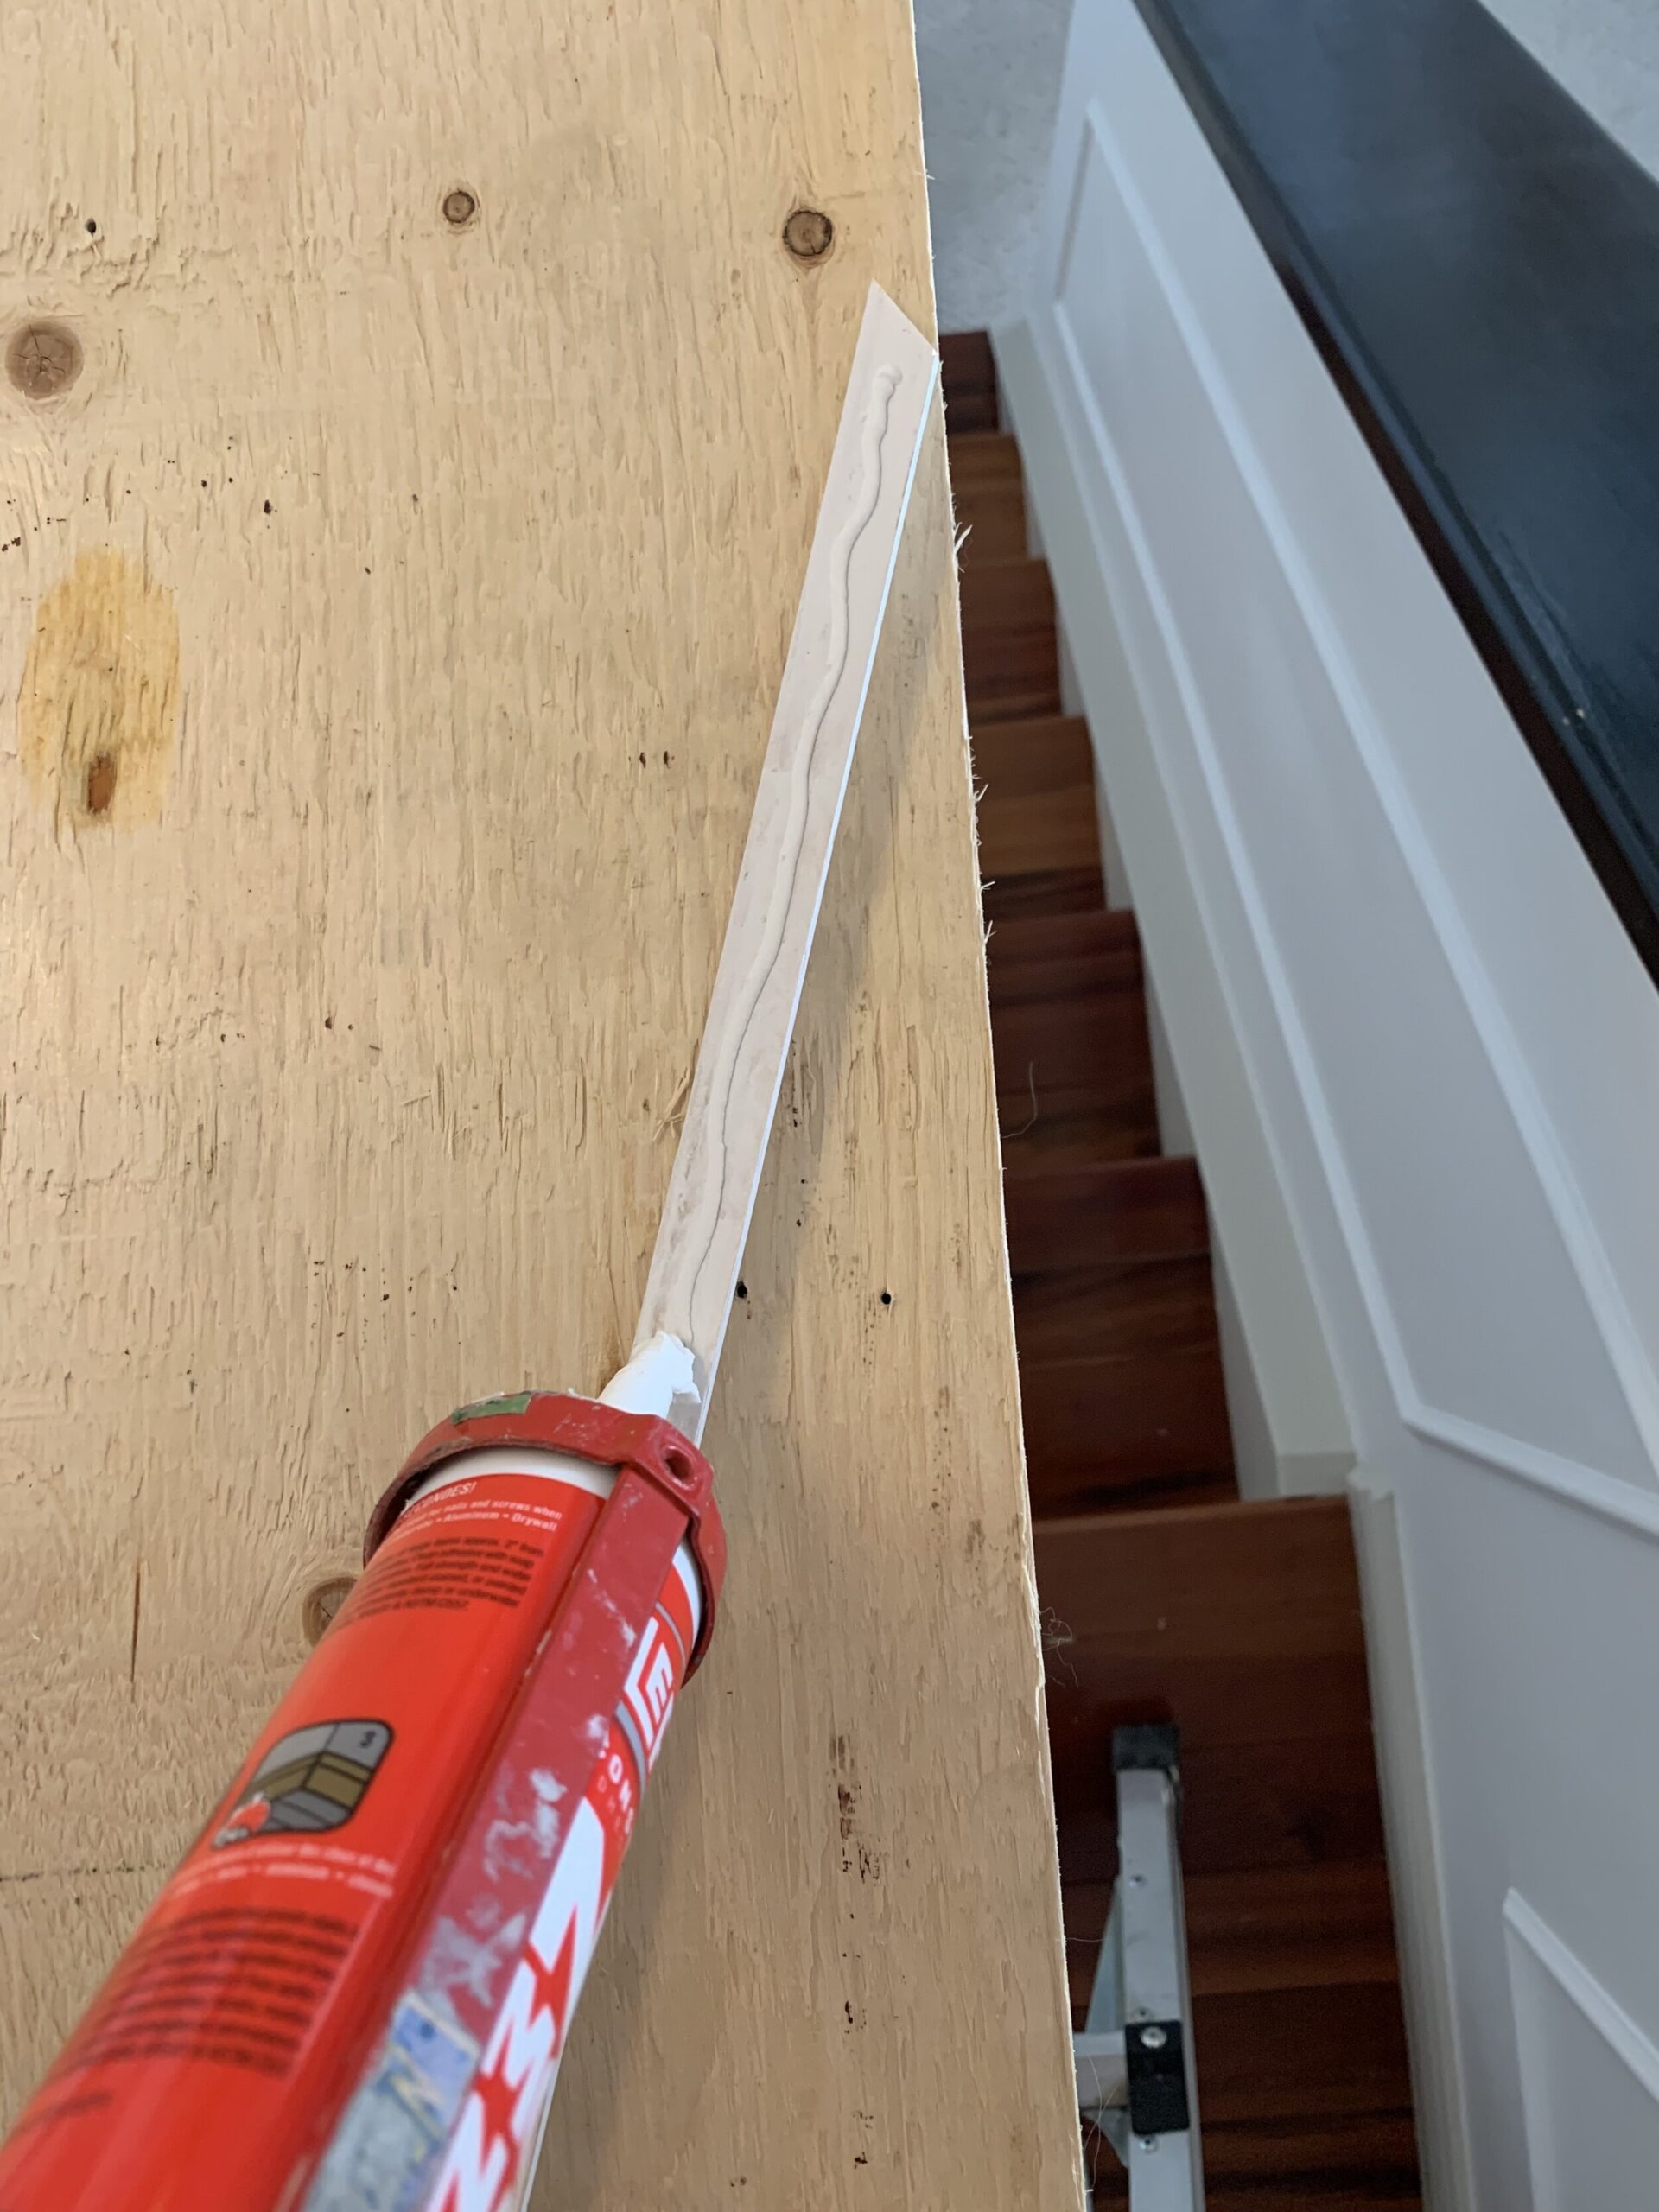
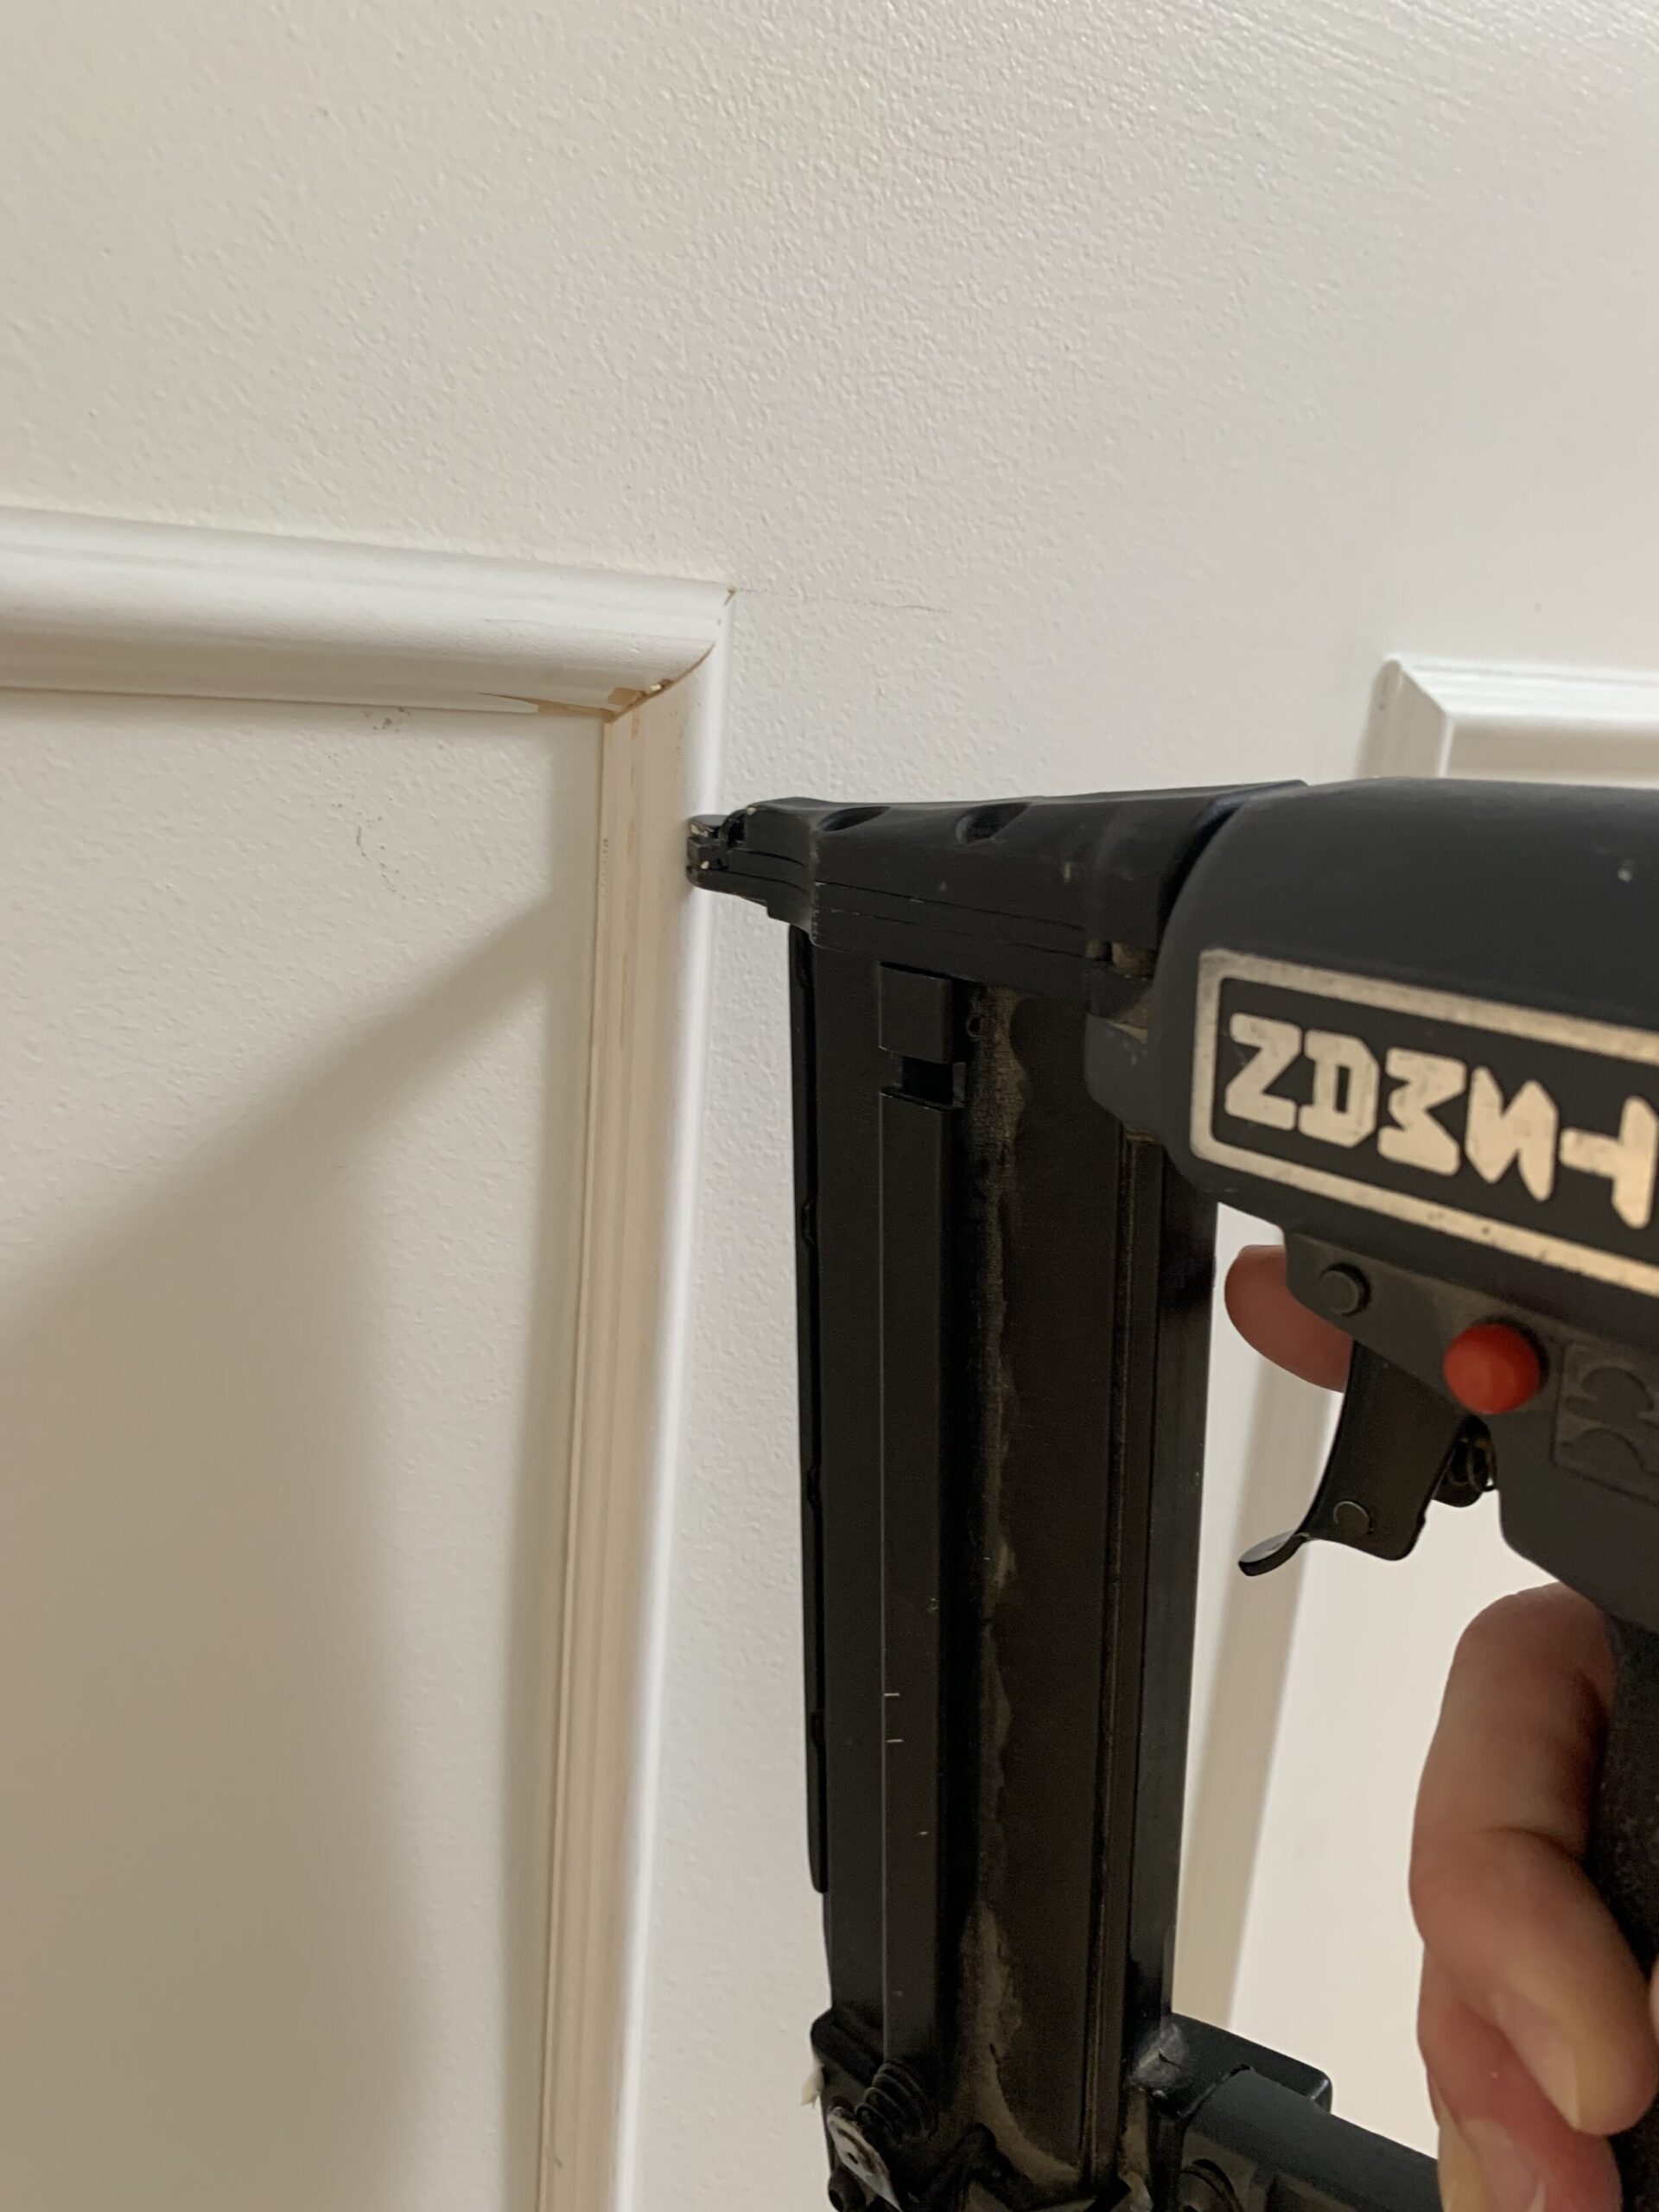
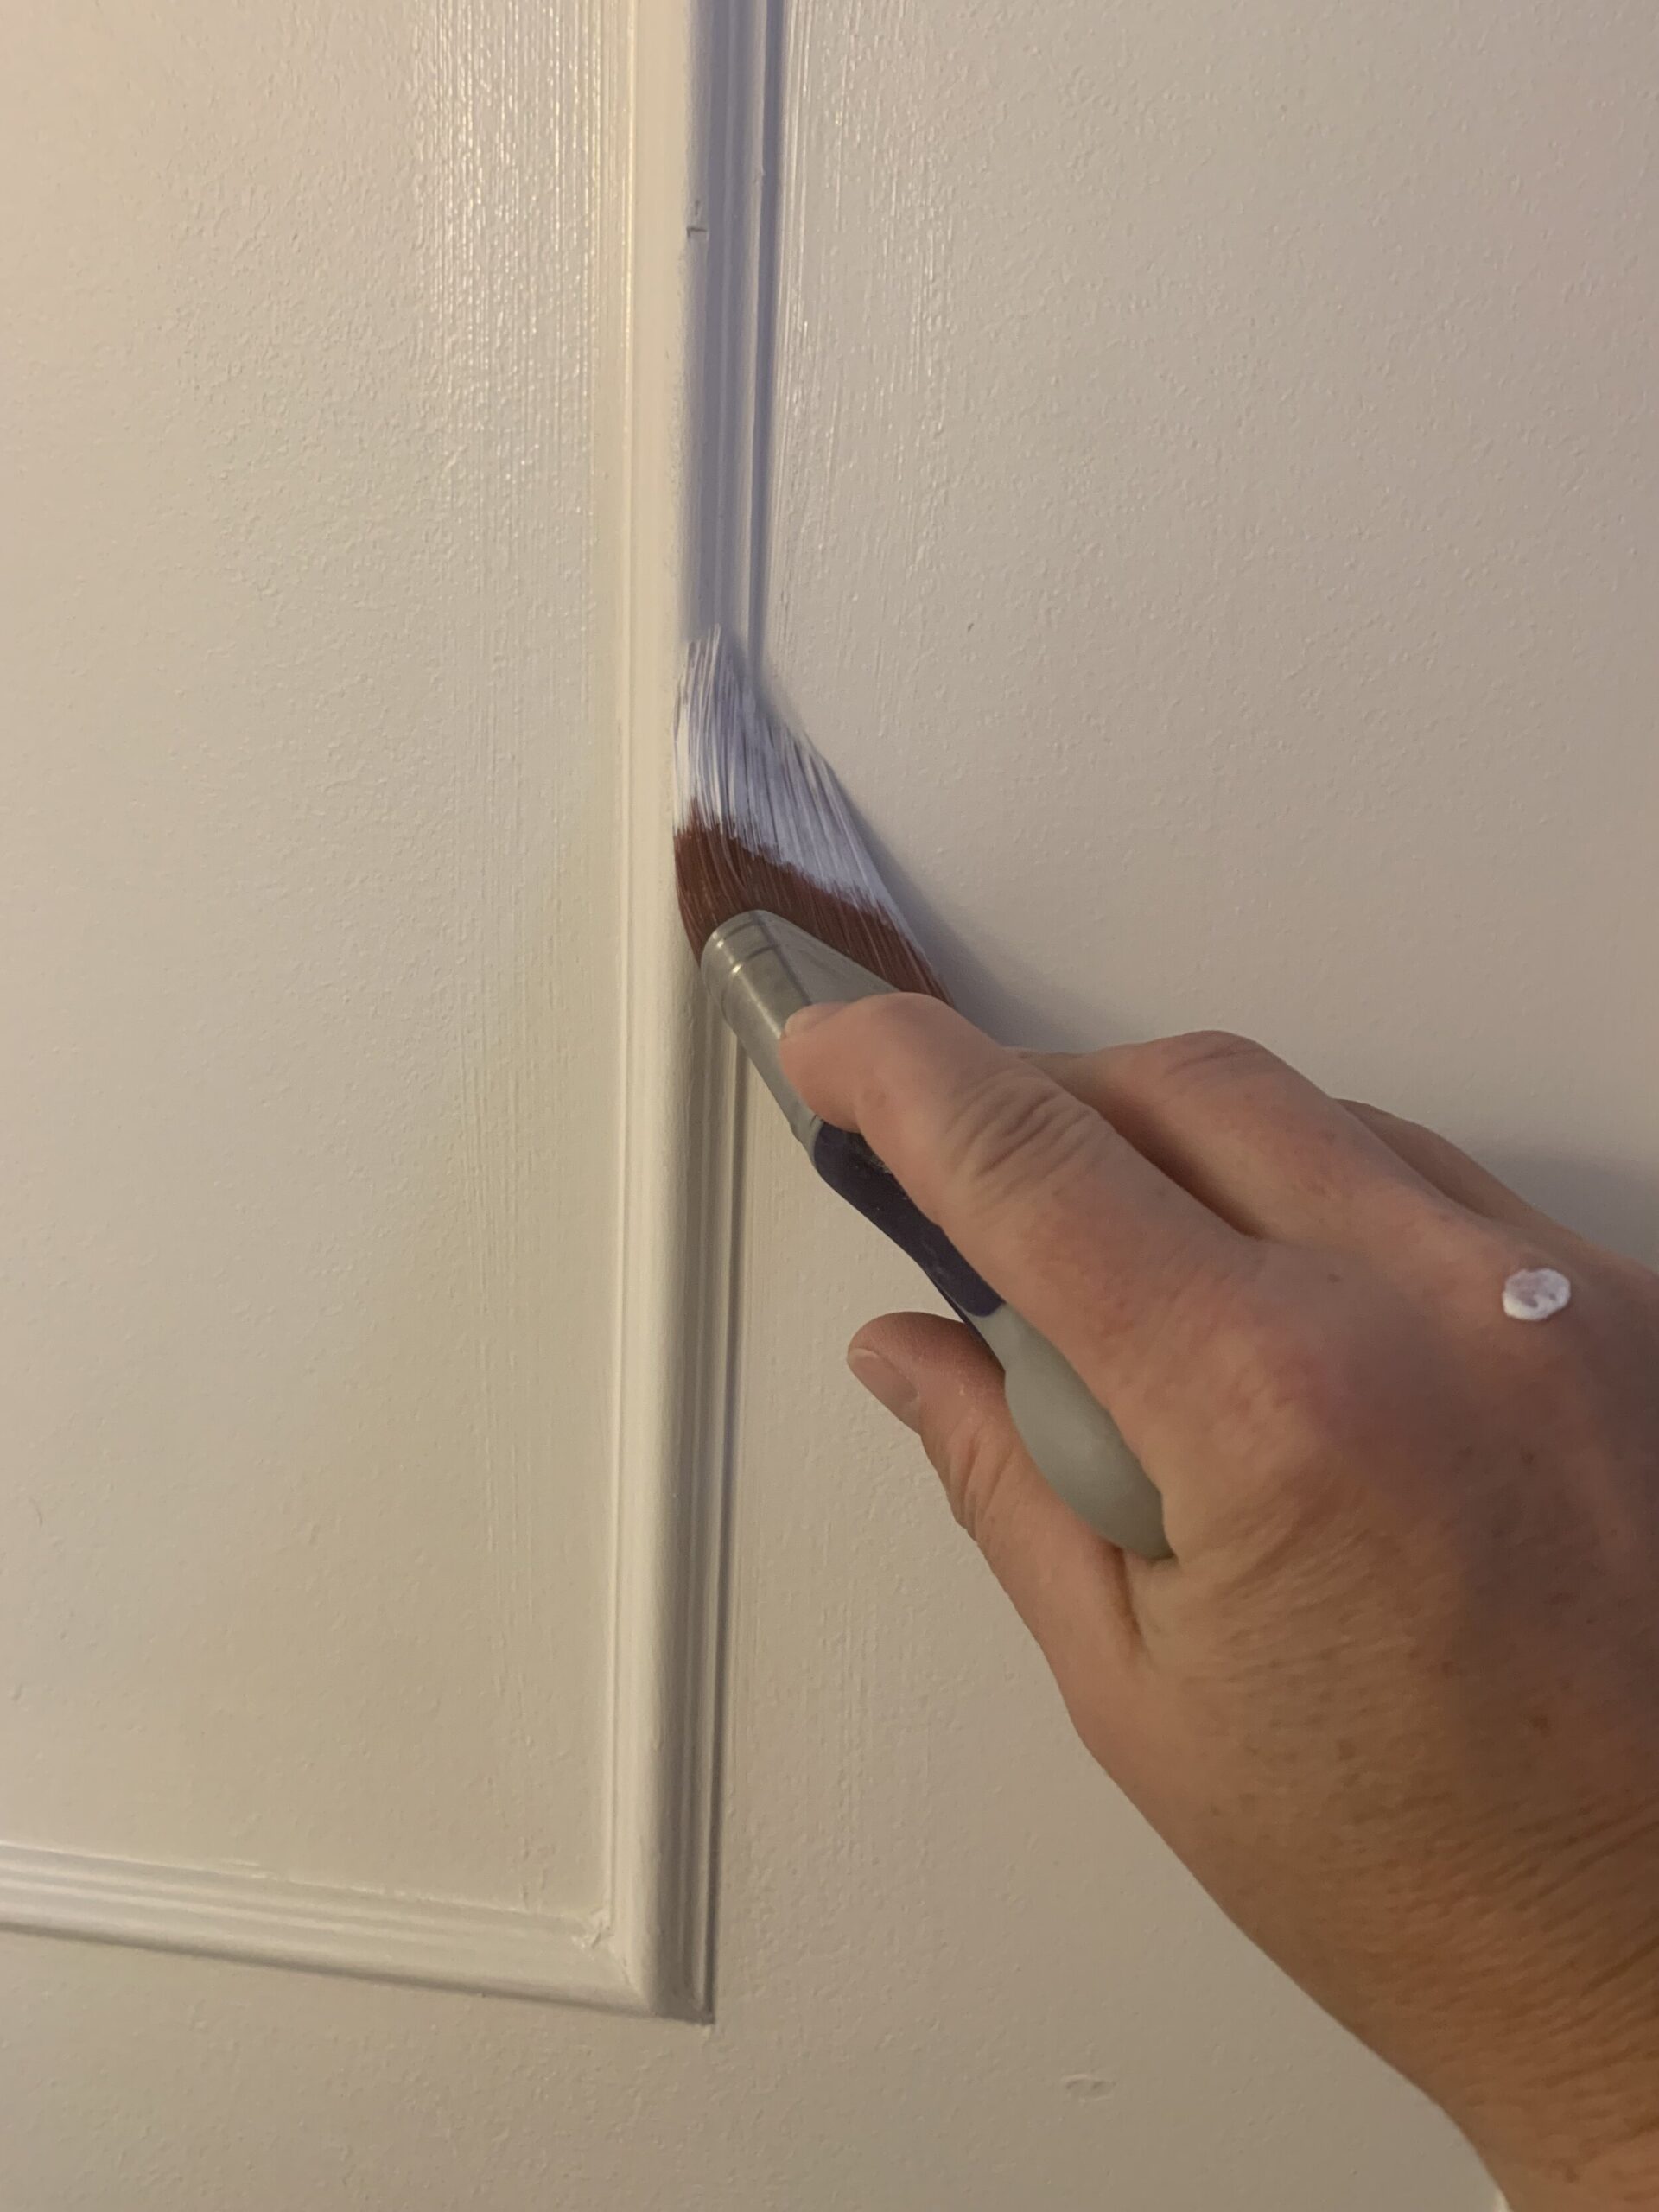
Now that you have four pieces marked for the box trim, add a little construction adhesive (I use No More Nails) to the back. The construction adhesive works really well, grabs quickly and allows you to put all 4 sides on the wall at once, and shift them around a little so you can get the corners perfectly lined up. Line up the pieces so that the trim is just inside the lines you made on the wall. Once you are happy with all of the corners, you can just leave this alone and let the glue do it’s thing, but I usually add a few finishing nails with my nail gun to hold it while the glue is setting up.
I have seen a few people install these just with nails, so they don’t ruin their drywall if they ever want to remove them. I prefer to glue so that I can line them up easily, and they are good and stuck to the wall, even if the wall is a little wavy or wonky. If I ever want these removed I will probably just move (haha) because they will tear your drywall.
I recommend No More Nails (Canada) or No More Nailss (US). Spread a little of the adhesive on the back of the moulding and place on the wall. Place and adjust all four pieces until they are positioned how you like them on the wall with nice tight mitres, and the adhesive holds them in place. Then, secure them with a couple of finishing nails.
Prep for Paint
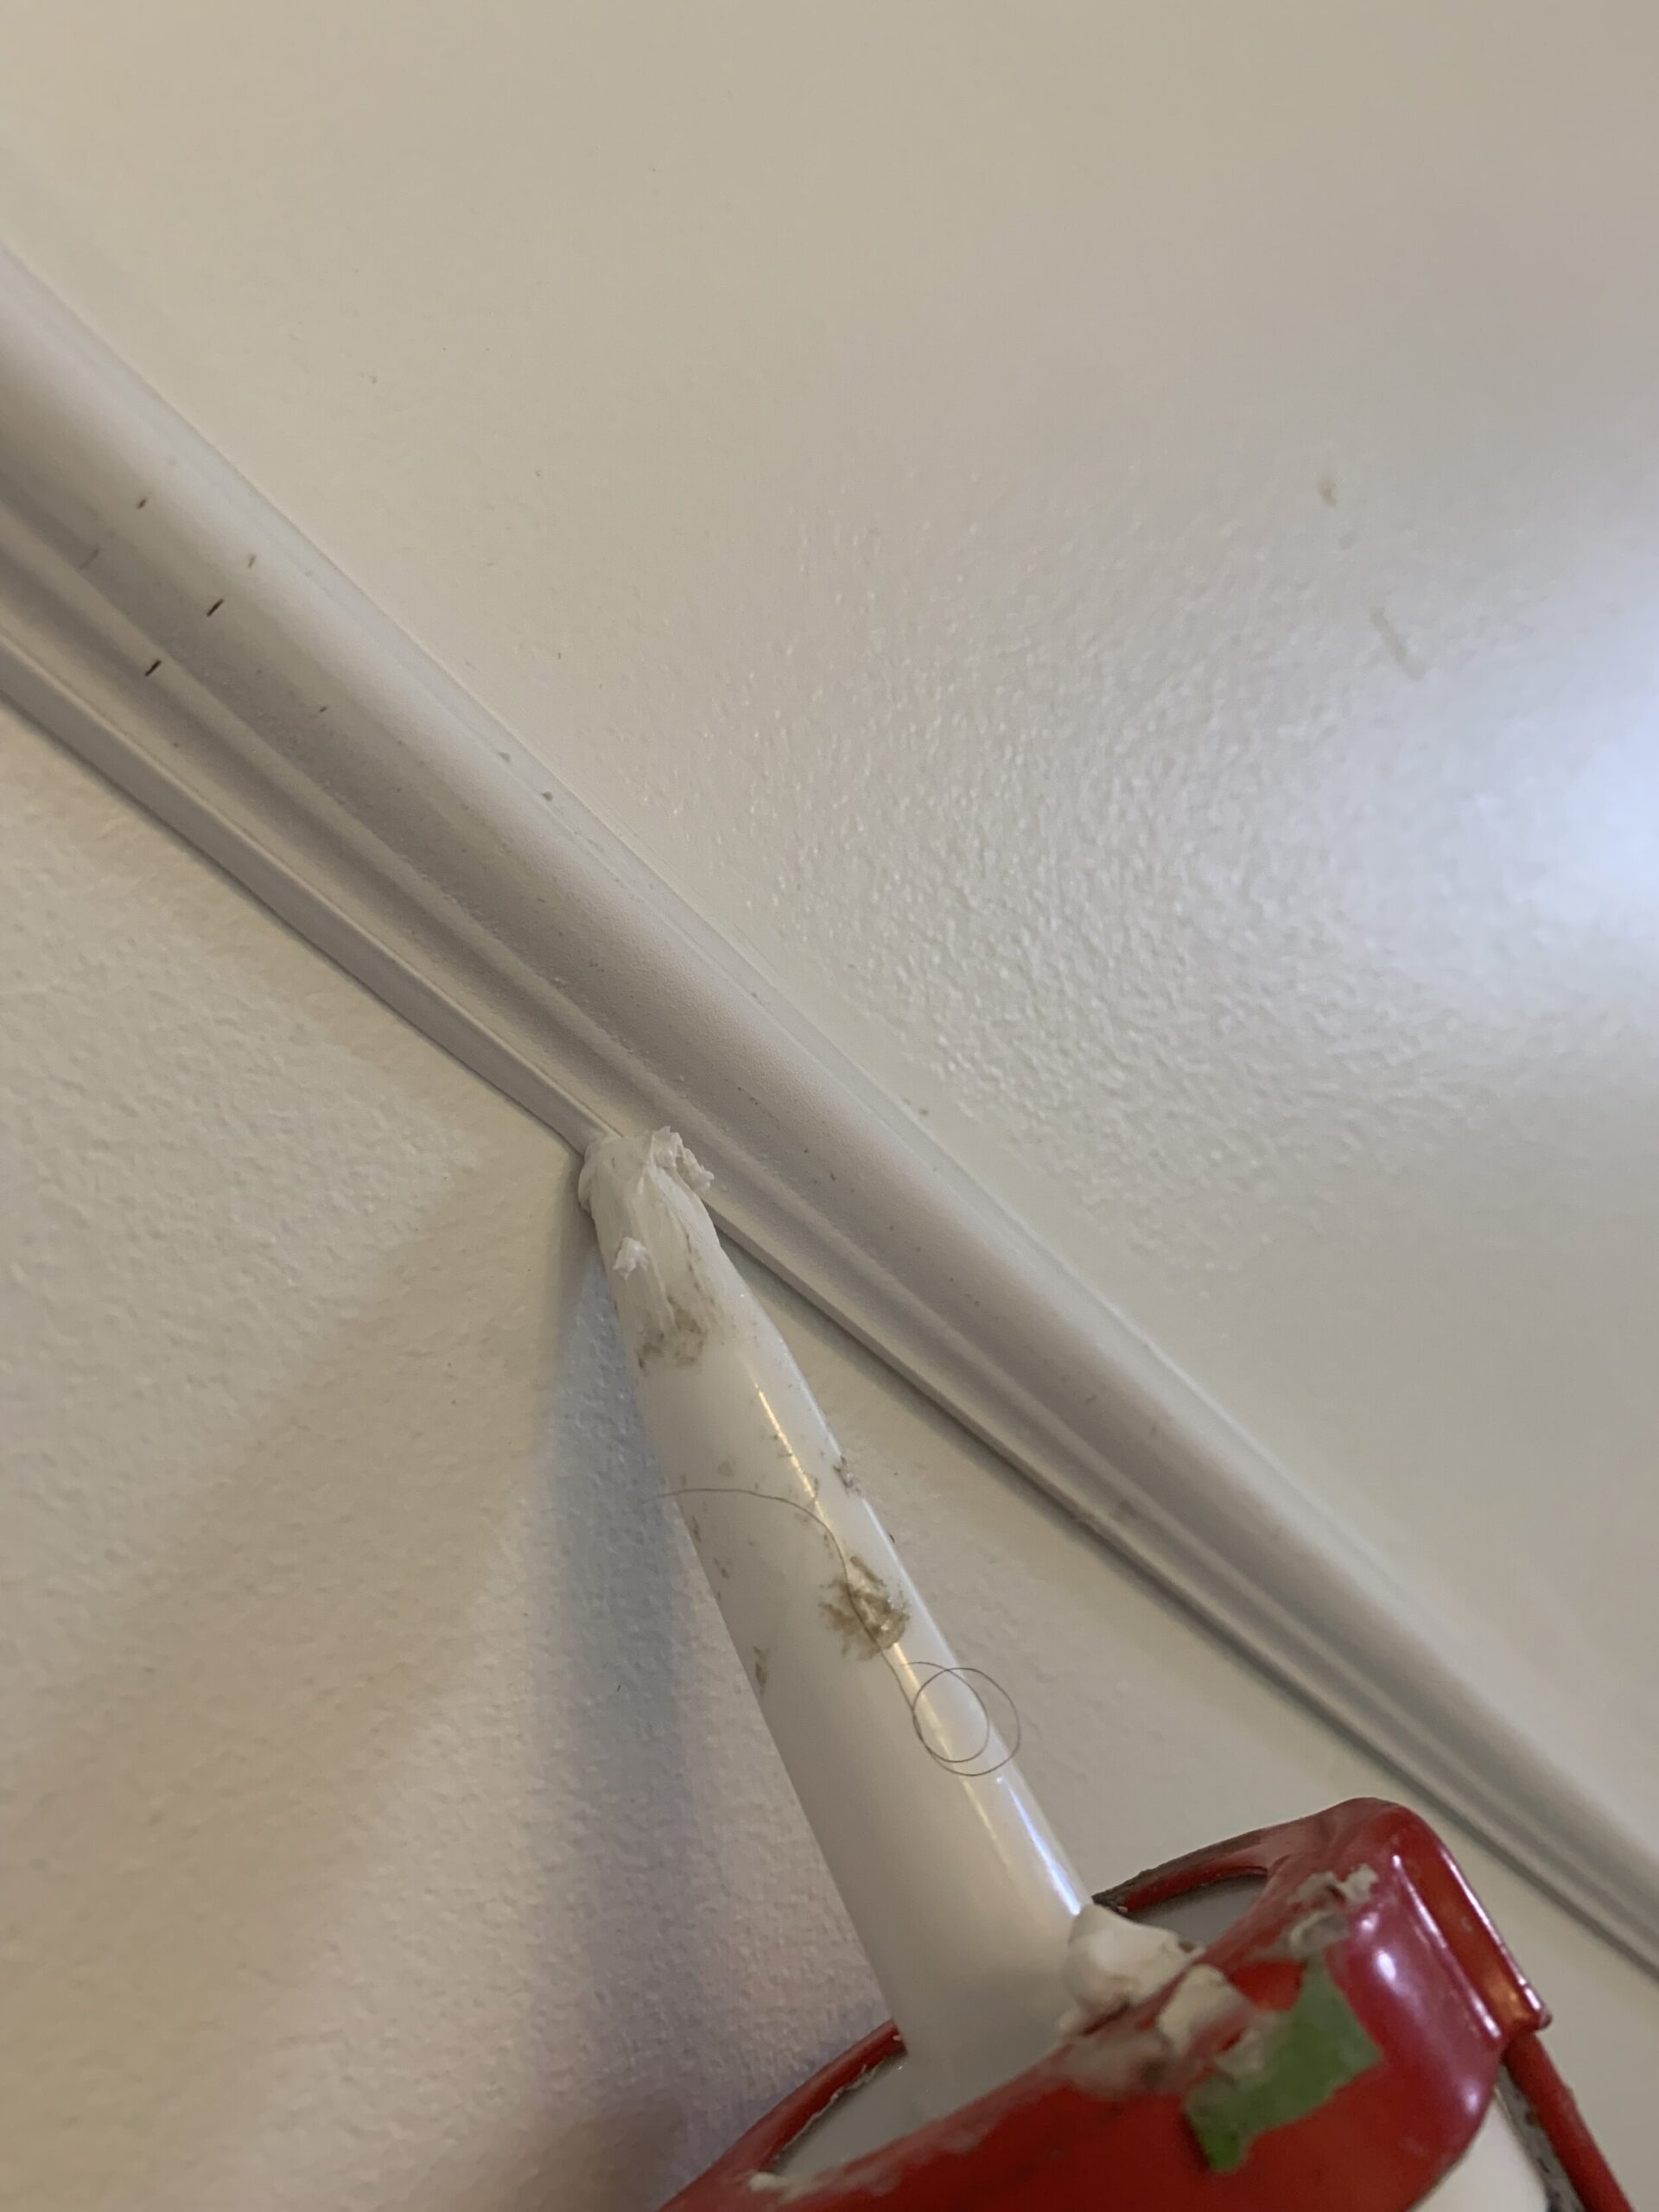
After the boxes are up, fill nail holes with spackle or wood filler and sand smooth, then caulk the edges and corners. This takes longer than installing them, honestly! But it’s so worth it for a seamless finish. Pop in a podcast and zone out.
Paint!
I prefer to paint these boxes with paint that matches the wall colour, because doing anything else would be a test on your sanity (but you do you!) When I painted my main area I added all the boxes and then painted, but if I had to do it over again I would have at least done one coat on the walls before adding the boxes. Either way works, just get some paint on there!
Admire your Fancy House
No matter what type of trim you add, there is no doubt in my mind that adding box moulding makes a house look much fancier. There is a reason that moulding like this is attributed to high-end homes, it can be very labour intensive to install and if you need to hire a carpenter to do it, it can be expensive to add. These simple boxes are a pretty easy DIY, however, and the moulding itself is also pretty inexpensive. For a few hundred dollars and some elbow grease, you can have that high-end look without the high-end price! I hope you found this guide on how to plan and install box trim moulding useful, let me know in the comments!
How to Plan and Install Box Trim Moulding
A quick description of how to plan and install Box Trim Moulding
Materials
- Moulding of Choice
- Adhesive
- Paintable Caulking
- Paint
Tools
- Finishing Nail Gun and Nails
- Caulkiing Gun
- Paintbrush, tray, rollers
Instructions
- Plan your moulding on the largest wall first. Decide how many boxes you want, visualizing with tape.
- Decide on your spacing between boxes, using the same spacing between each and every box, between the top of the box and the ceiling, and the bottom of the box and the baseboard. I used 6", but you may want a slightly larger or smaller spacing depending on the size of the room.
- Once you have your main wall decided, each and every wall have boxes as close as possible to the largest wall. The spacing between boxes you determined in step two will never change.
- Draw the boxes on the wall using a pencil and a level. Make a mark 6" from the ceiling or floor, and 6" from adjacent boxes, and use the level to draw the box. Do not follow the line of the ceiling or the floor as they can be out of level slightly.
- Measure your box and all four sides of the trim according to these measurements. The box you drew on the wall is the "long side" of the mitre cuts.
- Add some construction adhesive to the back of the trim pieces and position all four sides of the box on the wall at once. Adjust as needed for tight mitred corners. Once you are happy with the position, add a few finish nails to ensure the trim stays in place while the adhesive dries.
- Repeat for all the boxes in the room.
- Once all the boxes are complete, fill any nail holes with spackle or wood filler and sand smooth.
- Caulk the edges of the boxes with painter's caulk, around the entire box. (Although this is a tedious process it's well worth it - do not skip this step!)
- Paint your new Box Trim. Using the same paint as is on the wall is the easiest thing to do.
You might also like:
This was really helpful, thanks for sharing! I am considering adding molding to my guest bathroom. 🙂
This is so helpful to have it all spelled out simply, Erin! You have the best straightforward tutorials!
Thank you Laurie! I’m glad it’s helpful!
Great stuff. What size of box molding did you use? The actual molding width?
What dimensions were you box trim? You mentioned of choice, but hard to see what you used, looks great so I just wanted the same!
Hi Henric! We used the Alexandra Molding 3277S which is 3/4′ wide x 3/8″ deep. Good luck with your project!
It’s 3/4″ x 3/8″, its by Alexandra Molding #3277 if you want the same stuff!
How did you do the curved moulding (located on the outside of the pony wall surrounding g the stairwell I think) ? Since that pony wall is not a flat surface, how did you get the moulding to bend?
I tried a few things to bend the moulding (soaked it in water, kerf cuts) but nothing worked. In the end I ordered some matching Flexible Trim, called Flextrim, which is rubber and can be painted.
I dodnt see any examples of what you do where you have a window. If you have a large plain wall on one wall and a large window with just a small space above and below on the next wall what do you do there? Would you make smaller boxes under the windows and just use the same 6” spacing around it?
I would always keep the spacing consistent so if you tape out a box above or below a window using the same spacing and it looks way too skinny I would skip putting a box there. I have that in my living room, with only about 8″ of space above my window so I didn’t put a box there. Hope that helps!
So helpful and I never thought of using just large single boxes. One question, did you prime the molding before painting?
My molding was pre-primed, so yes!
This was super helpful and informative! I have one wall with 3 boxes that are 46.5″ wide. And then two other walls with 2 boxes that are around 40″ wide to try to keep the box sizing relatively the same/similar. But i have a fourth wall that has a closet – so the wall space is only 64″ in length. Would you suggest I do a big box here or two 26″ small boxes? The small boxes would go against trying to get all the boxes roughly the same size. But if I did one single box I feel like the box would be too big (around 56″)?
What would you suggest here? Anything will be helpful at this point in my indecision!
That is a tough call! What I would do is tape them each out on the wall to see what I like best. If you take a picture of each you can swipe back and forth and it will probably become clear! Good luck!