How to install a DIY Staircase Runner
I made over my staircase last summer and I really didn’t document much of it at all, but I often get questions about the stair runner and how hard it was to install. I decided to dig up some photos from the archives and pull together a little tutorial for you. It really was an easy DIY project and I was able to complete the whole thing in about a day and a half.
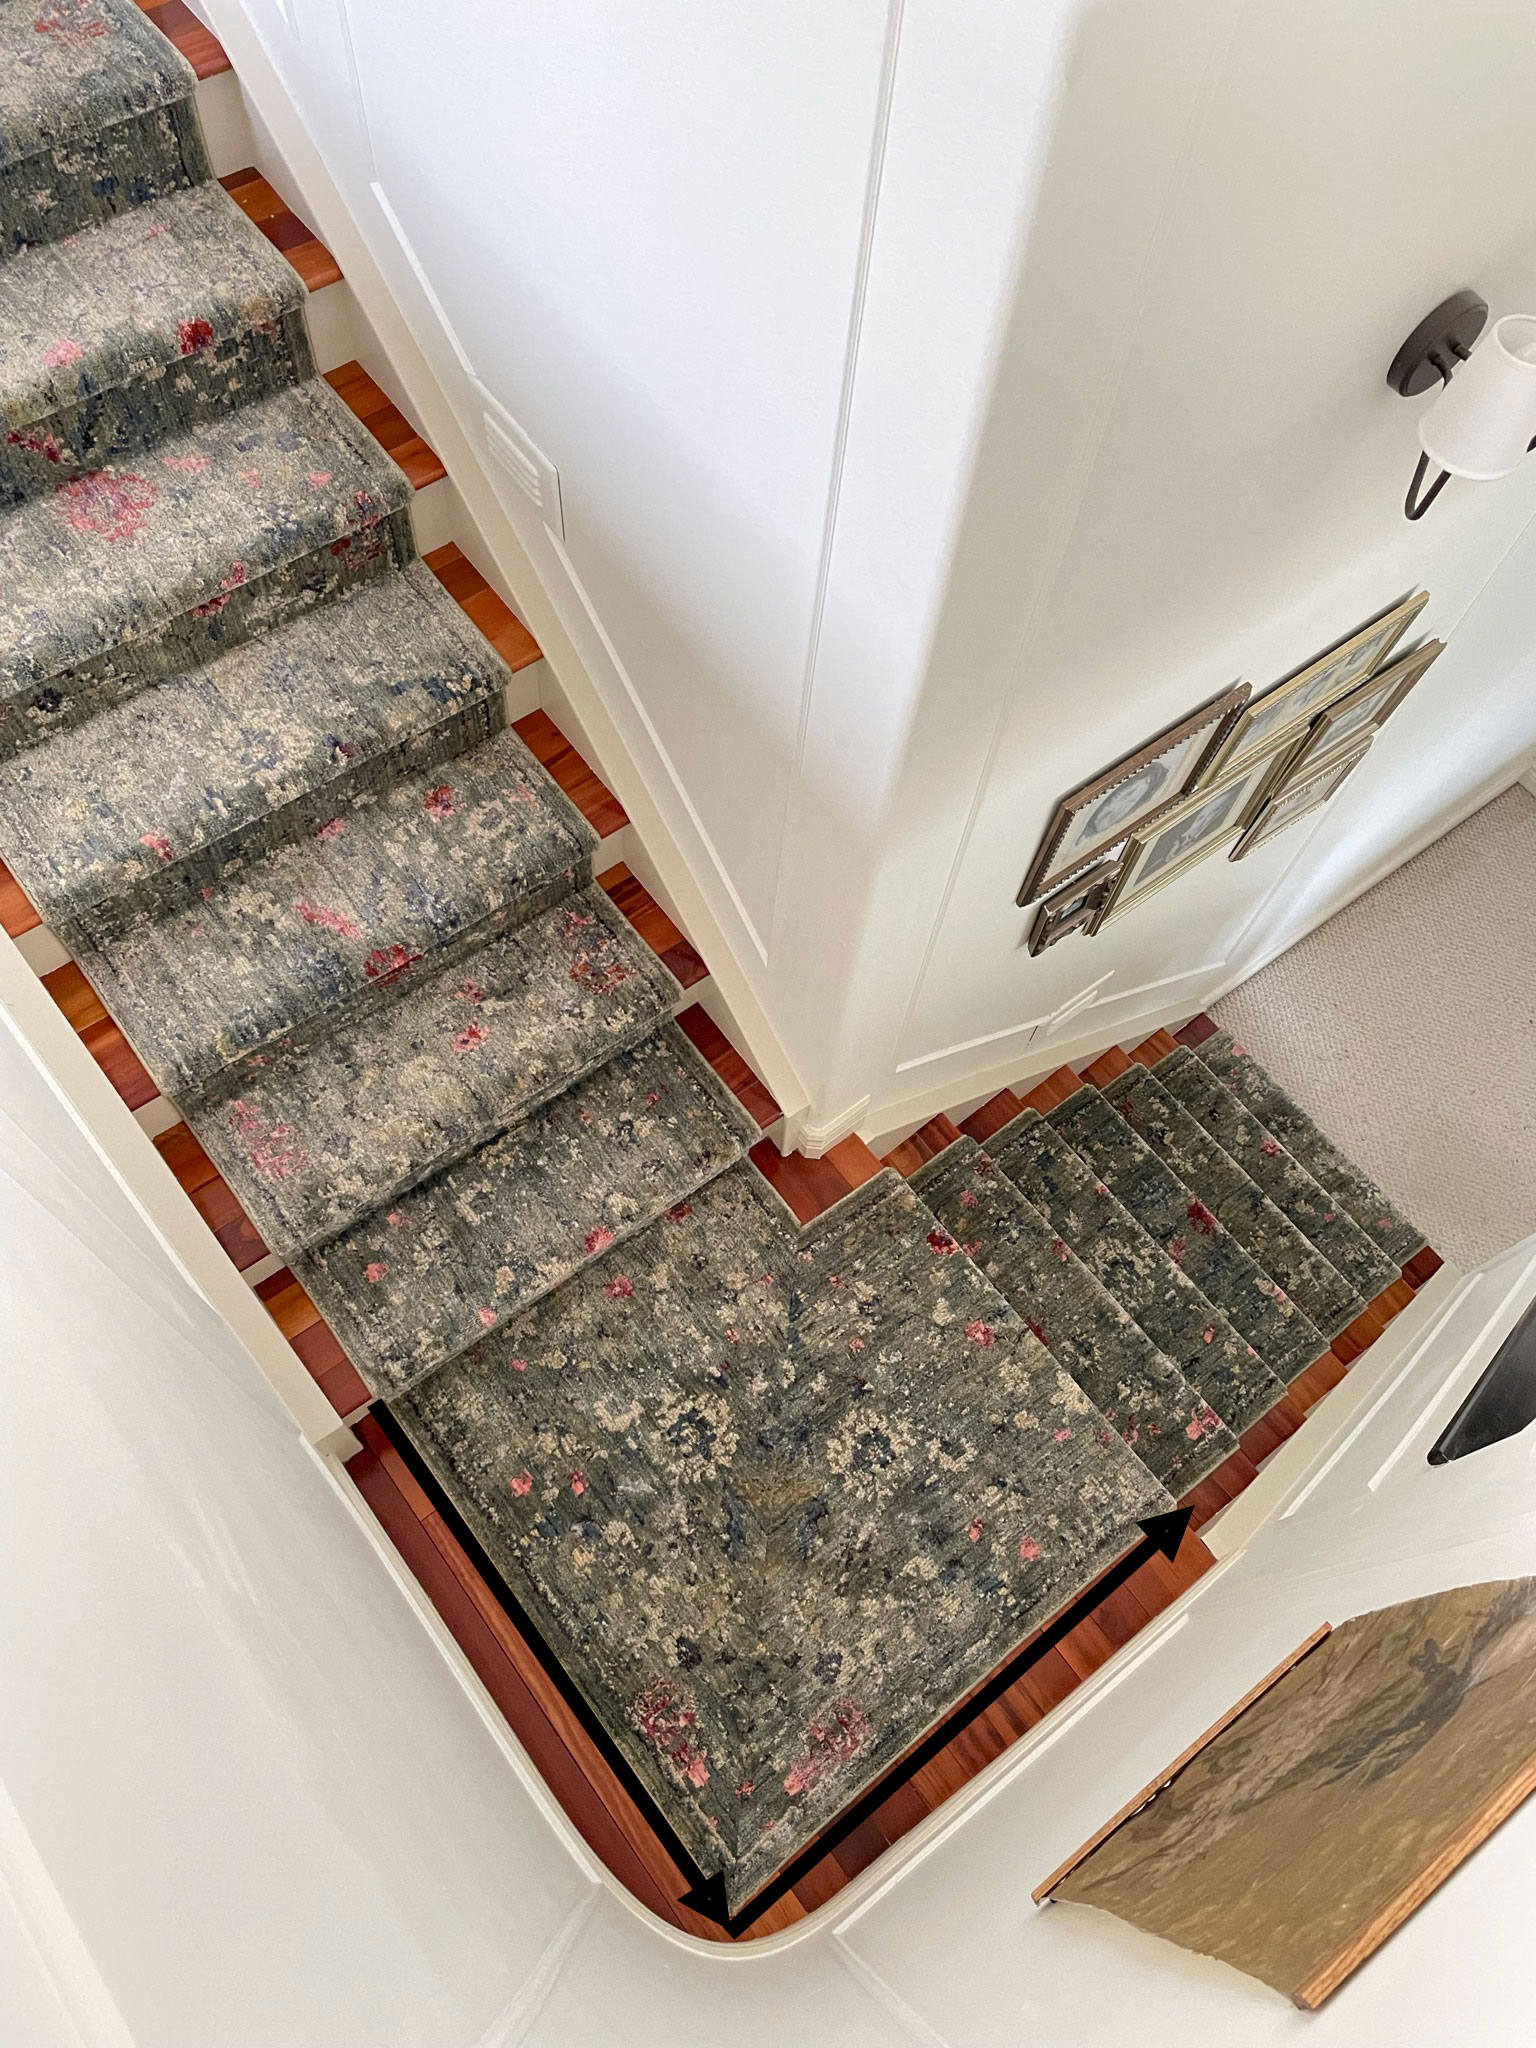
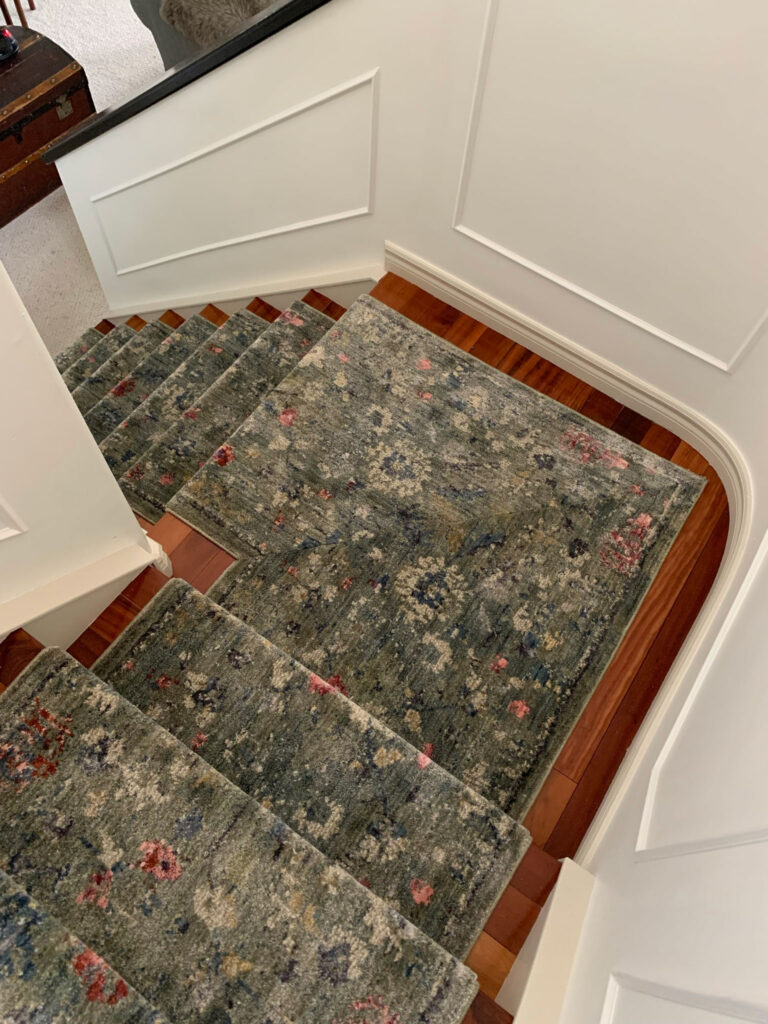
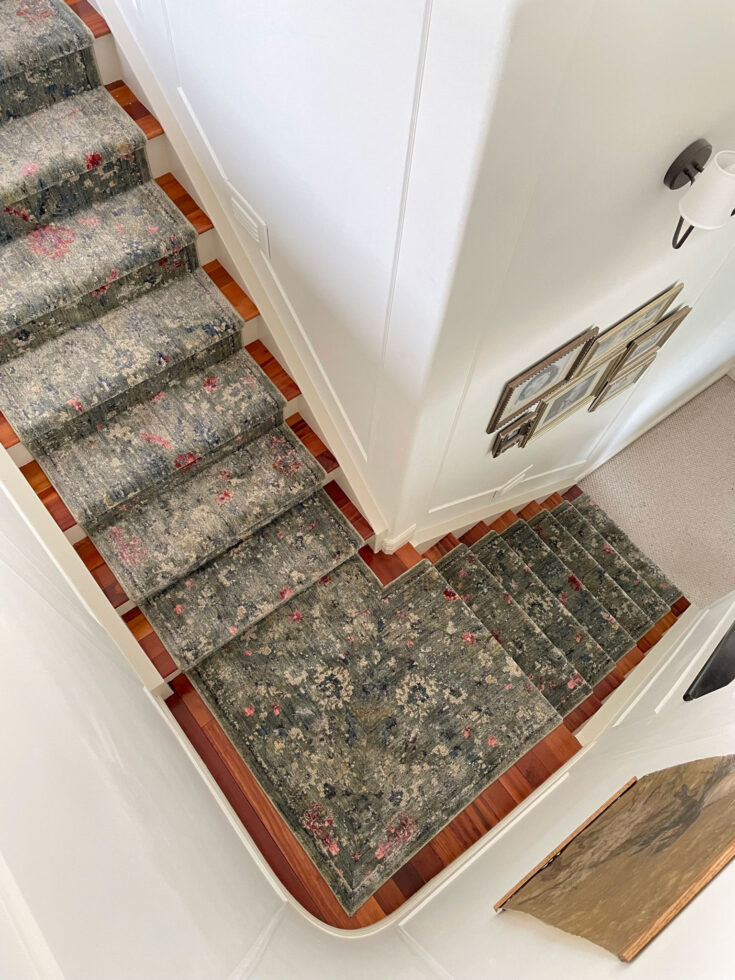
My stairs do go around a corner so I had to create a seam out of my runners as well to go around the landing area, and I’ll go through how I did that. I was a little worried about the seam coming up or not staying “stuck” but it’s been over a year and the seam is holding up perfectly!
This post may contain affiliate links. That means if you purchase anything from these links I earn a small commission, at no extra cost to you! This helps support my blog, so thank you!

Table of Contents
- Changes to the Stairwell Before we Installed the DIY stair Runner
- How to Pick a Stair Runner
- Measuring your Stairs to Determine the Size of the DIY Stair Runner You Need
- Tools needed for DIY Stair Runner Installation
- Install the rug pad
- Seam the Landing
- Installing the runner on the stairs
- Matching up with the Landing
- Finishing up
- The Final Product
- Before and After
- You might also like:
Changes to the Stairwell Before we Installed the DIY stair Runner
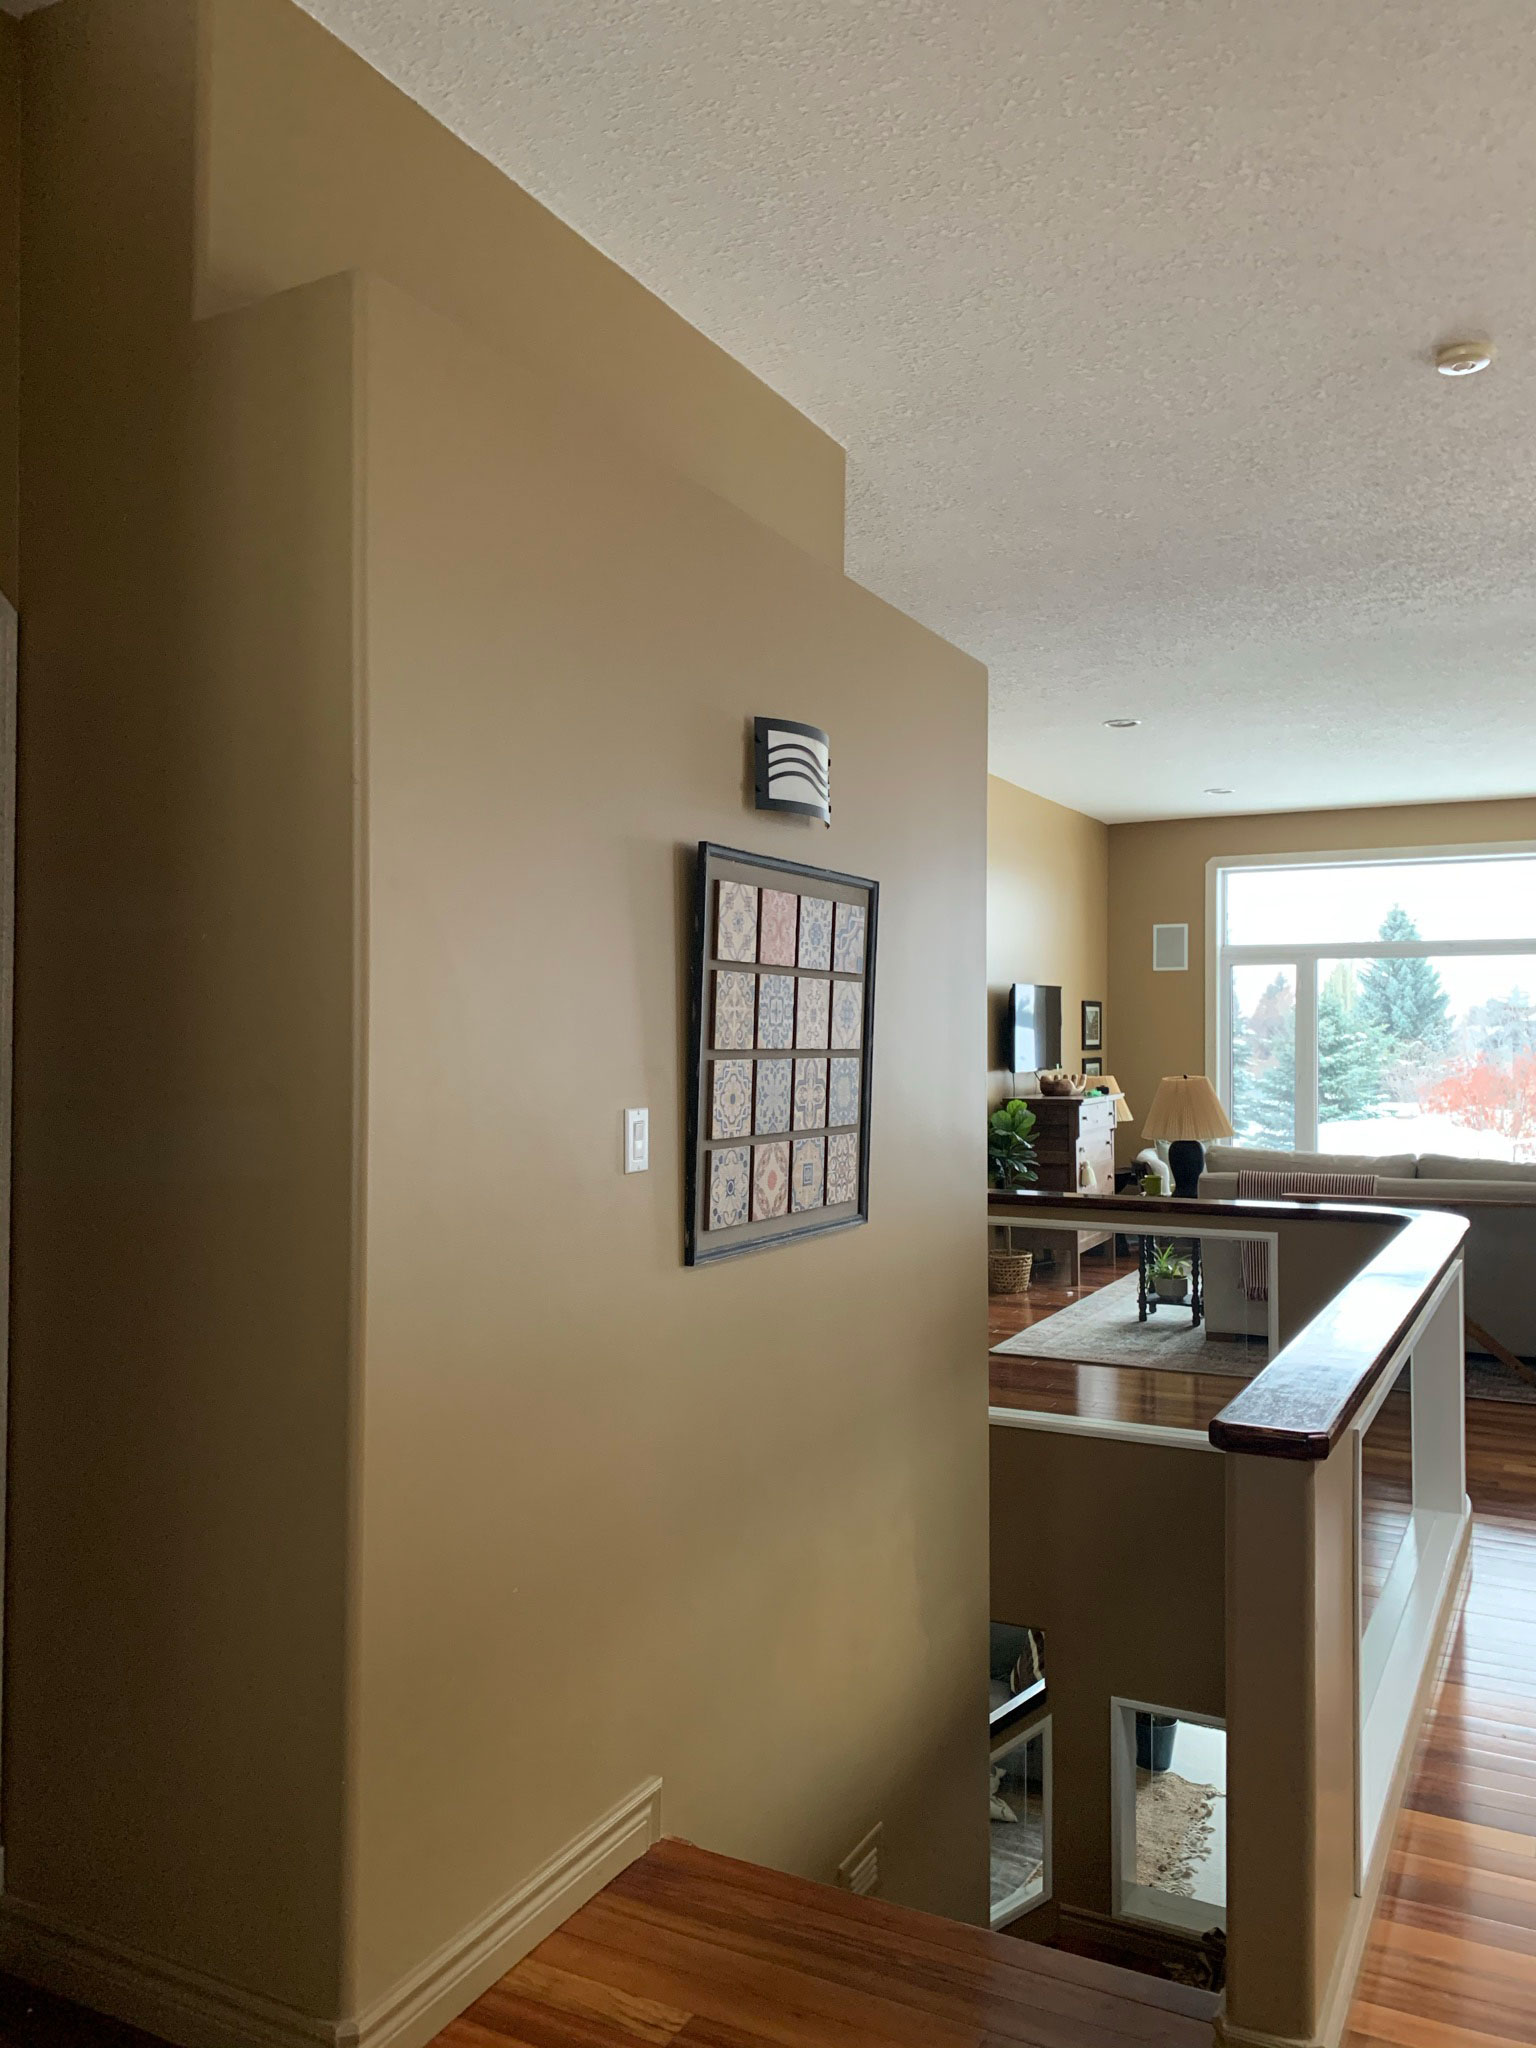
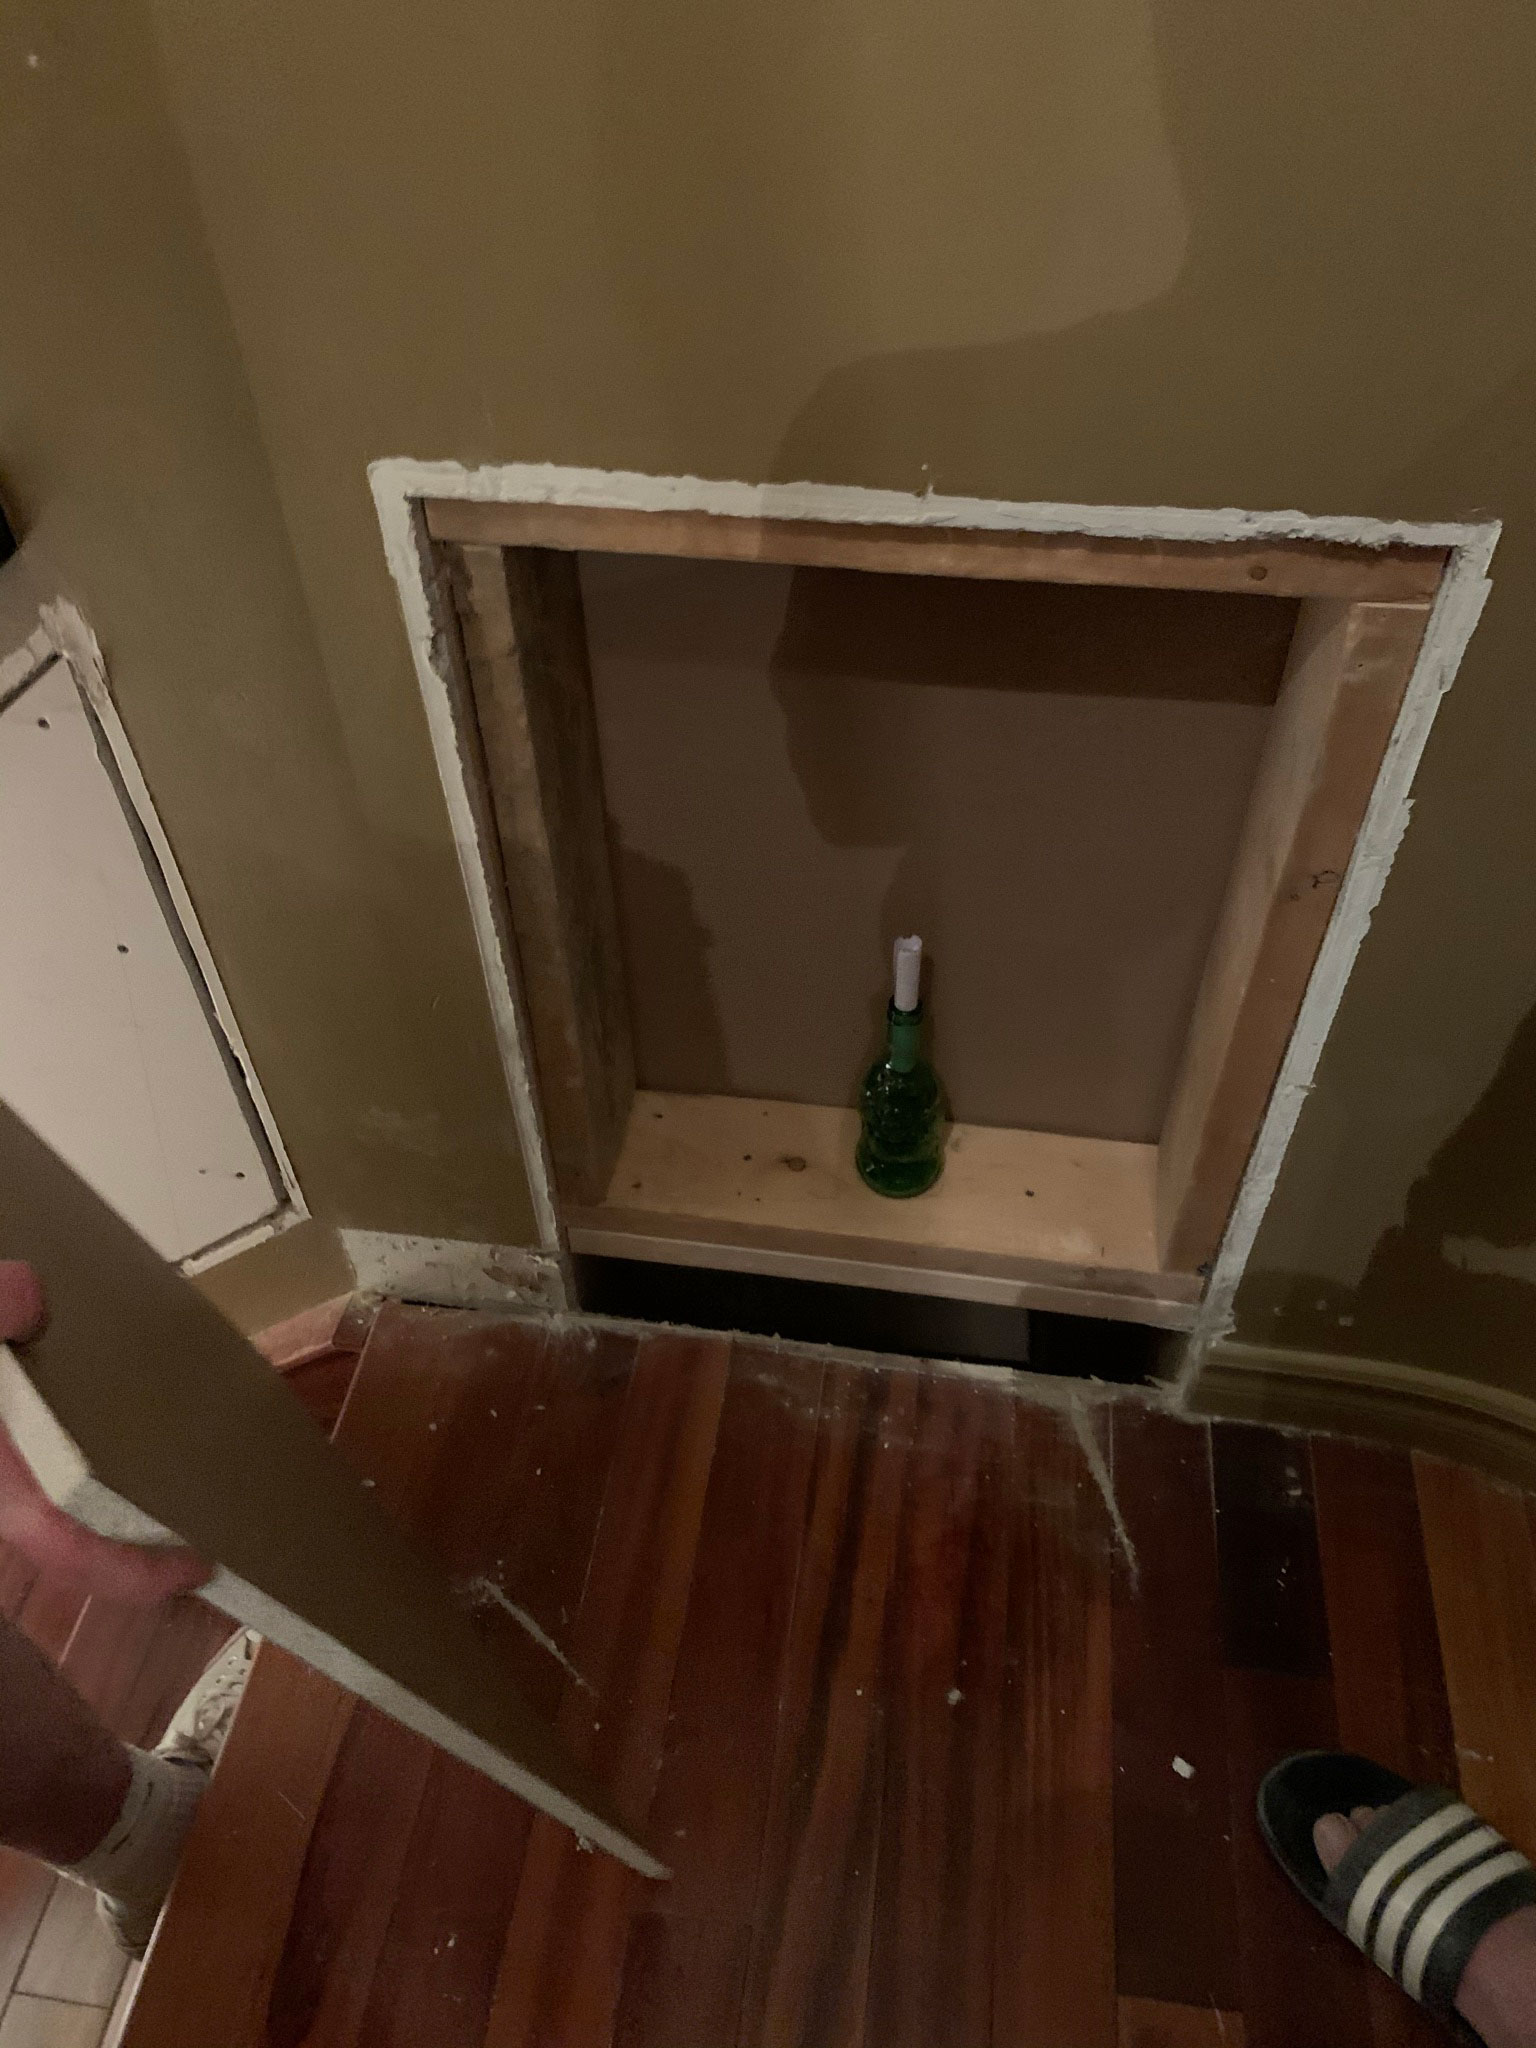
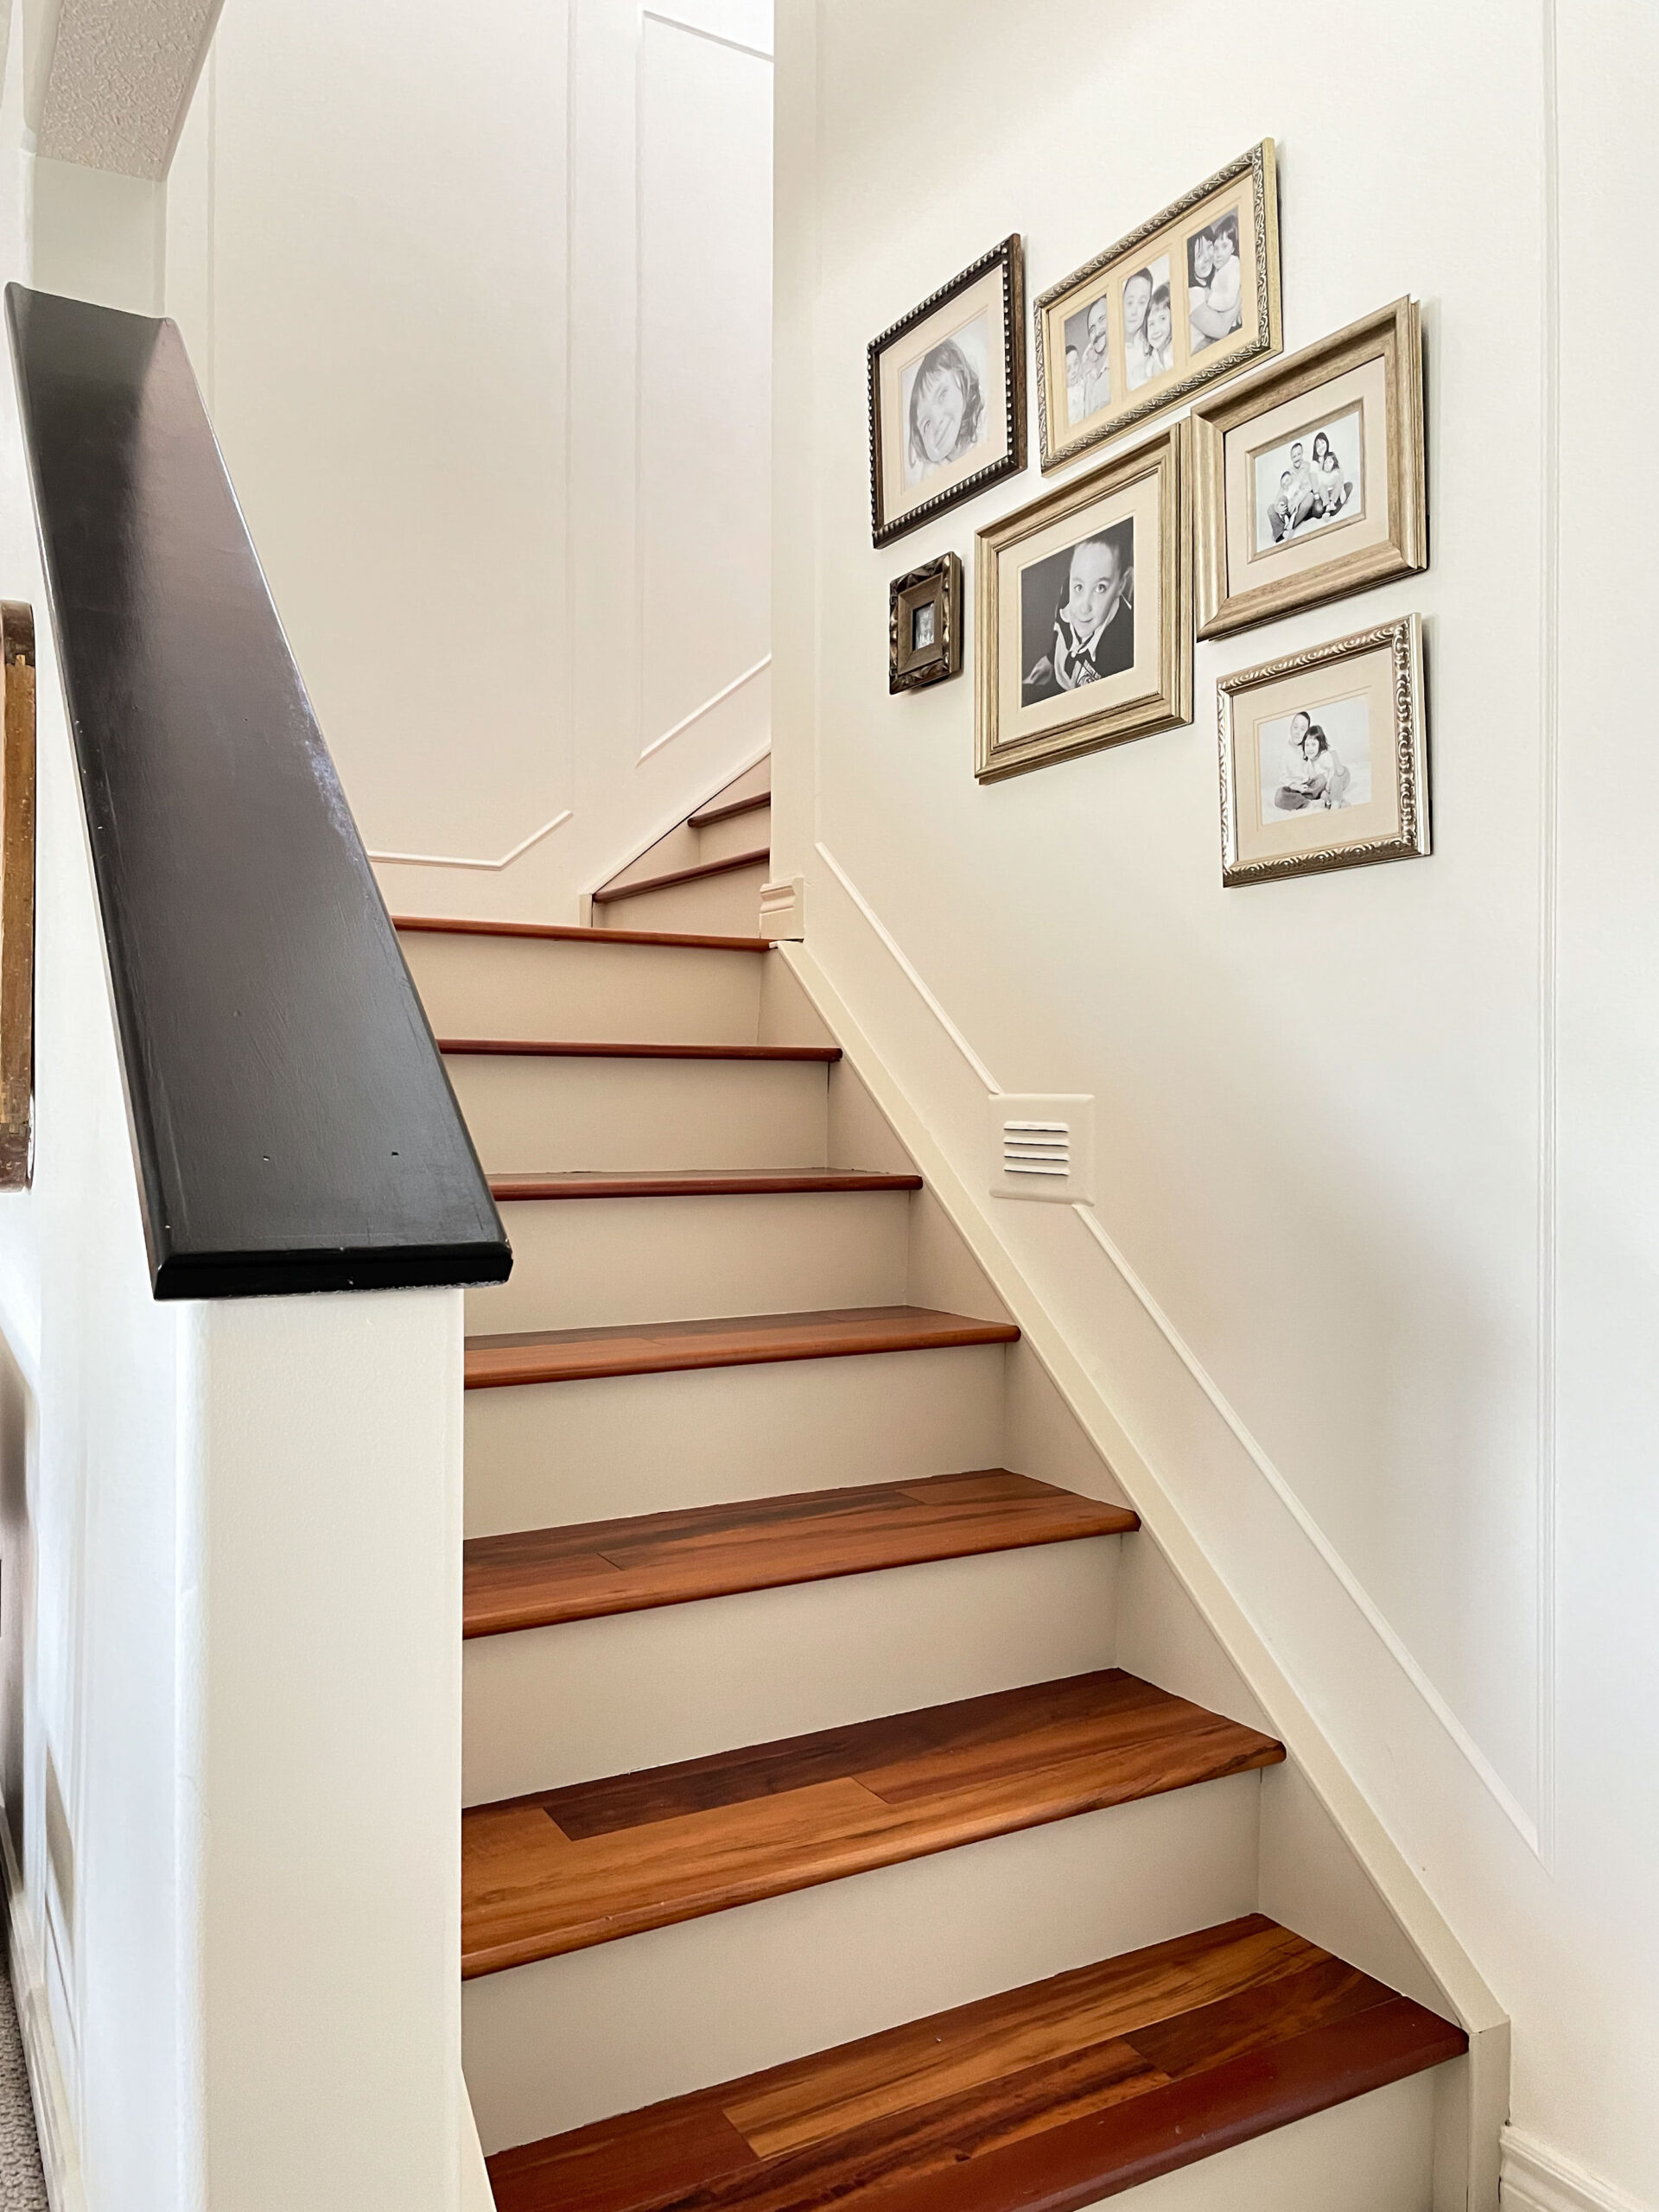
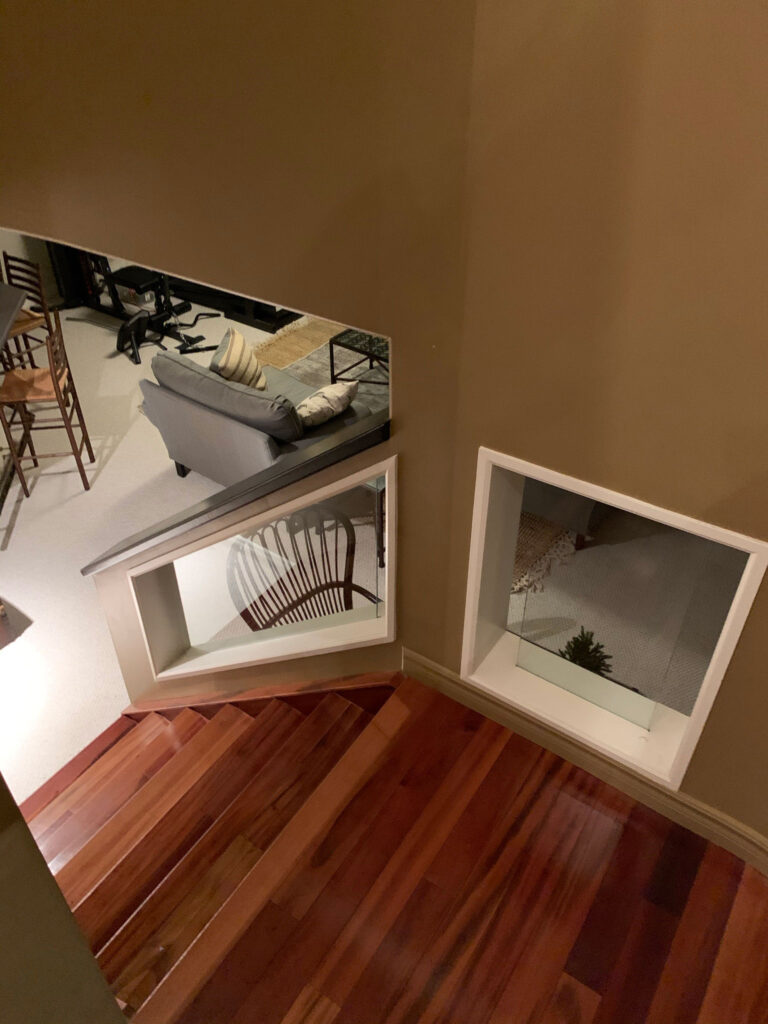
Before I get into the installation of the new stair runner, there were a couple of DIY projects that I completed first in this stairwell. First of all, when we bought the house there were some cutouts in the wall that had glass in them, similar to our railings. We removed those and drywalled over them when we completed our major “drywall updates” on the main floor. (You can read more about that here!)
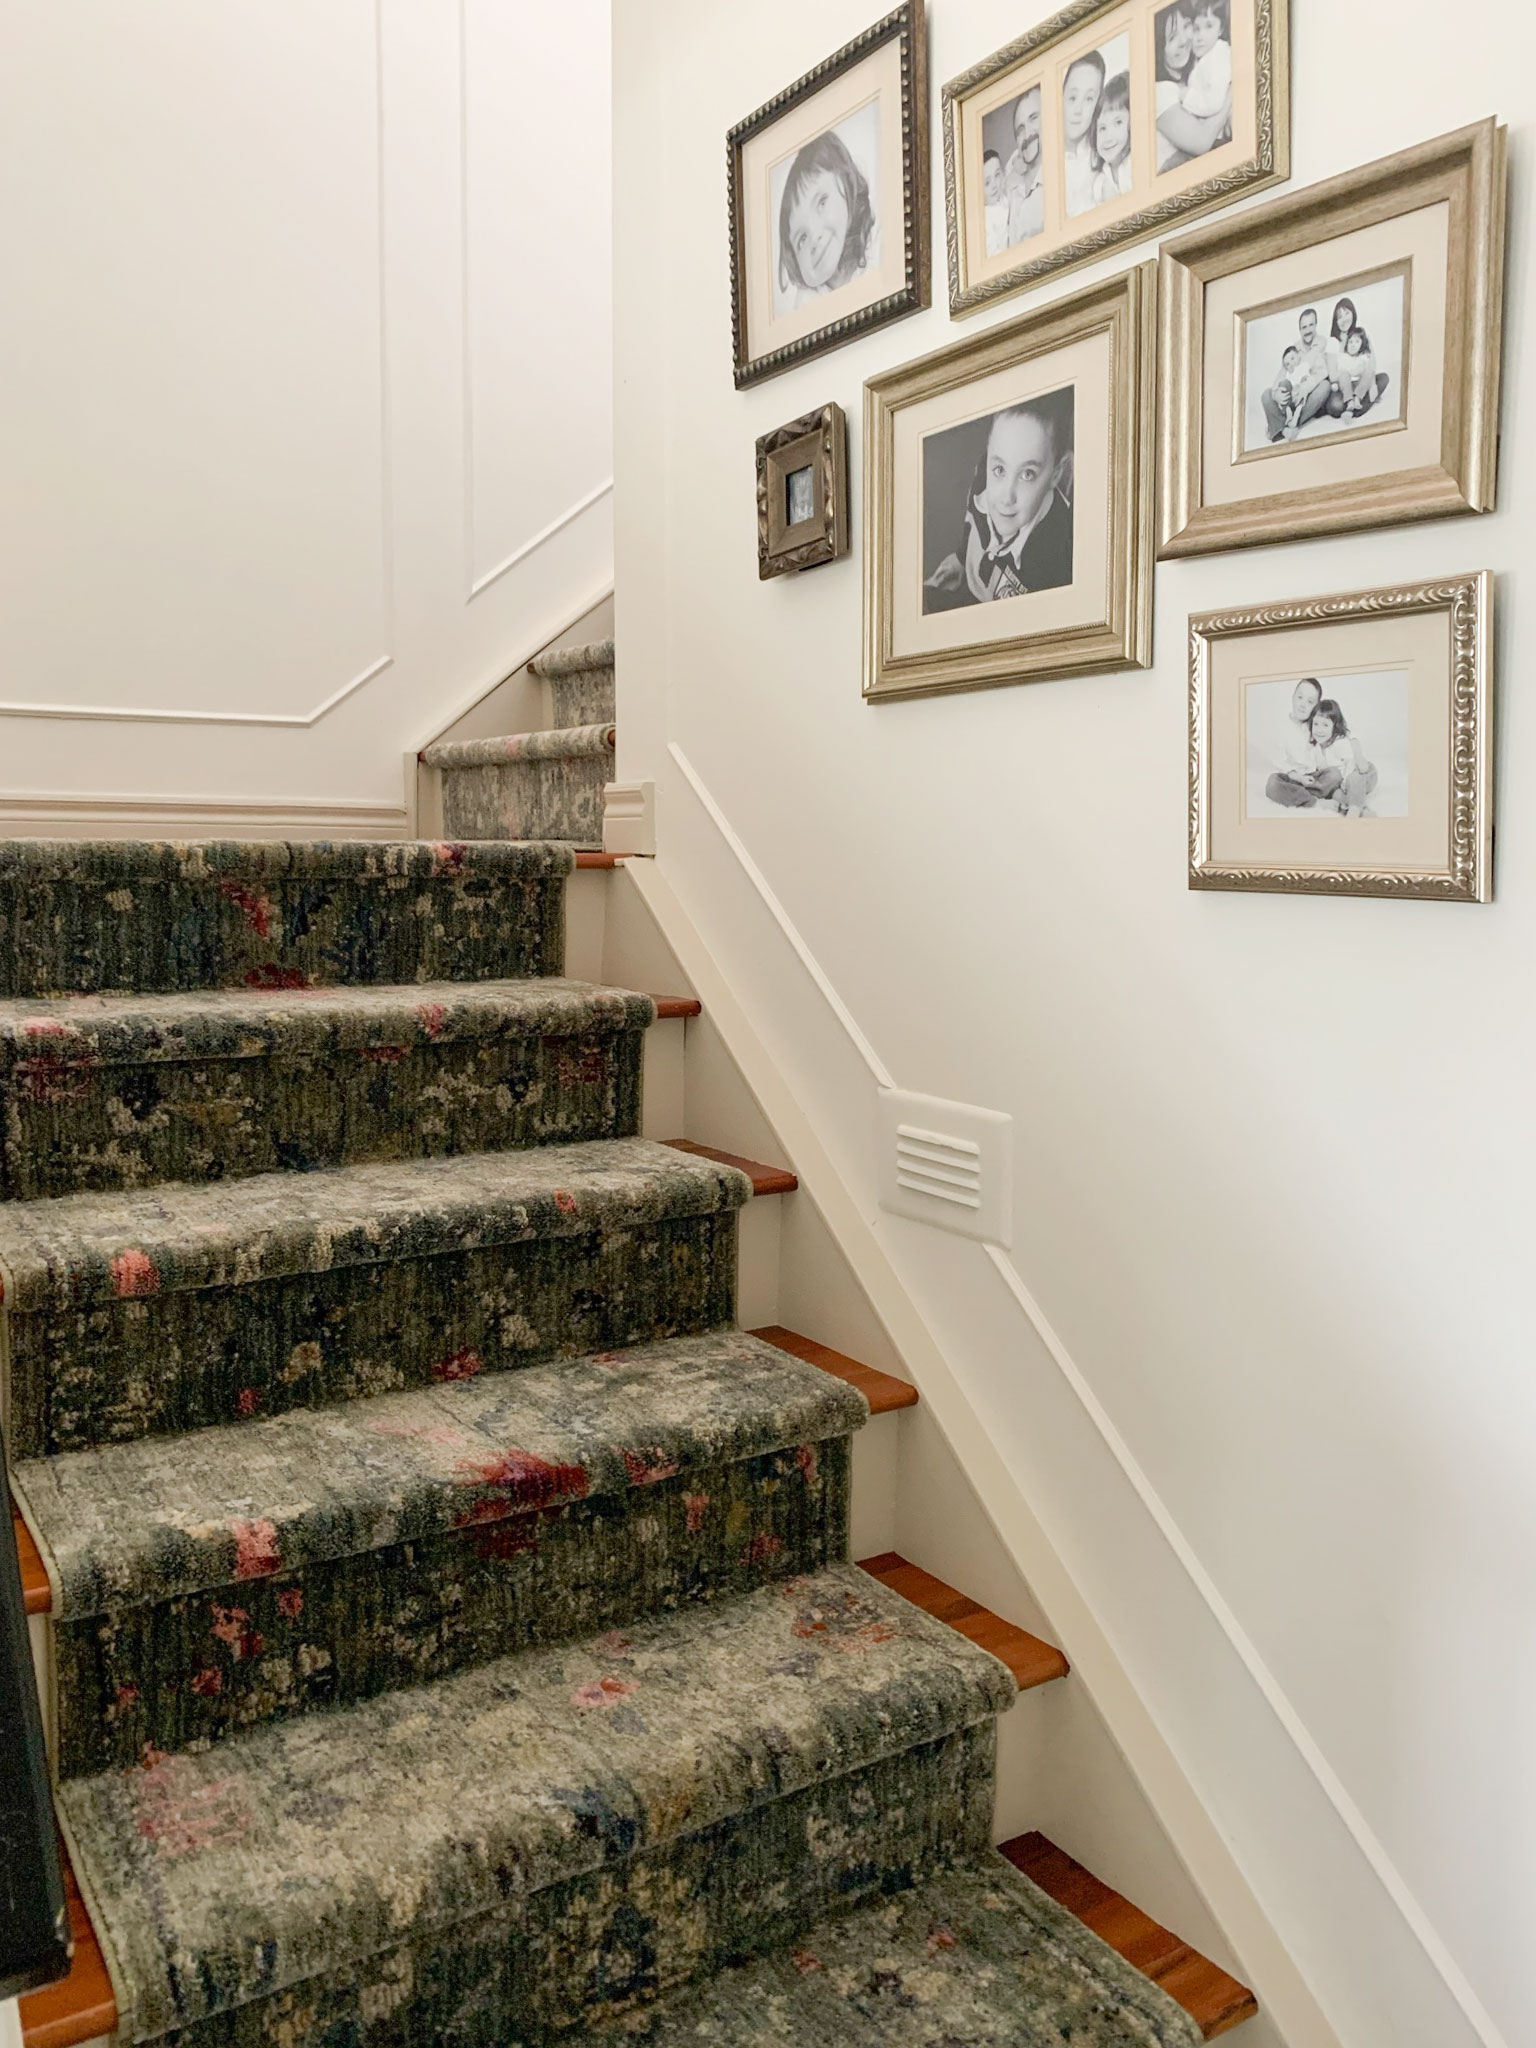
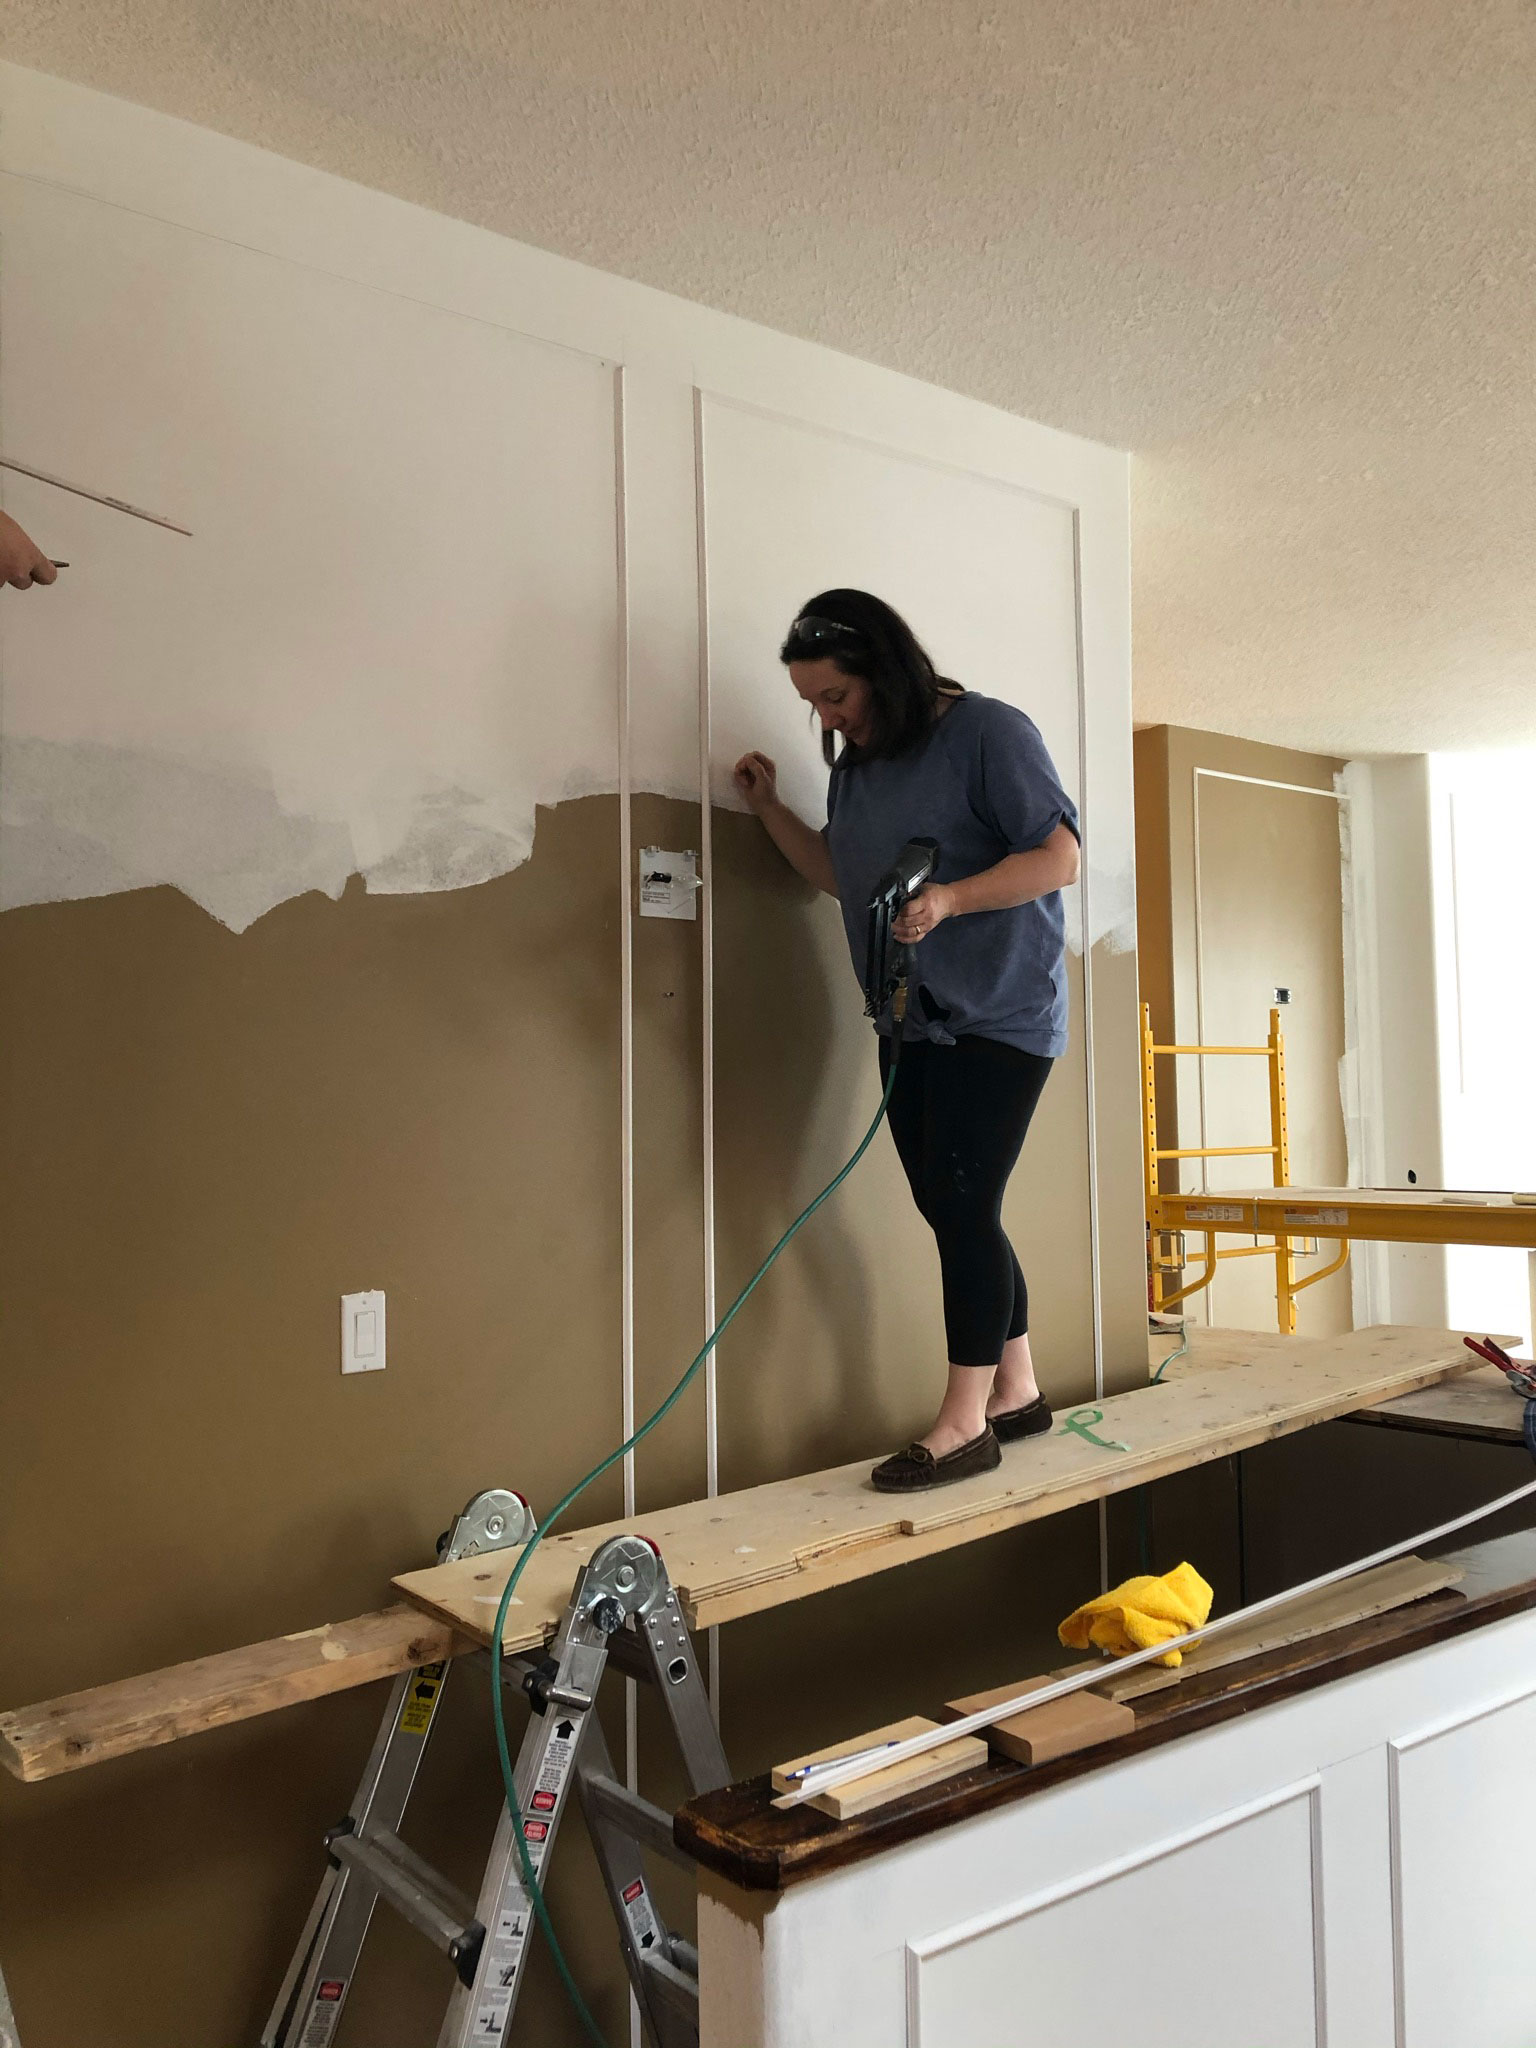
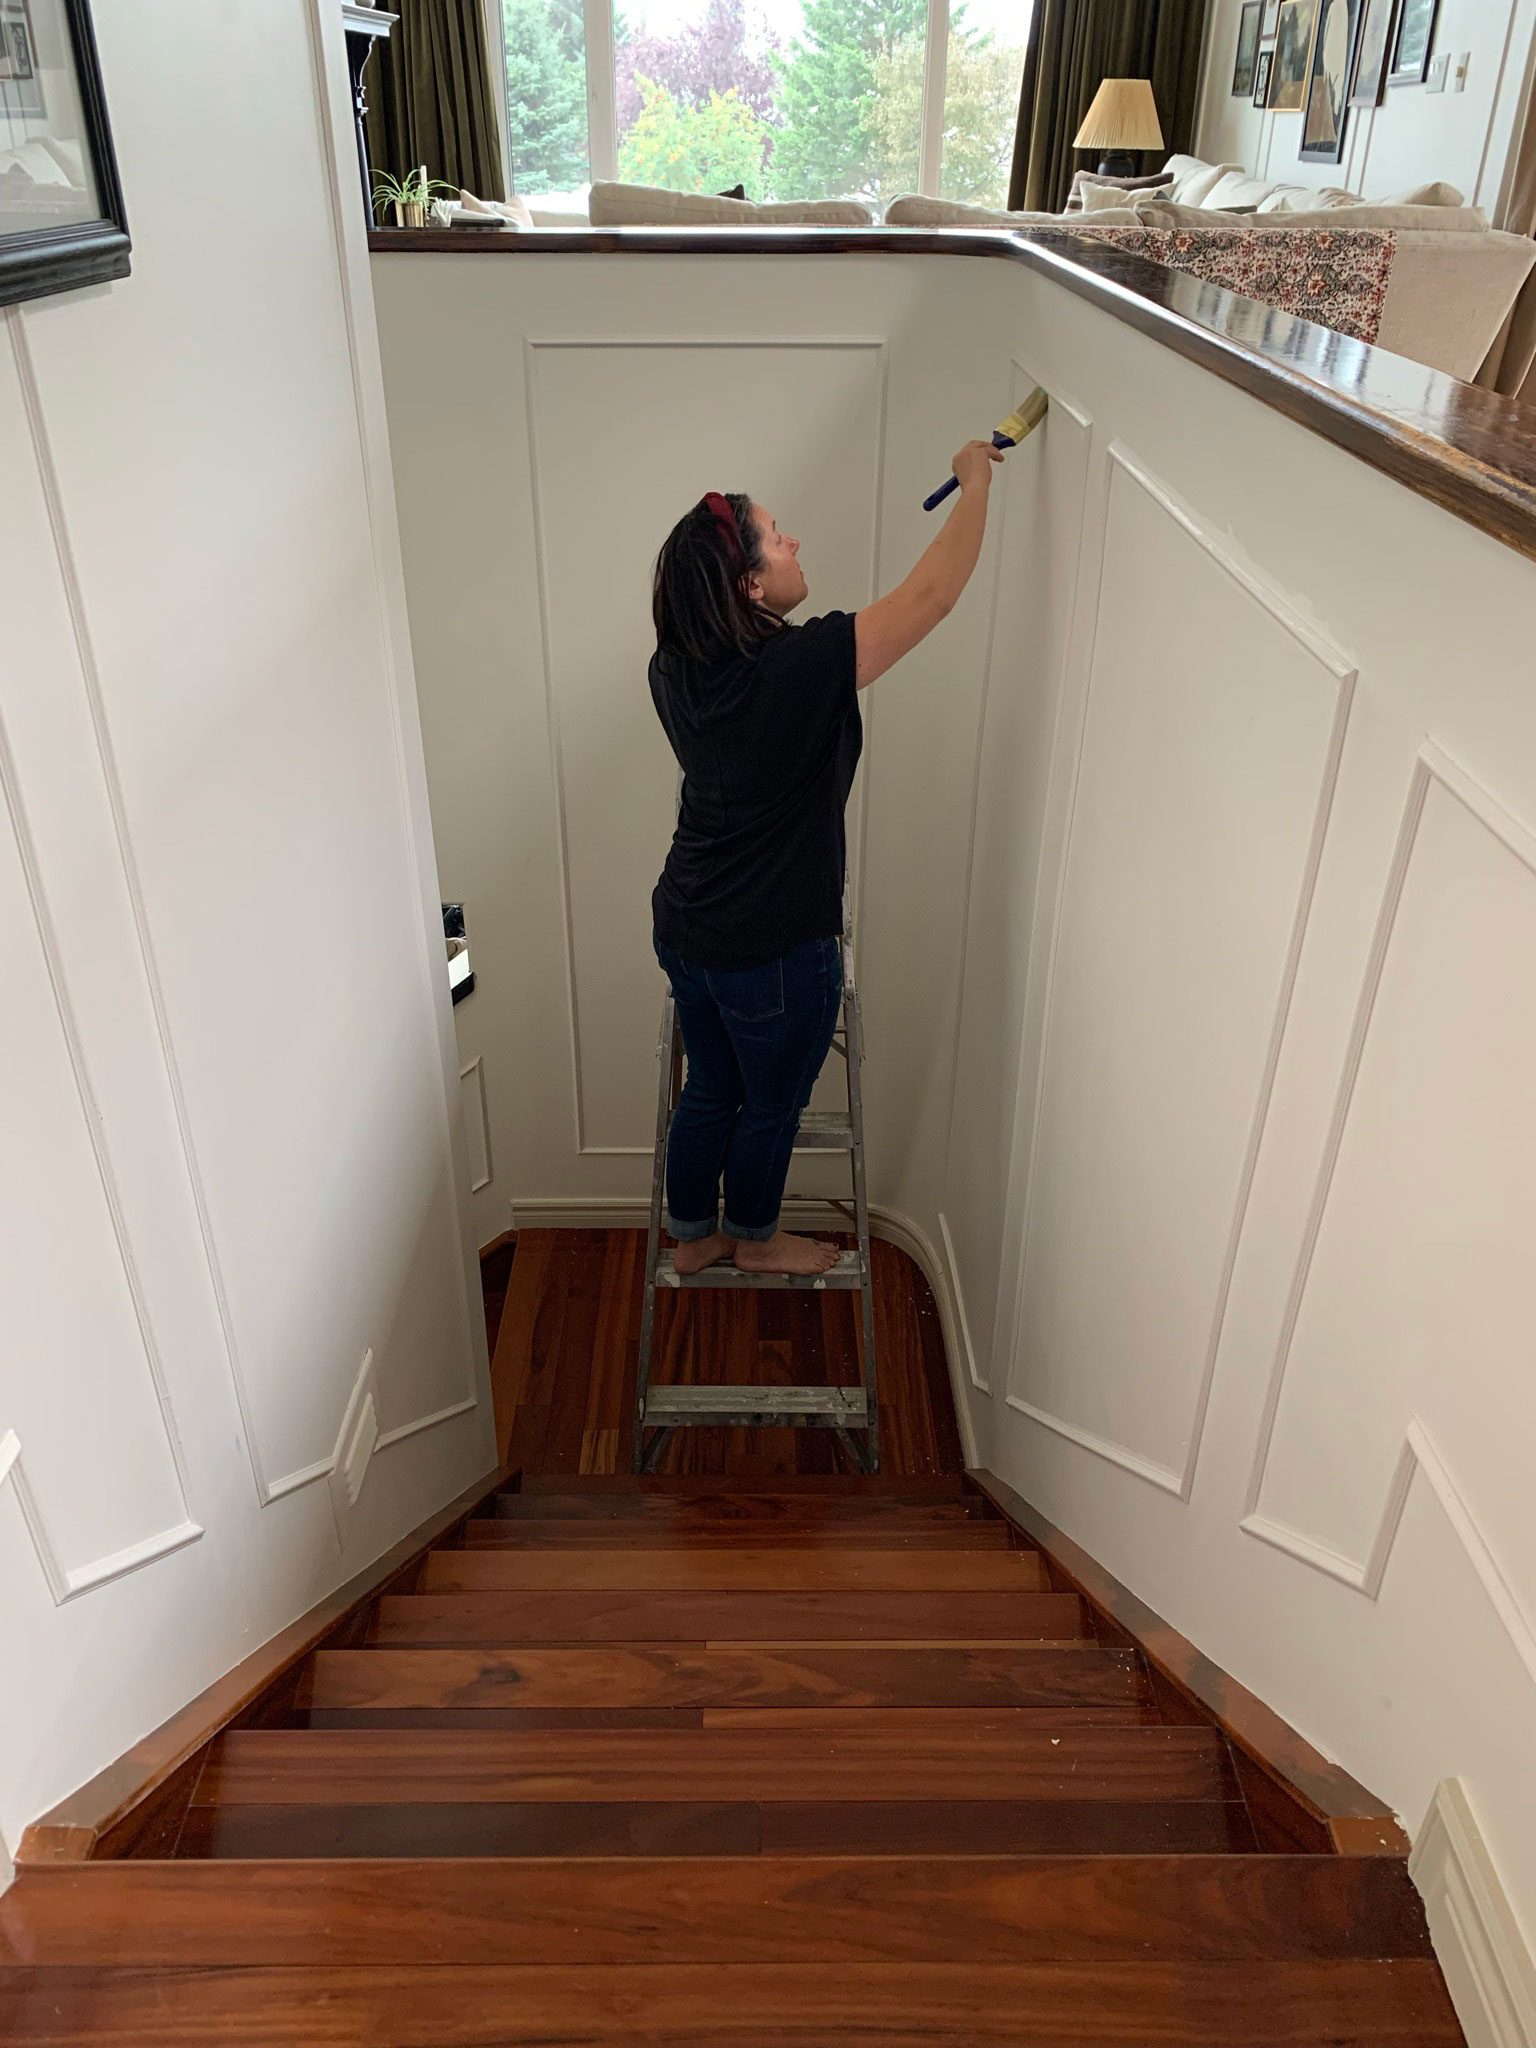
Once everything was drywalled and painted, I decided to add box moulding to the walls the same way that I did on the main floor. The box moulding from our main floor continued down the stairwell on the left and I felt that it needed to continue on the right as well.
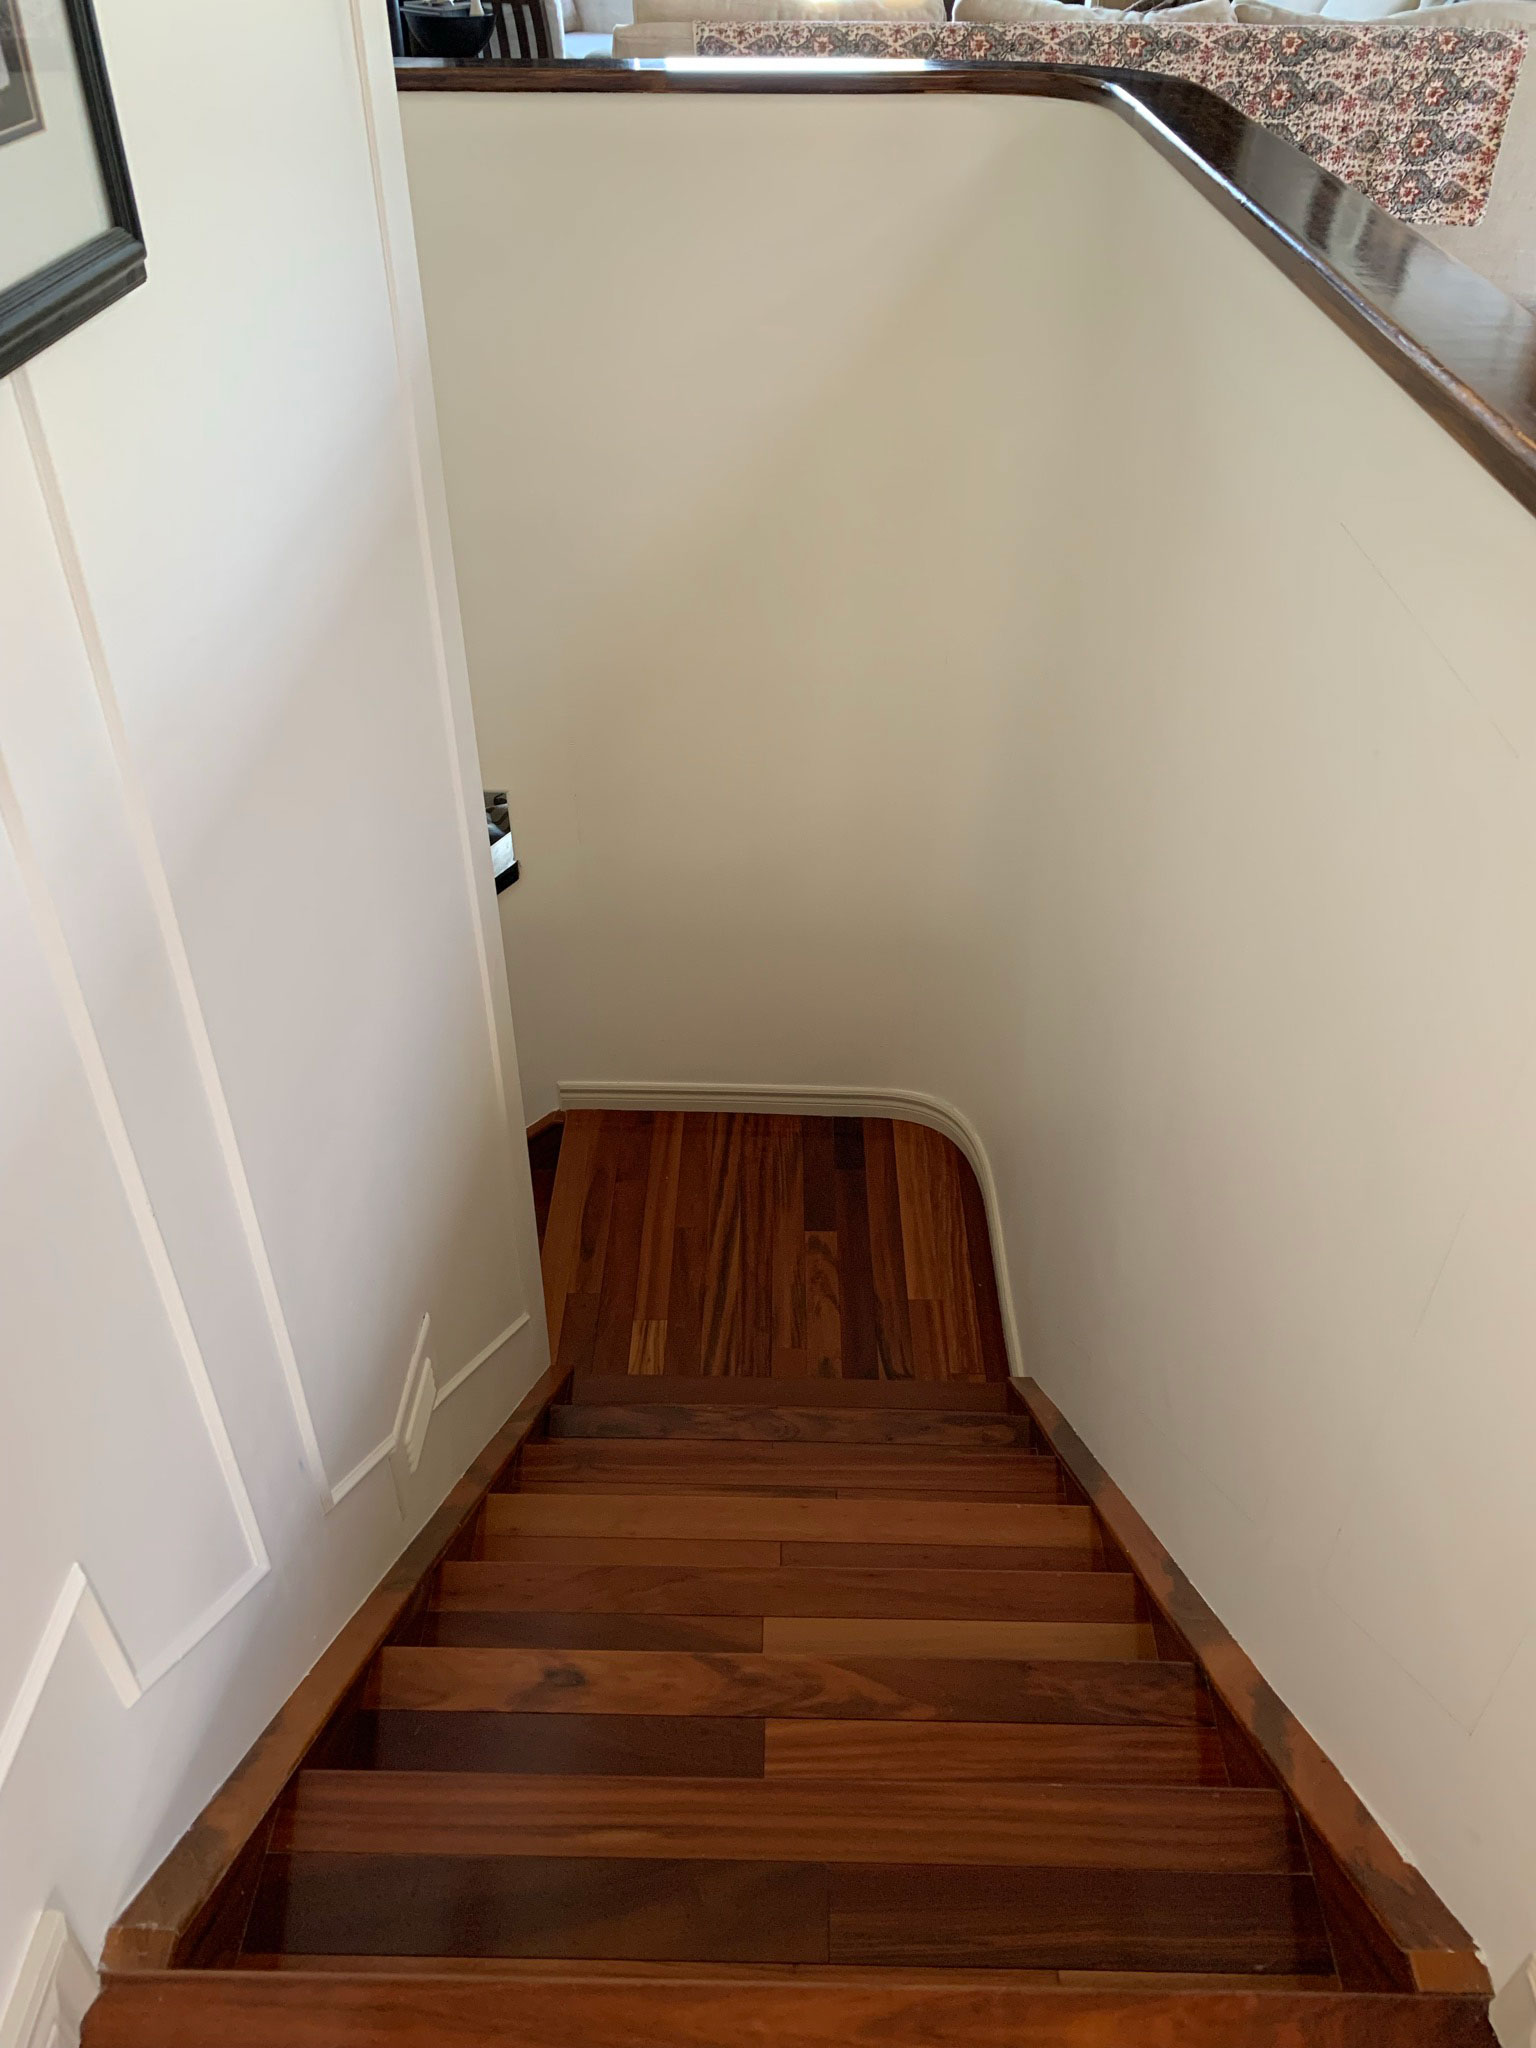

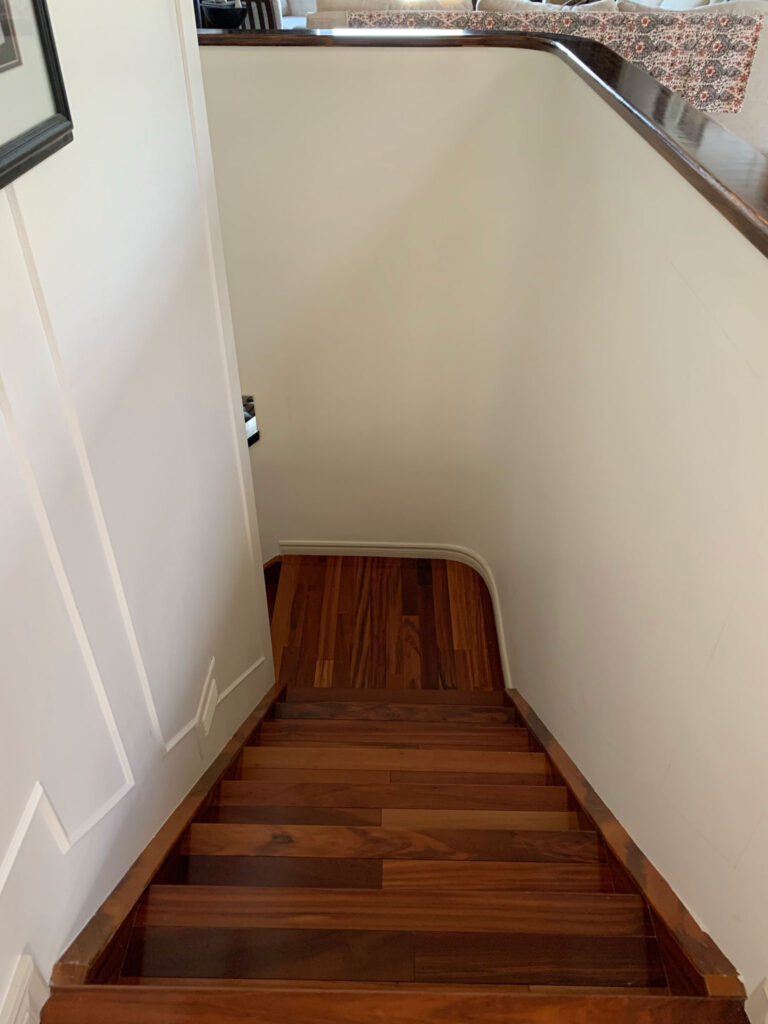
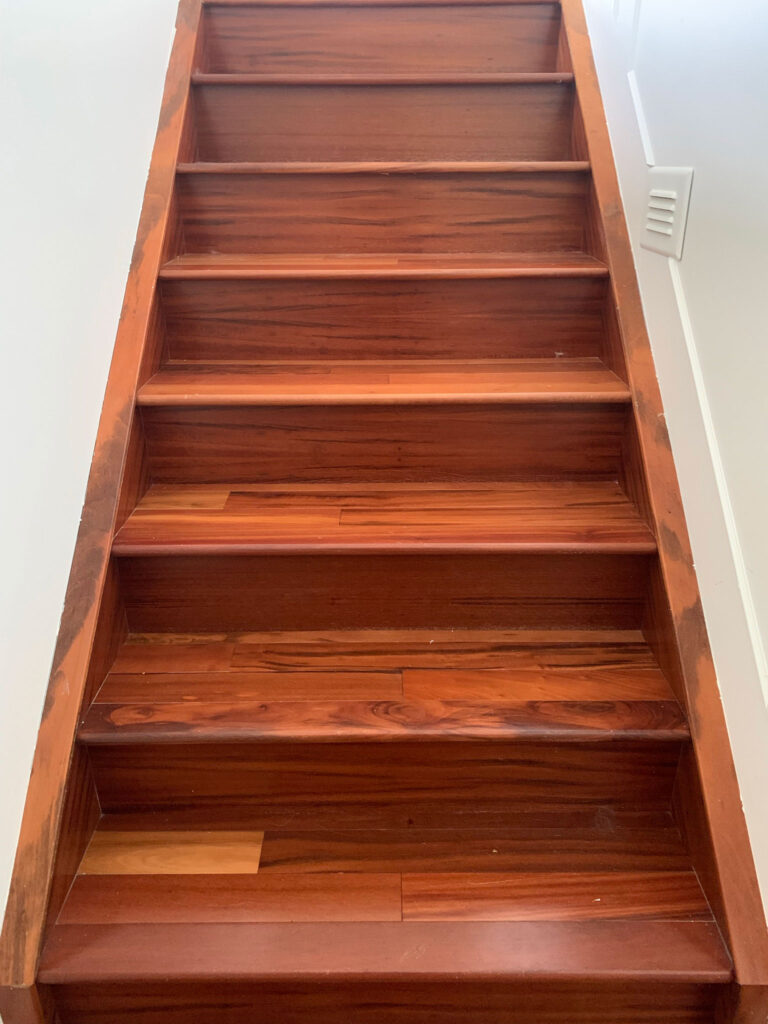
The stairs themselves were hardwood on the stair treads but the stair riser (the vertical part on the back of the step) and the stair stringers (the side parts that run along the walls) were not real wood, they were a laminate material that matched the wood tone. I decided I wanted to paint those parts of the stairs and only leave the stair treads wood.

I went back and forth on whether to paint the treads and the risers my trim colour (Benjamin Moore Edgecomb Grey) or use white paint like my wall colour (Valspar Swiss Coffee) or do a combination of those colours, but at the end of the day I decided to do it all in Edgecomb Grey. This ties in really nicely with the adjacent trim that buts up to it and I’m super happy with what a difference that little bit of paint made!
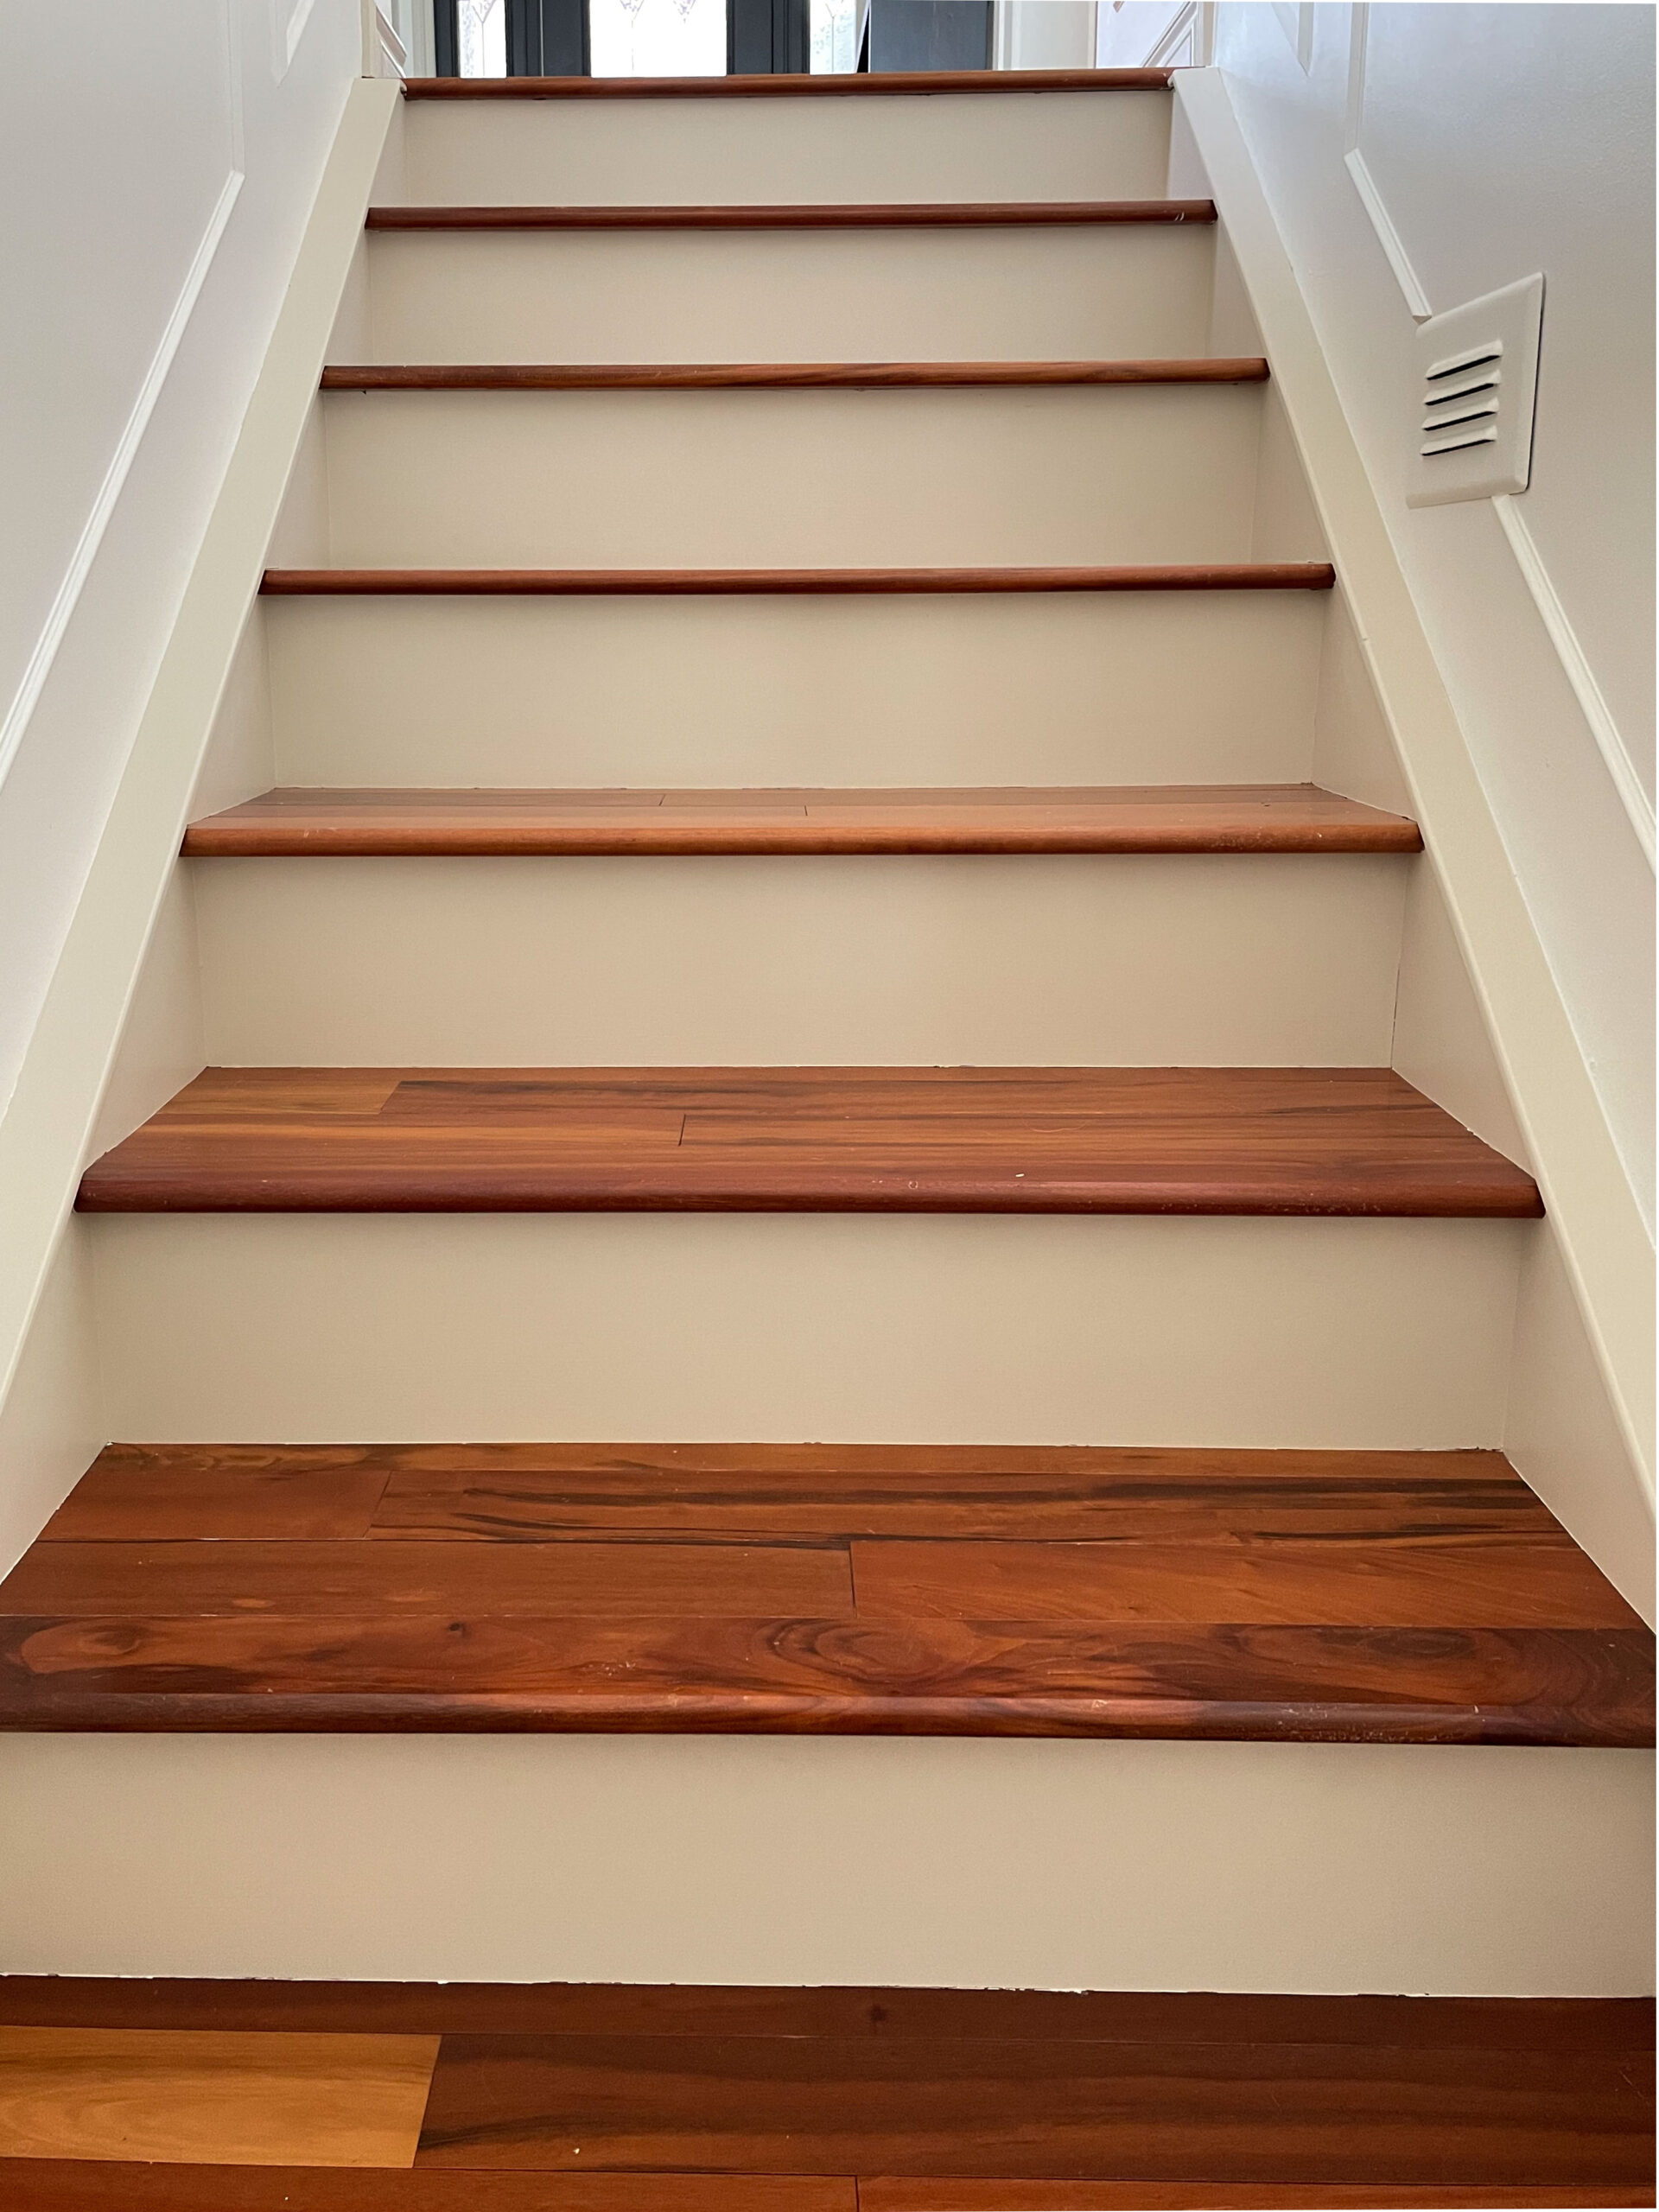
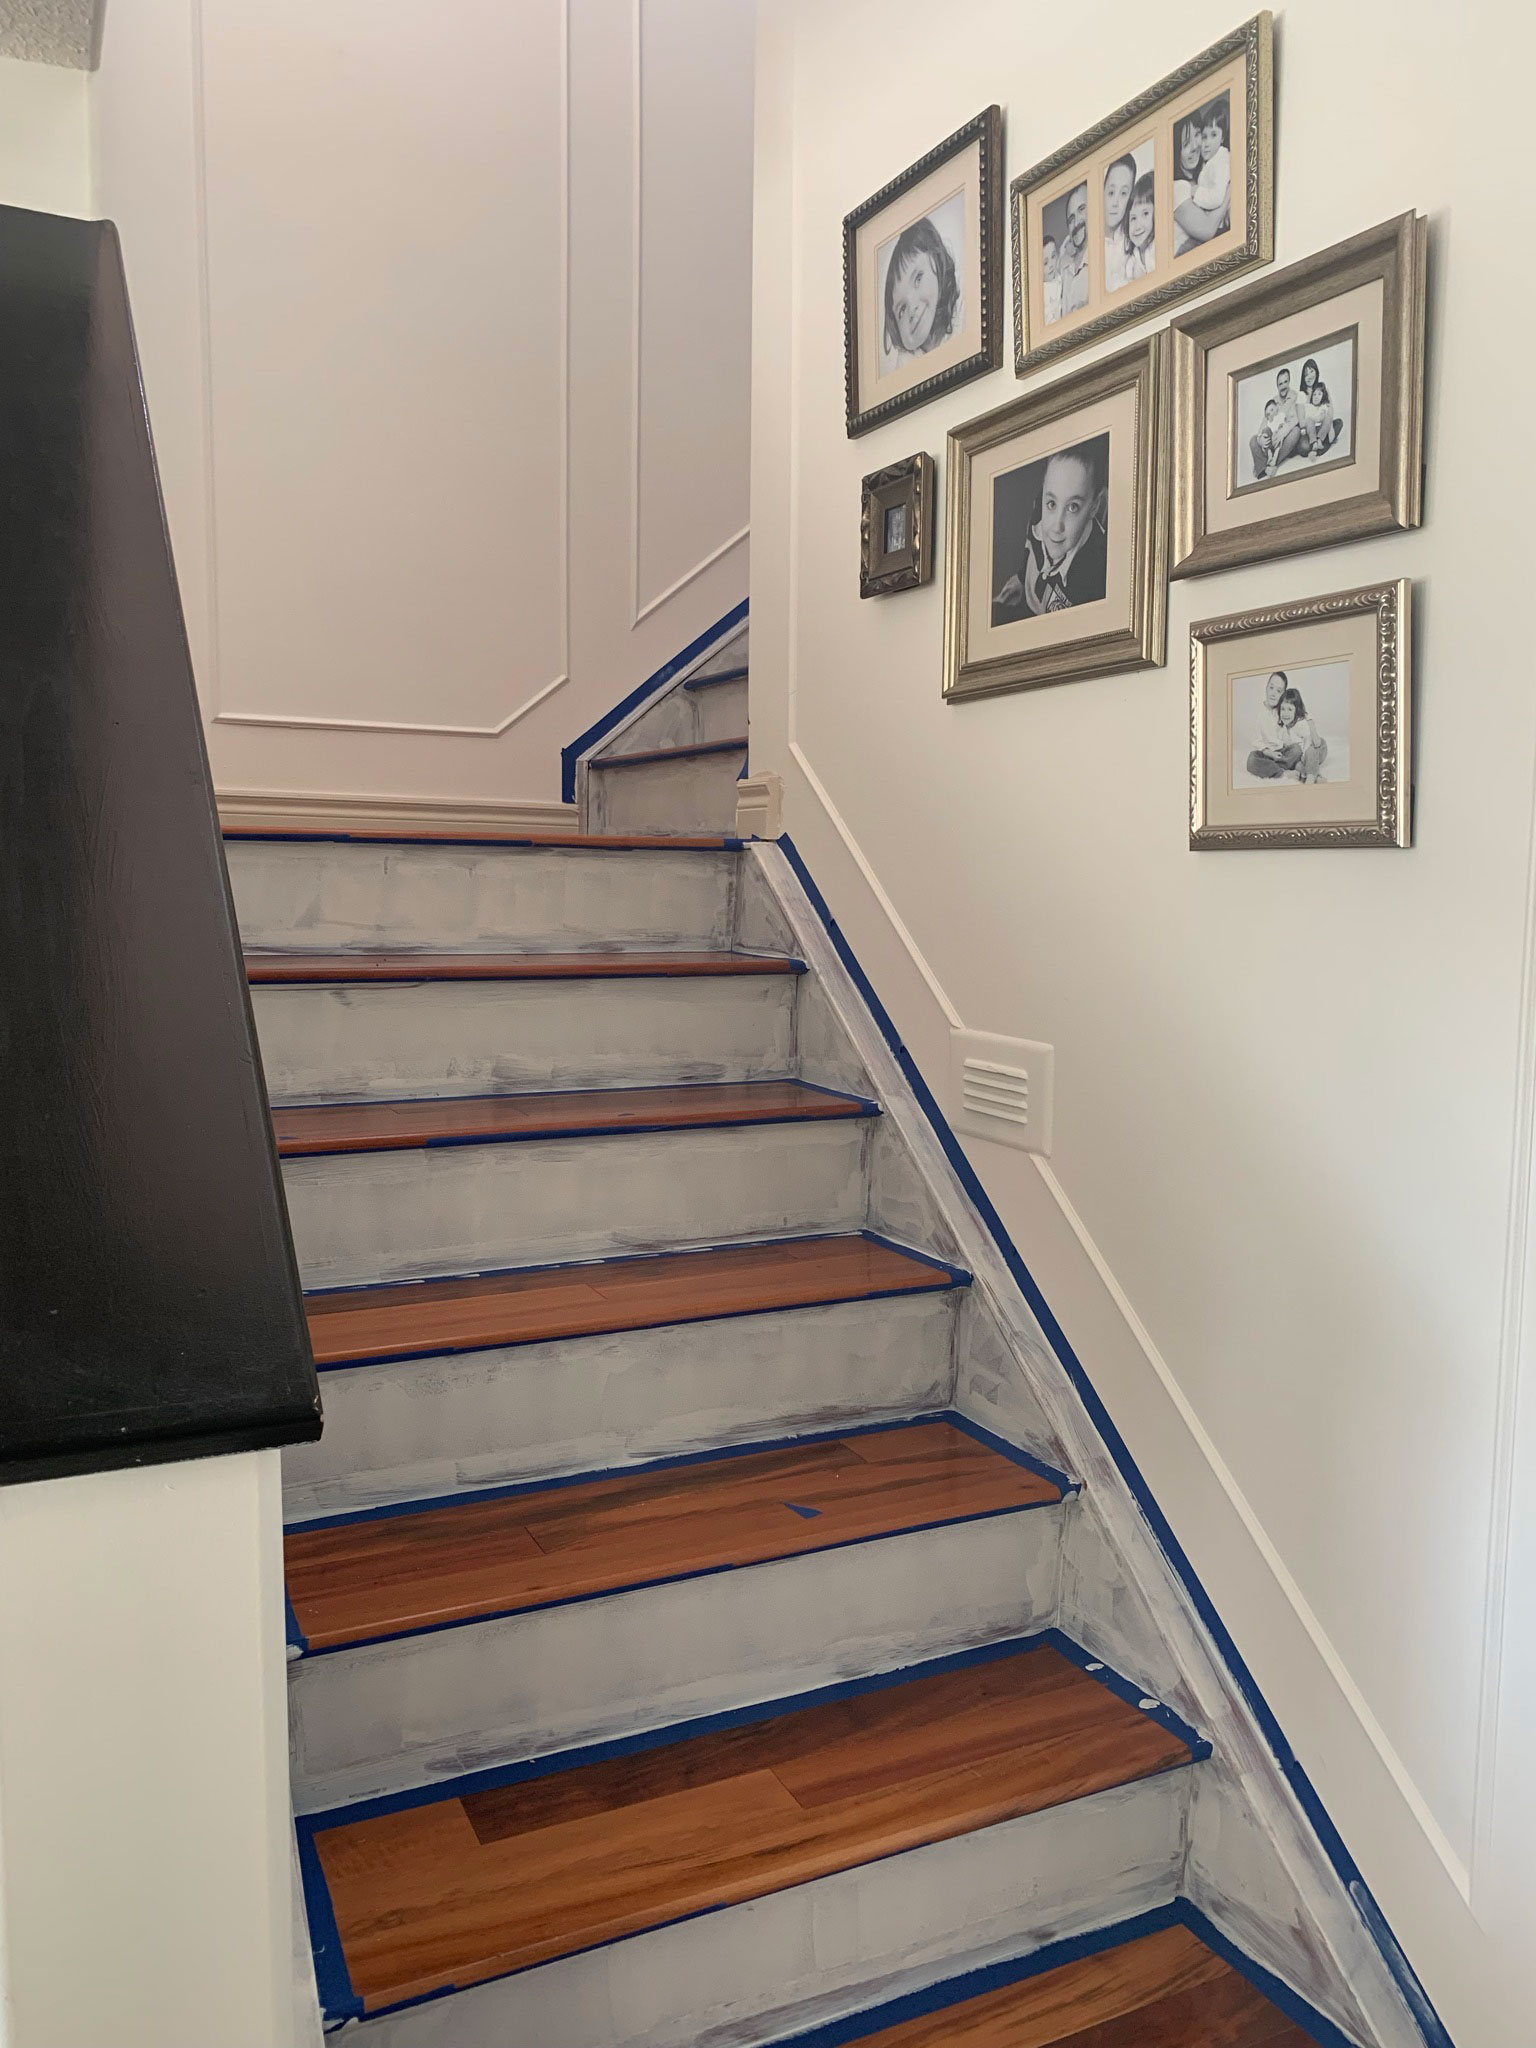
Because I was painting on laminate, I first primed everything with my favourite Shellac Based primer to ensure good adhesion.
Honestly, I could have stopped there because it was looking so much better after we did all of those changes! But hardwood stairs are actually super slippery and we had a few people slip on these stairs already, so we wanted to put a carpet runner down to make sure we didn’t have any bad accidents.
How to Pick a Stair Runner
You should consider what type of rug you would like for your stairs. You should keep in mind that stairs will show wear a lot faster than most rugs as people tend to walk right down the middle, so something with a high pile is probably not the best choice.
The runner I chose is a fairly low pile rug but it is not a flat weave. I can tell after about a year and a half that eventually I may have to replace it as you are starting to see where the traffic pattern is in the middle. It does fluff up after vacuuming so it’s not terrible! I really love the runner I used, however, and I’m happy to get whatever amount of years out of it I can! This is the runner I chose, it was gifted to me from Loloi.
Annie Selke makes a lot of really great quality and beautiful stair runners that are used a lot on stairs and come in varying lengths and are a popular choice for runners. Here are a few that caught my eye that I think would be good choices for a stair runner!

Choose a runner that will wear well and stay clean. Wool is a great option due to its stain-repellent properties, and natural material like sisal would also likely wear pretty well (because it’s the colour of dirt, ha!). Indoor/ outdoor rugs have come a long way and would also work pretty well. I have a whole post about rugs and how to choose them here!
Think about the pattern in the runner, too. If you have stripes, for example, you are going to have to be super careful about keeping them straight. If you have another kind of pattern, you might want to consider trying to match up the pattern which may result in a lot of waste. I chose a pattern that was kind of organic and random for that reason, and I cut the border off the ends.
Measuring your Stairs to Determine the Size of the DIY Stair Runner You Need
The first thing to consider is the width of your runner. You really should make sure your runner spans the width of your stairs with somewhere between 2 and 6″ on the sides, max! For a wide staircase, you can have a bit of a wider space, and for a narrower staircase, a bit smaller.
My staircase is 37″ wide and so I chose a runner which is 32″ wide, which left me with about 2.5″ of tread showing on either side.
Next, you need to determine the length of the runner. You need to measure the total length of the runner from the top of the stairs to the bottom.
Measure one stair and multiply it by the number of stairs, and then add any additional length you might need on a landing. For example, one stair would include the height of the riser, the depth of the stair tread, any lip or nose of the stair to the top of the next riser. Use a tape measure and measure each of those things and add them together to get the total length of rug for one stair. Then, multiply by the number of stairs you have.
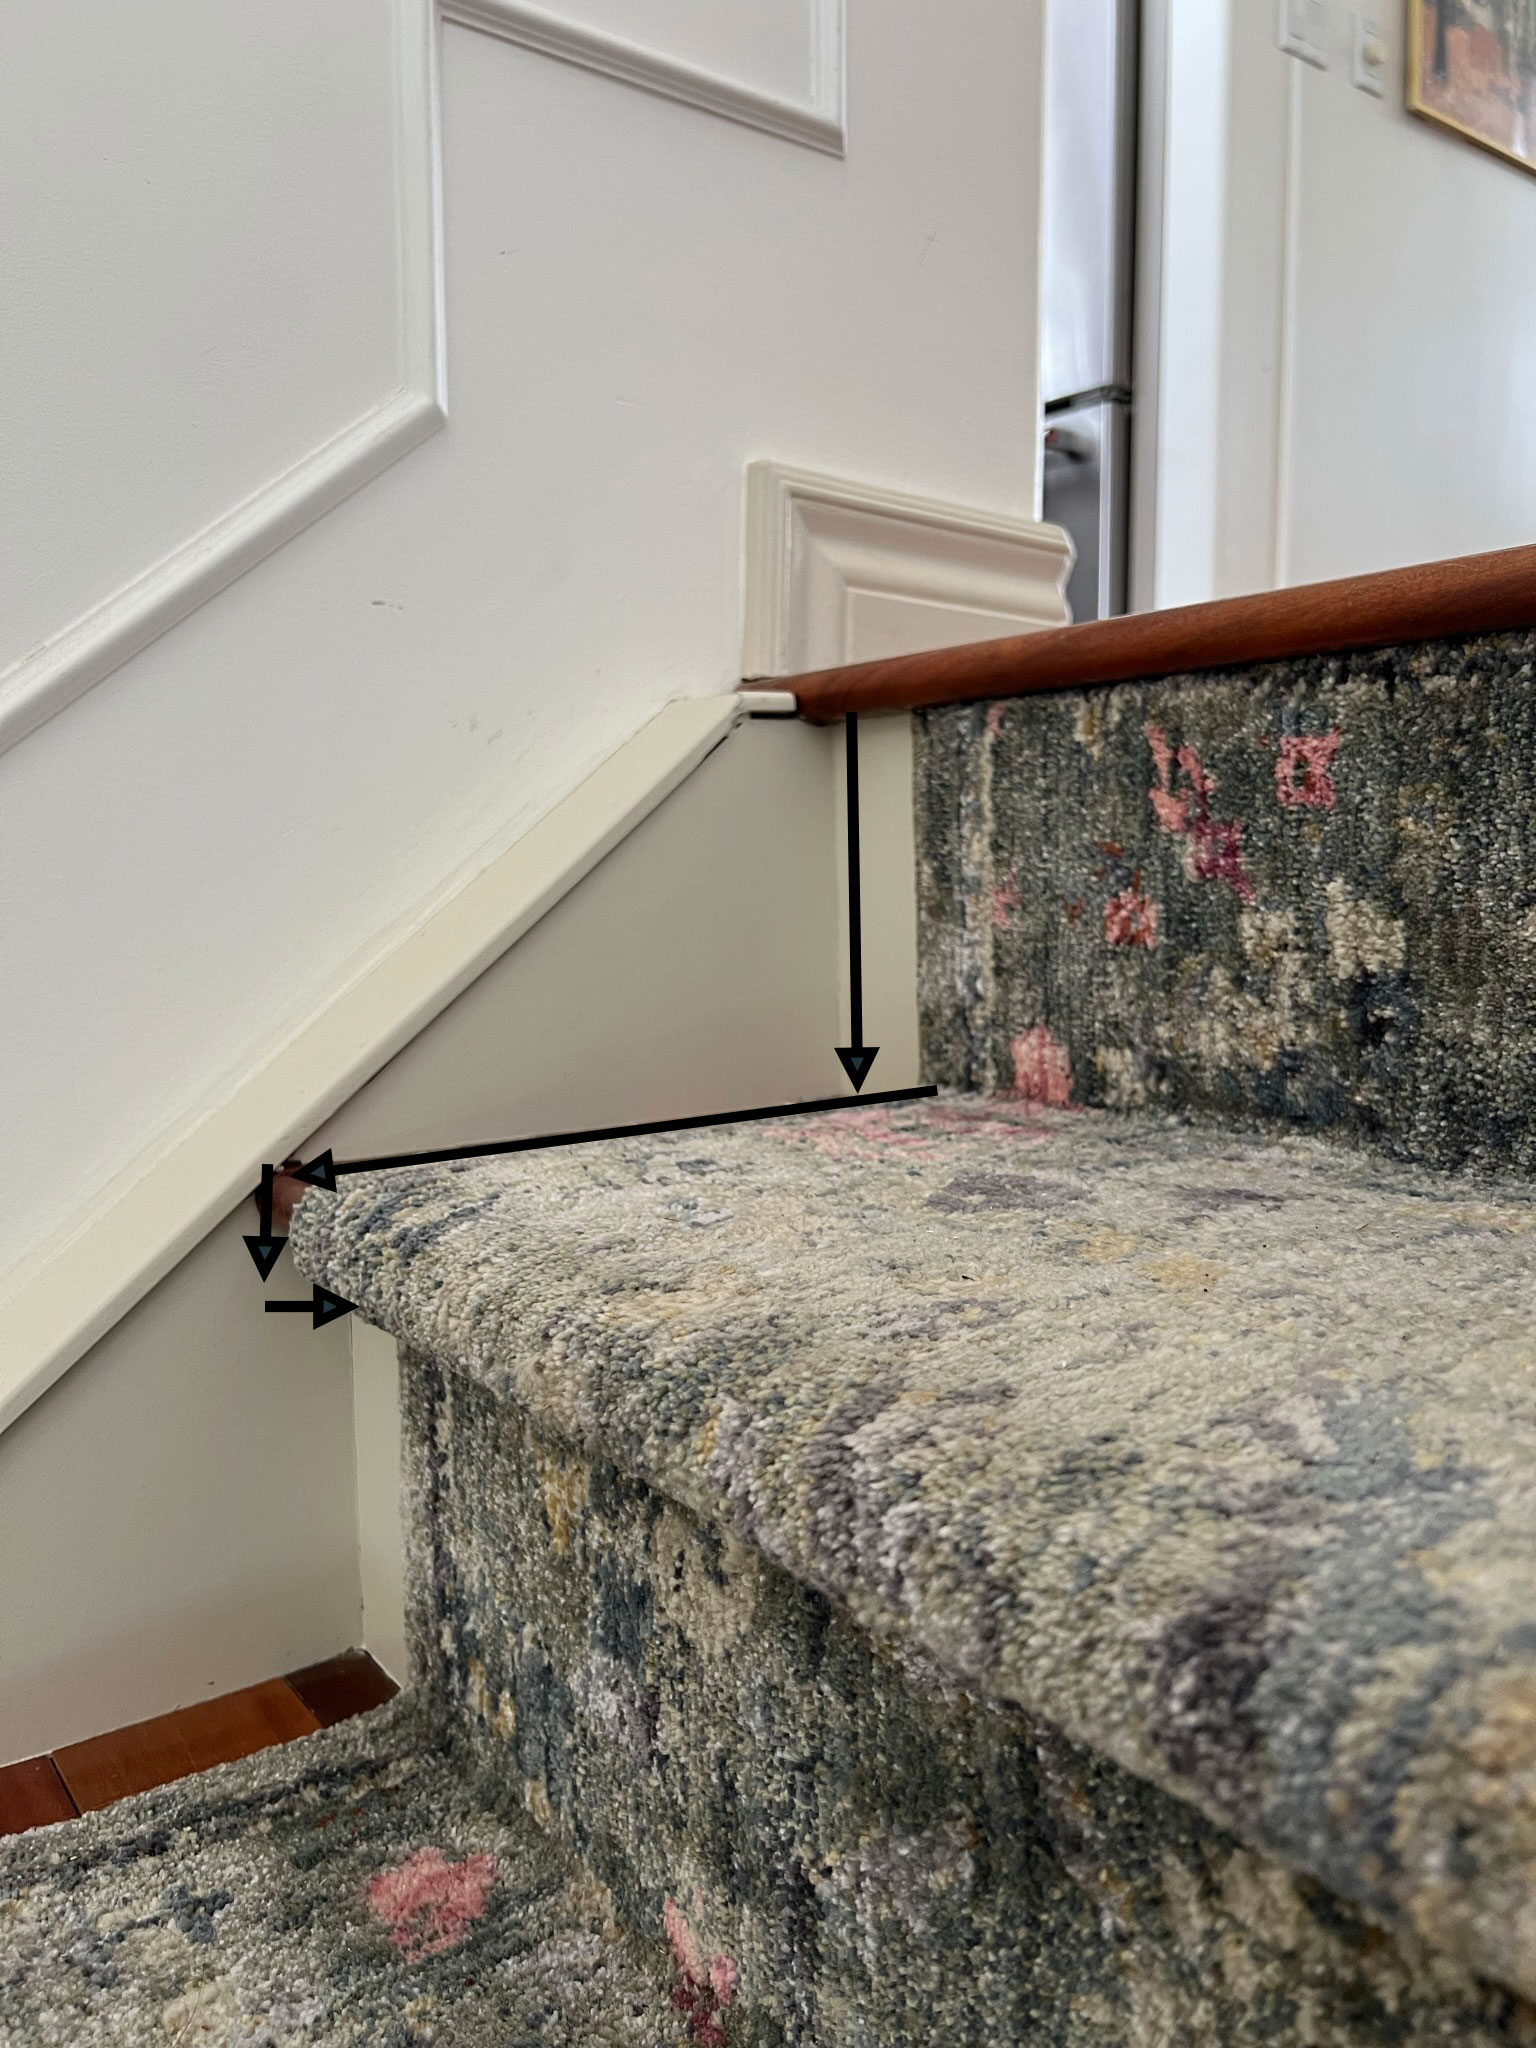
Once you have that, add in any additional length you might need, like for a landing. If you are going around a corner like I was, you need to make sure you measure to the outer corner so you can do a nice mitre cut.
You might want to consider ordering additional runners if you have a pattern that you will want to match up or cut off. My runner had a border on the ends that I cut off so that the pattern would look continuous so I took that into account when deciding how much I needed.
One more thing to remember is that you will want to piece your runners together at a “good location” like the underside of a stair nosing so the seam is less noticeable. That may mean that you will be cutting off a foot or more of the runner so you can line the seams up well. In my case, I knew I was going to be ordering 12′ runners so I figured out where each one would be seamed ahead of time so I could accurately calculate the waste.
I actually used a flexible table to double-check the calculations in my first step, just folding it around the stair nosing and going all the way down the stairs with it. When I got to 12′, I went back to the best “seam location” and started measuring for my next runner from that spot.
Longer runners work best so you don’t have to piece them together as much, but you can use shorter runners. Just keep in mind that shorter runners will have more waste and allow for it in advance.
Tools needed for DIY Stair Runner Installation
To install a stair runner you will need:
- Stapler and Staples (An Air Stapler or Electric Stapler)
- Sharp utility knife
- Carpet Seam Sealer
- 2 Sided Carpet tape
- Carpet Seam Tape (If you are doing a landing)
- Straight Edge like a long level, or a carpenter’s square
- A Carpet tucker would have also been beneficial but I got away without it, I used the edge of my square to push the carpet into the corner
- Rug Pad
- Runners of your choice
Install the rug pad
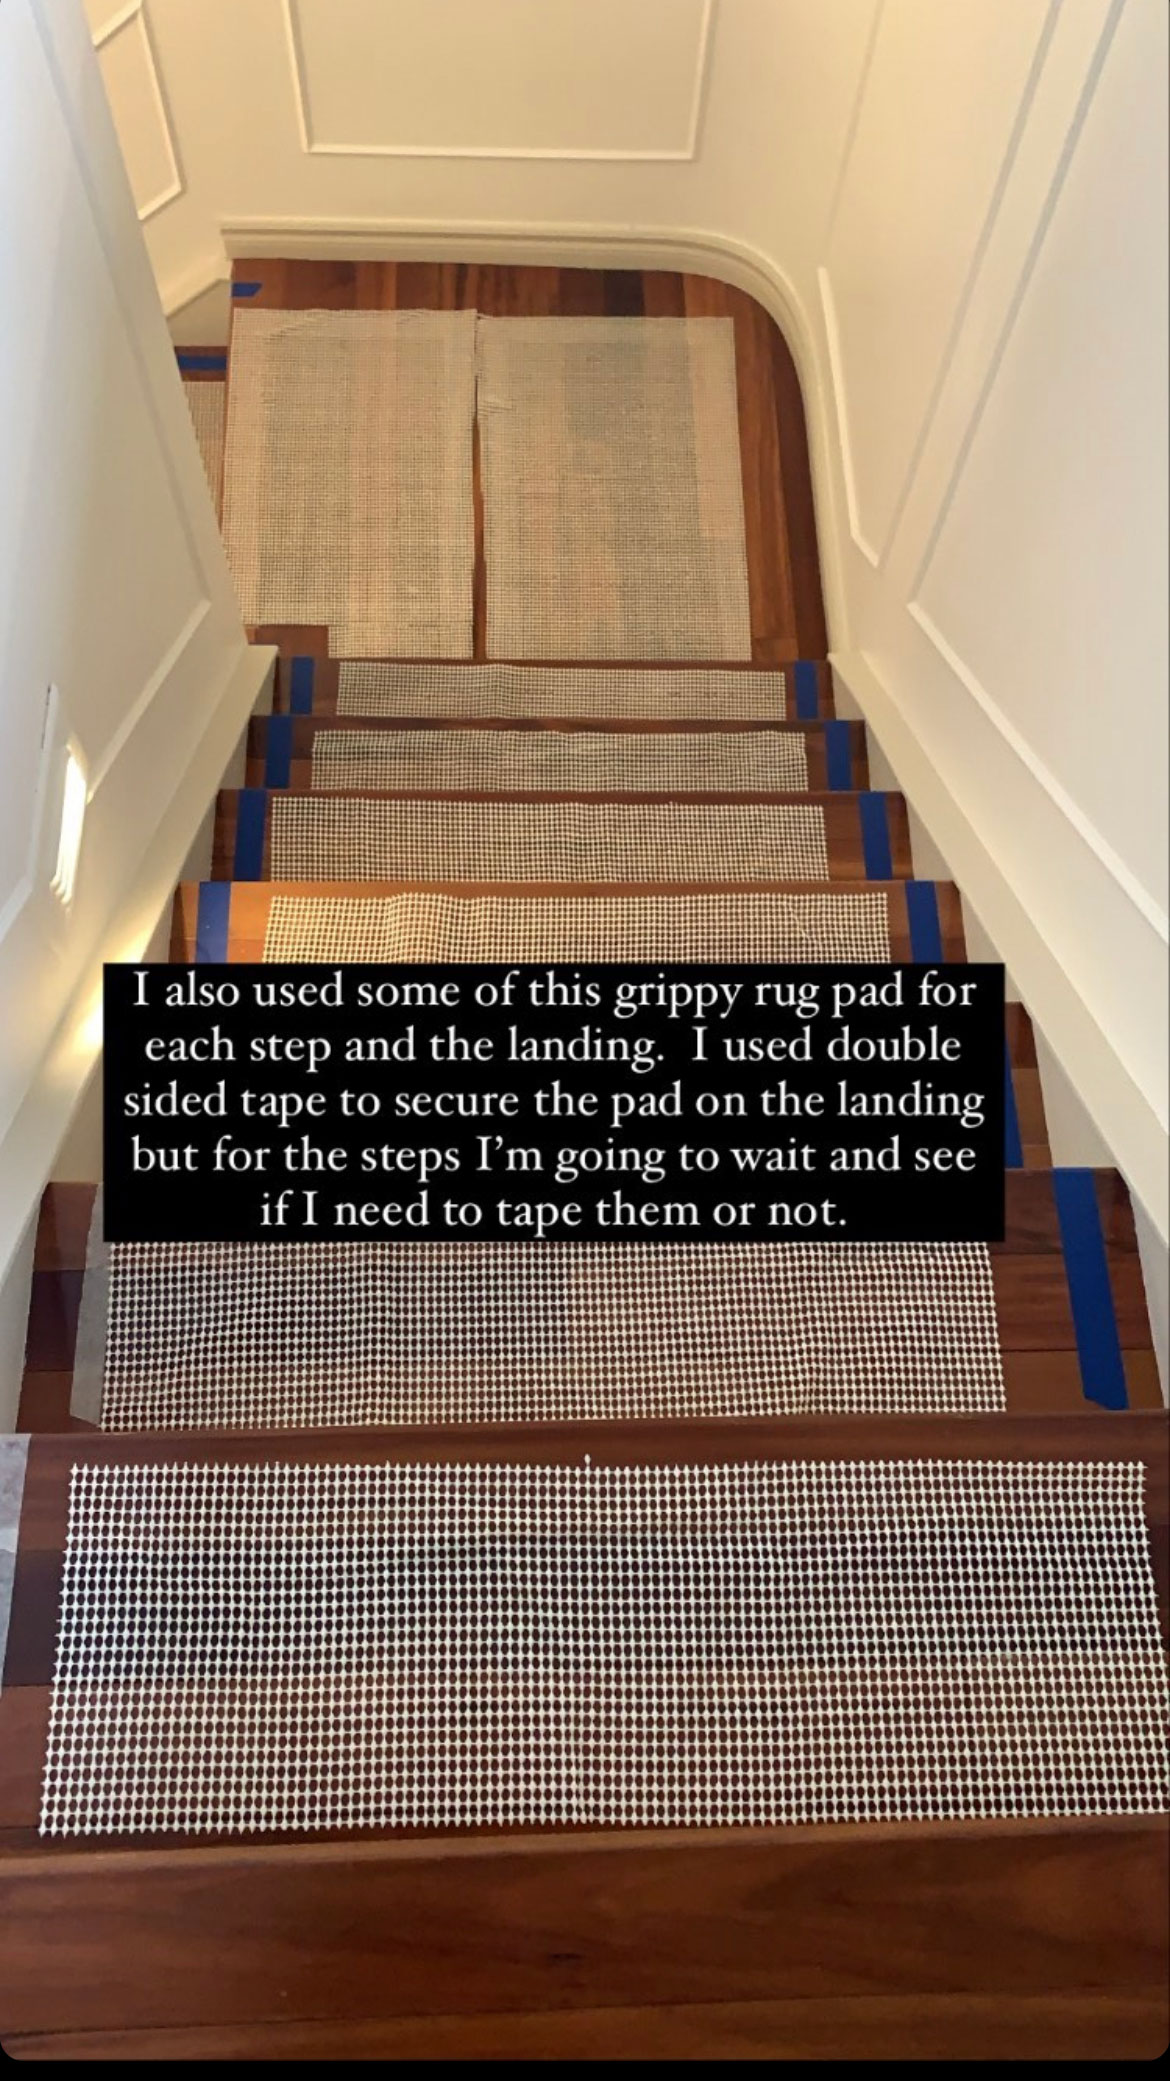
In order to keep the runner from sliding around, you should install a little carpet pad on each step. There are various types of carpet pads but I think a low profile one works best for stairs as it does not extend all the wall under all the parts of the runner so you don’t want to have a “bump” under there, you know? This is the one I used. I just bought a 9×12 size and I had plenty to use to cut up for each stair (and some left for my kitchen runner too!)
Next, cut your runner pad for each step. I cut mine about 3 – 4″ narrower than the width of the rug and a couple of inches shorter than the depth of the tread. I didn’t do anything to hold these in place because they are sort of grippy. Once you staple down your runner there is nowhere for it to go! I placed each of these as I worked my way down the stairs with the runner.
I also cut a square for the landing where my runner turns the corner. On the landing, I felt that a little more adhesion was required beyond the non-slip rug pad, and I decided to add double-sided carpet tape as well. I added the carpet tape all around the edges of the rug pad.
Seam the Landing
The first thing I did was make my corner seam for my landing. I wanted to have that done first so that I could make sure that it lined up with the runners on each of the stair runs as I did those.
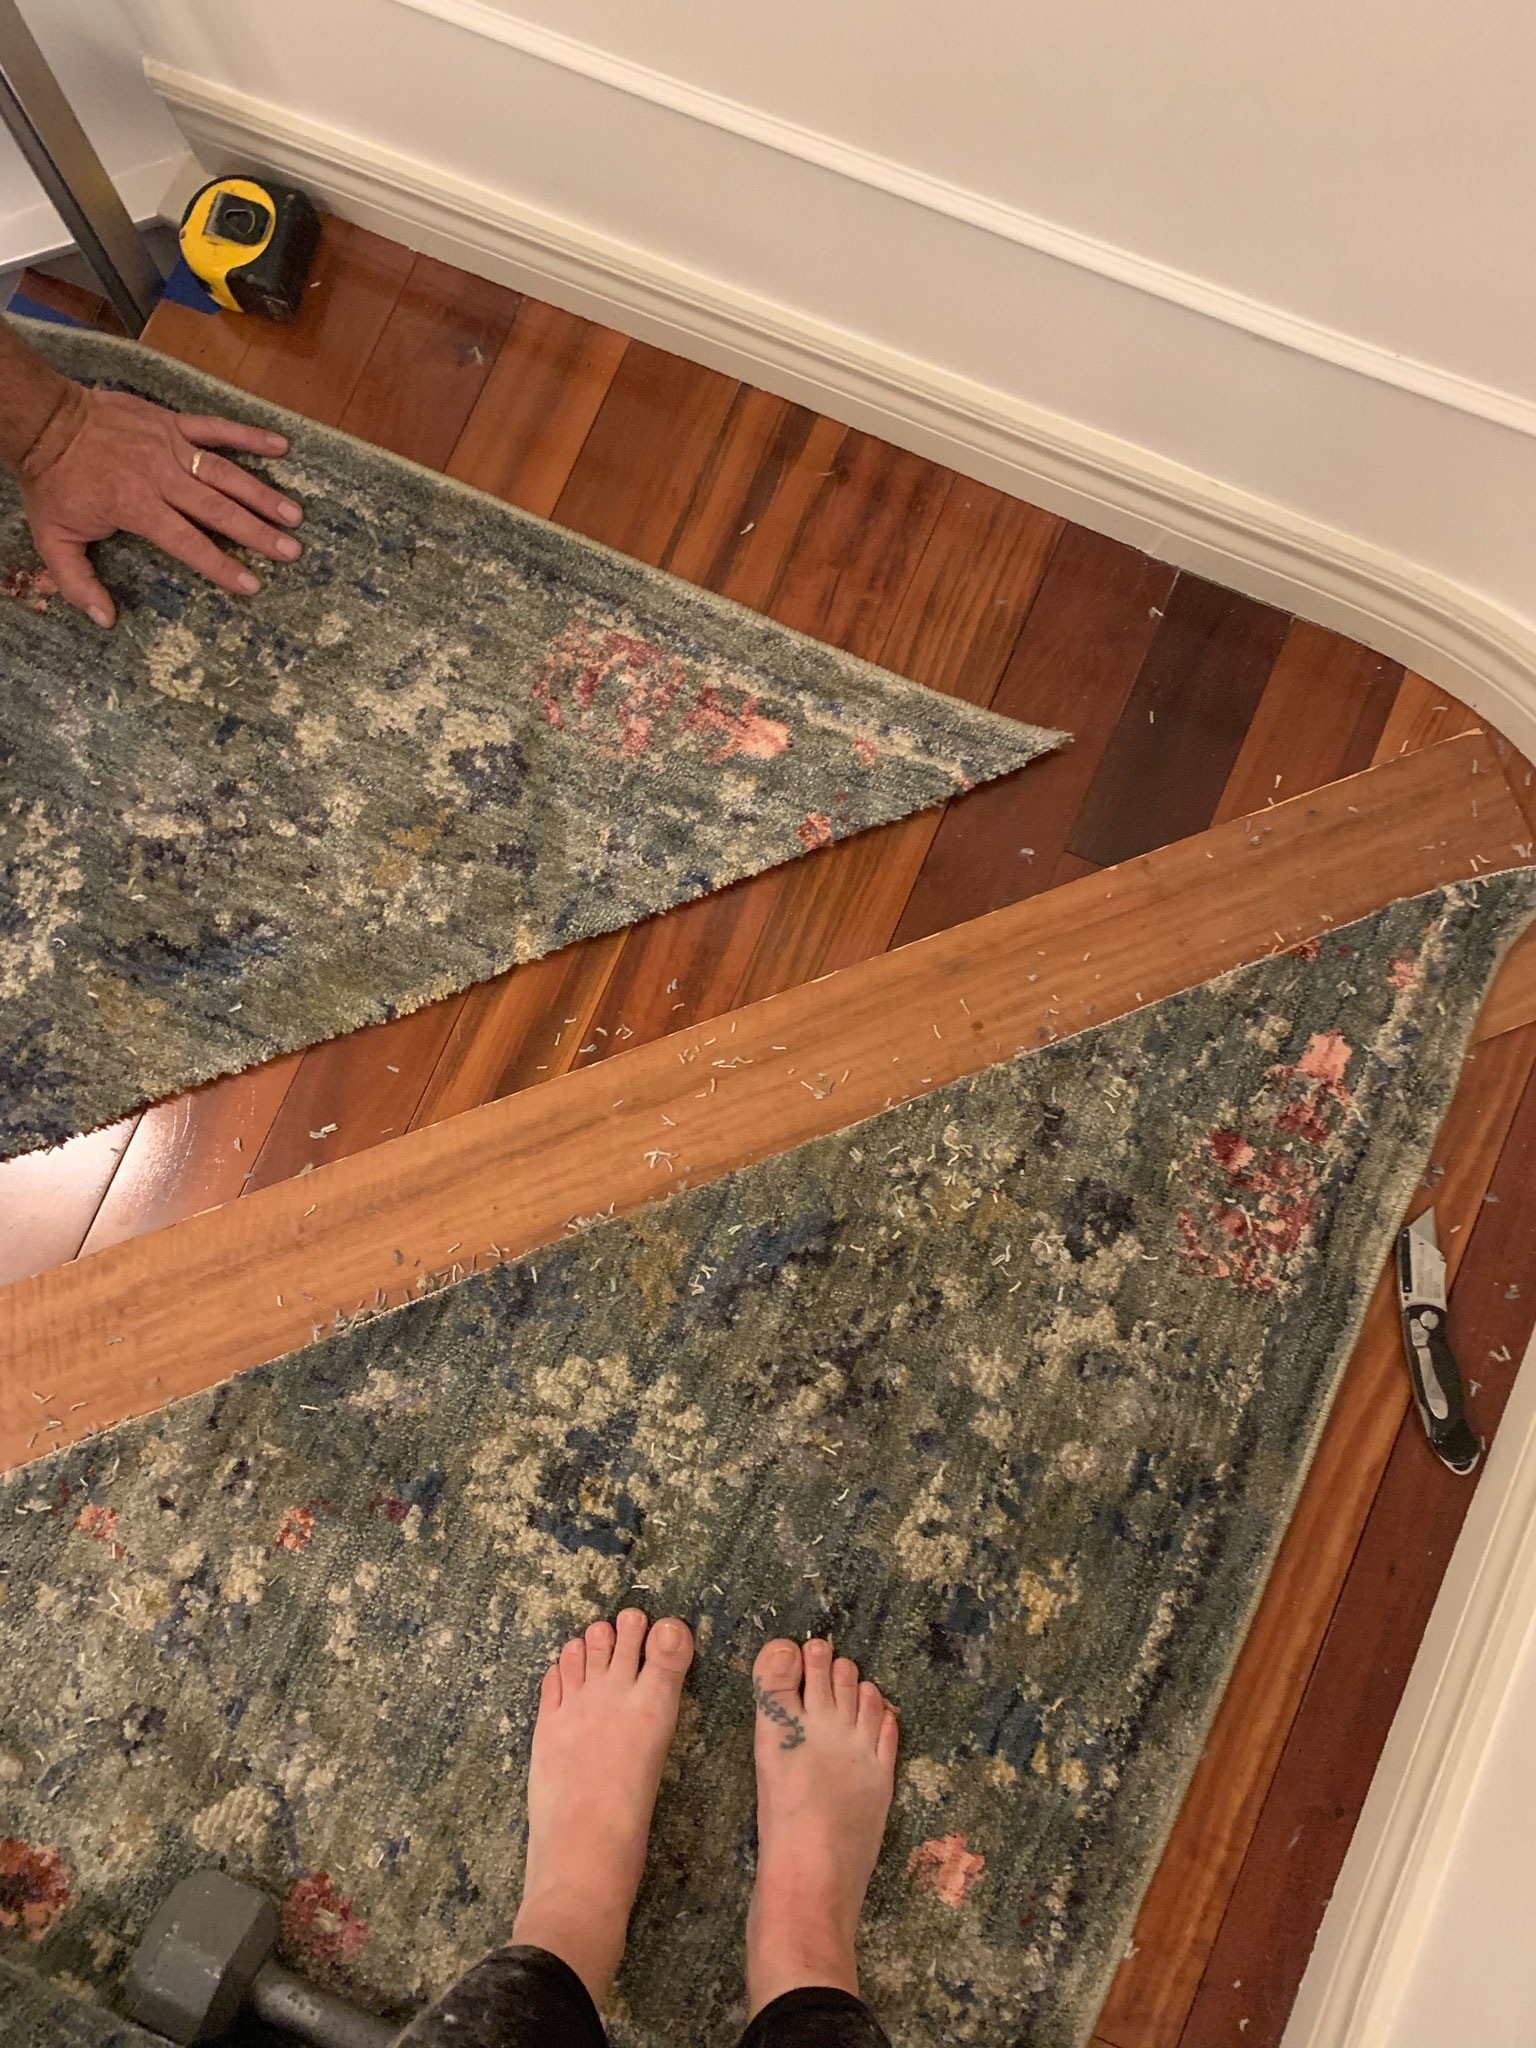
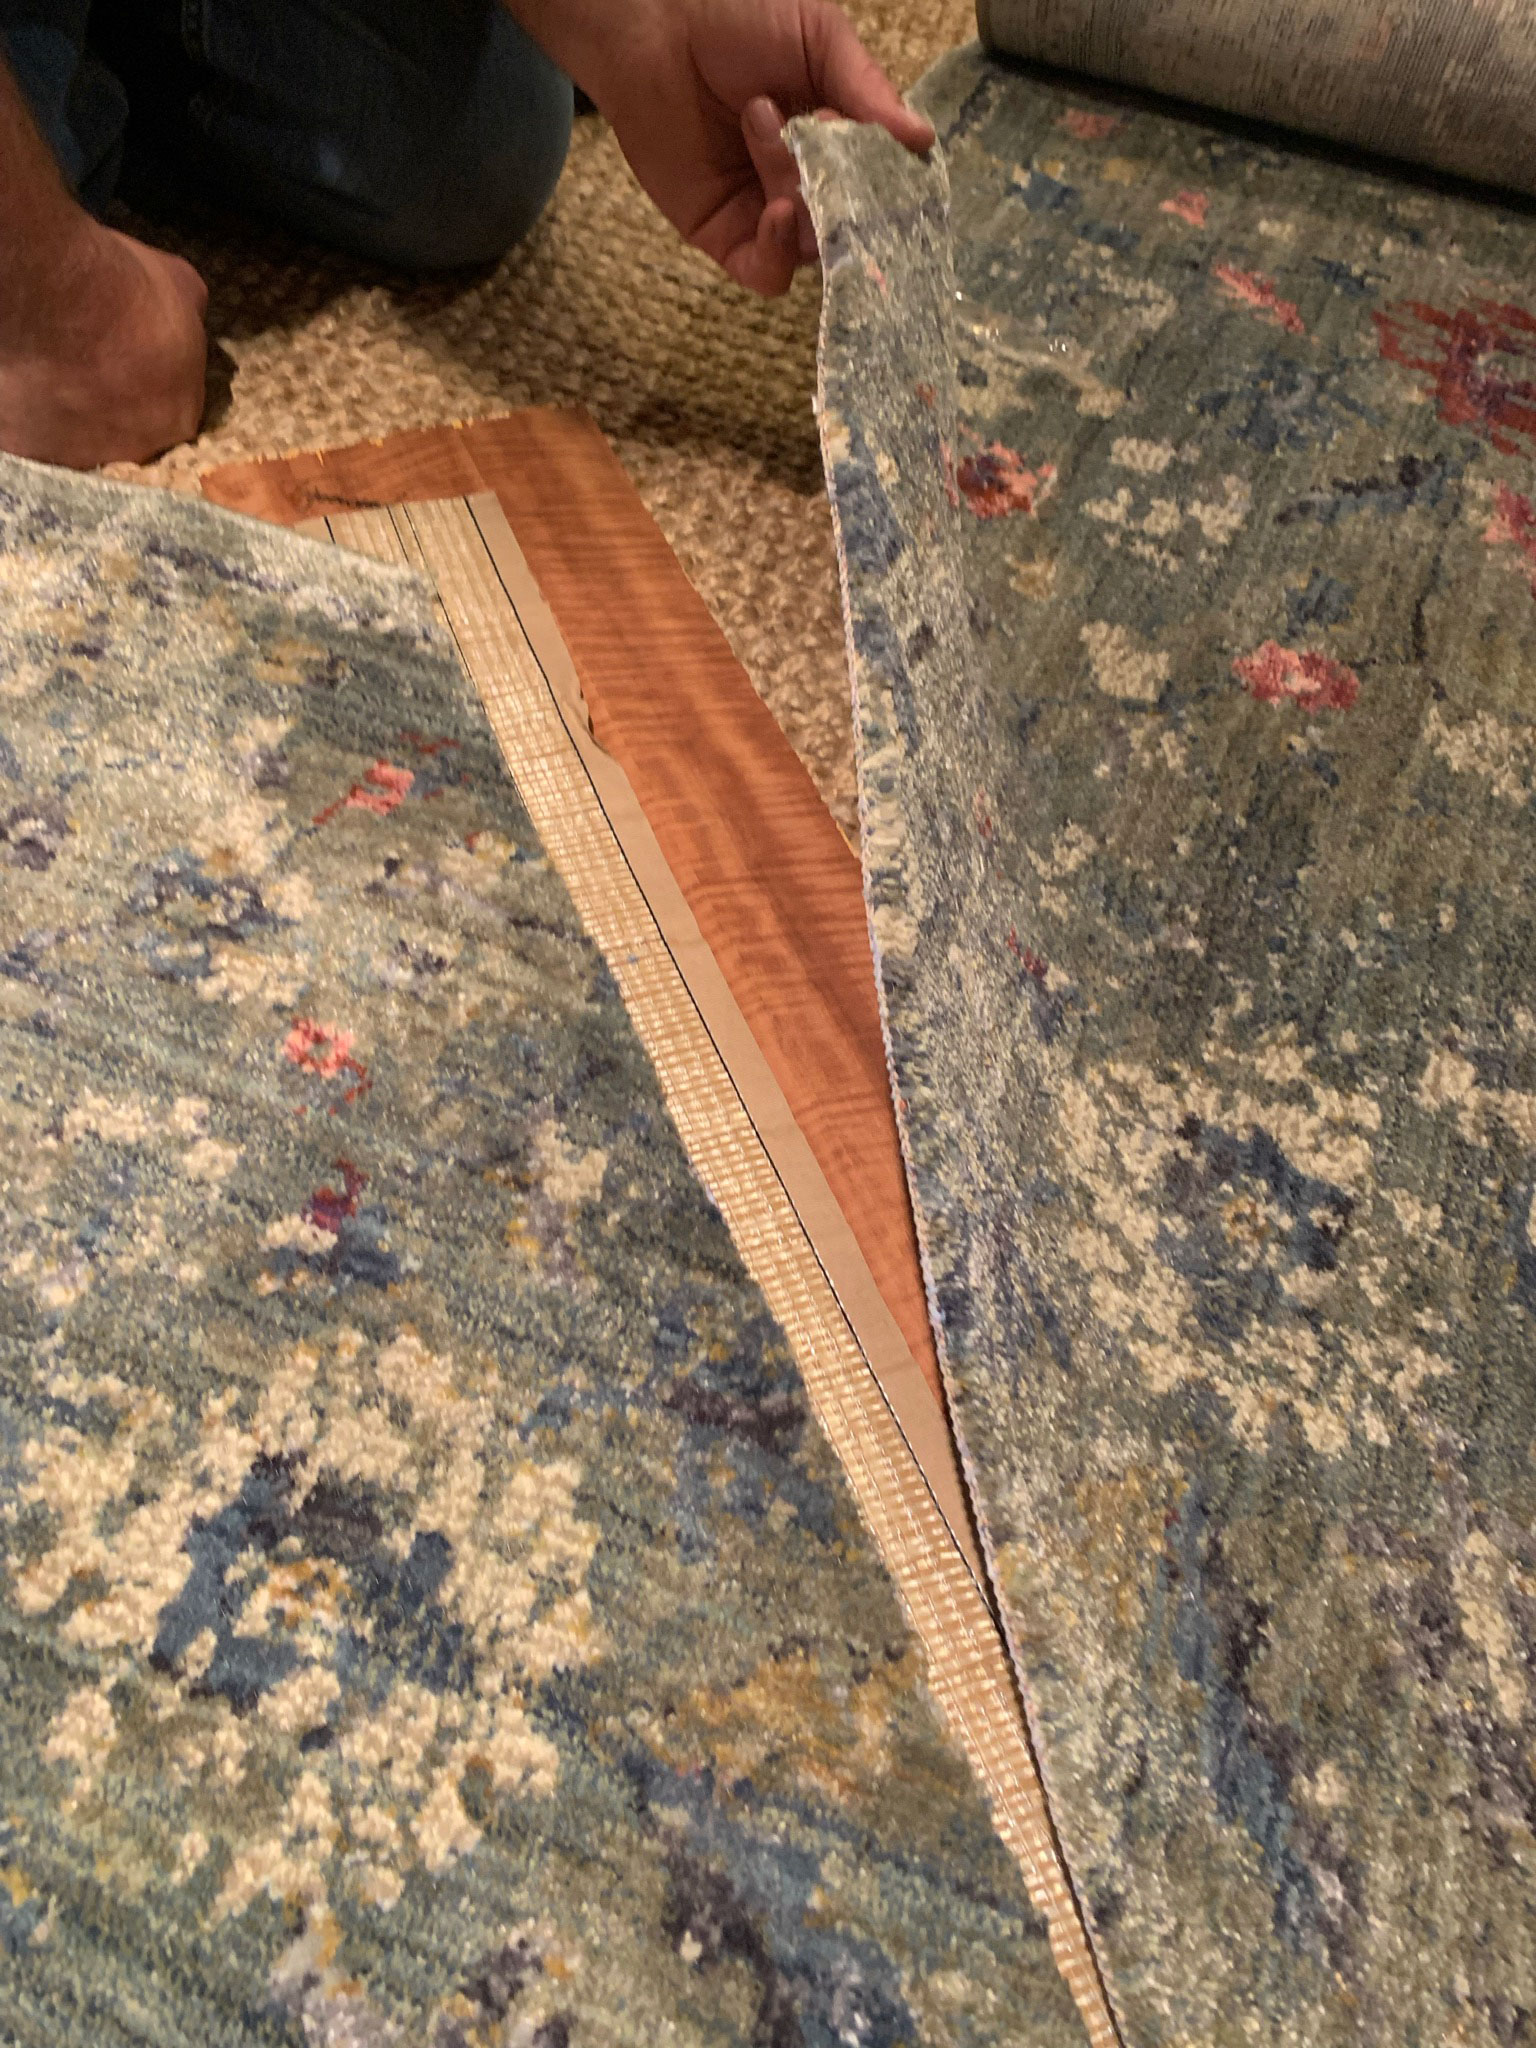
I was a little nervous about cutting that corner but it was actually not too hard at all. I started with two of my runners and overlapped them at 90 degrees on my landing. I used a square to make sure the corner was perfectly square. I had a thin board placed underneath the carpet so I could cut through them with a sharp knife without scratching the hardwood beneath.
Once I had the two carpets overlapped and lined up at 90 degrees, I used a straight edge (I used a long level) to line up the outside corner to the inside corner and used it as a guide for my utility knife to cut through both carpets at once. Cutting through both of them at once was the key to a night straight seam. My carpets cut fairly easily and once I removed the excess I had a super tight fitting 90 degree corner.
Once the carpets were cut, we took them down to the basement to seam them together. I used some carpet seam sealer first on both of the angled cuts I made to keep the carpets from fraying. I think this also helped with the seam.

Next, I used some carpet seam tape to tape the seam of the angled cut. It is a pressure-based tape, so we put a board over the seam and then loaded that board up with some hand weights and left it overnight.
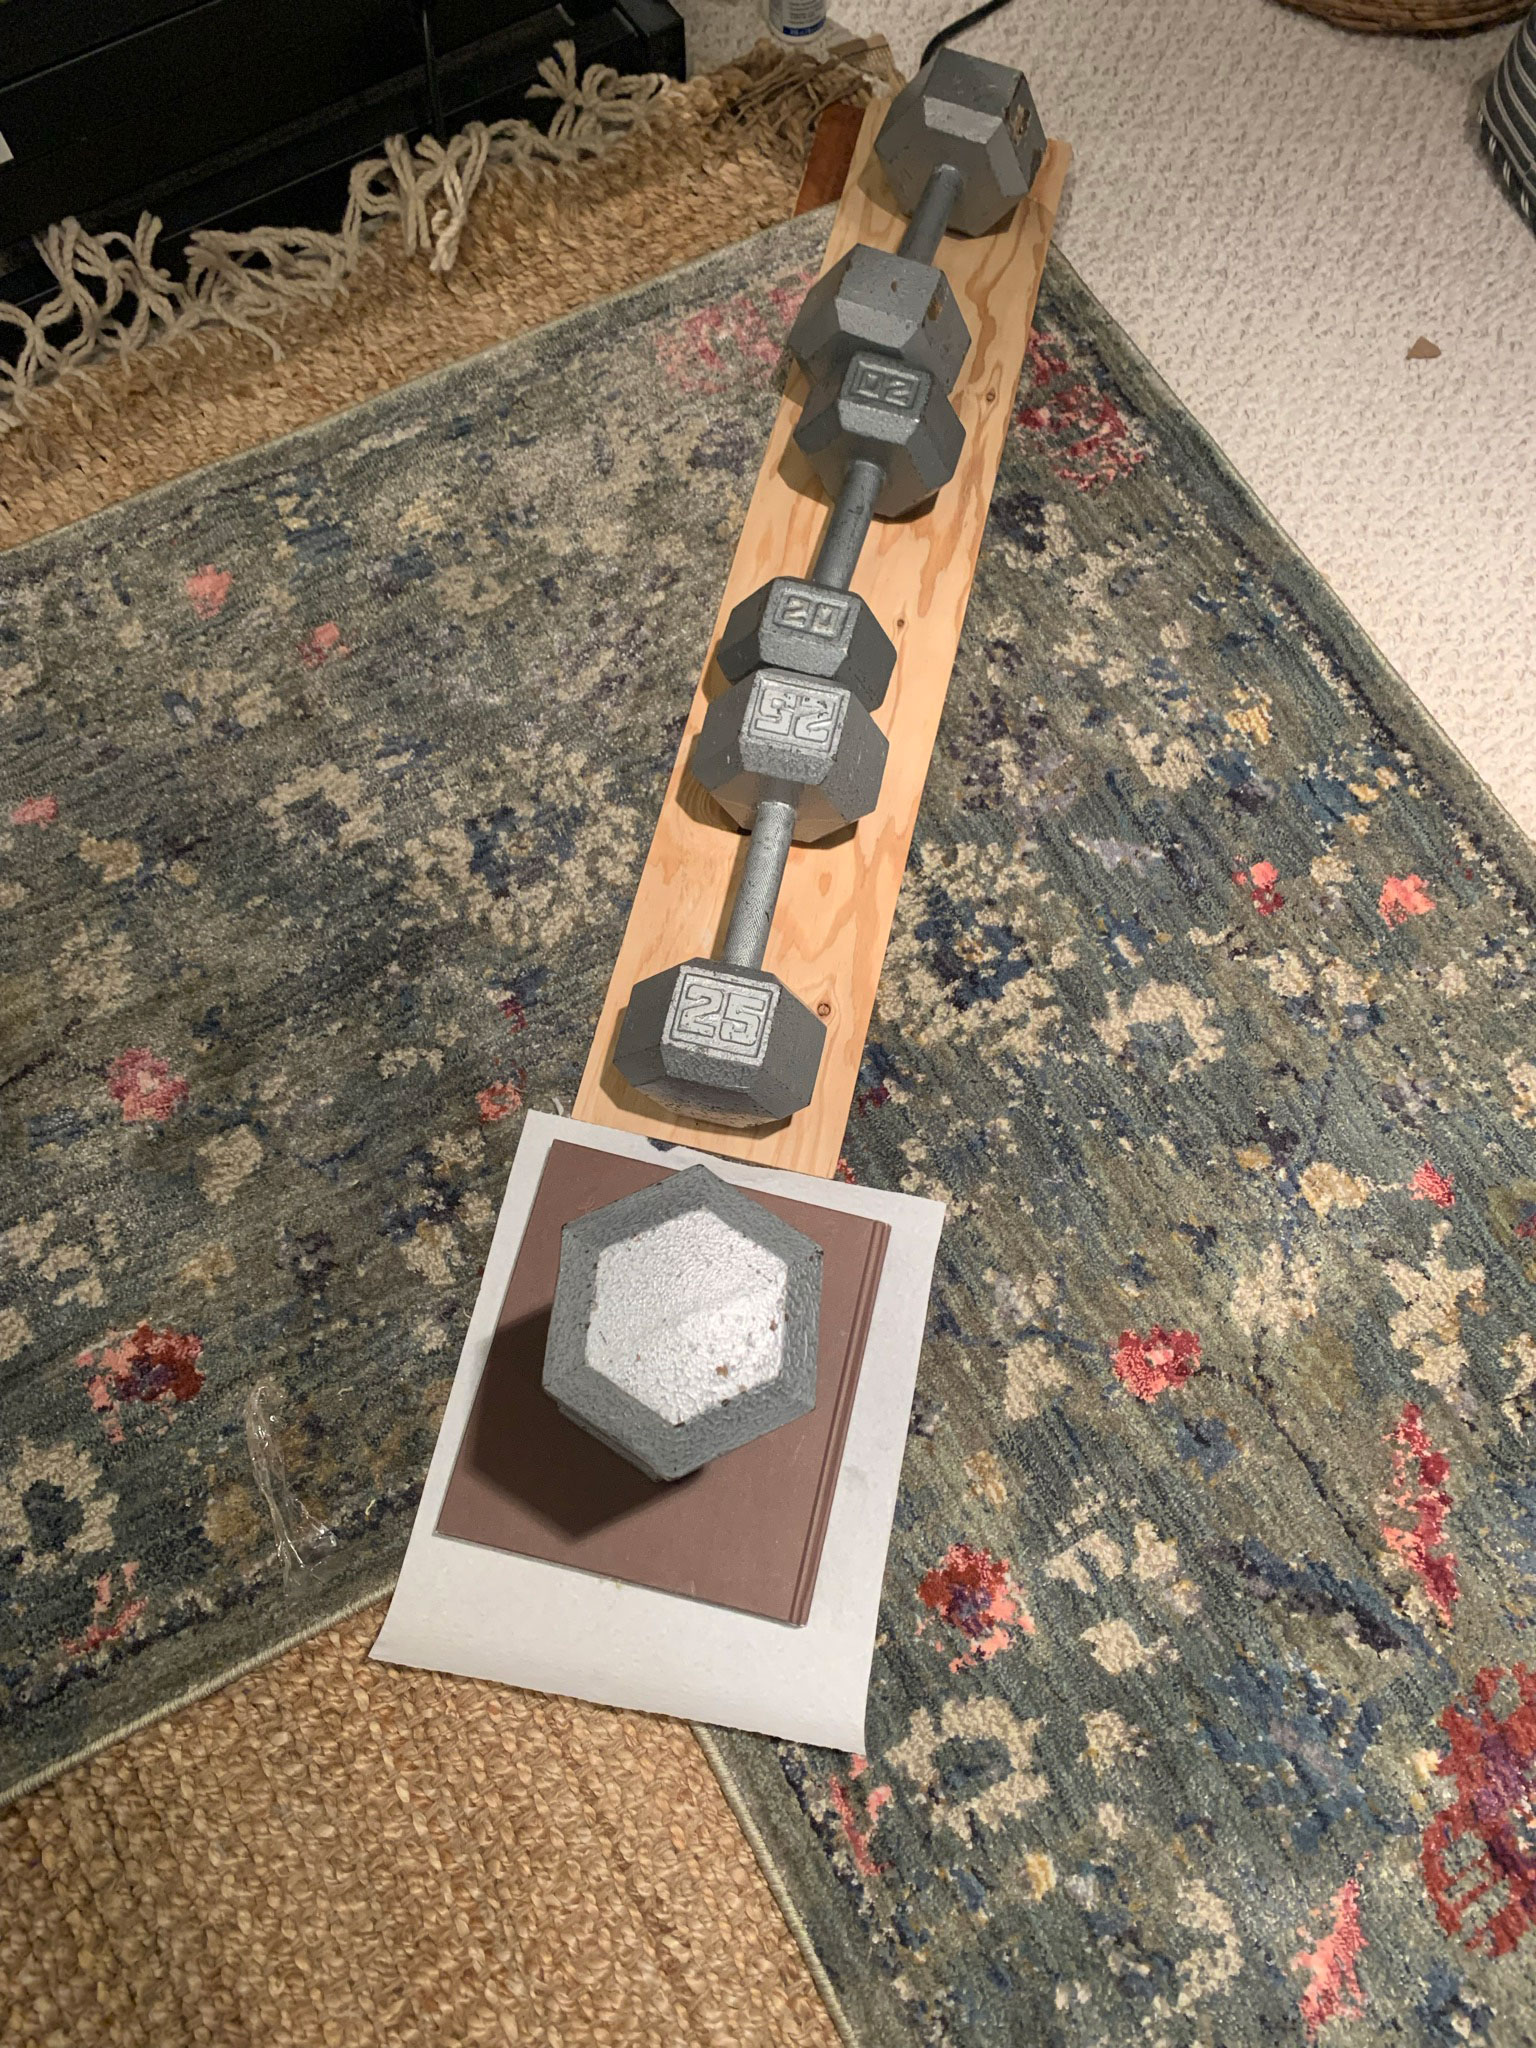
In the morning the seam was nice and strong and we were ready to start installing! I think the seam sealer also helped bond the two pieces of carpet together in the seam.
Installing the runner on the stairs
Before I started with the runner, I used some painter’s tape to mark out the side of the runner on each stair. This is a good visual to use to make sure your carpet is staying straight as you work your way down the stairs.
I originally thought that I would install the corner on the landing and extend the runner up the stairs from there, but as soon as I tried that I knew it was going to be too difficult to work from the bottom up. So I put my seamed corner piece aside and started with a new runner at the top.
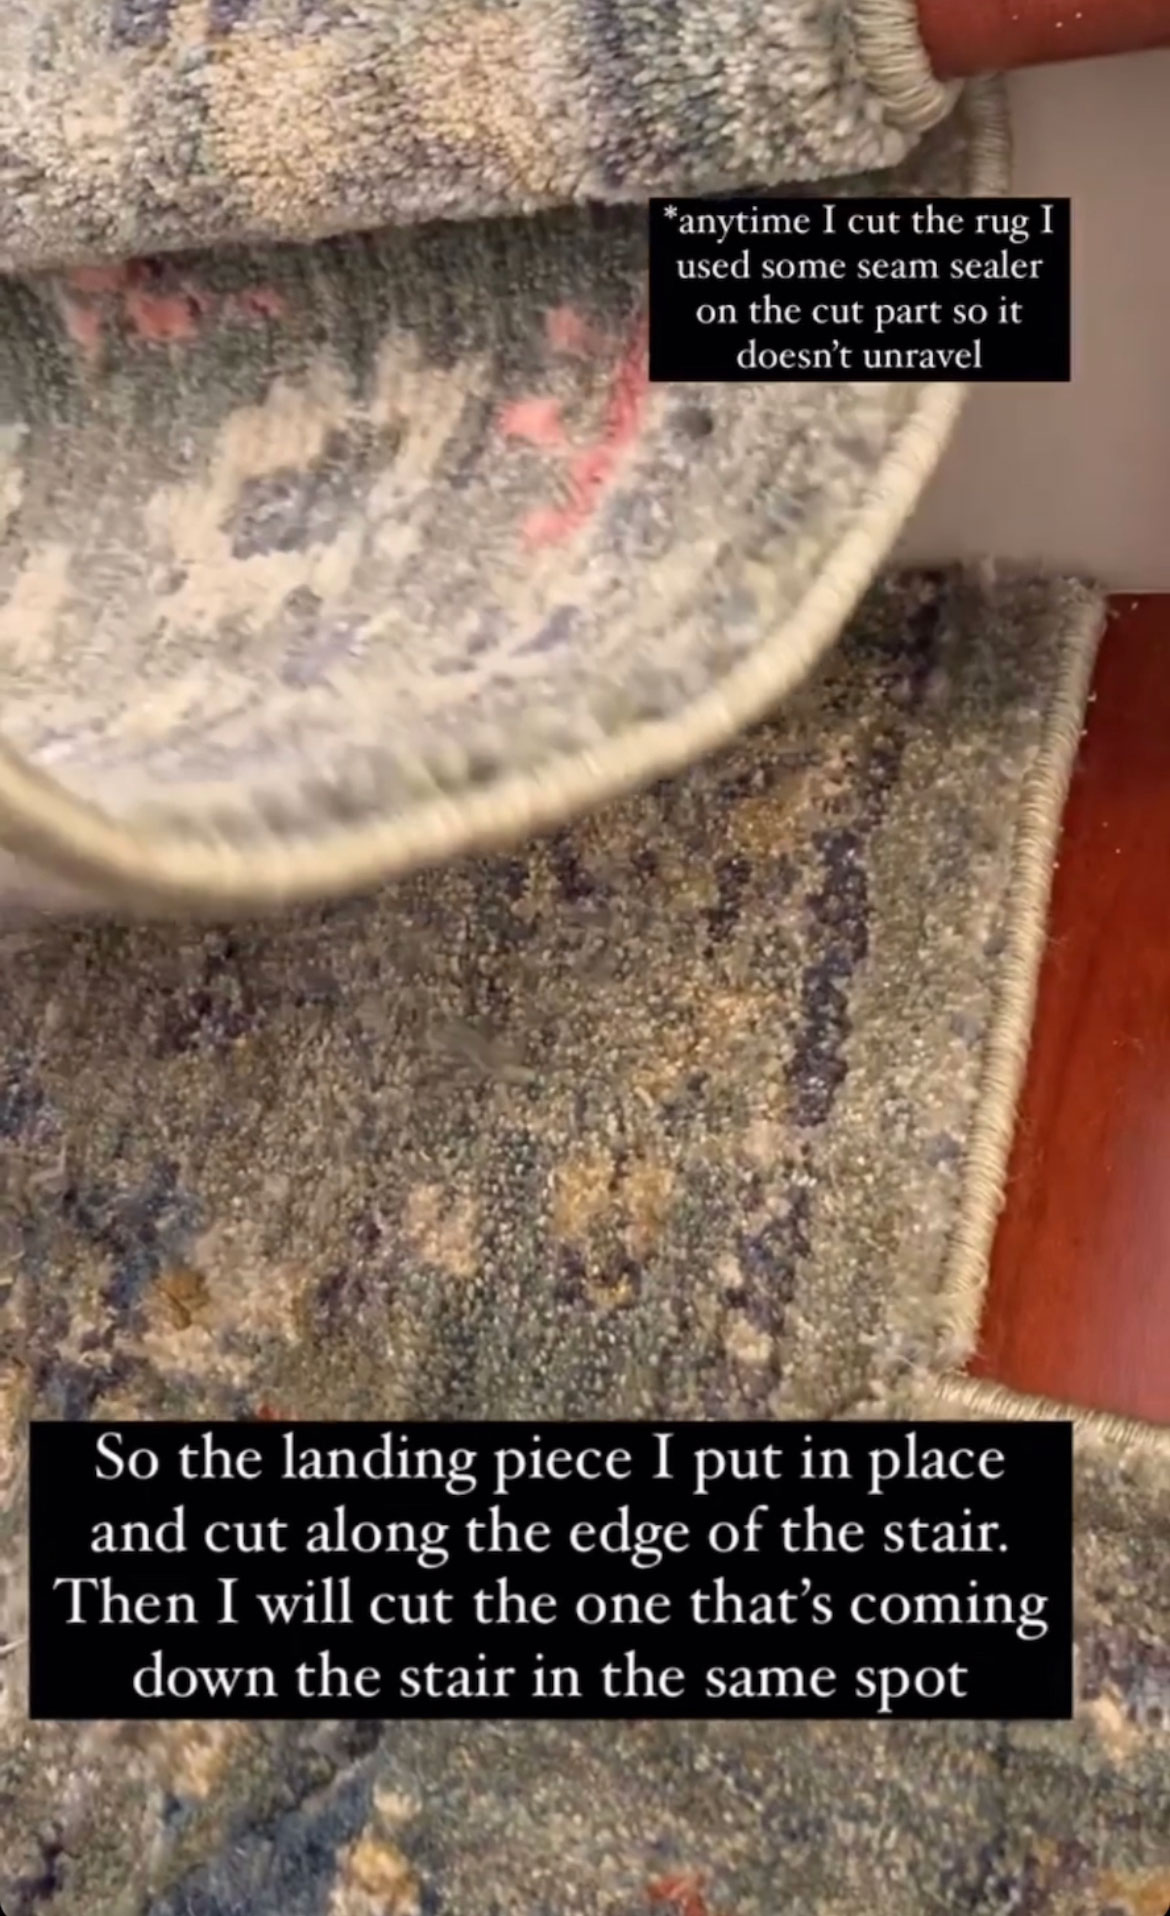
As I mentioned I had a bit of a border on mine so I decided to cut that off the ends. I started by cutting my first runner square (using a carpenter’s square) and adding some of the carpet seam sealer to the raw edge to keep it from fraying. (Note: I used the seam sealer whenever I cut the carpet even if I don’t expressly say that).
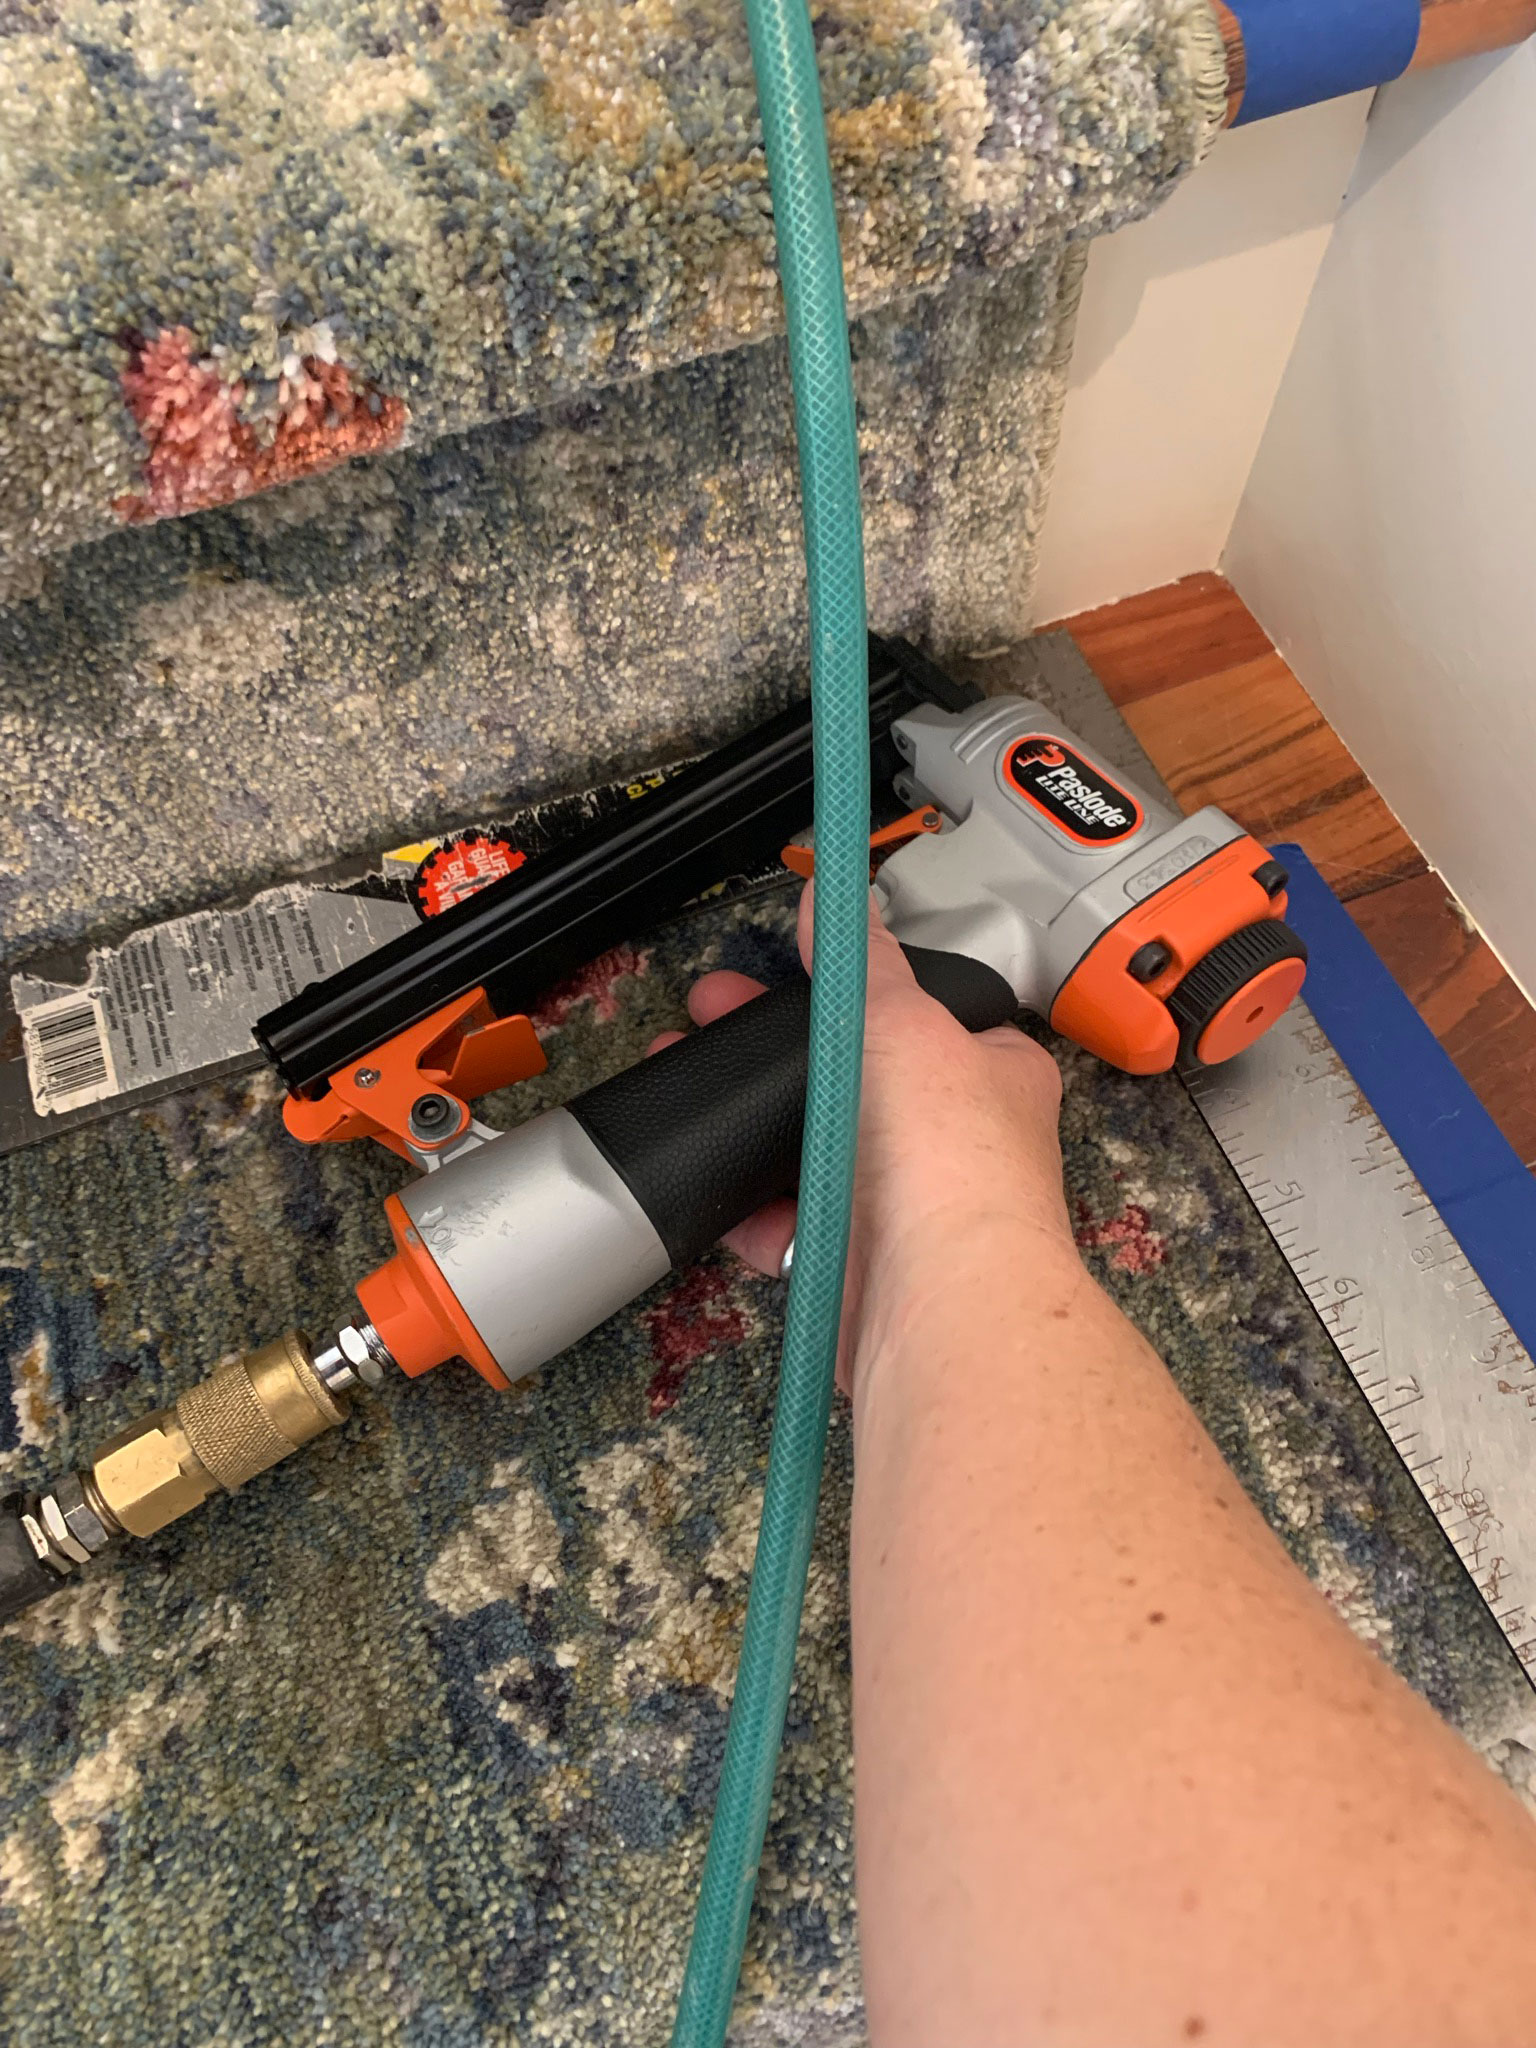
Next, I used an air stapler to attach the runner to the underside of the stair nosing on the top step. I have an upholstery stapler which attaches to an air compressor that I used for this project, but you can also use an electric stapler like this. I wouldn’t use a manual stapler for this because it would take forever and I feel like afterward you would have some serious claw-hand…. but I suppose that you could if you need a hand workout!
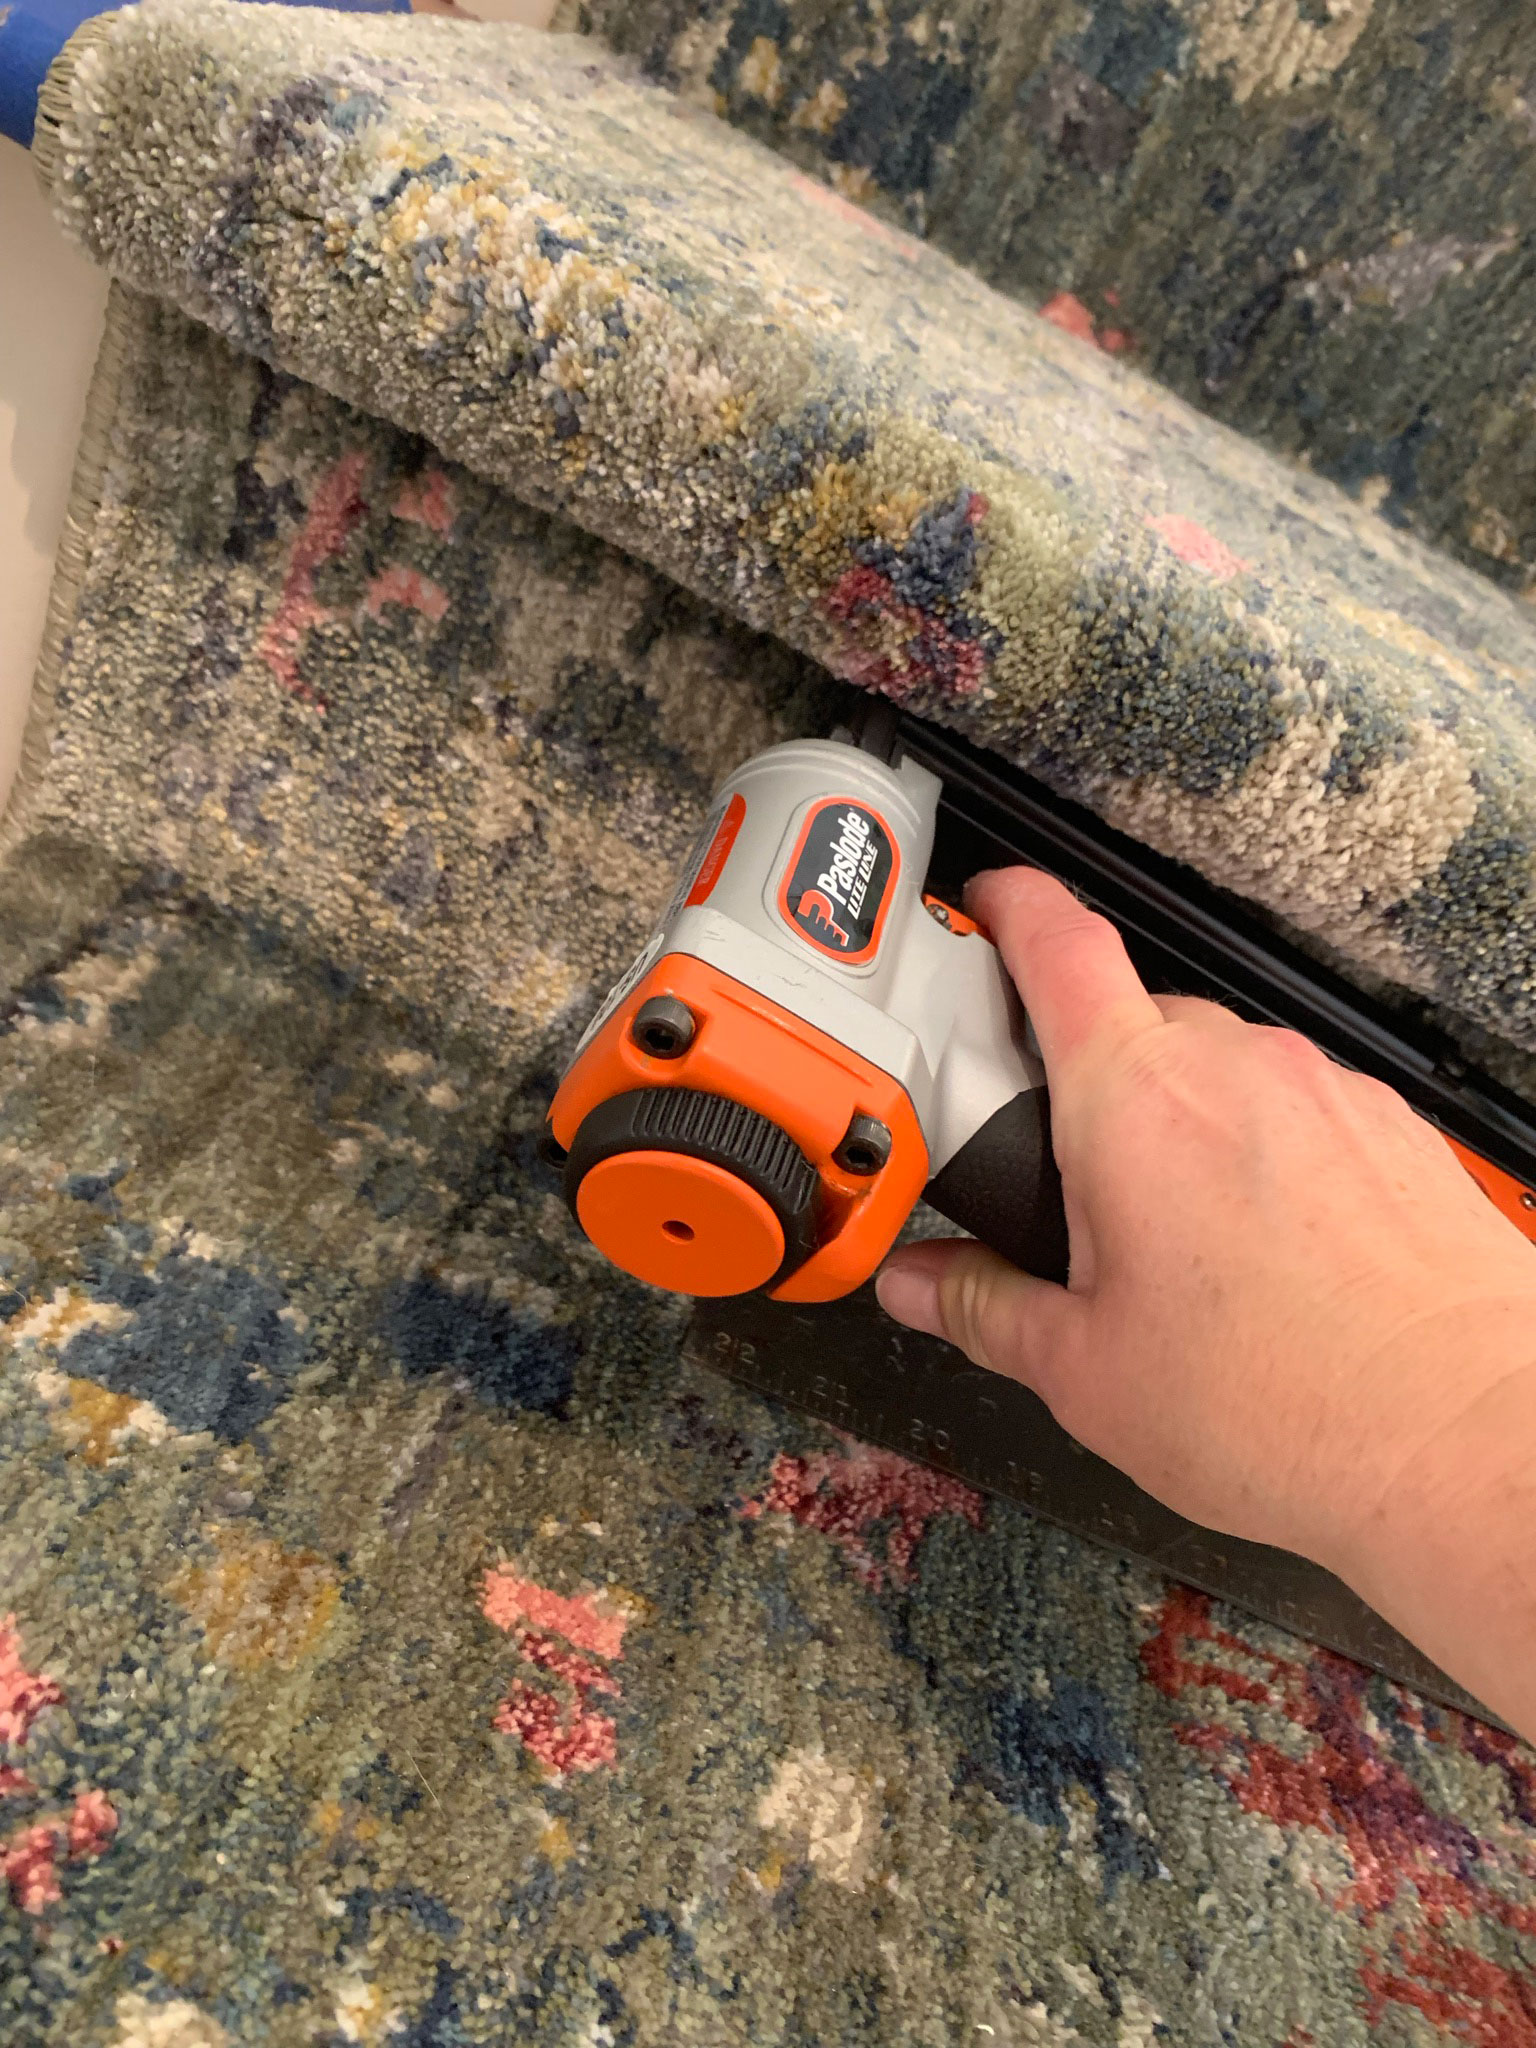
I added a staple every couple of inches. Because my rug has a bit of a pile in it, the staples didn’t show so I wasn’t too worried about putting them in super straight. If you have a low-pile rug, you might want to be a little more careful about the placement of the staples. I have seen people use a sharpie that matches their runner to colour the staples before loading them into the nail gun to camouflage them more, which is an excellent idea.
Working from the top down allows you to kneel on the stairs and sort of bunch up the rug in front of you as you work your way down, and gives the best angle for stapling.
Smooth the carpet down along the riser and push it tightly into the corner at the back of the tread and the base of the riser. I used a carpenter’s square as a makeshift carpet tucker to sort of push and crease the carpet into the corner as tightly as possible. Then, use your staple gun again and staple the carpet into that corner about every few inches.
Make sure the rug pad is in place on the tread as you work your way down the stairs, but just repeat this process with stapling under the nose, then in the bottom corner until you come to the end of the runner, or close to it.
Cut your carpet either under the nose of the stairs or at the base of the riser, in the two places that you are stapling. Use your straight edge (I used my carpenter’s square for this again) to push the runner tight into those corners and run your utility knife along it to cut it. Staple the end securely.
When you start your next runner, push it tightly into that edge and staple down, In my case, I didn’t want to put any staples into my hardwood (only in the risers or the underside of the nosing) so I preferred to have all my seams under the stair nosing. This also helps disguise the seam a little as it’s less visible than the base of the riser.
When I got to the landing, I cut the runner at the base of the first riser.
Matching up with the Landing
By this time I had things sort of figured out and I thought the best thing for me to do would be to cut my landing rug so that it only extended to the base of the first stair going up and just under the first nosing going down. I was a little worried that my 90-degree corner wasn’t super perfect (or my stairs weren’t perfectly 90 degrees) and if I tried to use the whole length of runner up or down from the corner, it would end up crooked on the stairwell.
Since I had worked my way down to the landing and had the upper part of the stairs all done by now (it looked so good!) I used that to line up my corner landing piece. I ended up cutting my landing piece a few inches longer than it needed to be just to make it easy to work with. Then, I lined it up where I thought it should be going down the stairs and going up the stairs so that it lined up with the runner I had already installed.
This is difficult to explain but if you are doing it, it will make sense! Once it was lined up I cut the seam at the bottom of the riser on the landing using my carpenter’s square as a straight edge and utility knife and stapled it in place.
Before I moved down the stairs, I added some more strips of carpet tape to the landing area. The landing rug I thought would have more of a tendency to move about since it was bigger and there were no staples in this area. I could have stapled this down too, but as I mentioned I didn’t want staples in the hardwood in case I decided to remove this in the future. The carpet tape has been working fine for the last year or so since I’ve done this with no movement to report!
Finishing up
Once the landing was secure with the 2-sided tape I stapled the landing runner to the bottom of the first tread nose going down from the landing and cut it there. I was planning on not cutting it and just continuing down, but when I laid out the carpet I could see that it was not totally inside my tape lines (it was a little crooked) so cutting it allowed me to make a minor correction to keep it straight as I made my way down.
The next part was repeating the same thing that was done on the upper part of the stairs, pulling tight and stapling.
At the end of the staircase runner at the bottom of the staircase, I cut it at the base as usual, added my seam sealer, and stapled.
There is a printable How-To card at the bottom of this post if you want to print this out for easy reference!
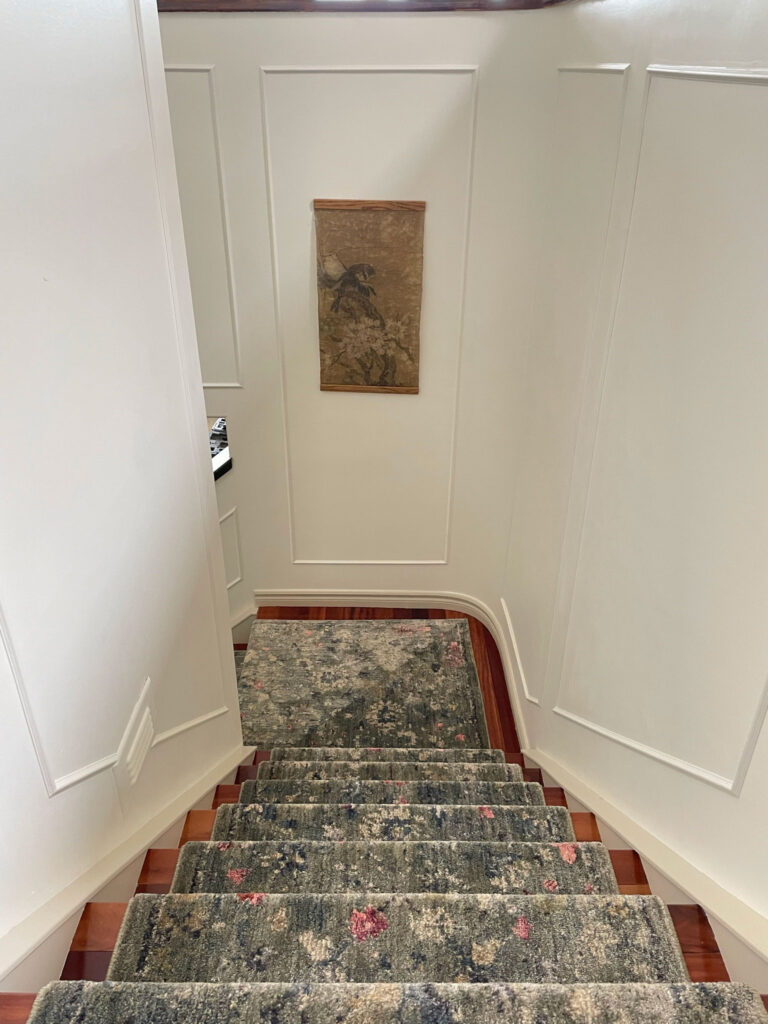
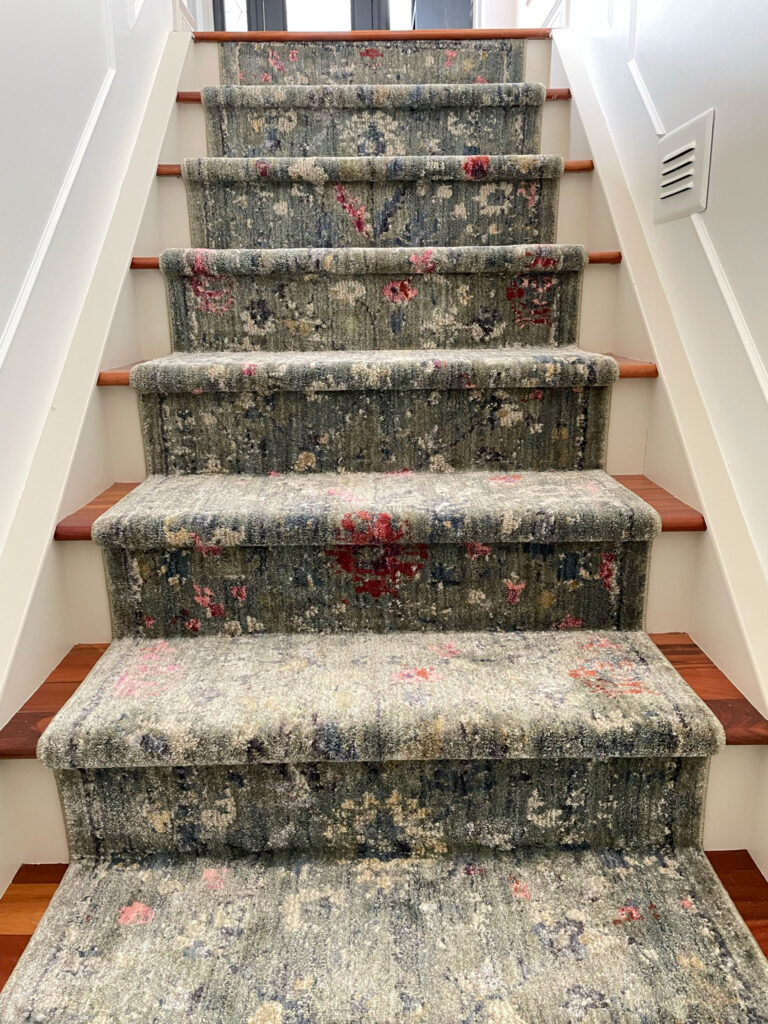
The Final Product
This project really wasn’t all that hard and it’s such an improvement to these stairs! It is nice and soft to walk on with bare feet, and eliminates the safety hazard that was there before with the slippery hardwood. Hopefully, this tutorial gives you the confidence and all your need to install your own stair runner!

Before and After
I love a good side-by-side before and after! Unfortunately, this stairwell wasn’t well documented before so I only have the one true before with the brown paint and the glass cut outs, but you get the idea I’m sure!
How to Install a Stair Runner
How to install a stair runner including how to do a 90 degree turn on a landing
Materials
- Runners long enough to cover the stairs, risers and landing
- Rug Pad
- 2 Sided Carpet Tape
- Carpet Seam Sealer
- Carpet Seam Tape
Tools
- Staple Gun and Staples (Air Stapler or Electric is best)
- Straight edge (like a level)
- Carpenters Square
- Utility Knife
Instructions
- If you have a landing, start by making your 90-degree corner. Overlap two runners to make a corner on the landing. Once you are happy with how they are sitting, line up a straight edge from the inside corner to the outside corner and use your utility knife to cut through both runners at once. (You might want to put a board underneath so you don't damage whatever you are cutting on).
- Spread a little carpet seam sealer on the cut edges
- Cut a strip of carpet seam tape and lay it sticky side up. Place your first cut corner piece halfway onto the tape. Place the second cut corner piece to butt up tightly against it
- Place a board along the seam and something heavy on top and let it set up for a while (we left ours overnight).
- Cut rug pads for each step about 3 inches narrower than your runner and a few inches narrower than the stair depth. If you have a landing, cut a rug pad for this part too. You can secure the rug pad with double-sided carpet tape. I secured only the landing piece, the parts on the treads stayed in place without tape.
- Mark out where the edges of your runner will be using painter's tape to keep the rug centred as you go.
- Check if your runner is square at the end using your carpenter's square. If it isn't, cut it off to be square and seal the edge using the carpet seam sealer.
- Start under the first nose of the top step and staple every few inches to secure the runner to the underside of the nosing
- Smooth the carpet down the riser and use something to crease the carpet into the corner where the riser and the tread meet. A carpet tucker works well for this, or a straight edge like a carpenter's square. Once you have the carpet nice and tight against the riser, add staples to the riser as close to the bottom of it as you can, every inch or two or as needed to keep it secure.
- Pull the carpet tight over the rug pad and the next stair tread and wrap it around the nose. You can use the carpenter's square or carpet tucker again here to push the carpet tight into that corner under the stair nosing. Staple as before.
- Continue on in this manner until you near the end of the runner. Decide where to place the seam, they are much less noticeable if you put them under the stair nosing. Staple it into the underside of the stair nosing and then use a utility knife and a guide (Like the carpenter's square) to cut the carpet nice and straight in that corner. Add some seam sealer.
- Start a new runner, butting the end up to the last one and stapling it in place. Keep in mind you may have to cut off the end binding or pattern if there is a border, or square the end again. If you do cut it, be sure to seal the seam with the seam sealer.
- Continue in this matter until you reach the landing. Cut the runner at the base of the last stair (where the landing and the stairs meet).
- Place your 90 degree corner that you previously made for the landing onto the landing and line it up with the runner that you just installed going up. (You might want to cut the runner to make it easier to handle and line up, just give yourself a few extra inches so you can more precisely cut it once it's lined up.) Line up the landing runner and the stair runner and Cut the landing running at the bottom of the last stair tread. Staple it in place.
- Install a few staples (or double sided carpet tape) here and there on the landing through the rug.
- For the portion that extends down the next set of stairs, check how straight it is with your marker tape. Often walls and stairs are not perfectly straight so it's unlikely this rug will be perfectly straight and within your tape lines. If it isn't, just cut the rug under the first stair nosing, square the end of the rug again, and start over installing as you did for the upper portion of the stairs.
- Continue down the stairs until you reach the bottom. At the bottom, cut the carpet with a straight edge and knife at the base of the last riser, staple, and add seam sealer. You're all done!
Notes
If you have a landing that turns twice, (like a u-shape) you can do the same thing as I did above, you will just need to make 2 - 90 degree corners instead of one.


Thank you for your excellent instruction; clear, vivid photos and material / tools needed to complete the project. We have just moved into our home here in Virginia ( it’s 30 yrs old), after moving from a large family home in Upstate NY where we lived for 53 years. I am an avid DIYer, have already tackled wallpapering powder room, painting laundry room and replacing 5 ceiling light with updates. The stairs are hardwood underneath dull white pile carpet, can’t wait to redo stairs, you are my inspiration! Thank you.
Thank you Susan! I’m glad you found it helpful, good luck with your project!
I agree with Susan! Excellent instructions. You are amazing, Erin, esp when you say something “isn’t that hard”!
Sort of surprised no railings on your stairs. The runner would definitely be helpful.
Thanks Mary! Ahh yes adding a railing to the stairs has been on our radar too. We were surprised that there wasn’t one either, there definitely should be!