Clever Ways to Hide Outlets in the Kitchen
When we renovated our kitchen, I thought long and hard about where my electrical outlets would be. Kitchen outlets are essential to making a kitchen convenient, but looking at unsightly outlets isn’t always the best design choice. I considered a lot of different clever ways to hide outlets in the kitchen and I did a few myself, so let’s go through your options!
This post may contain affiliate links. That means if you purchase anything from these links I earn a small commission, at no extra cost to you! This helps support my blog, so thank you!
Table of Contents
- Disclaimer – Check Your Local Electrical Code
- Camouflage Them!
- Outlet Placement
- Power in Kitchen Islands
- Cover the outlets with accessories
- Embrace the Outlets
- Some final thoughts on how to hide outlets in the kitchen
- Shop This Post:
- You might also like:
Disclaimer – Check Your Local Electrical Code
Different countries (and even different states and provinces within the same country) have different local building codes that they follow. So just because you saw someone on the internet using creative ways to hide their power outlets, it does not mean that you can do the same thing where you live.
In Alberta where I live, you are not able to put an electrical outlet inside of a cabinet with a door unless it has a limit switch that shuts the power off when the cabinet door is closed. In many parts of the United States, that is not a part of the code and many people have outlets inside cabinets. So before you begin, check your local codes or run your ideas by your friendly neighbourhood electrician!
Camouflage Them!
The easiest way to hide your outlets is simple camouflage! Is your island black like mine? Be sure to use black outlet covers and black outlets. Is it going in white tile? Use white covers and a white outlet.
I’m here to tell you that all the outlets and covers in your house don’t have to be the same and there are colours beyond white outlets! The outlet and cover you use should fit the space they are in. Think about the background that the outlet is on and swap out that cover or even the outlet itself to blend in.
Nowadays there are some really great paintable covers that you paint to match the surface they are on and they really do a good job of making those outlets disappear!
There are some companies on the market now like Trufig that make a specialty flush outlet that can be painted to match the existing background with a faux finish and really blend in.
Outlet Placement
Think about the location of your outlets in the design of your kitchen too. There are electrical codes that govern how many you need and where. They also govern what type of outlet you need (like you need a GFCI outlet (ground-fault circuit interrupter) near a sink). You need one for so many feet of countertop even if you don’t want one.
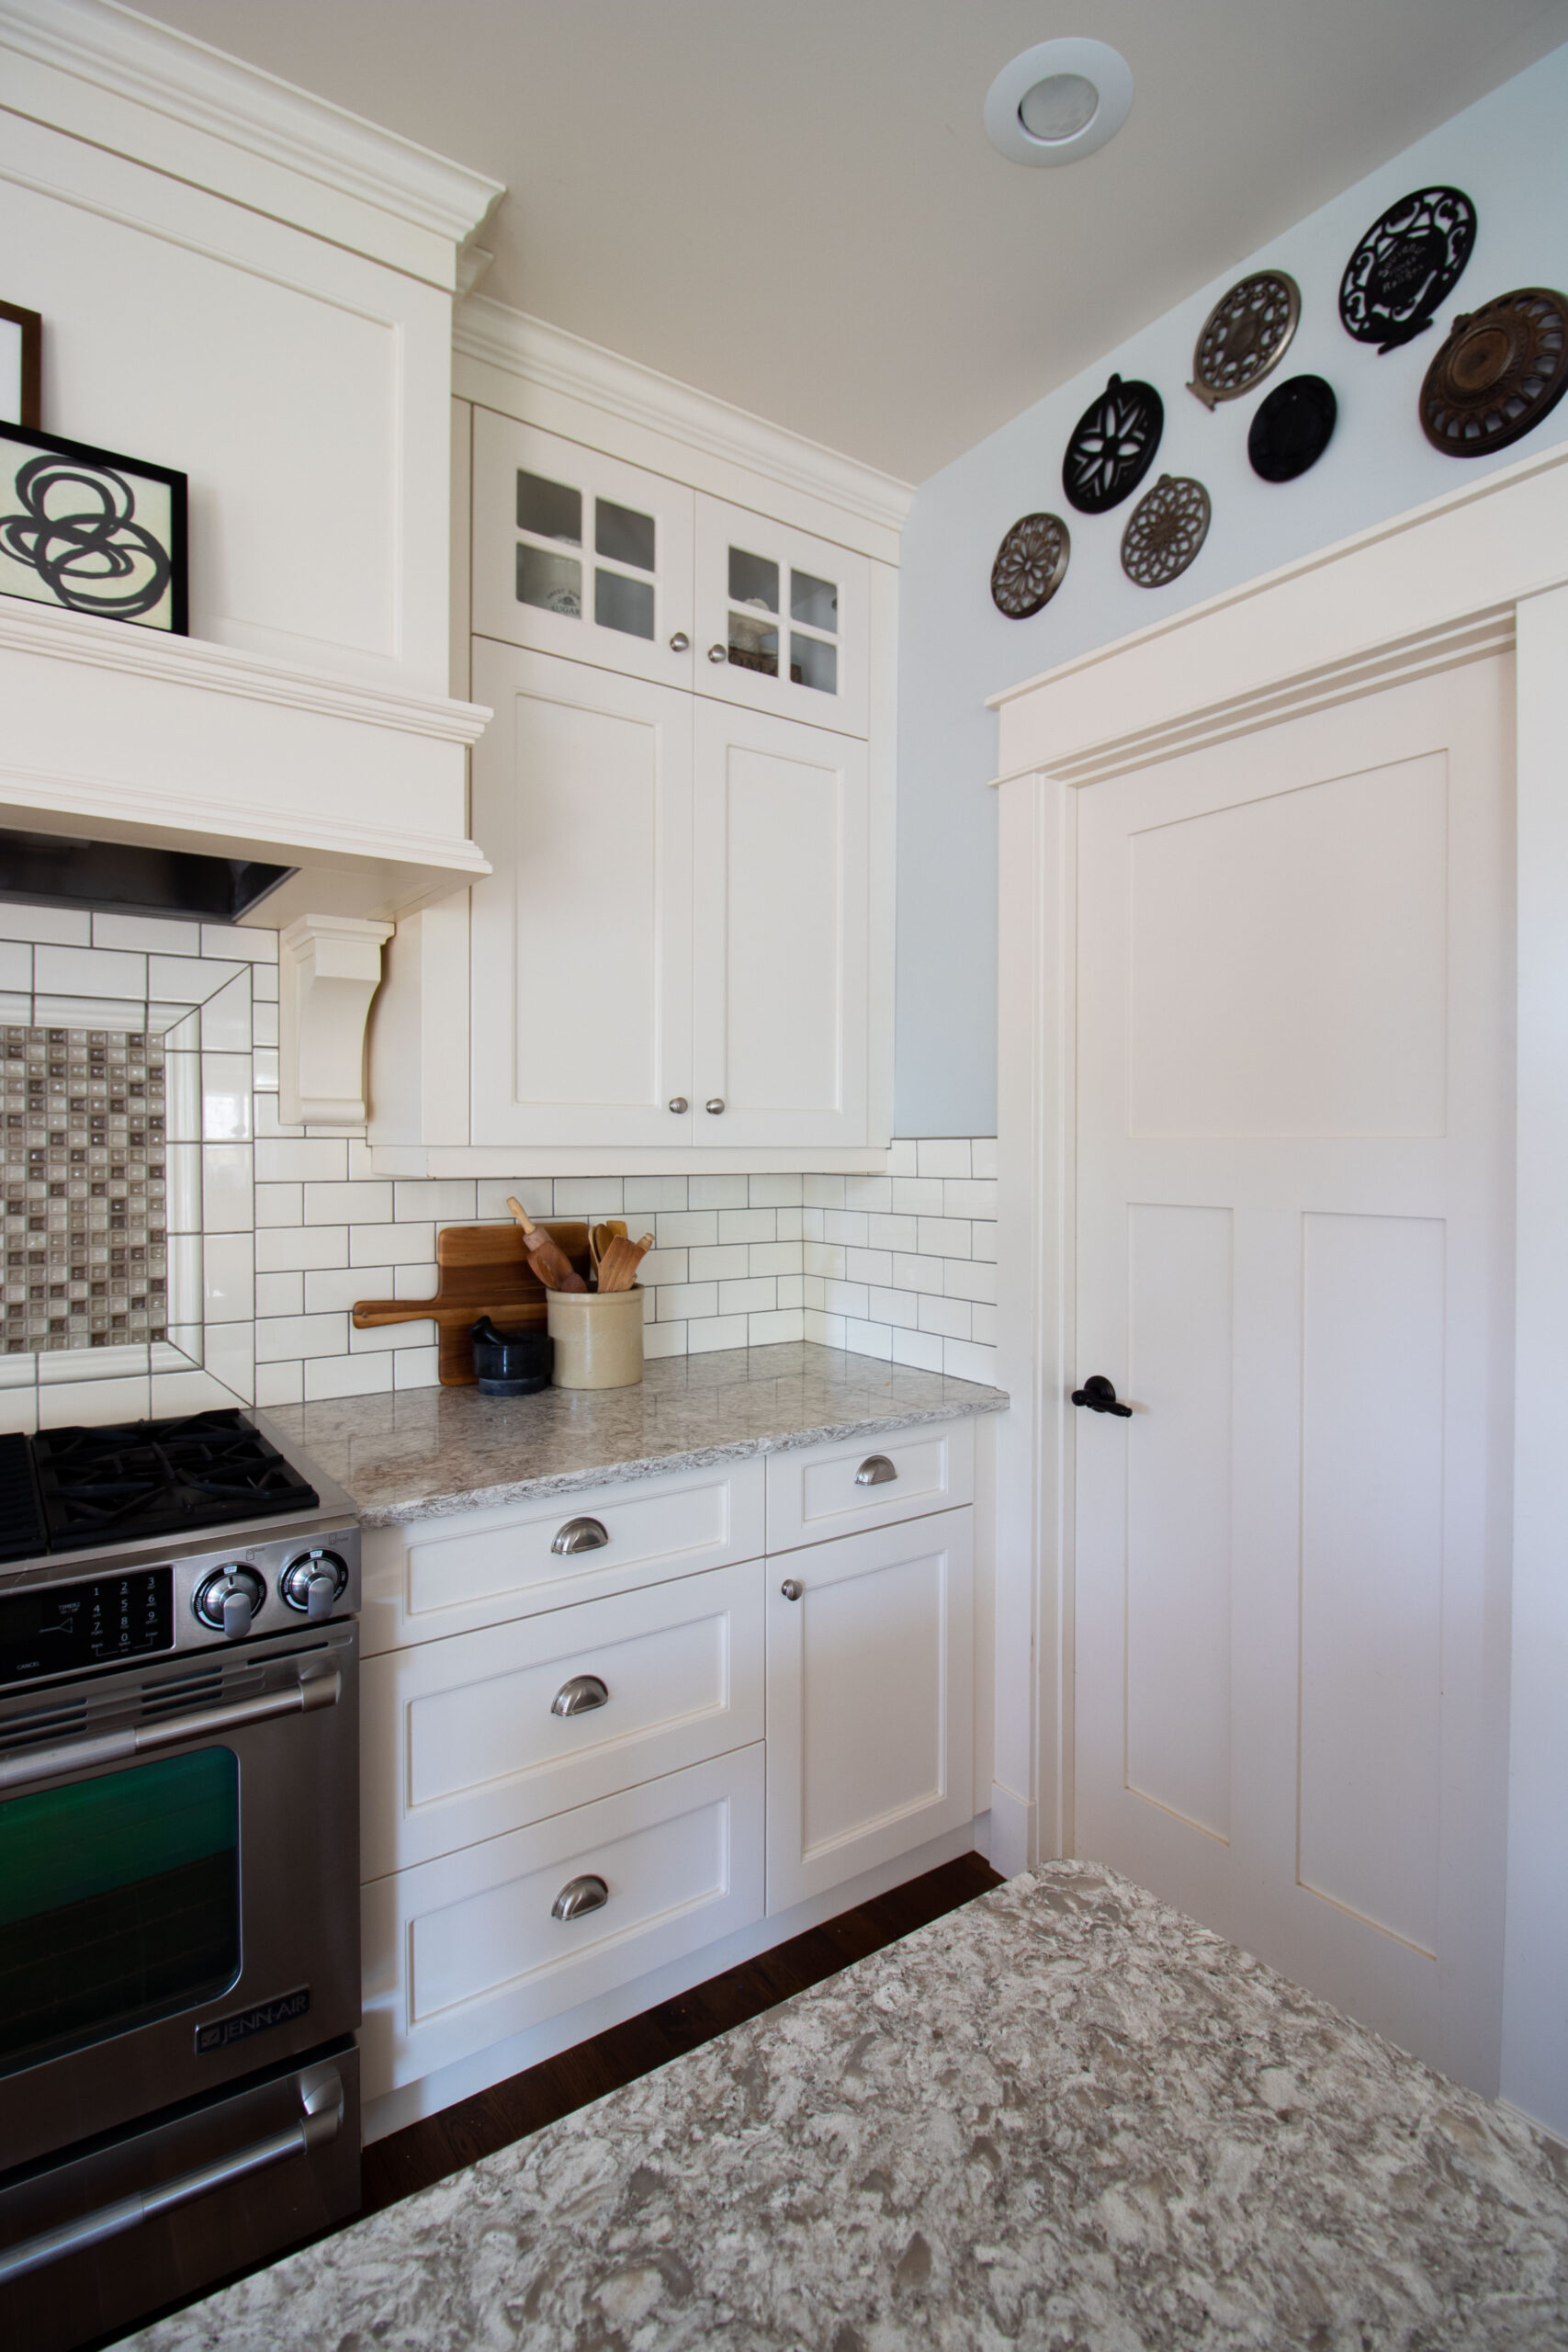
Once you know where you need to have them by code, you can play around with the exact location just a little bit. For code, we needed to have one on either side of my range but I did not want them to mess up the look of my kitchen backsplash tile. So I placed an outlet on the side wall in a horizontal position instead of on the back wall. I used a white outlet so it blends in, and now it is a lot less noticeable.
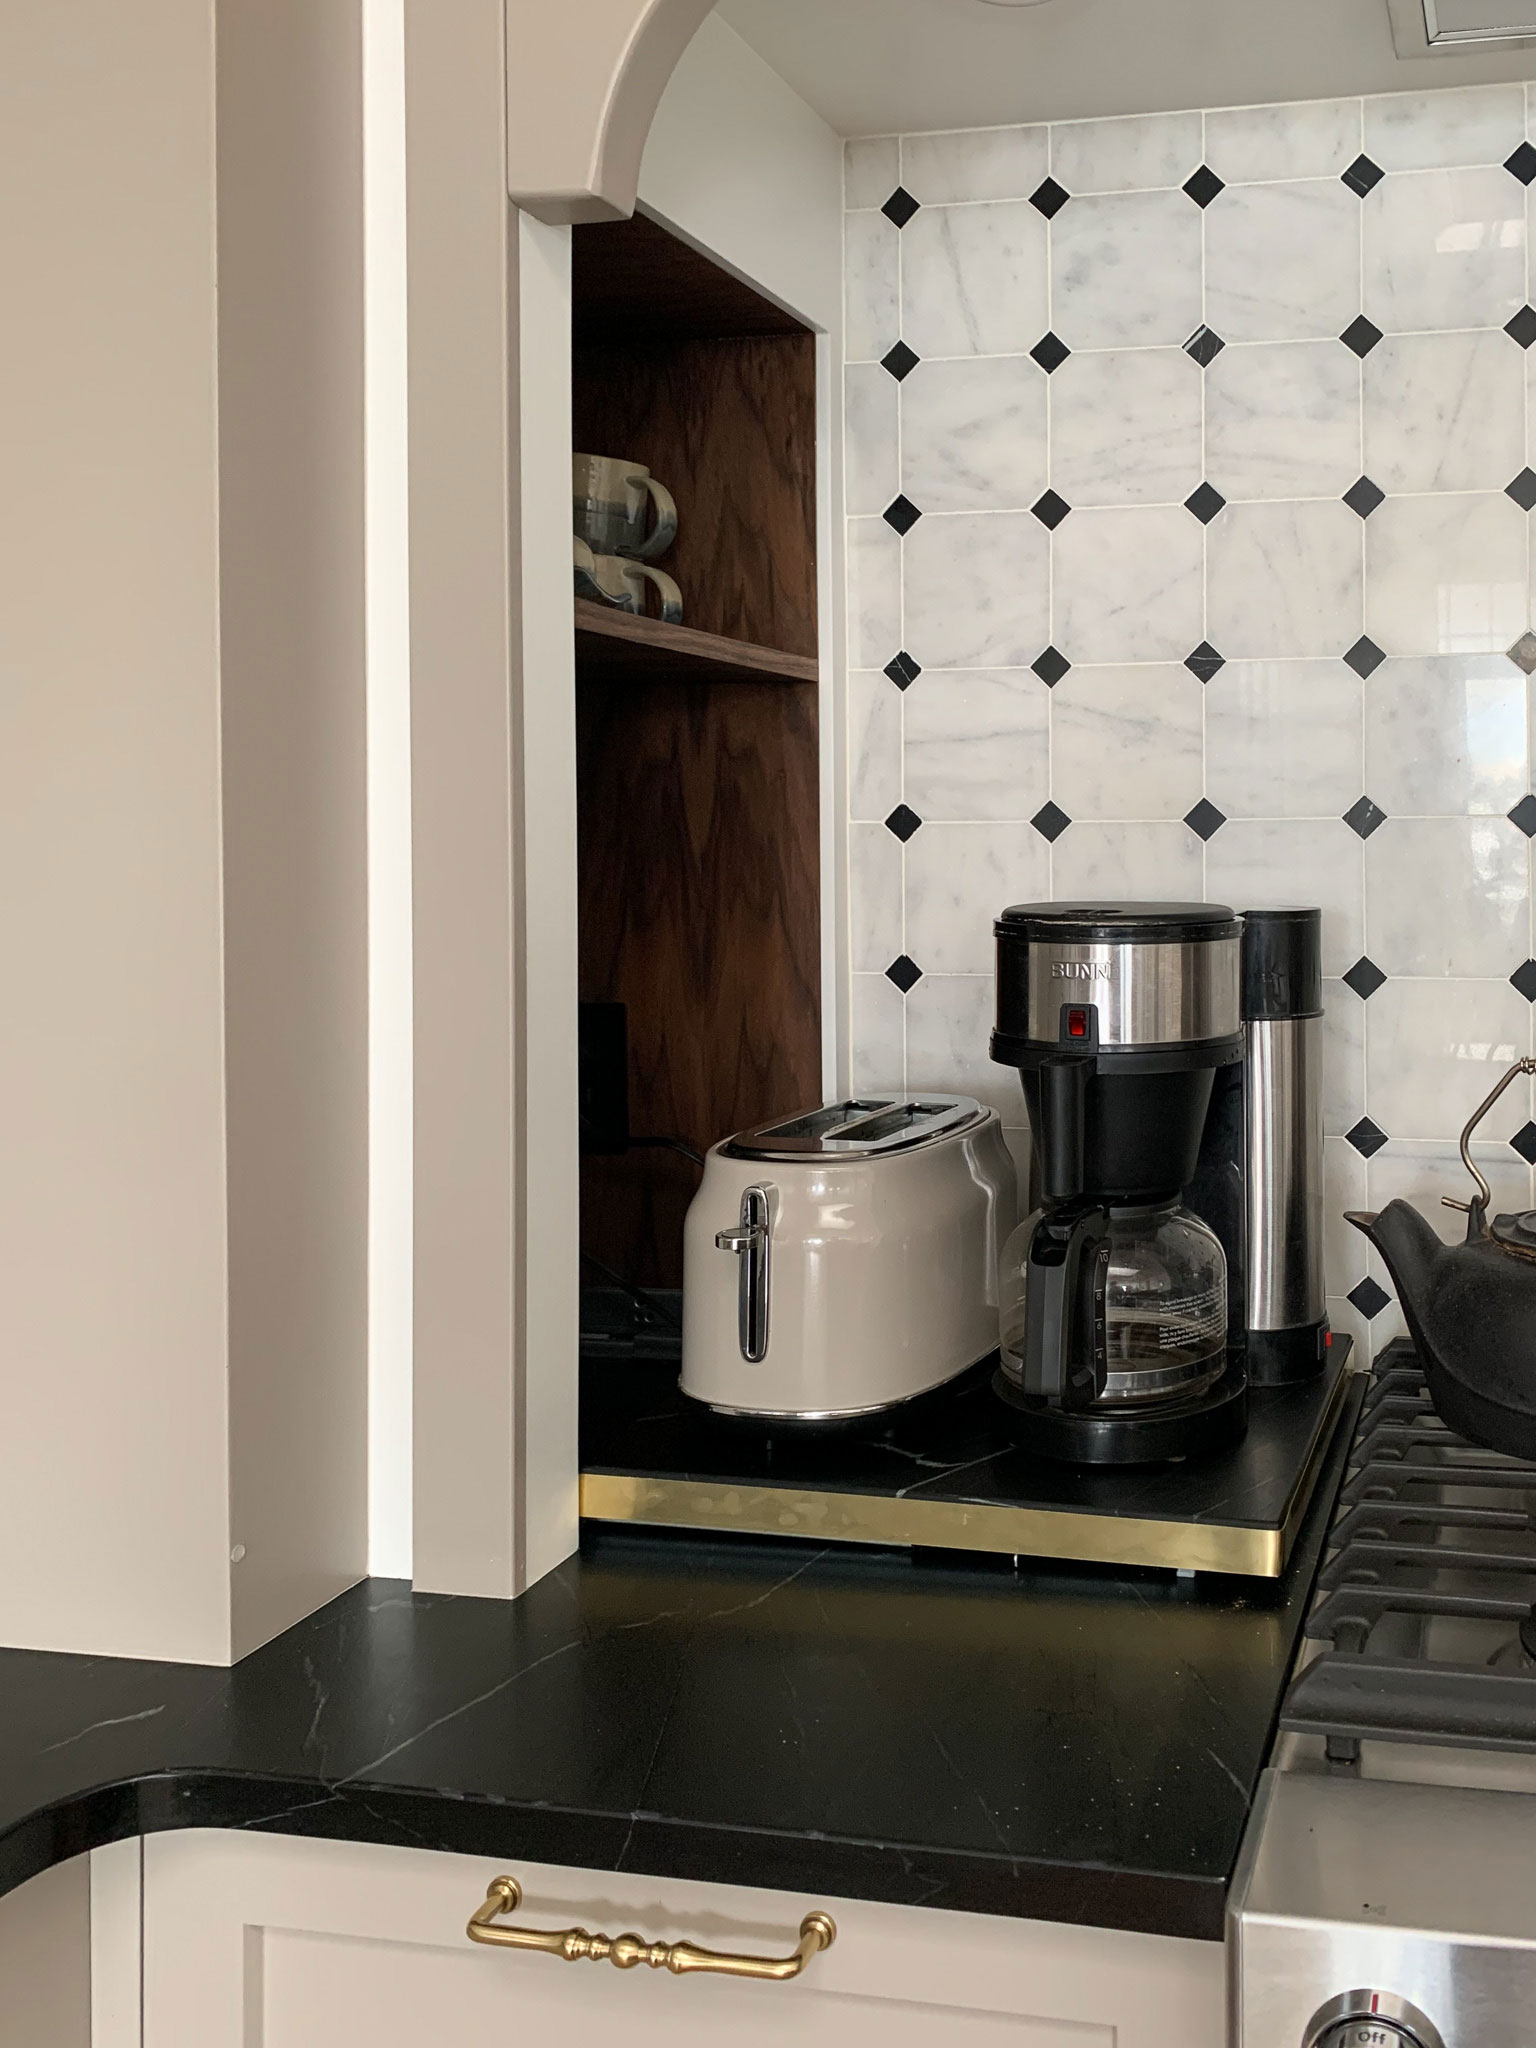
Placing the outlet low and horizontally as I did above also helps with camouflaging them later, they will be less visible behind any countertop styling or your coffee pot if they are lower on the backsplash.
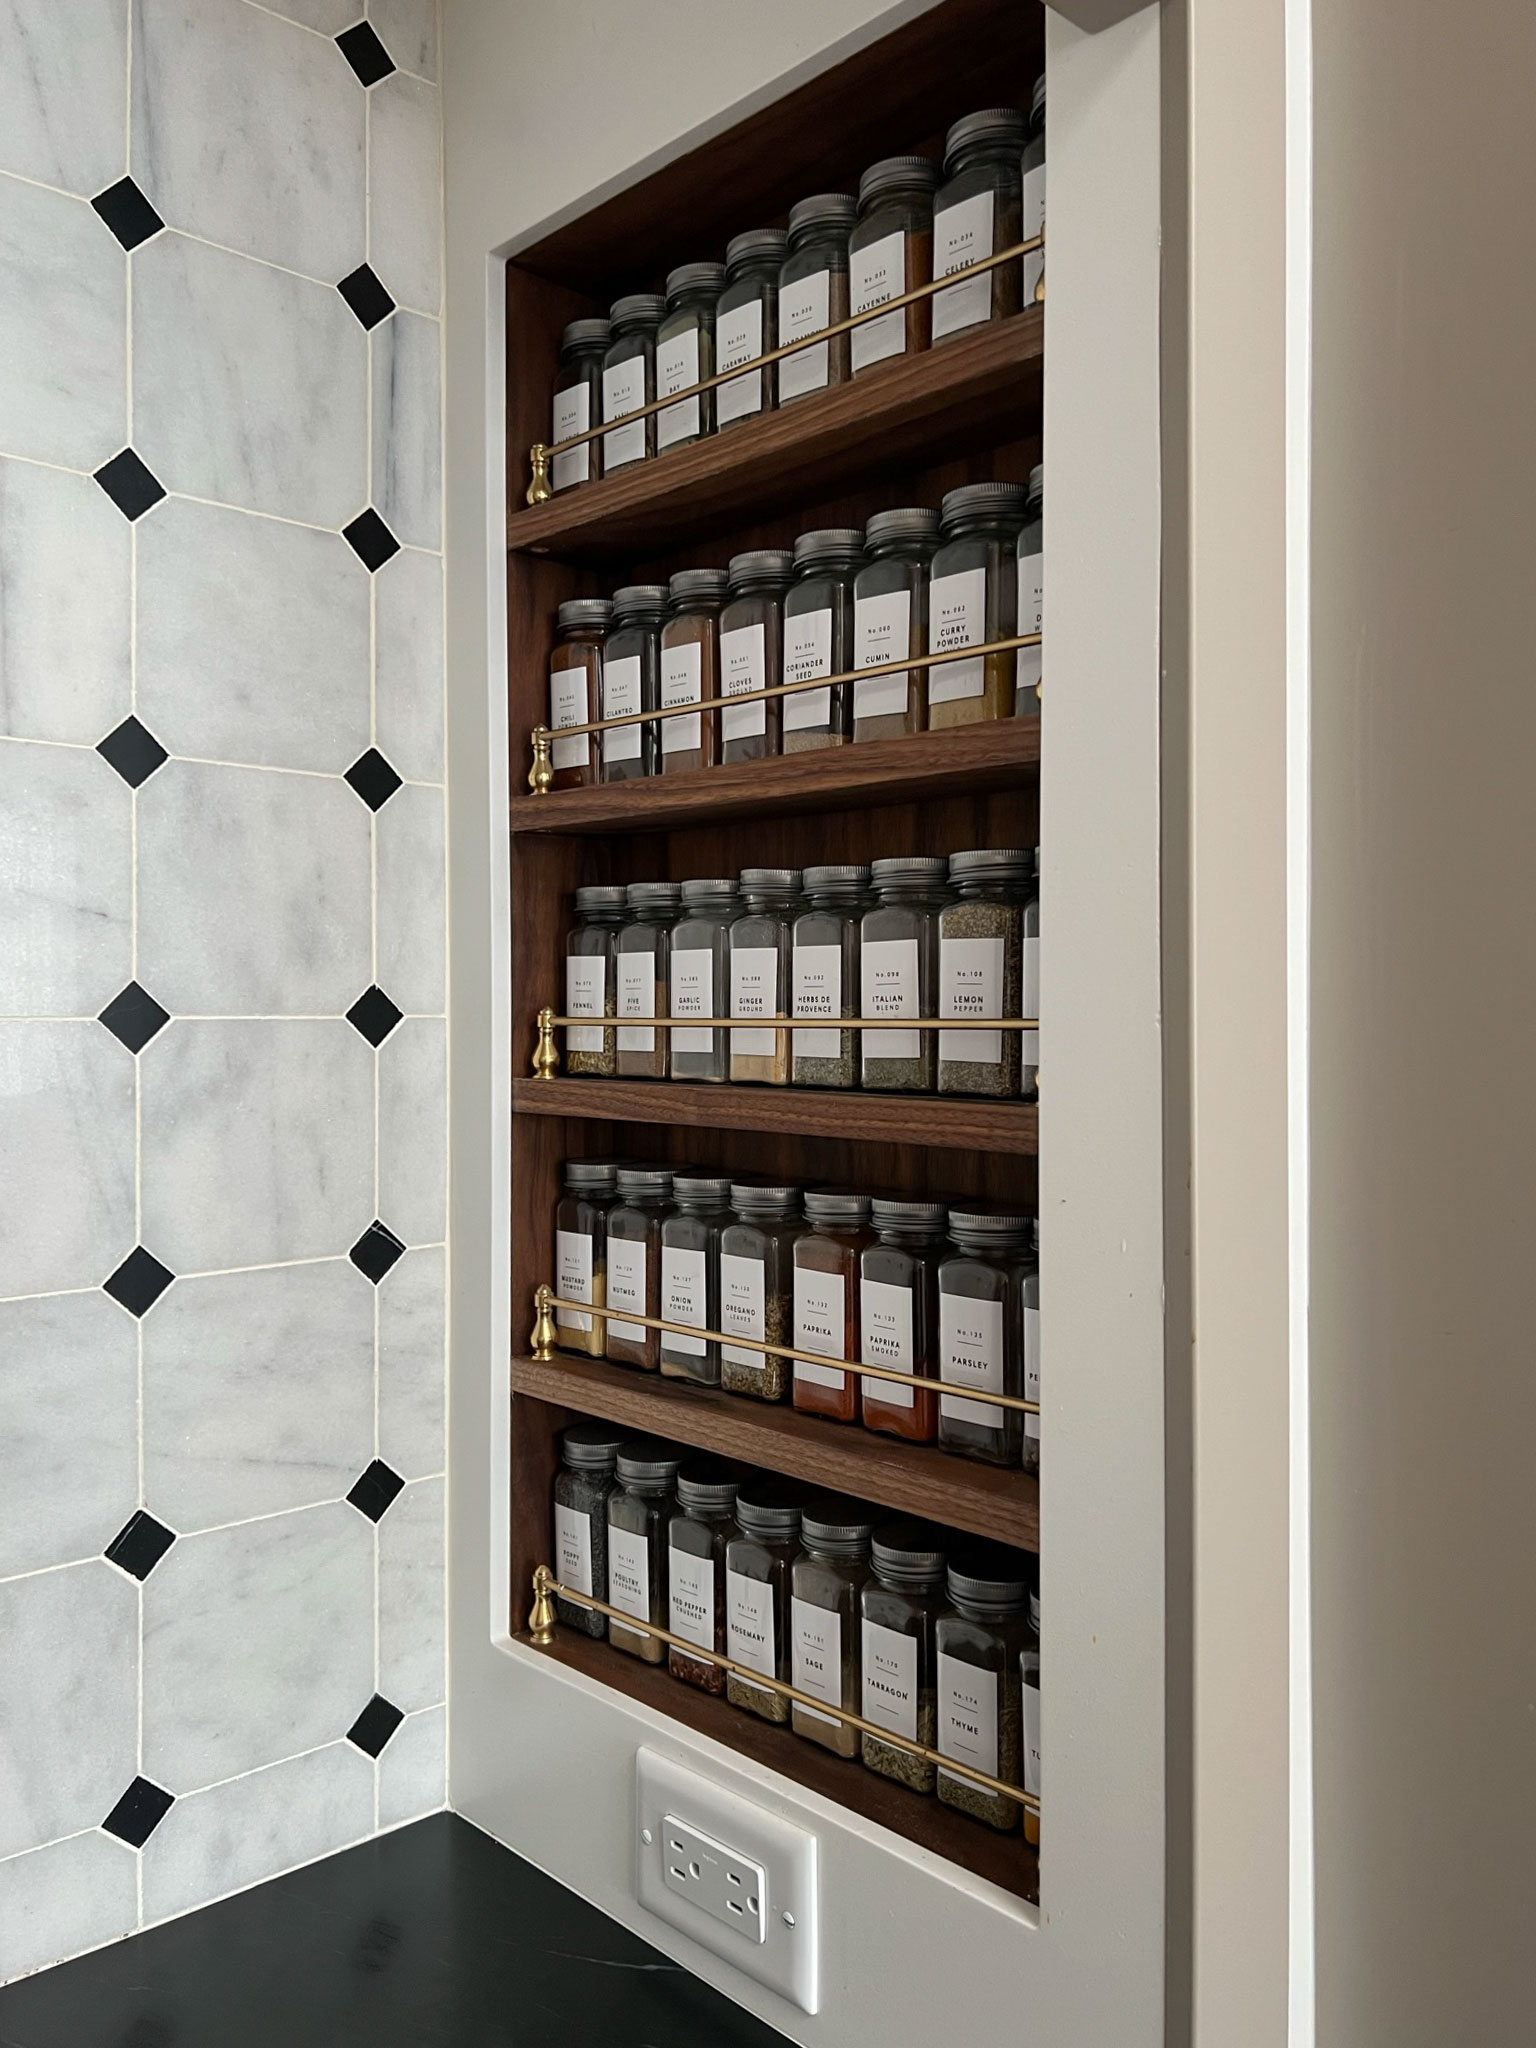
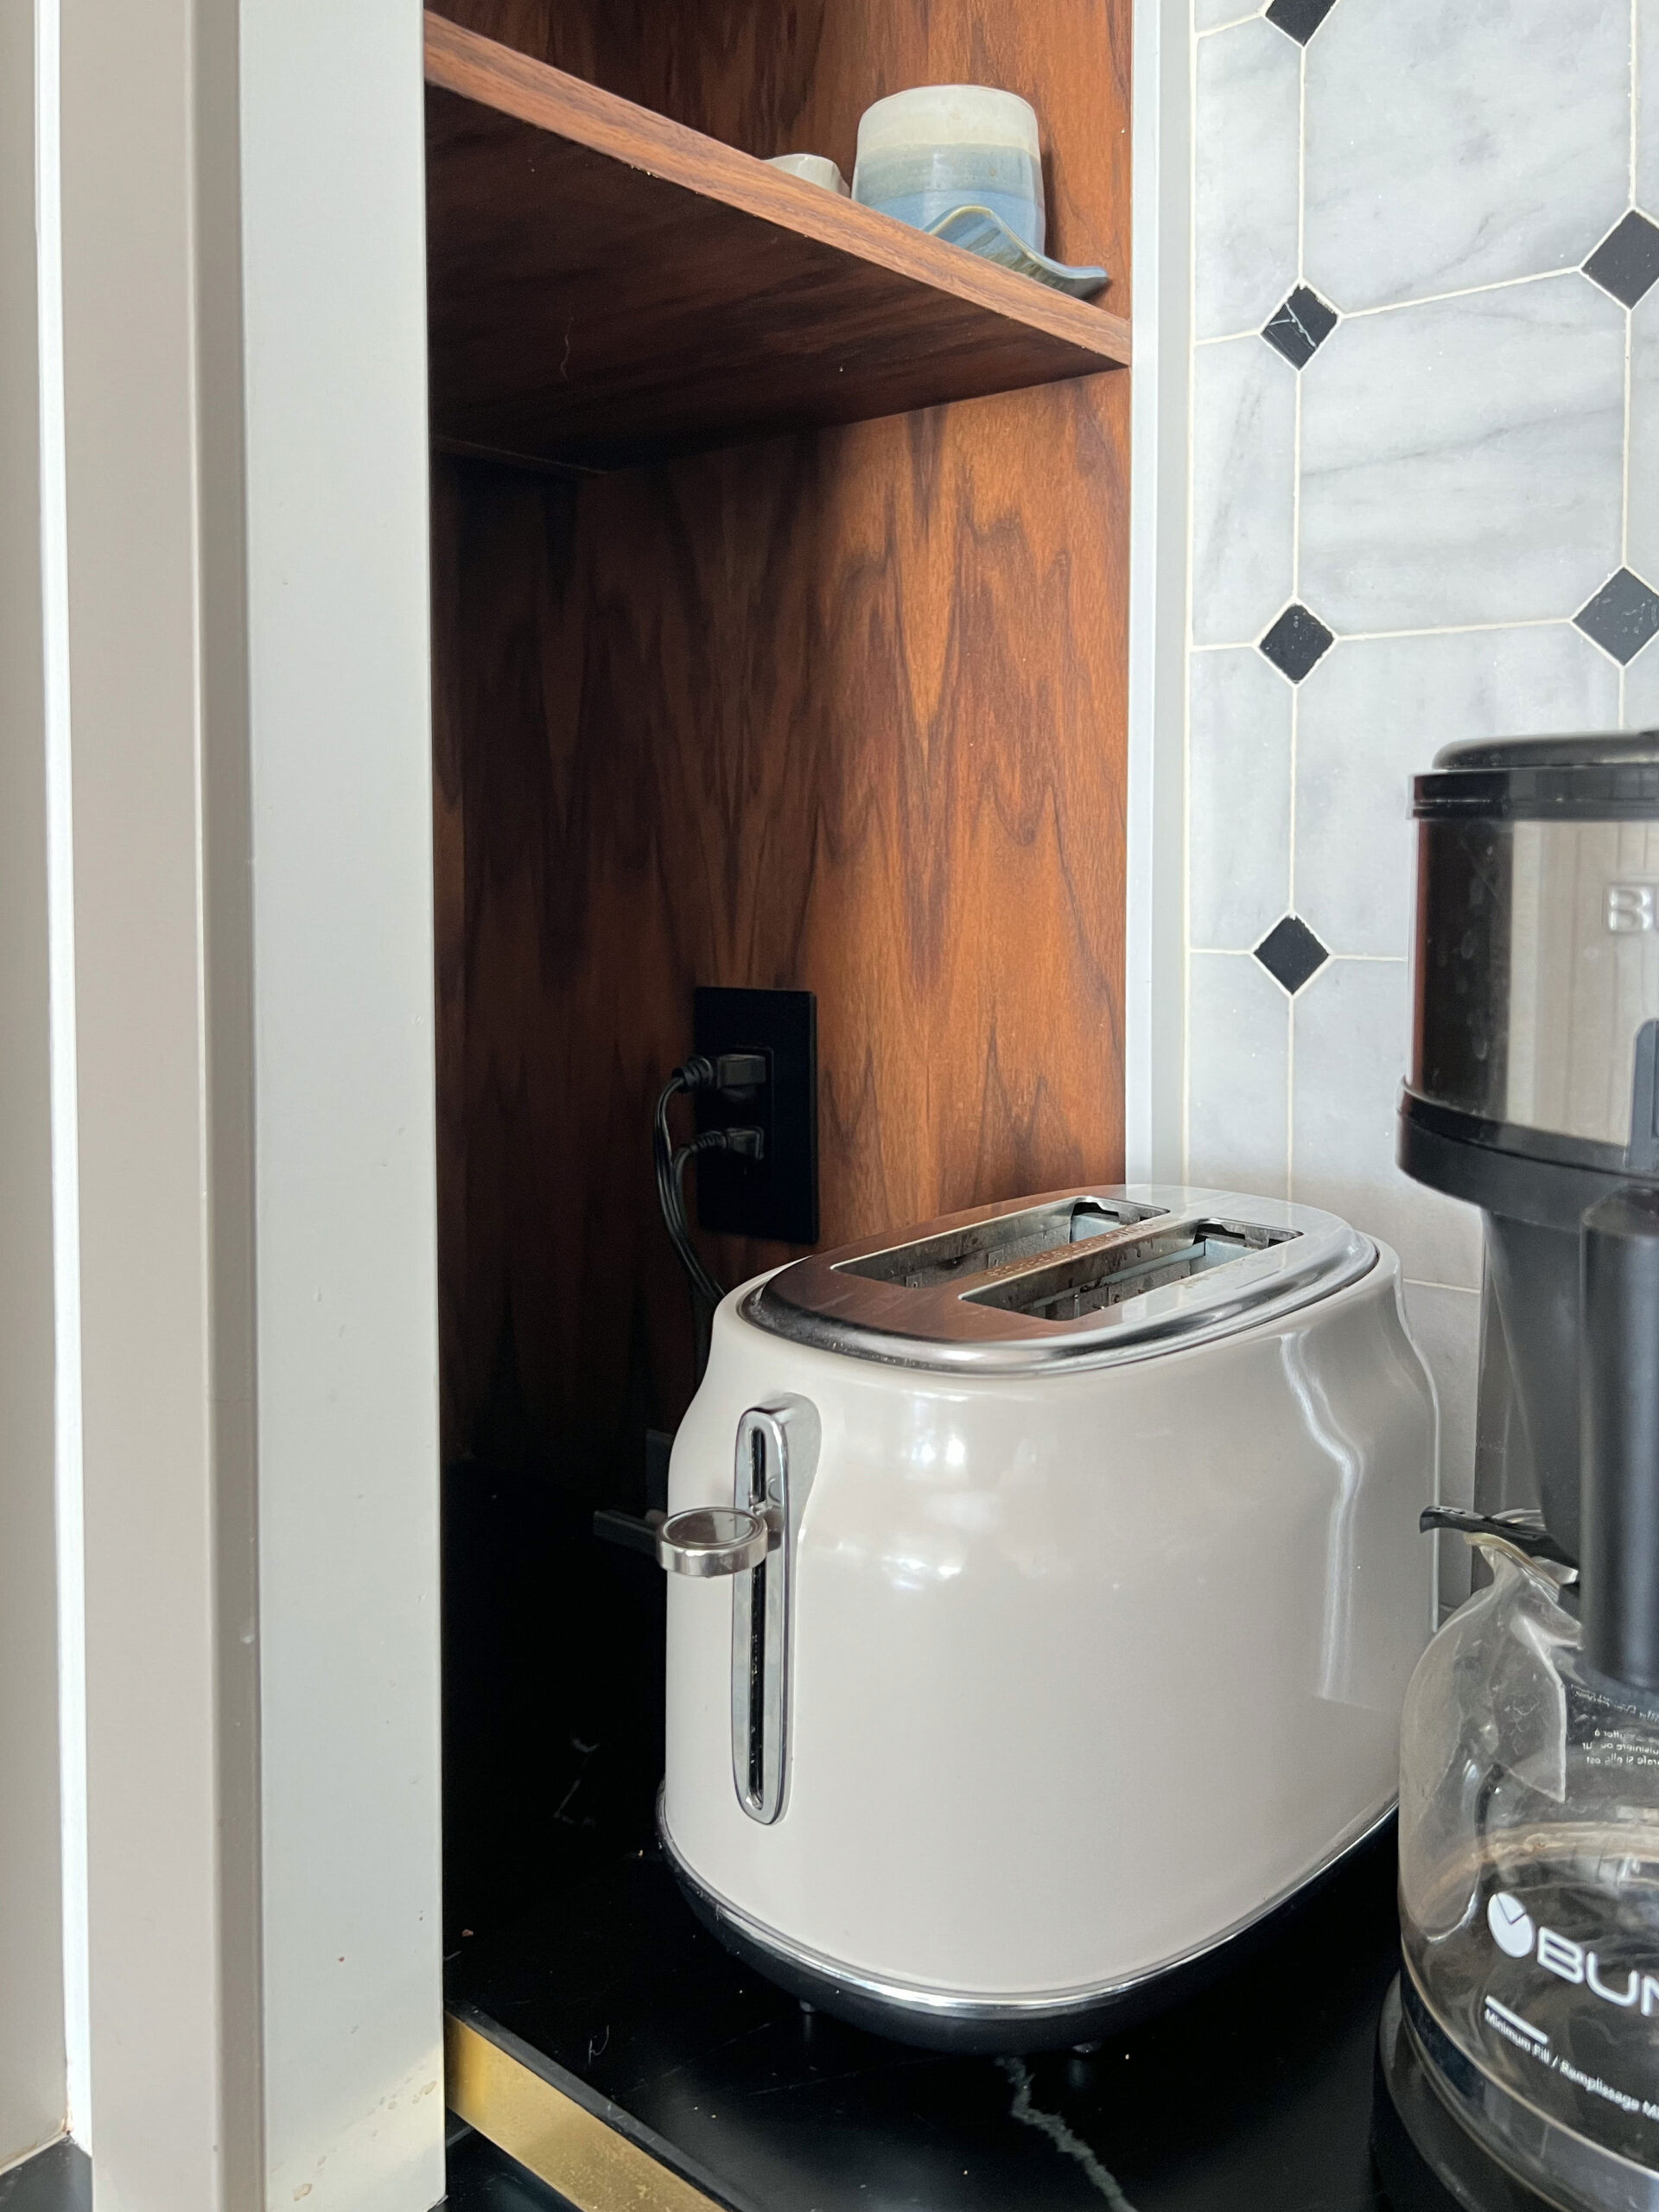
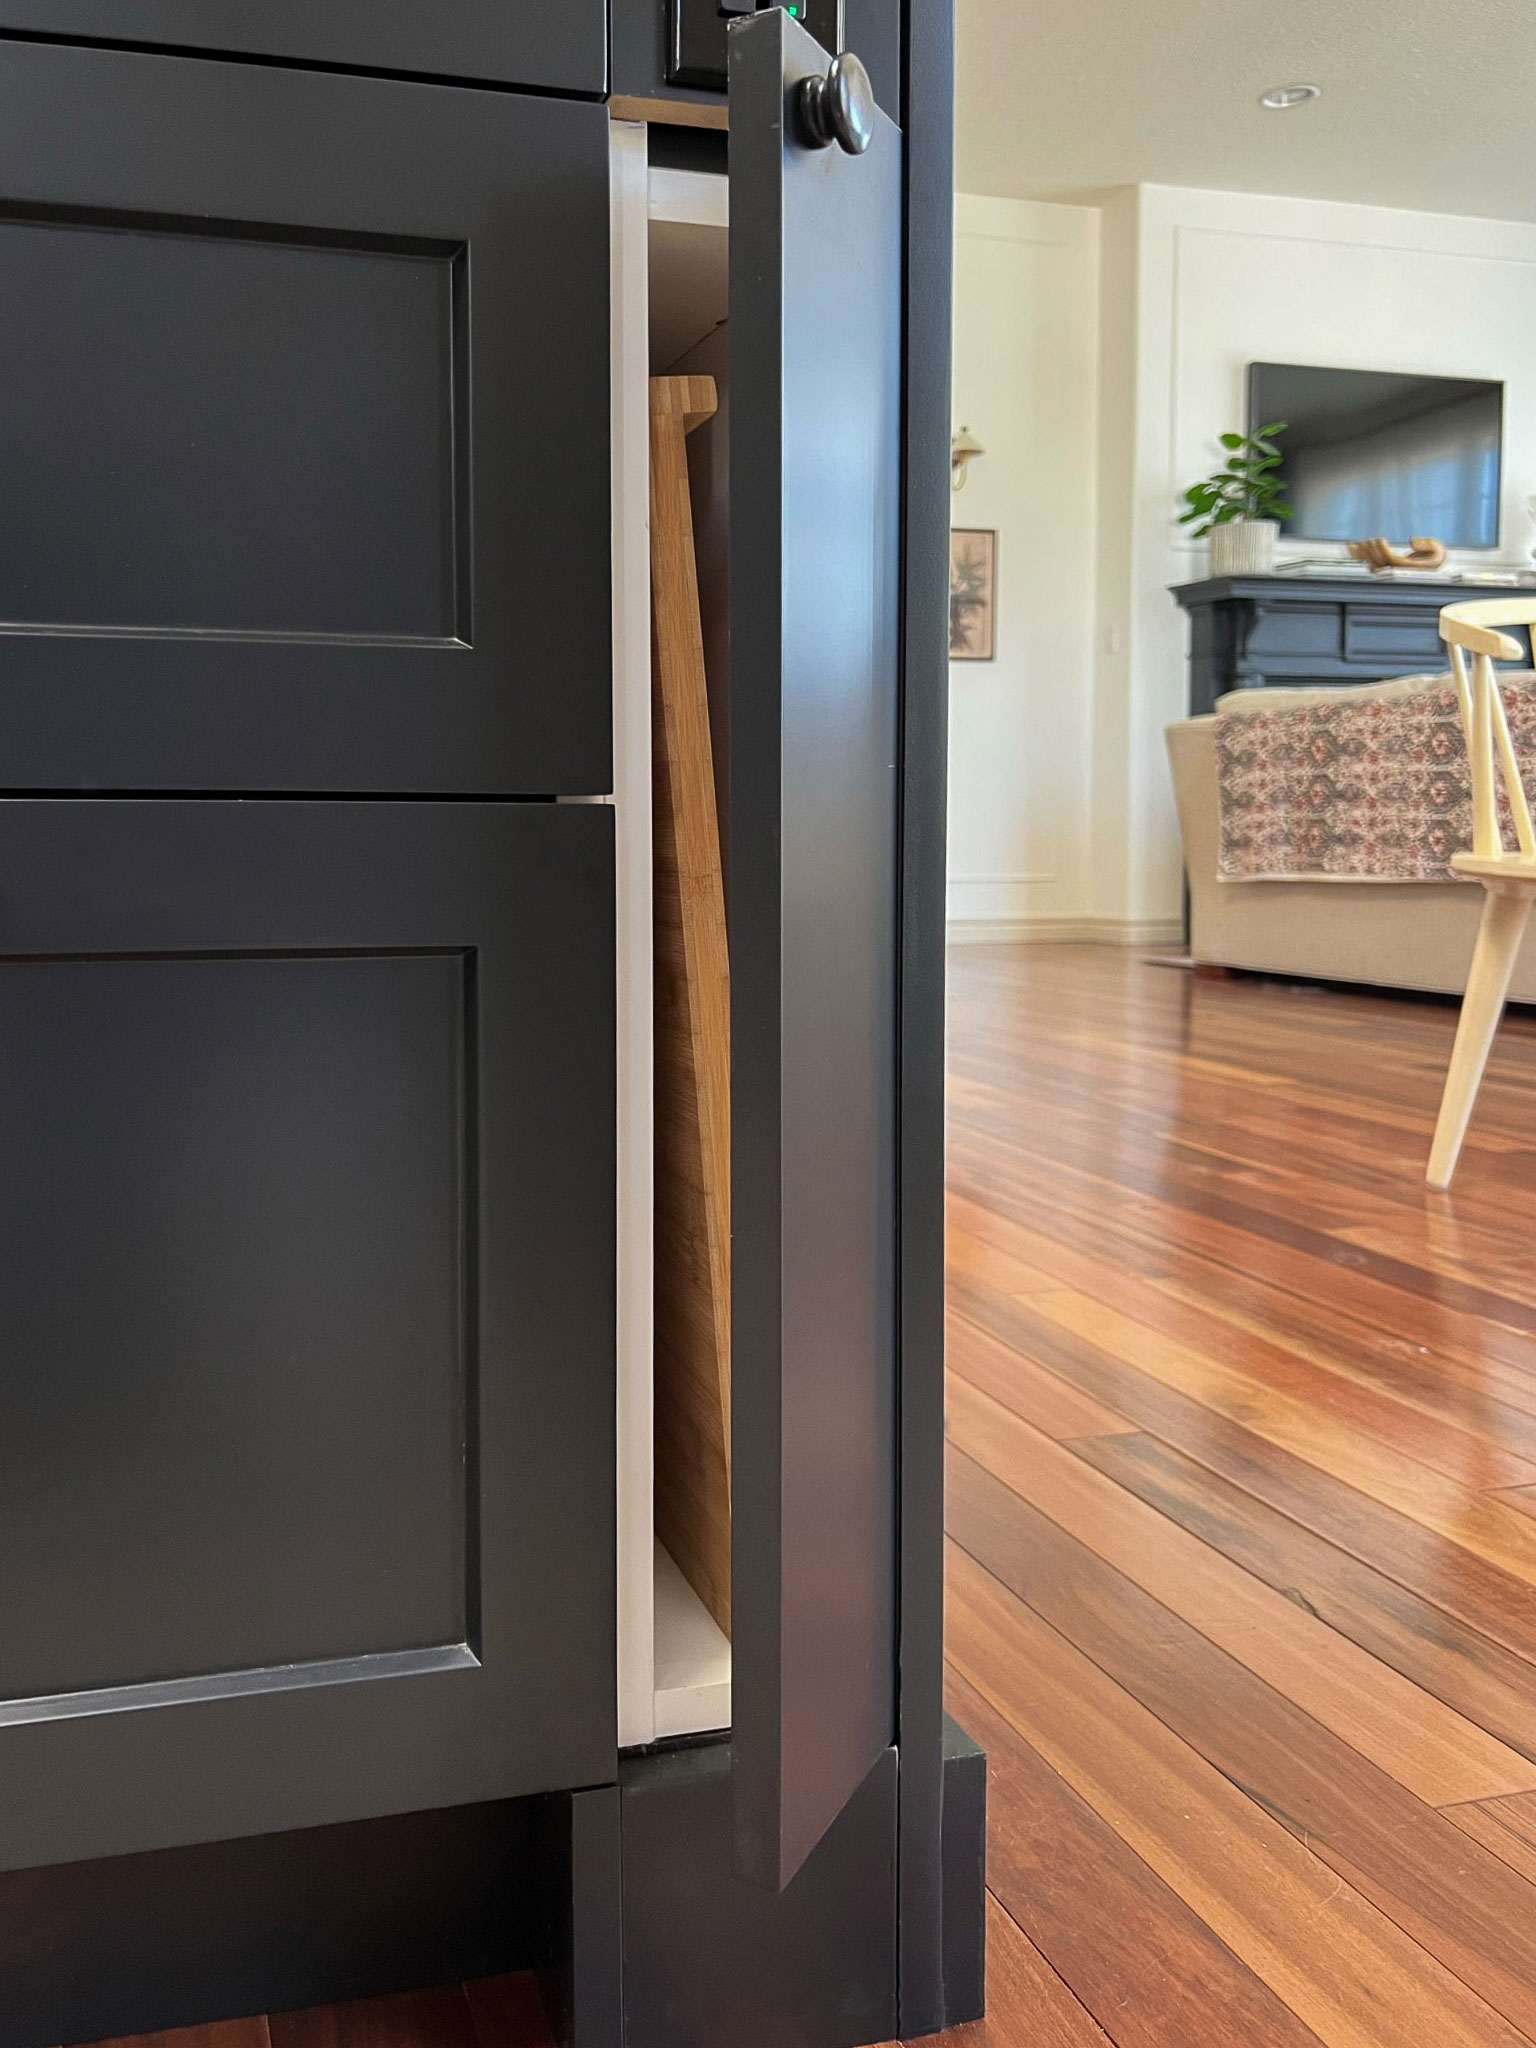
On the left side of the range, I built a little pull-out sliding tray for small appliances which I was not able to put a door on due to our national electrical code. However, I was able to place an outlet deep within the recess of that niche (and made it black so it blended in even further) and now you can’t even see it back there.
There are under-cabinet power strips and outlet boxes you can install under your upper cabinets. This is another way to have a lot of easy access to outlets without being able to see them unless you bend down to look at them.
Power in Kitchen Islands
Most kitchen islands require a power source on at least one end (or both ends) of it and it can be difficult to know where to put them as there is no wall to place them on. Here are a few solutions for the island:
Option 1 – Add space to the Island for the Cabinet Outlets
When I was designing my kitchen island, I had dreams of a beautiful side panel that had v-groove moulding and was a gorgeous, uninterrupted space with no outlet plates messing up that surface.
However, on an island, there are no vertical surfaces to put an outlet so the side of the island is often where they are placed. This is not always something that the cabinet company thinks of ahead of time (in my last two kitchens, neither companies that I worked with brought this up.). If you know about it, you can accommodate it in your kitchen cabinet design.
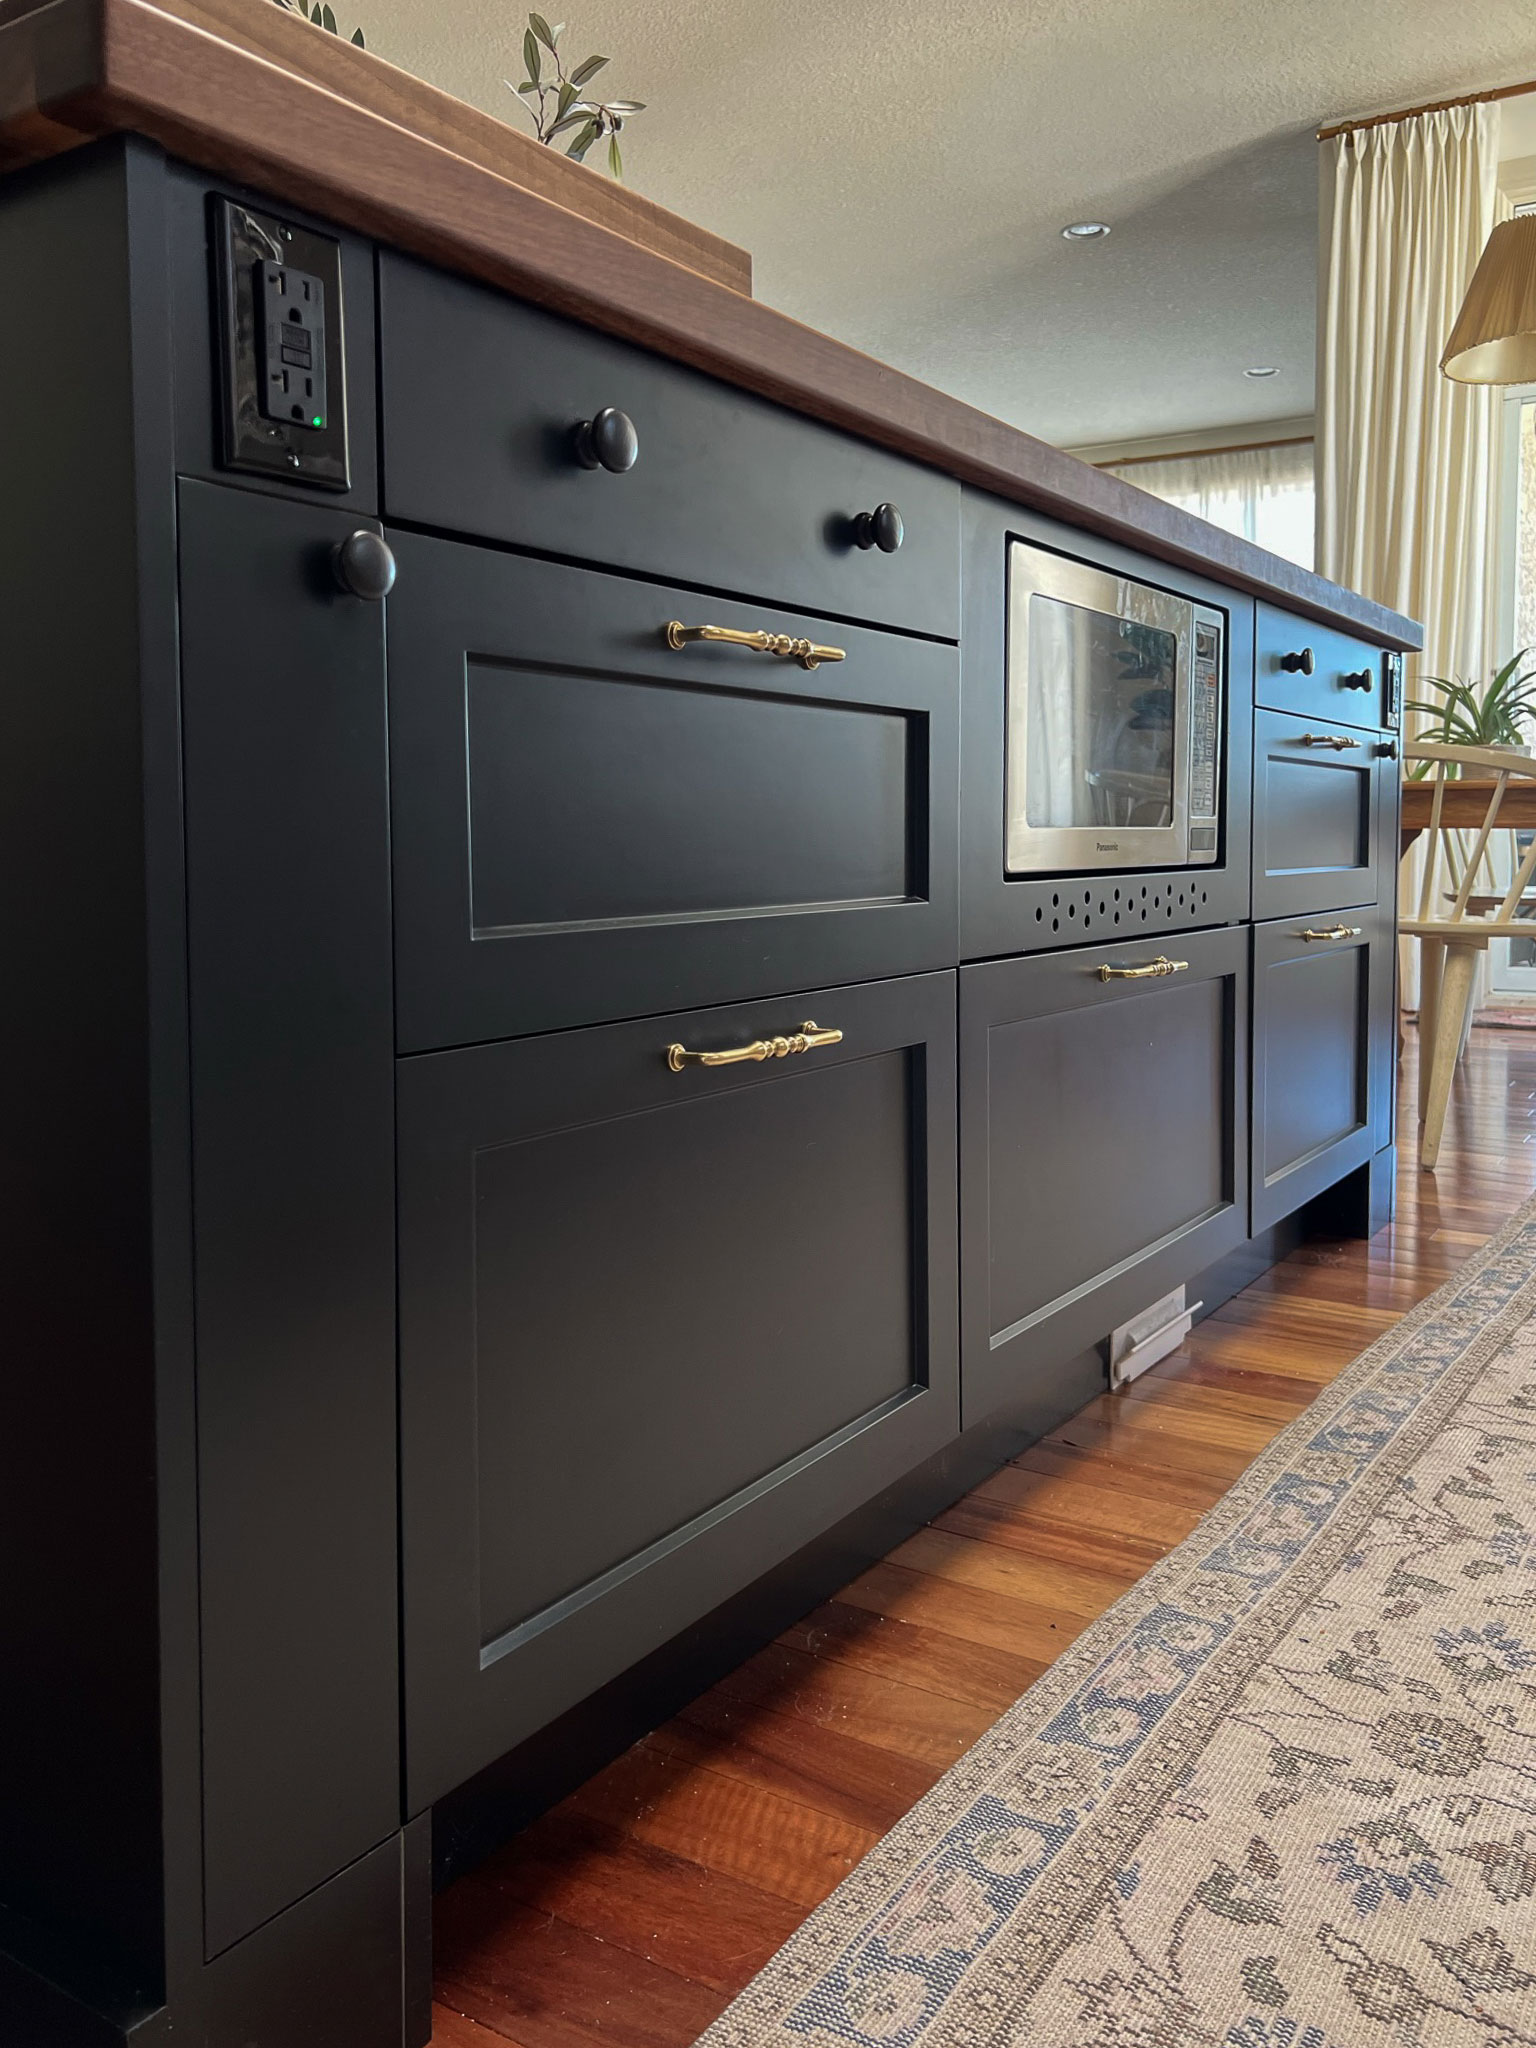
The way I accommodated the outlets in my island is to add a few inches to either end of my island with a filler. This creates a space on the front of the island, where the drawers are, to place the outlets. That is much less distracting that the side, which is generally highly decorative.
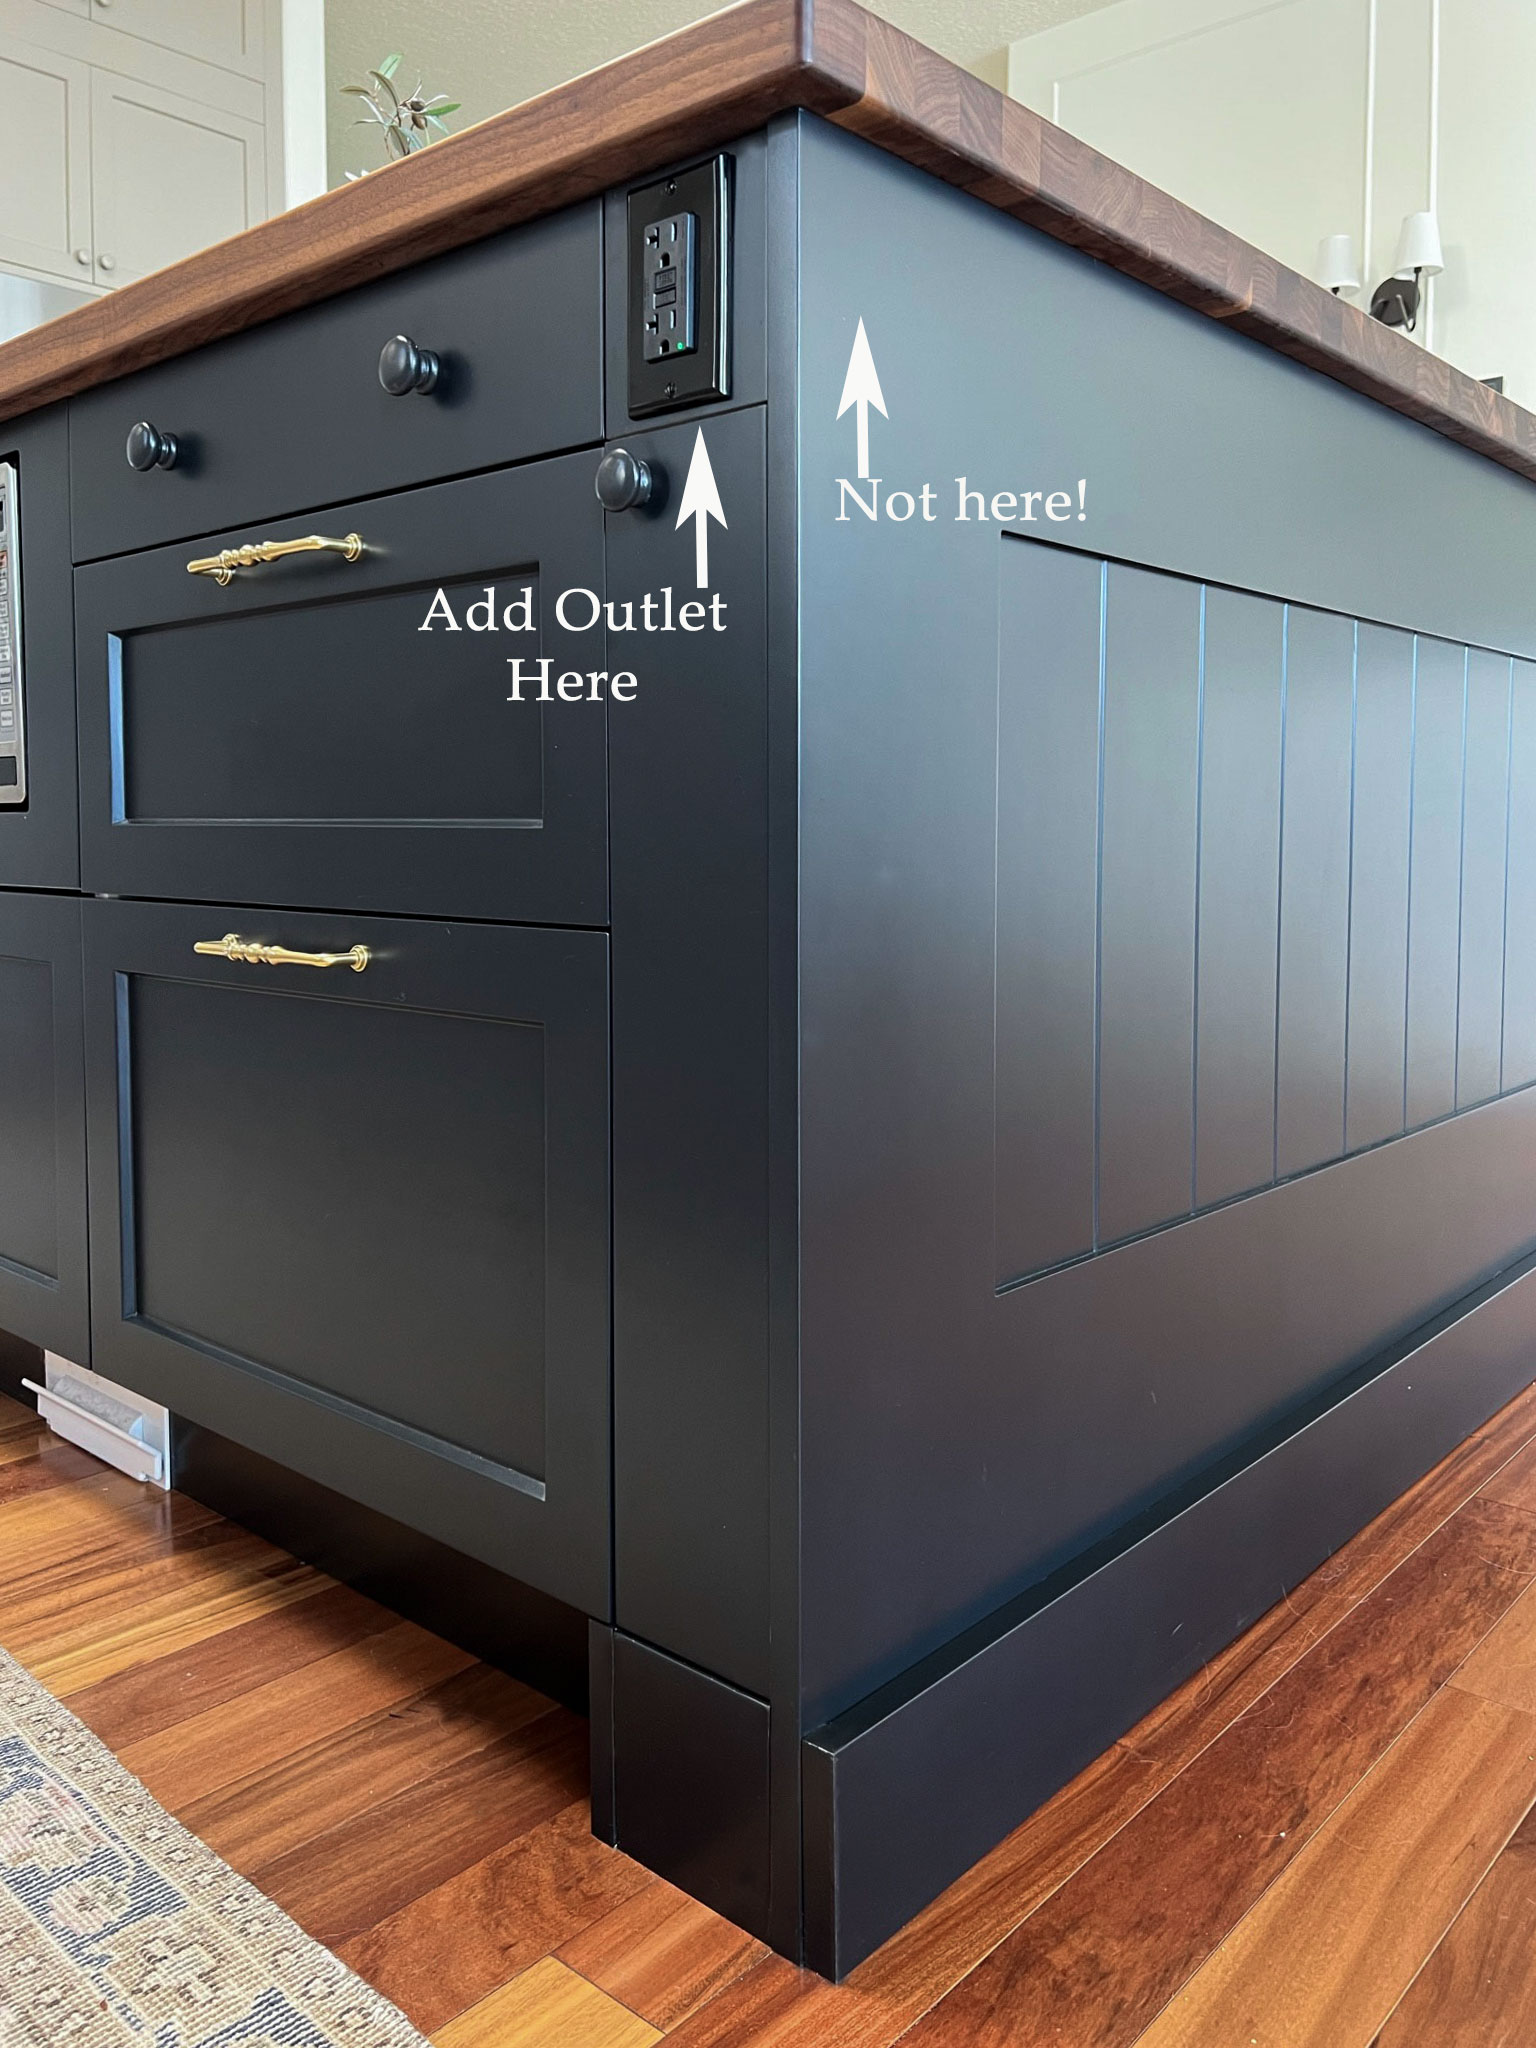
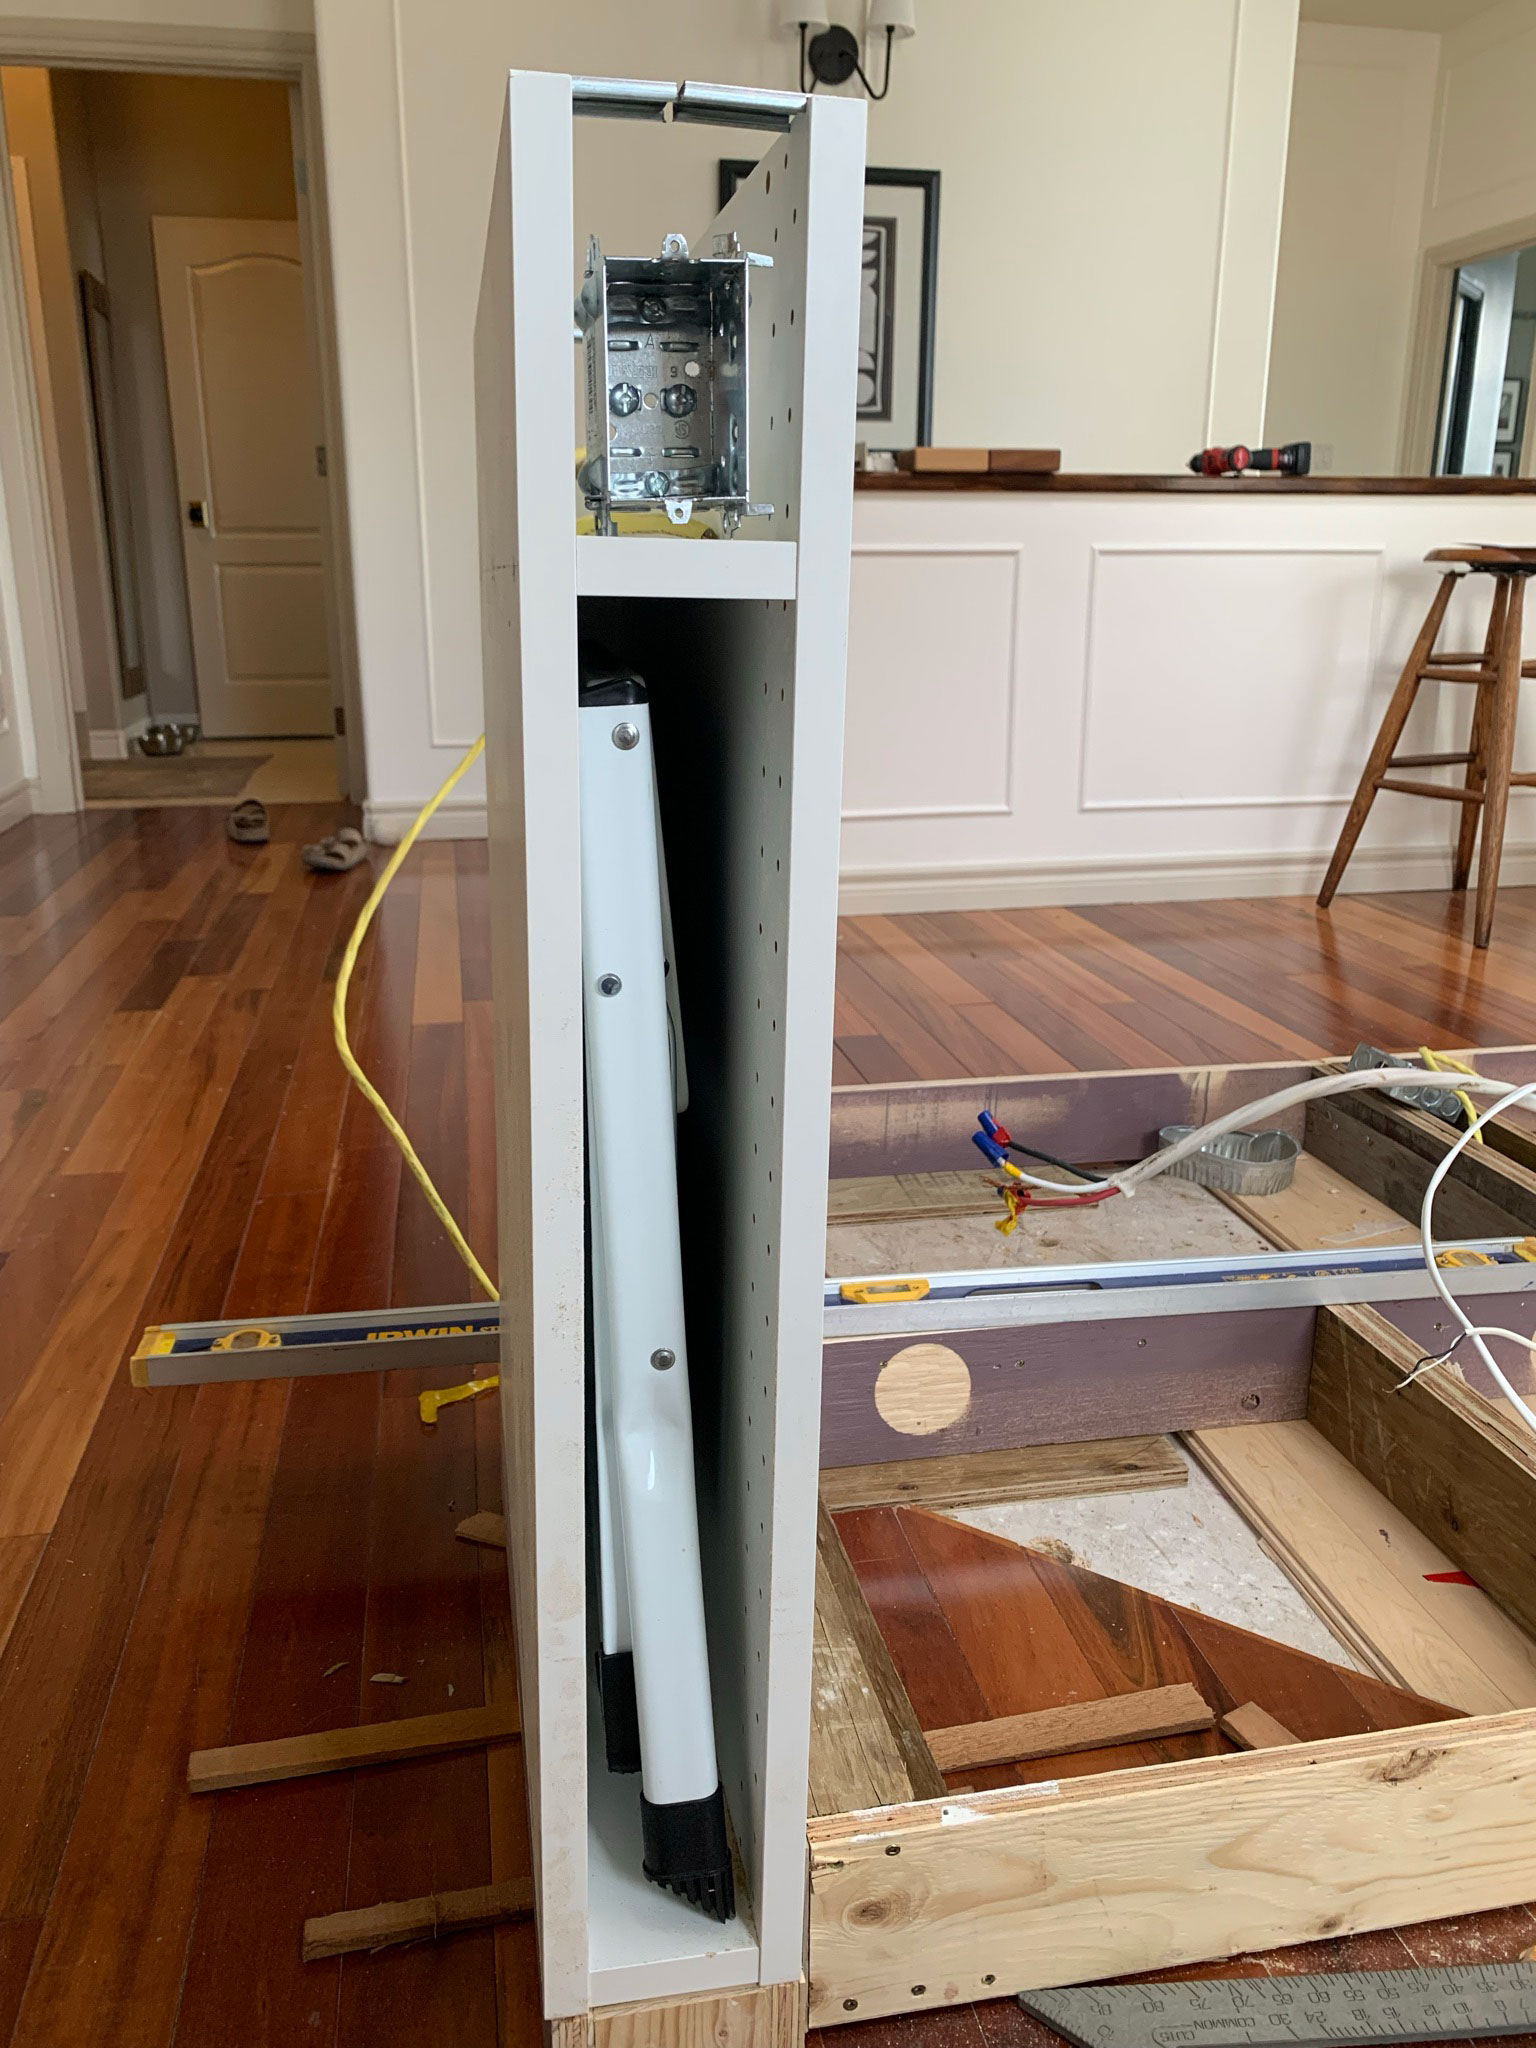
In my case I added 4.5″ and then used the space below the outlet to add a skinny cabinet to really make use of that space. I talked a little more about that in this post!
Option 2 – Pop-Up Outlets
I’ve seen a lot of pop-up outlets in countertops and those can be a good option if you are not able to find another place on your island to put it. I am not sure if that is something I would choose unless I had to as I don’t like the idea of cutting extra holes in my countertop! But sometimes that might be the only option. I think the smaller you can make these, the better! A few of these have wireless charging for your phone without opening them up which is pretty cool!

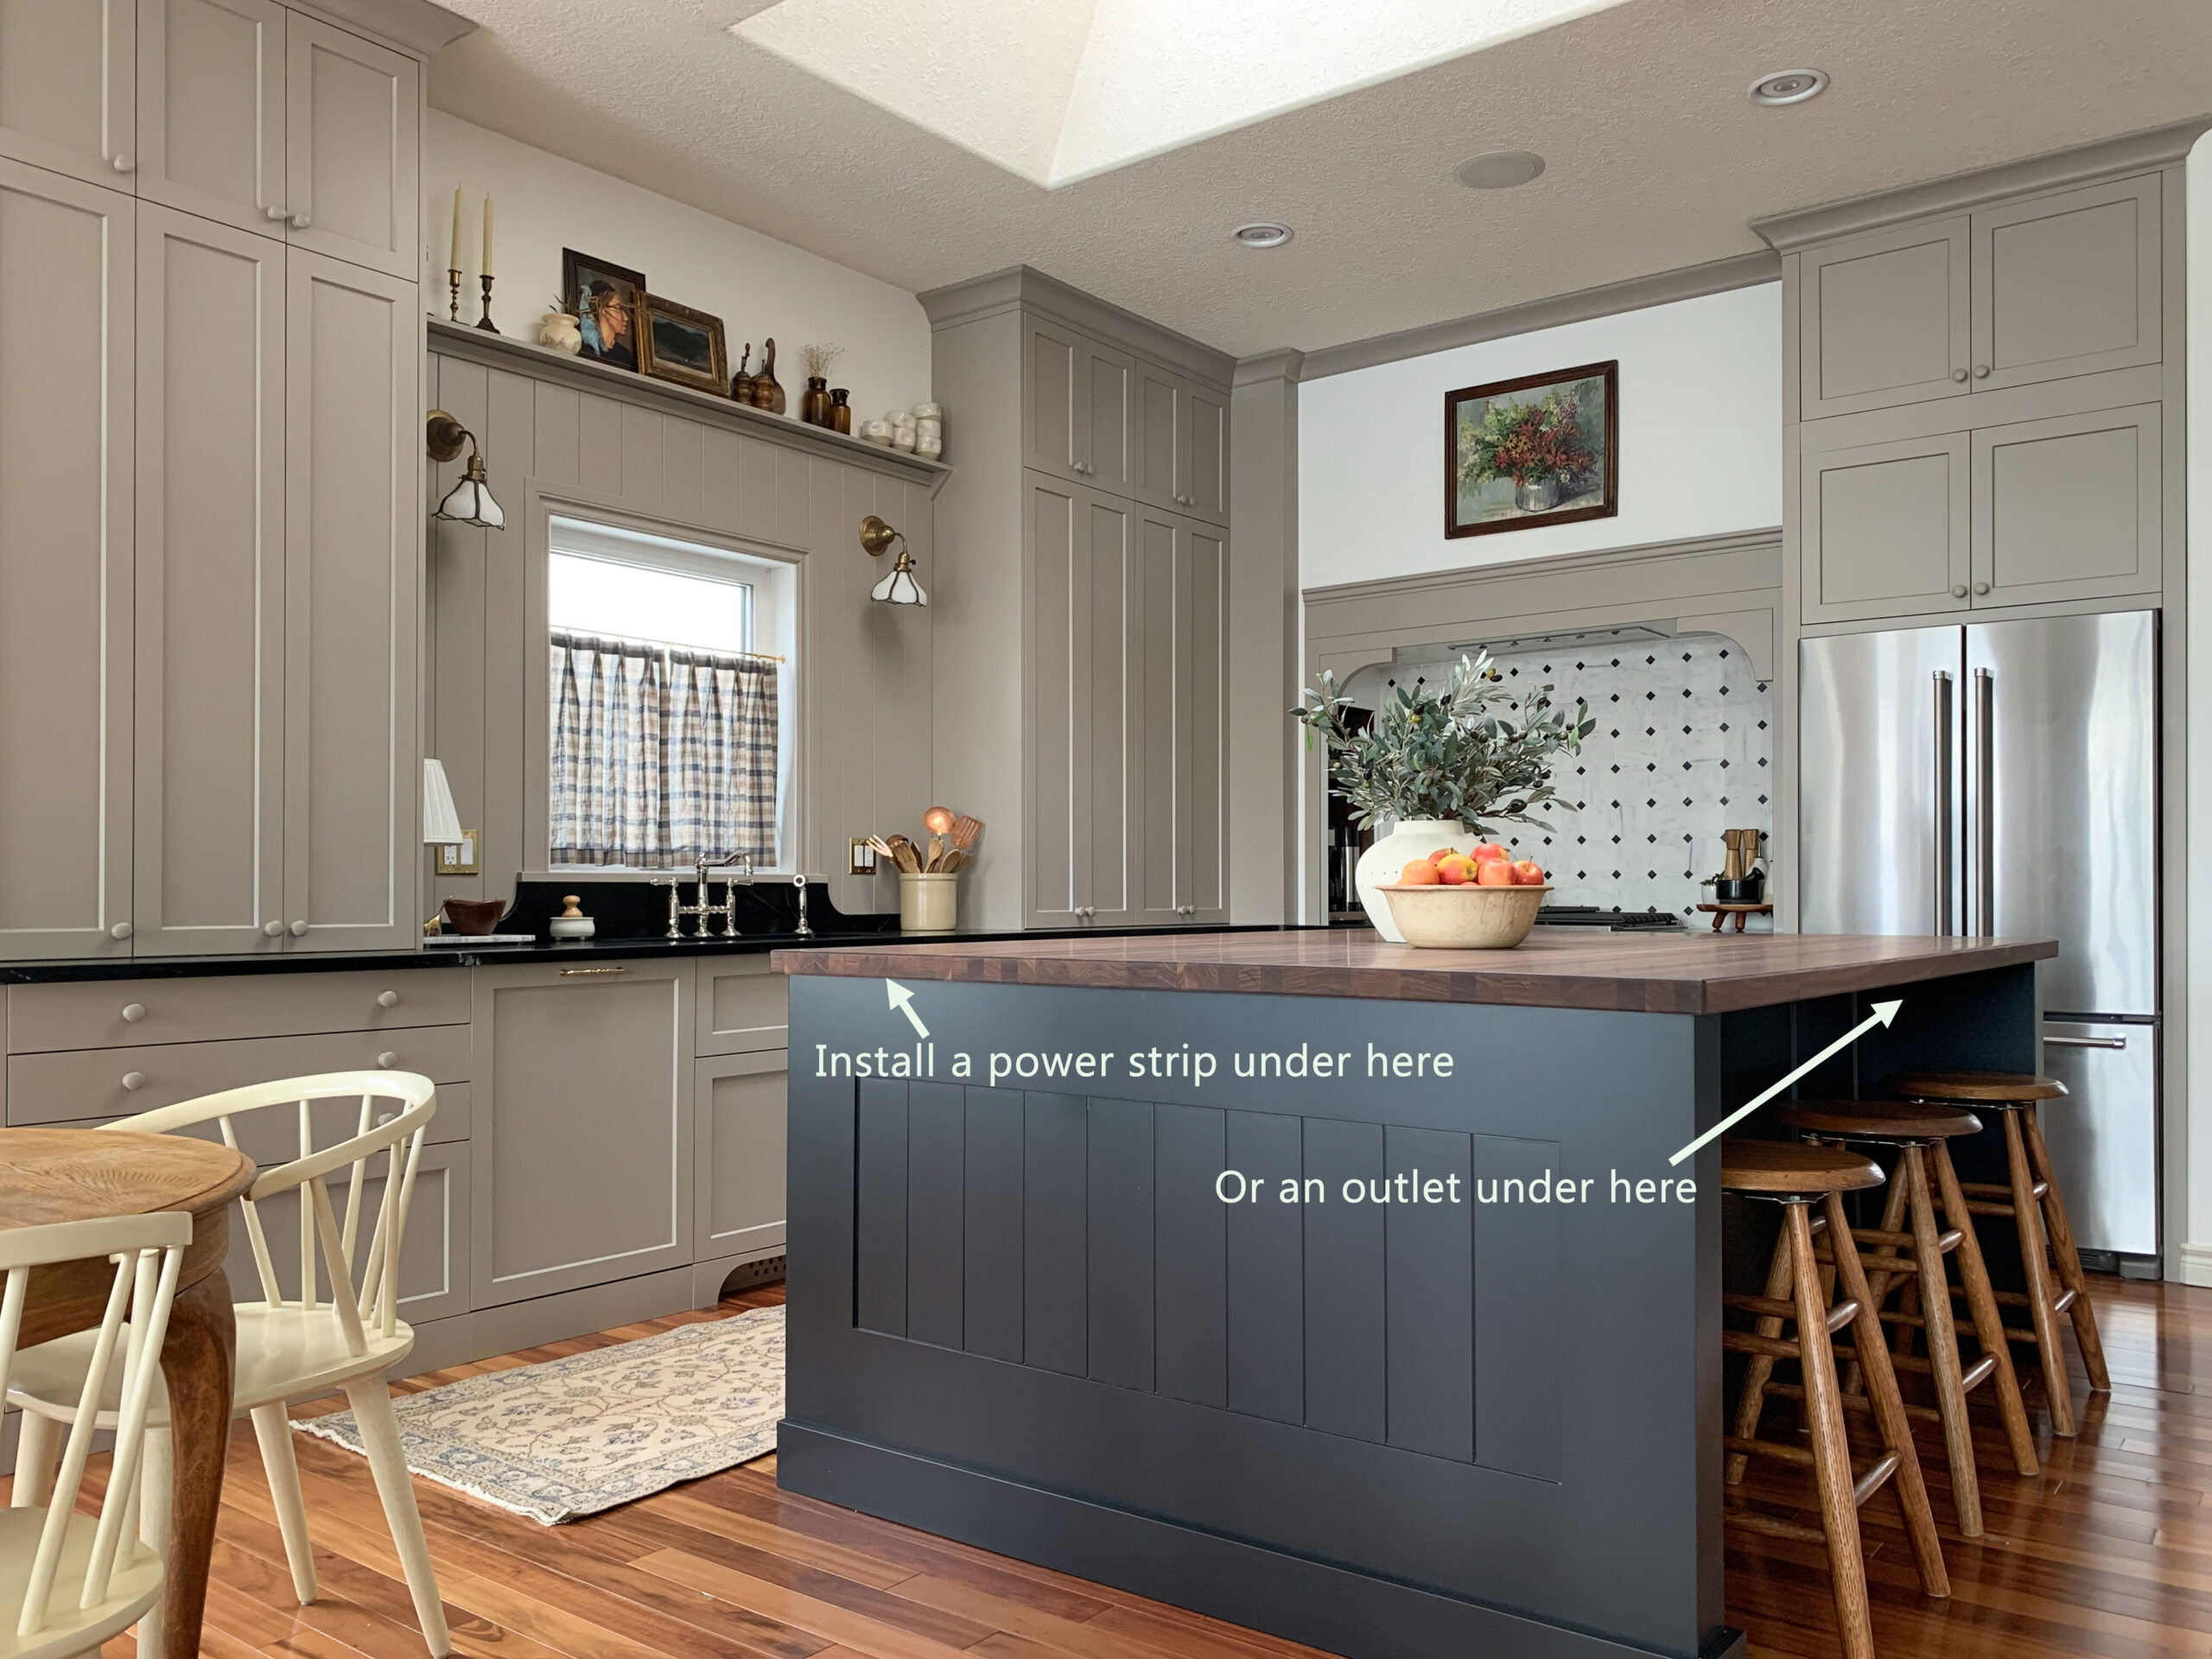
Option 3 – Undercounter power strips or under the overhang
This option I also considered in my kitchen design for my island. An outlet strip can be mounted right underneath the lip of your kitchen counter. You would not see it from a normal standing position so it is a clever way to hide them in plain sight. Be sure to check with your electrician on how to install these, there would still need to be an accessible location to have the electrical box installed somewhere nearby.
If your island has an “eating side” where people sit and a countertop overhang, you can also place the outlets under that and they will be a lot less noticeable. However, having it there isn’t the best place for them if you want to actually use that outlet!
Cover the outlets with accessories
In our last house, we had an outlet front and center in every part of our backsplash. In front of most of them, I styled accessories like cutting boards and art to hide them for the everyday. That is a good solution for people that maybe have an outlet they can’t move but also don’t really want to look at!
Embrace the Outlets
Sometimes, there are outlets that you really can’t get away from having. For me, that was the two outlets on either side of my sink. I can’t really cover them with accessories either as the outlets also have switches next to them that we use often to run the garburator and sconces.
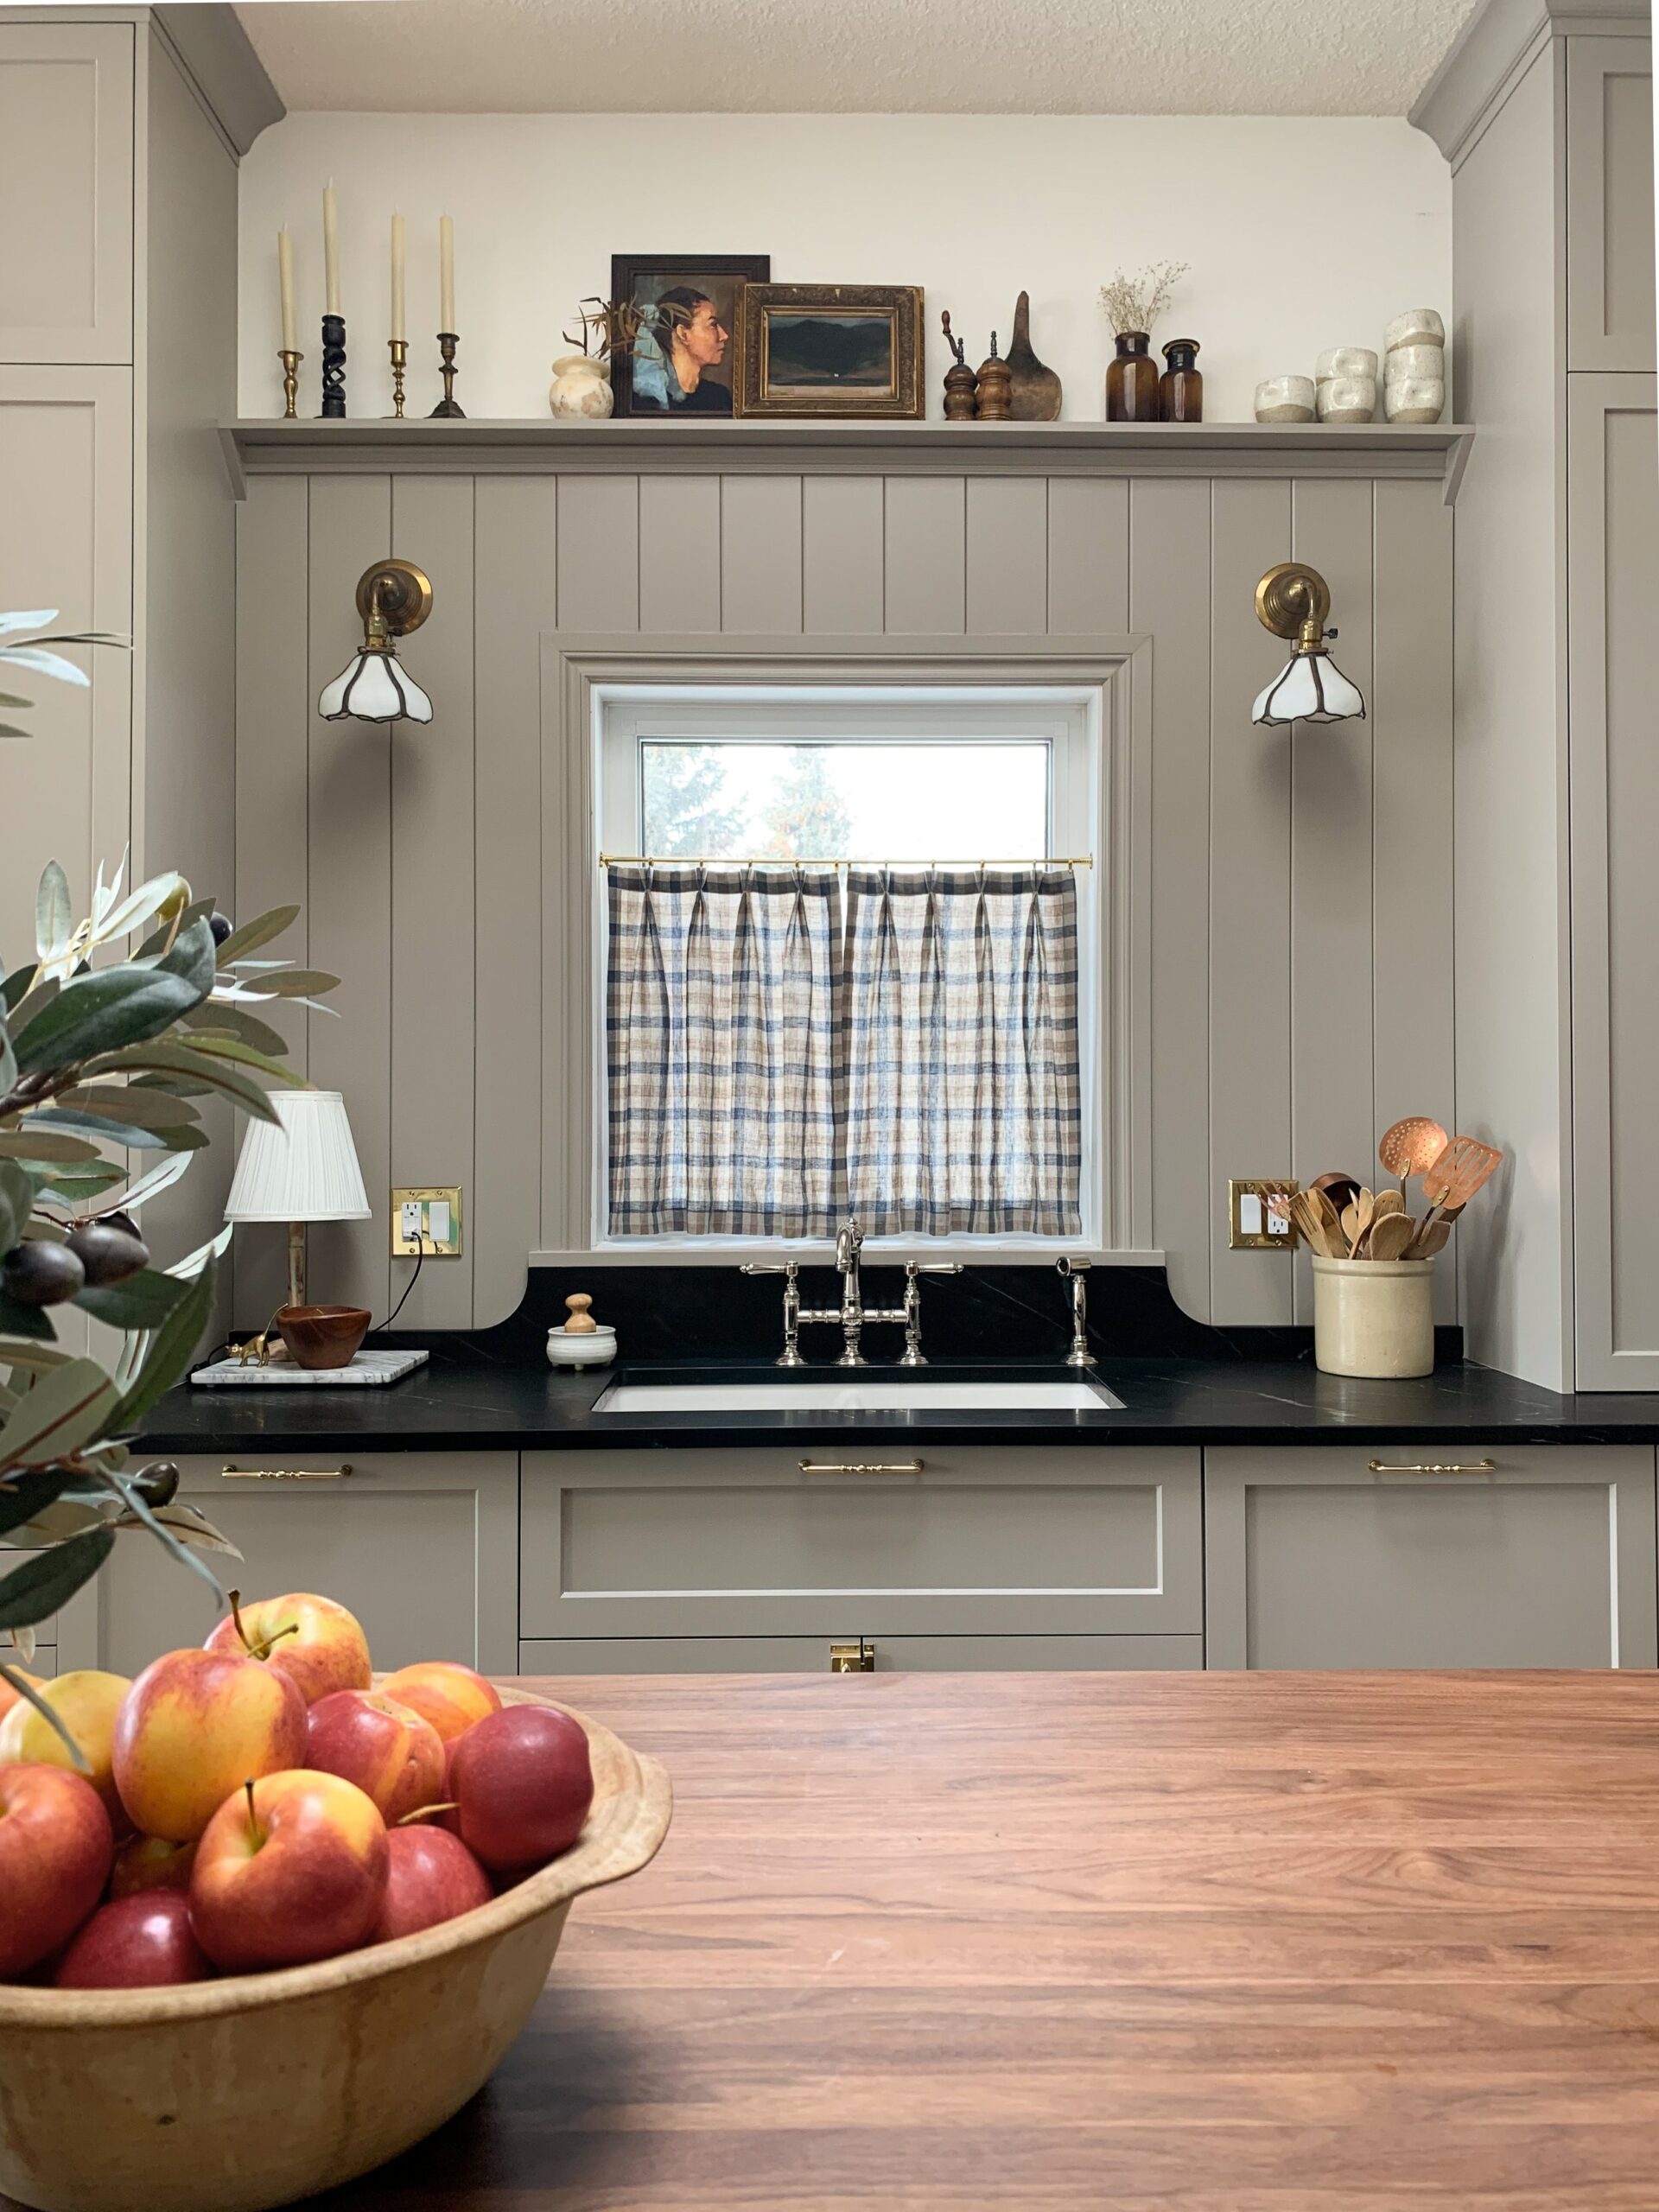
In that case, I decided I was just going to make those outlets a bit of a design feature. I first of all make sure that they were symmetrical on either side of the sink so they didn’t look like an afterthought. Then, I put brass electrical plates on them to make them look a little bit fancier. The brass ties in with my cabinet hardware and sconces so it looks like a design decision.
I’ve seen some really beautiful ornamental covers lately like this ceramic outlet cover or these solid brass ones! If you have to look at it, it might as well be cute!
Some final thoughts on how to hide outlets in the kitchen
If you are undertaking a kitchen remodel or designing a kitchen from scratch, you probably already know that there are a lot of little details to consider! Planning out the location of the light switches and standard outlets seems like something that could well be left to the electrician or builder to figure out, and that is exactly what a lot of people do. However, taking a bit of time to consider how the outlets might detract from the overall design is well worth your time!
The good news is that some of these changes are so easy to incorporate. Some of them don’t really cost anything additional at all, only a little foresight.
The best time to consider your electrical and outlet location is during the design of the kitchen cabinets before any work is done. I would also suggest, unless you are really familiar with electrical code, to run your plan for your outlets past your electrician so he can let you know if he sees any issues.
Shop This Post:
You might also like:
- How to Design and Install Cabinet Toe Kicks for Your Kitchen
- How Much does it cost to DIY a Kitchen?
- A DIY Kitchen with Ikea Cabinets – the Kitchen Reveal!
- How to Customize the Width of an Ikea Cabinet
- DIY Pull-Out Cabinet Organization for Hair Tools
- How to Make a Kitchen Island Out of Base Cabinets
- A Guide for Standard Kitchen Cabinet Dimensions
- DIY Coffee Bar and Appliance Garage from a TV Cabinet
Great post! So many great ideas here, thank you!
Thank you Jennifer, I’m so glad you found it helpful!
I’m going to do a better job of camouflaging my outlets. Thanks for this Erin.
I’m glad it was helpful!
I’m moving into a new apartment and I can’t believe they don’t have under cabinet lighting. It looks like the best option for me would be to install an electrical outlet inside the cabinet and run a wire underneath for my lighting. Thanks for this post.
This is the most incredible blog I have ever read on kitchen design. I thank you so much. I am trying to design my kitchen and you have been a wealth of info. Thank you Erin
I’m so glad it was of help! Good luck with your kitchen design!