

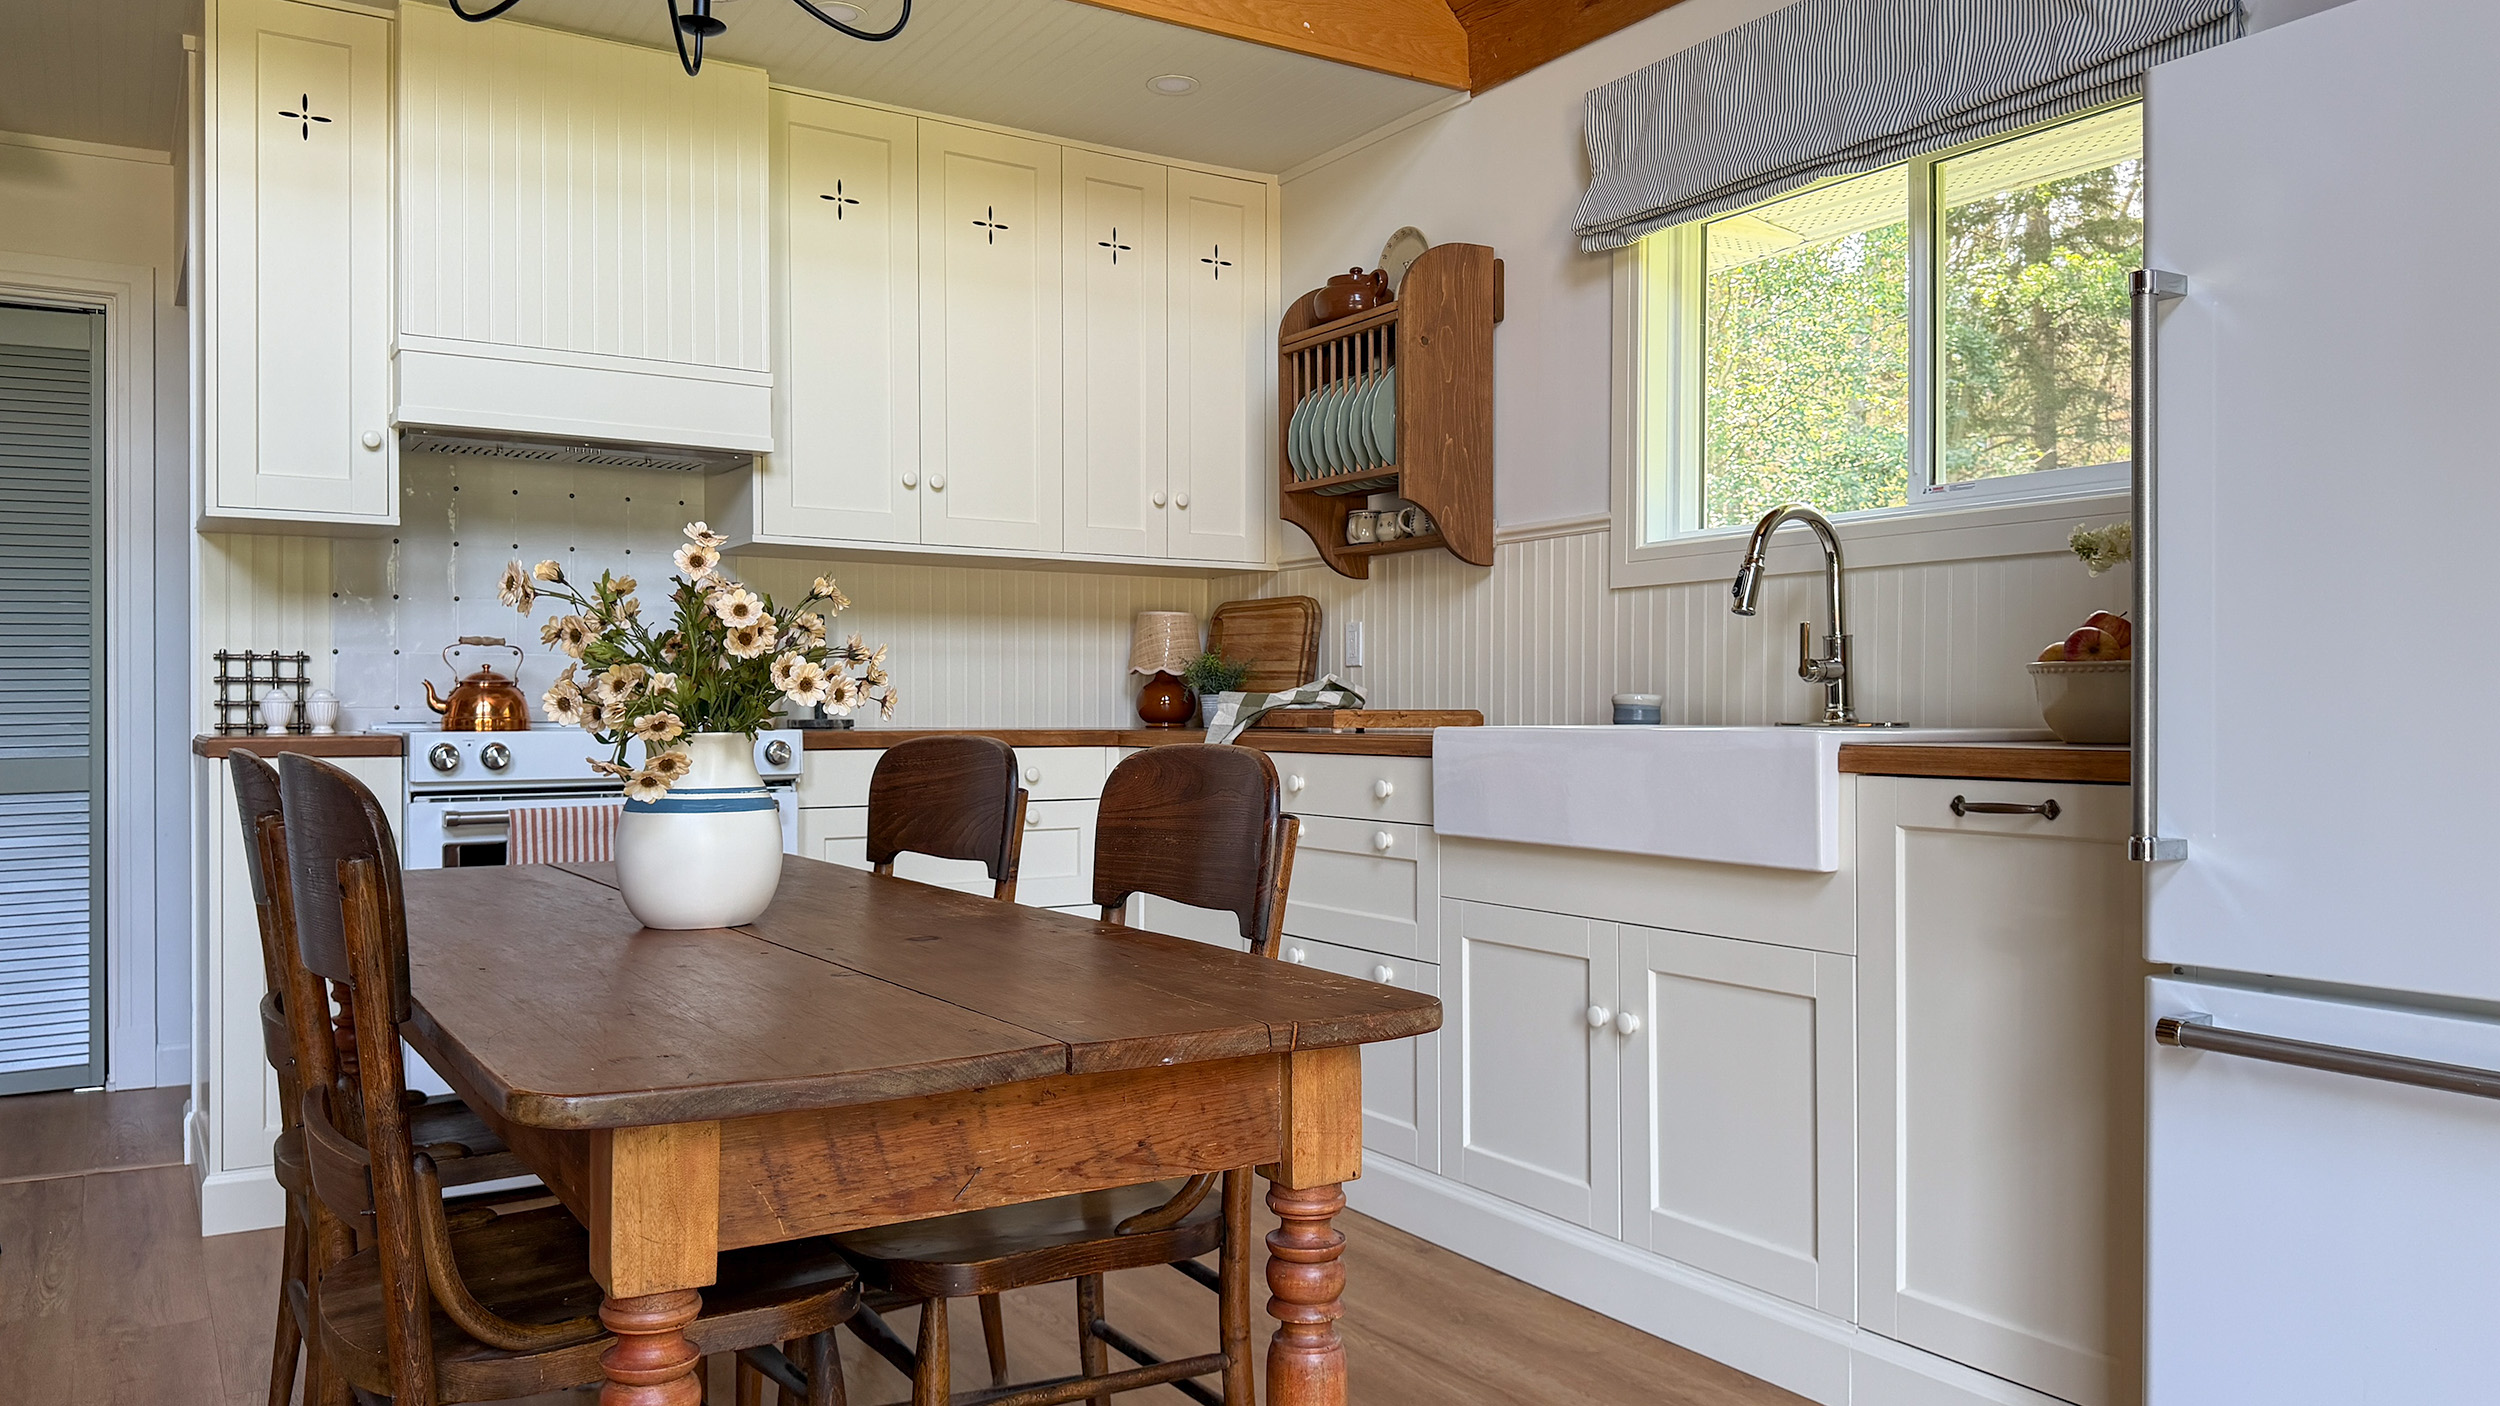
Charming DIY Cabin Kitchen Makeover Using Ikea
After a lot of planning, a lot of DIY, and some creative solutions, our Ikea kitchen makeover is complete! I could not be more thrilled with how it turned out. Read on to see everything we did to take this basic small kitchen to cottage cozy, in our Ikea kitchen makeover!
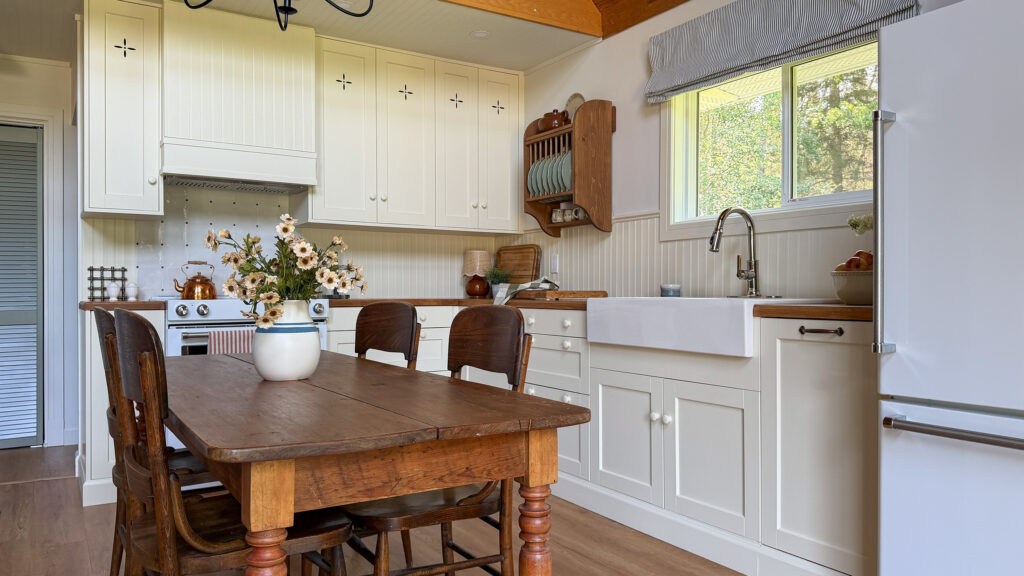
When I stand back and think about this kitchen, I think it really is the best representation of who I am as a DIY’er and a content creator. I like things to be nice, polished, and professional. But also I do not like to spend money needlessly. I feel like my best work, and my most creative designs, come from when I’m trying to stretch a dollar while trying to make a room still feel designer-ly. It forces me to get really creative when I don’t just throw money at it to make it beautiful. This kitchen has a lot of creative solutions, fun little DIY’s, and a WHOLE lot of elbow grease. I’m just so proud of this kitchen and how it turned out for those reasons, and I hope you love it as much as I do.
This post may contain affiliate links. That means if you purchase anything from these links I earn a small commission, at no extra cost to you! This helps support my blog, so thank you!
The Layout Before
When we first looked at our cabin, I thought I would probably keep the kitchen cabinets and rework them and paint them. However, once we started using the kitchen a bit we realized that is was really not very functional.
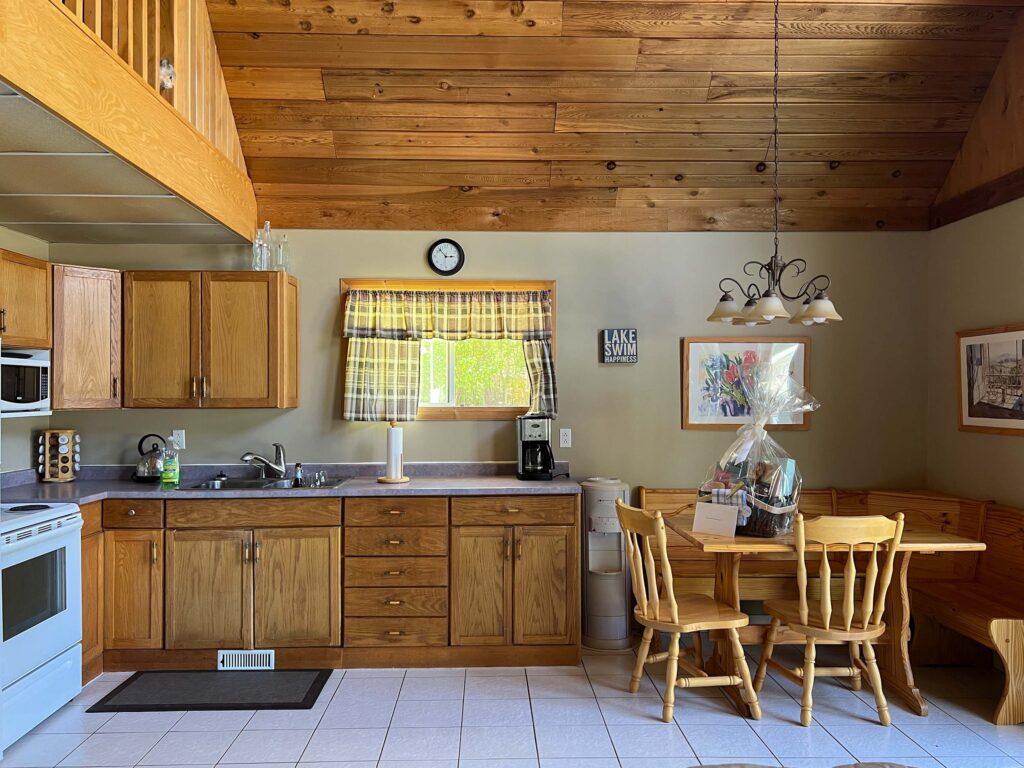
If you know me at all, you know that I value spaces that function well, as well as being nice to look at. There were a few things about the existing kitchen layout that I knew could be much better.
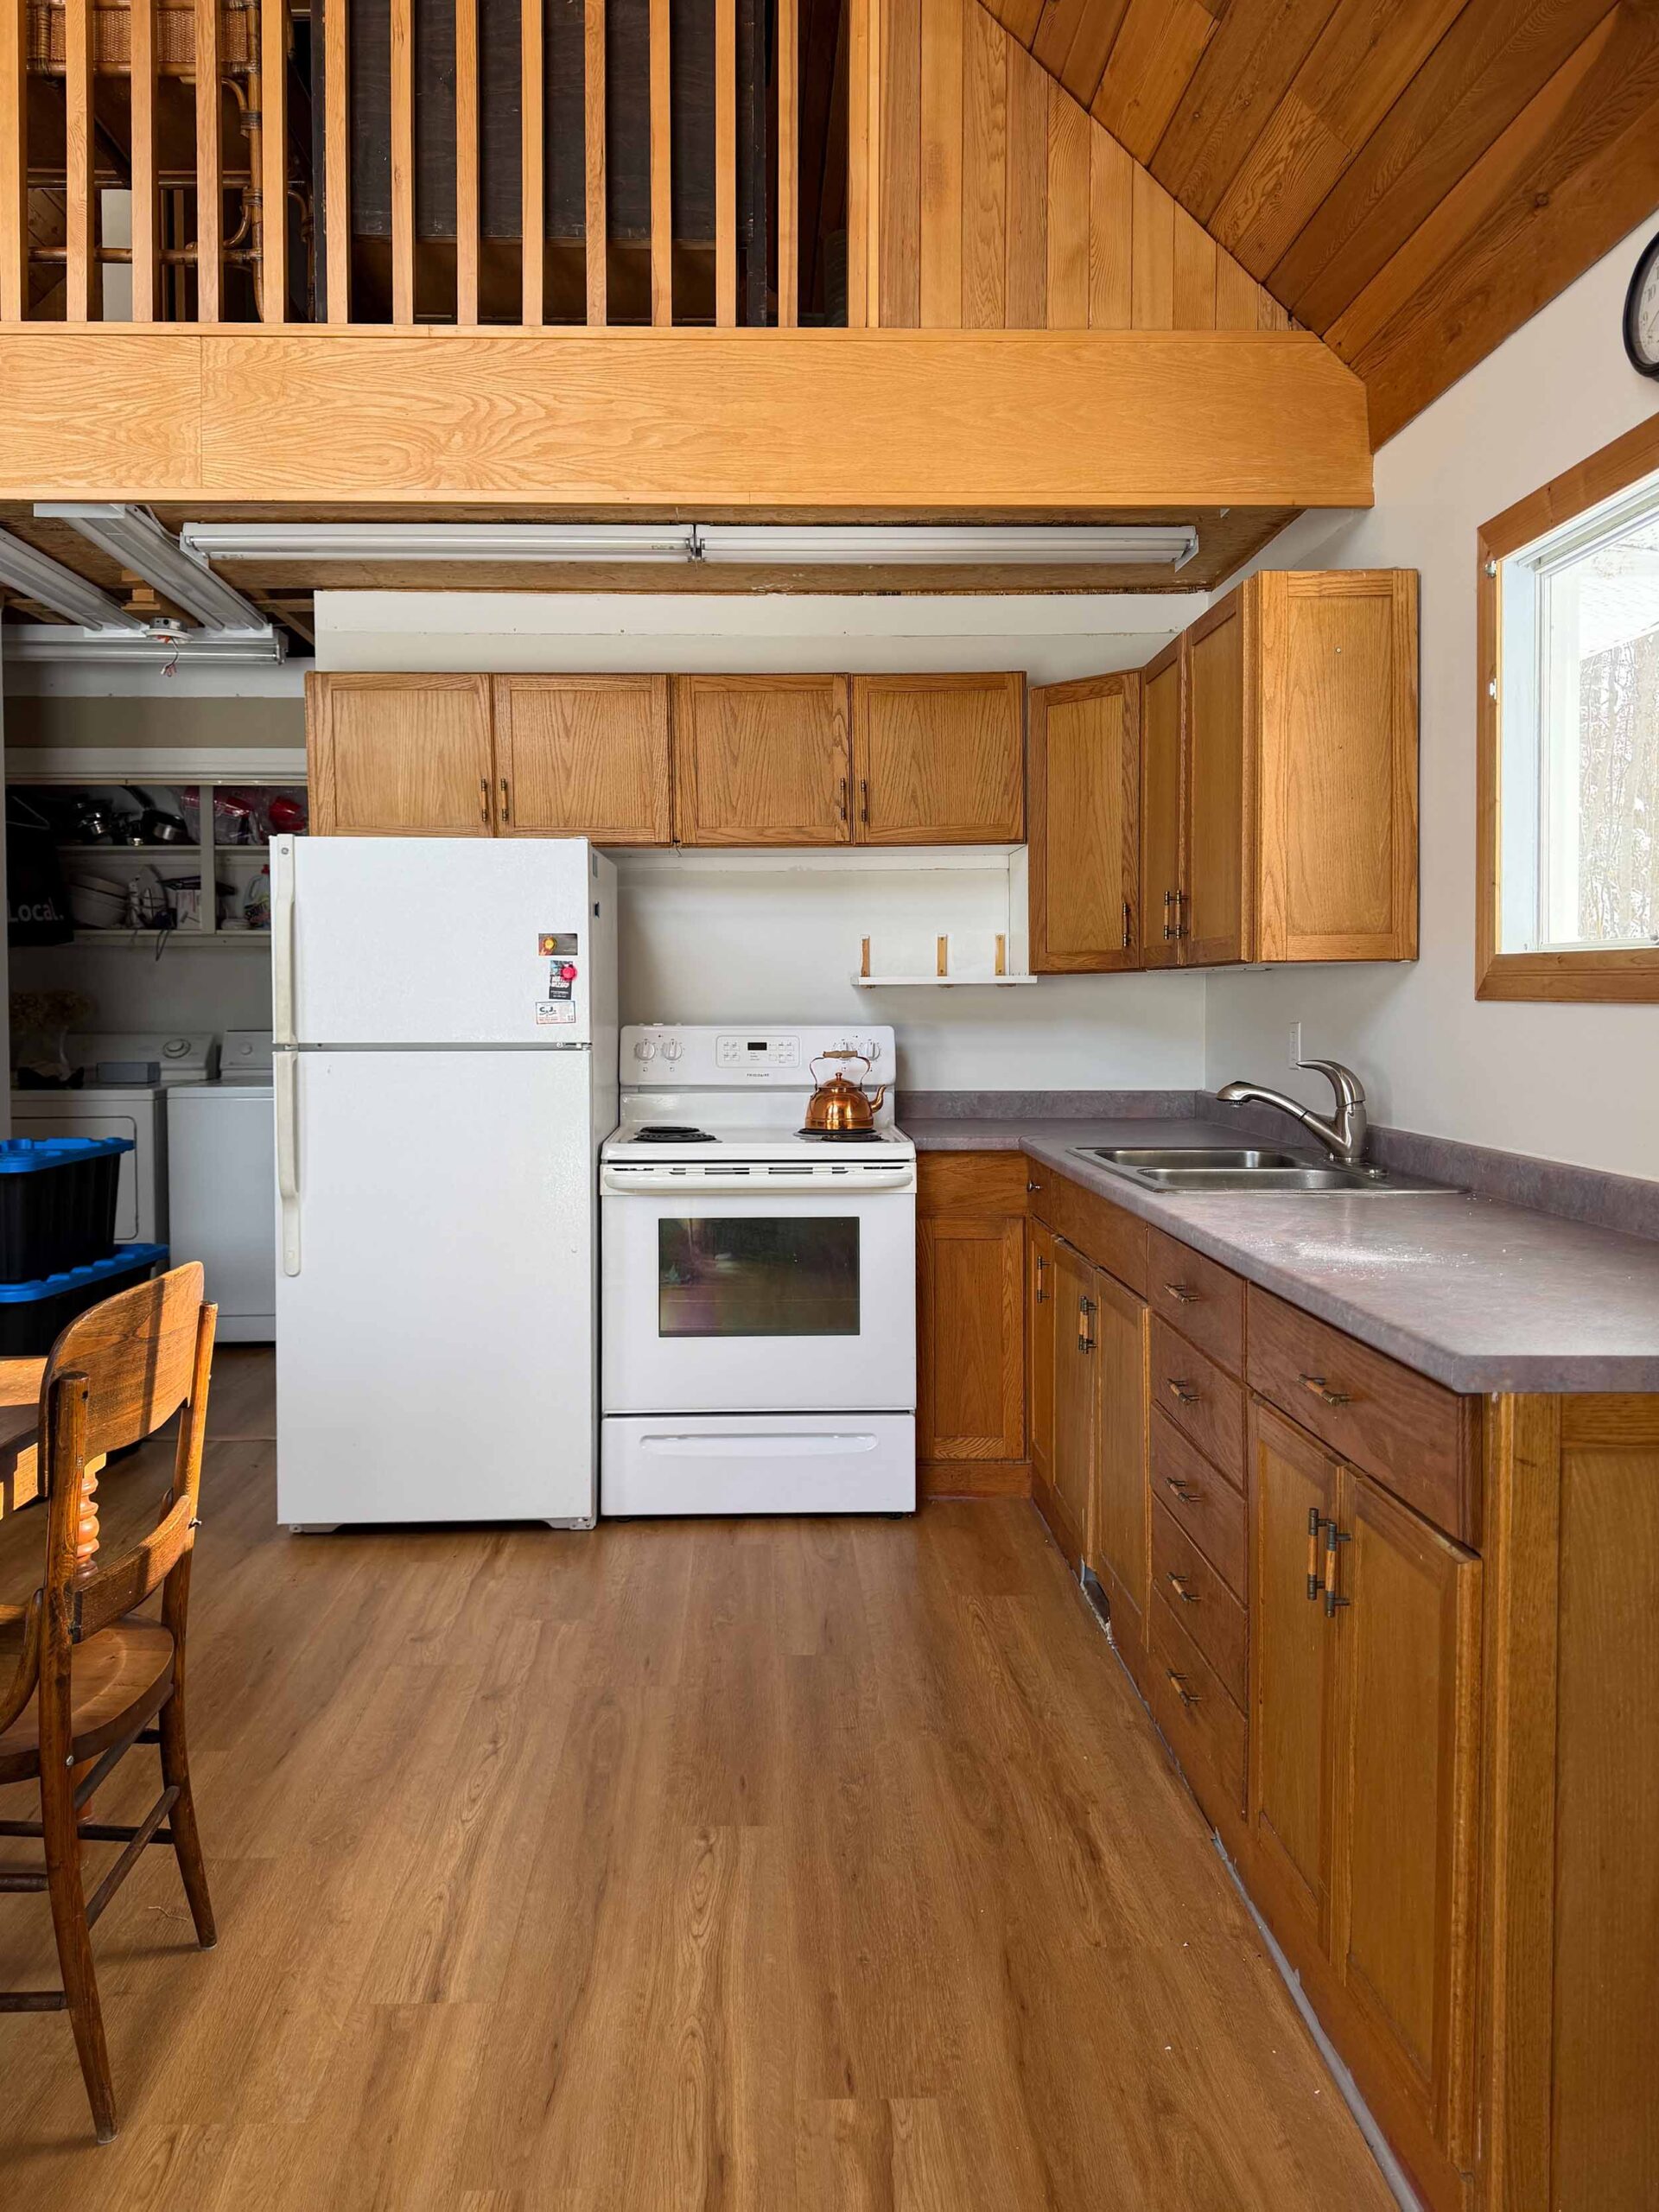
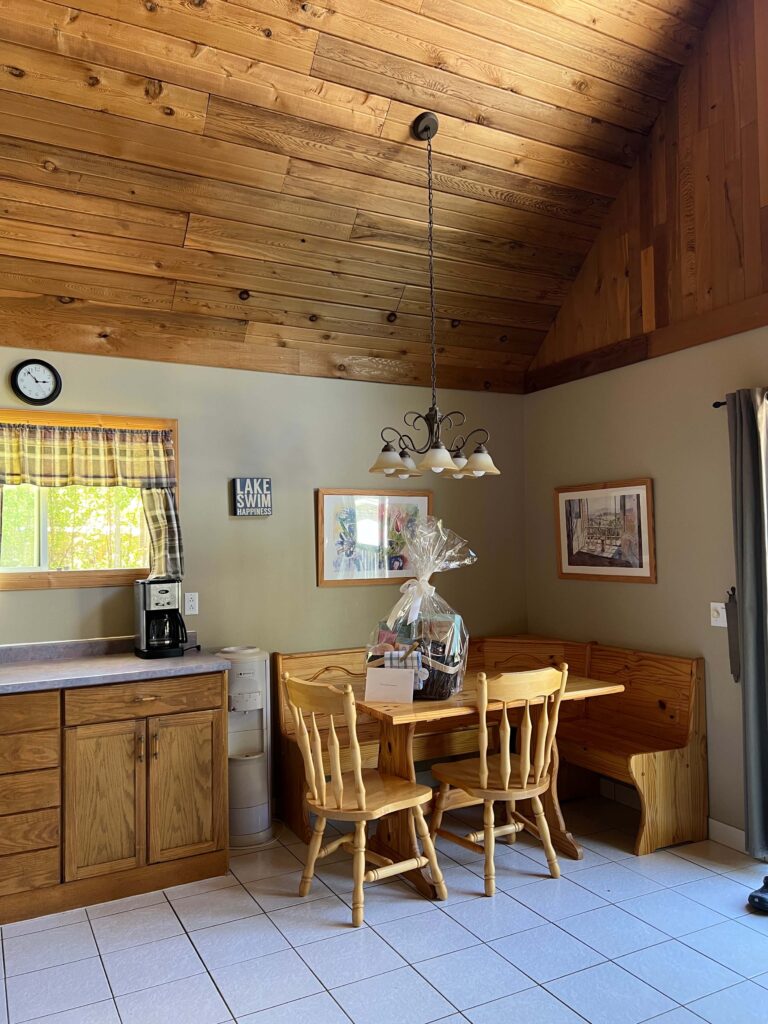
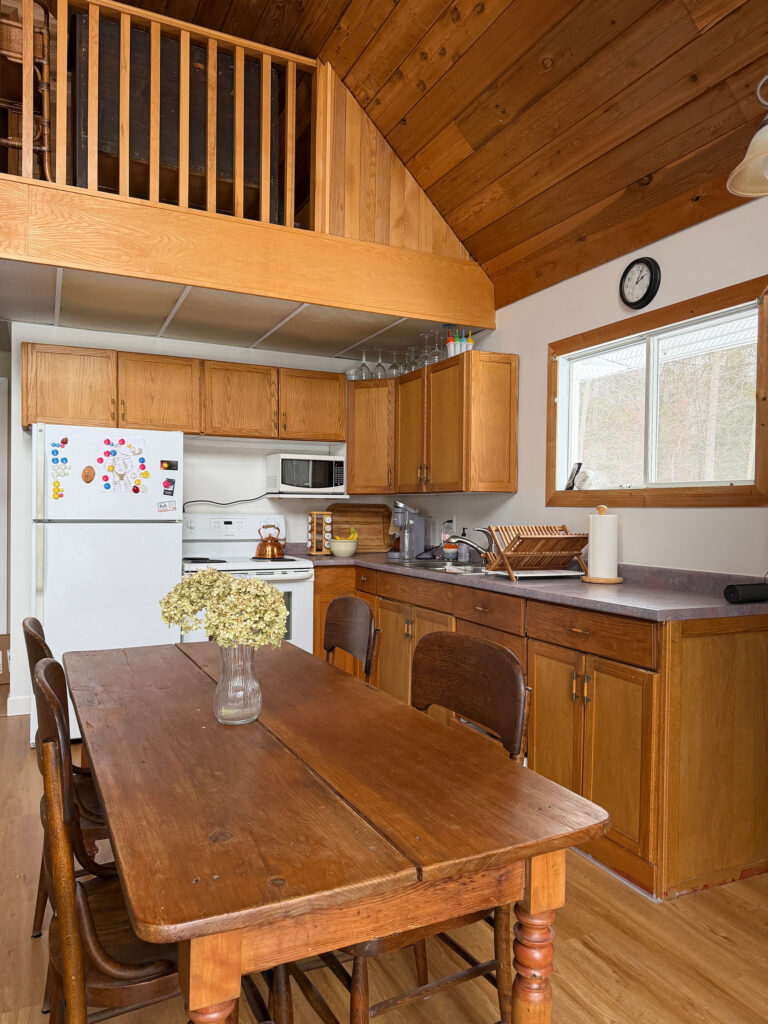
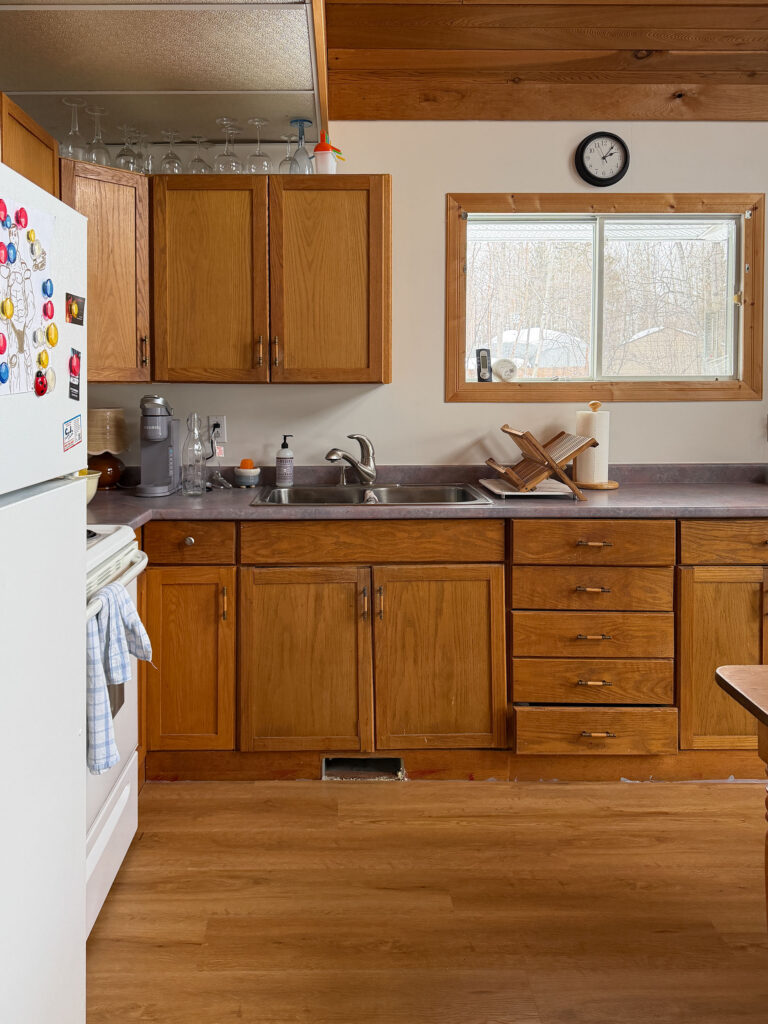
The kitchen before was an L-shape. At the end of the kitchen cabinets was a little dining room of sorts, in the form of a corner banquette. There was a ton of wasted space in the middle of the room as well.
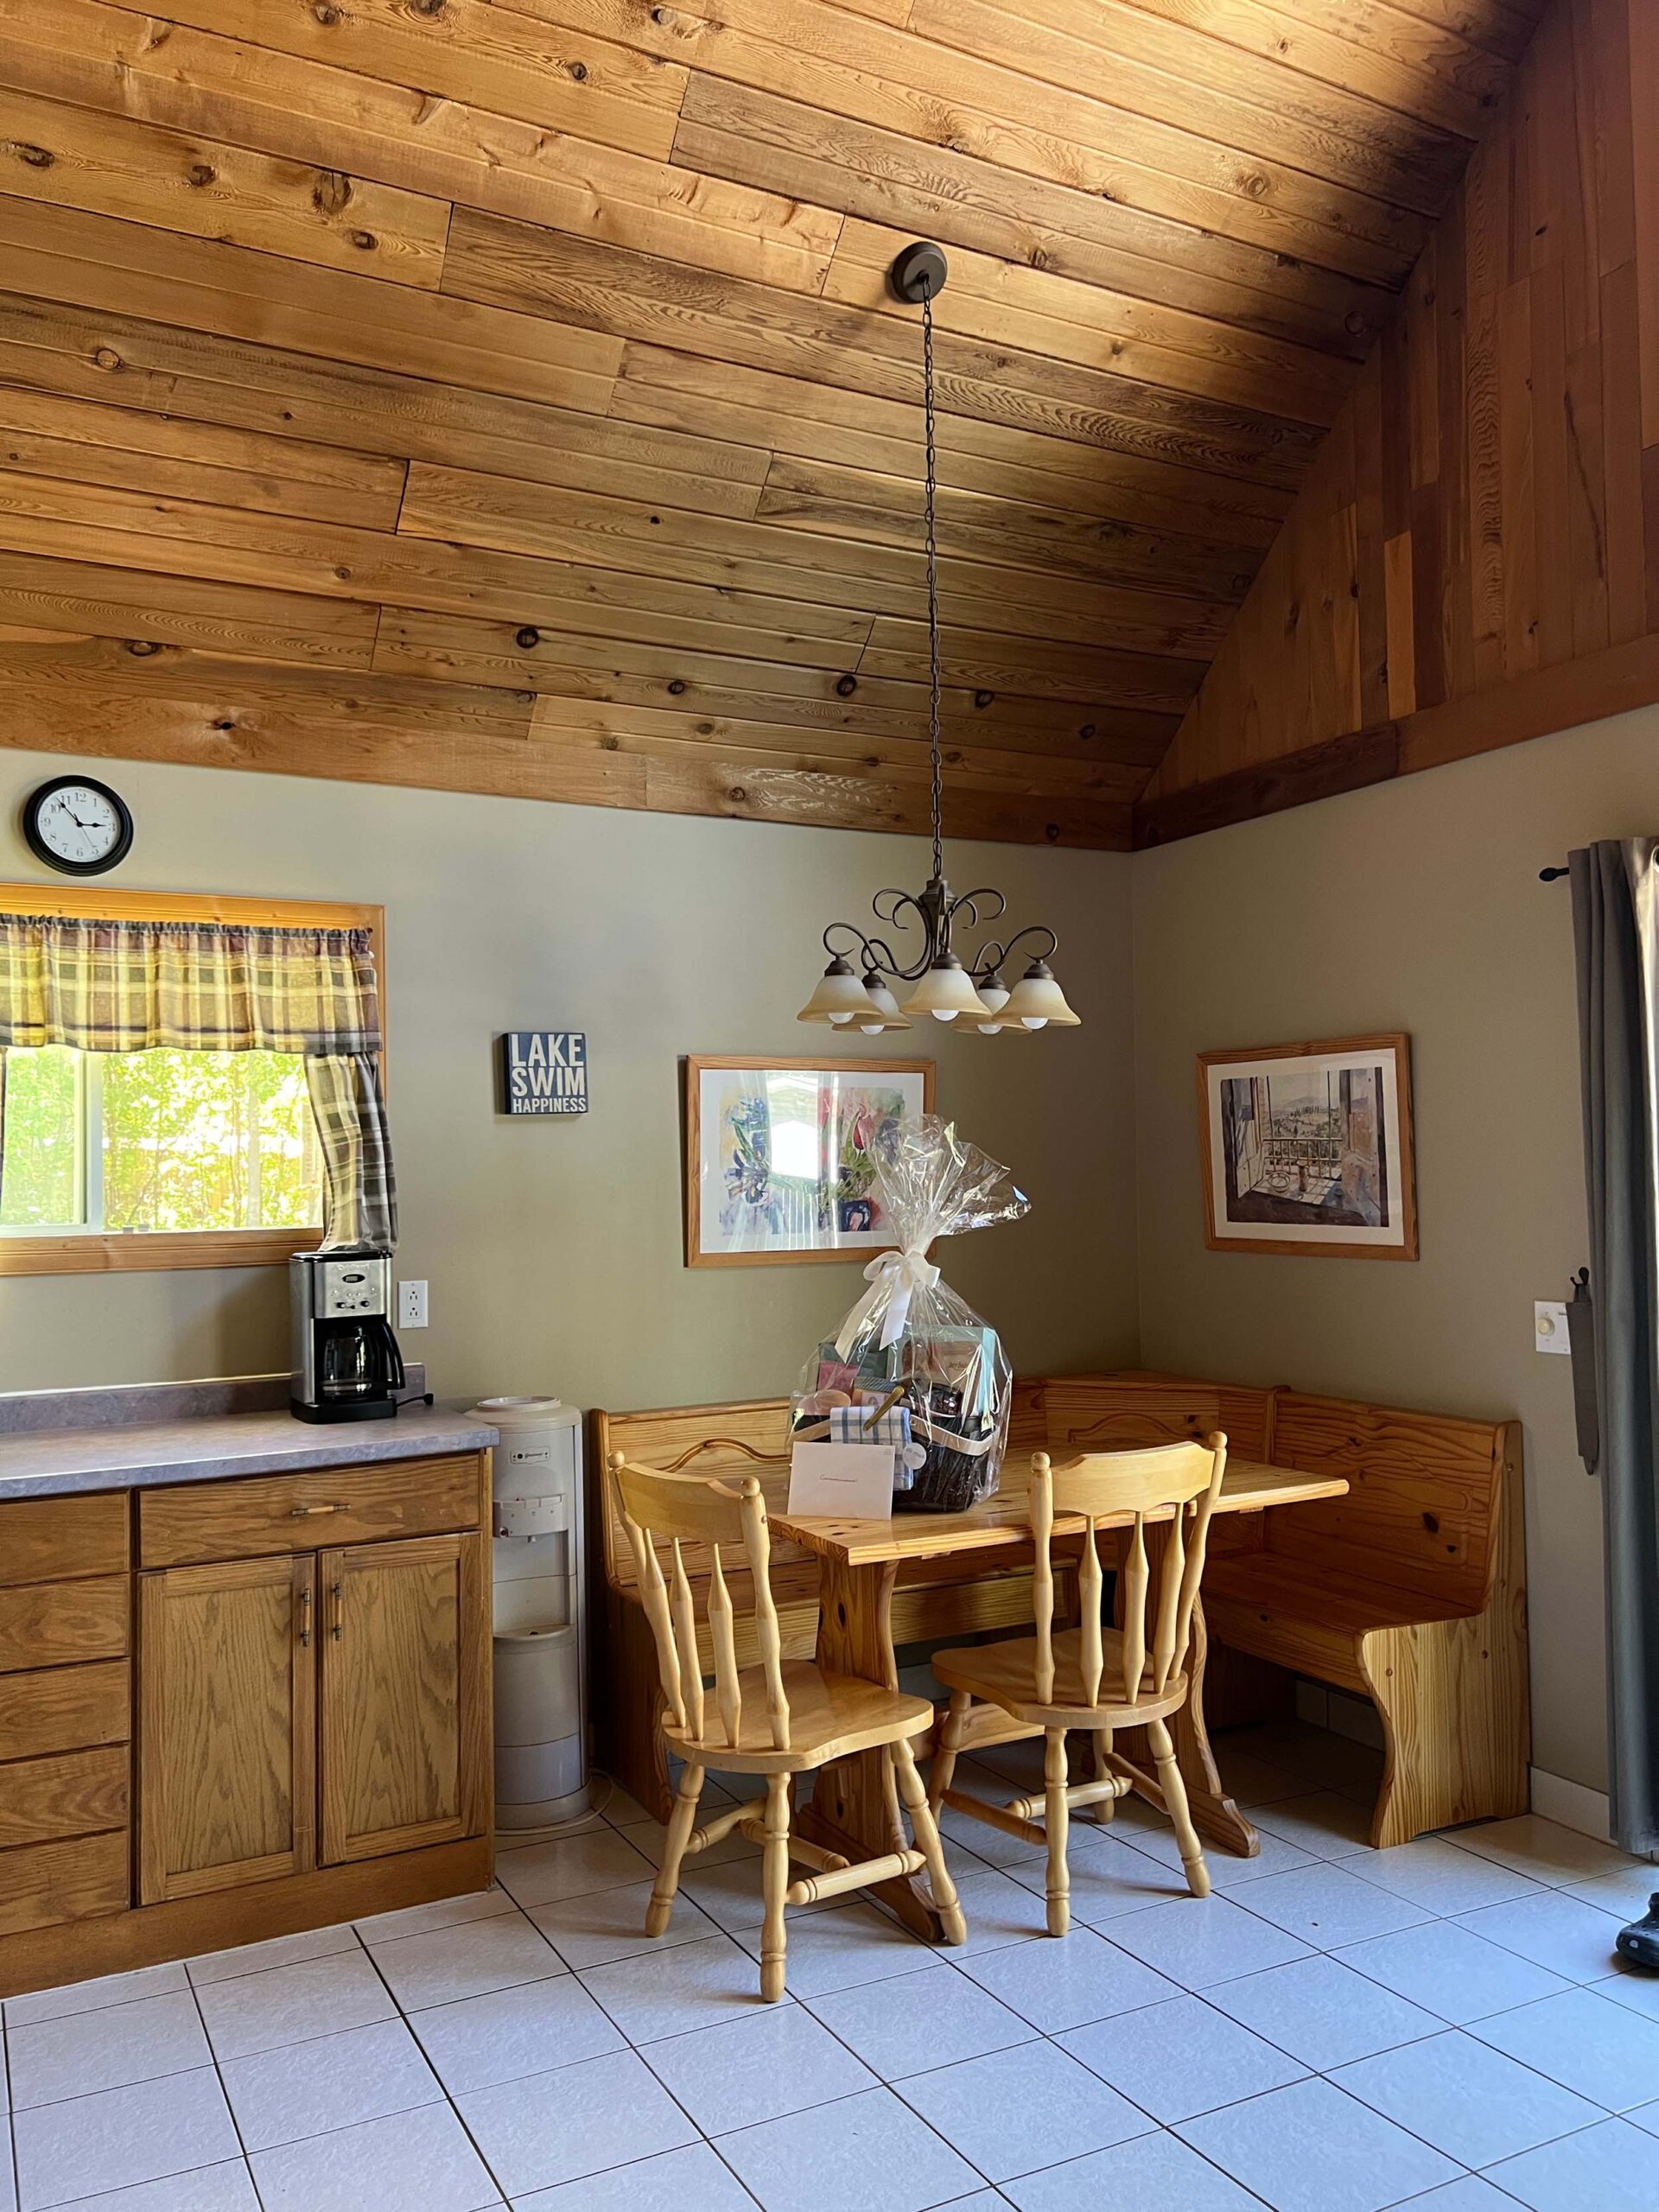
The fridge and stove were right next to each other with a makeshift microwave plugged into the top of the oven on a shelf. The cabinet over the fridge was impossible to get to (especially for this short girl!)
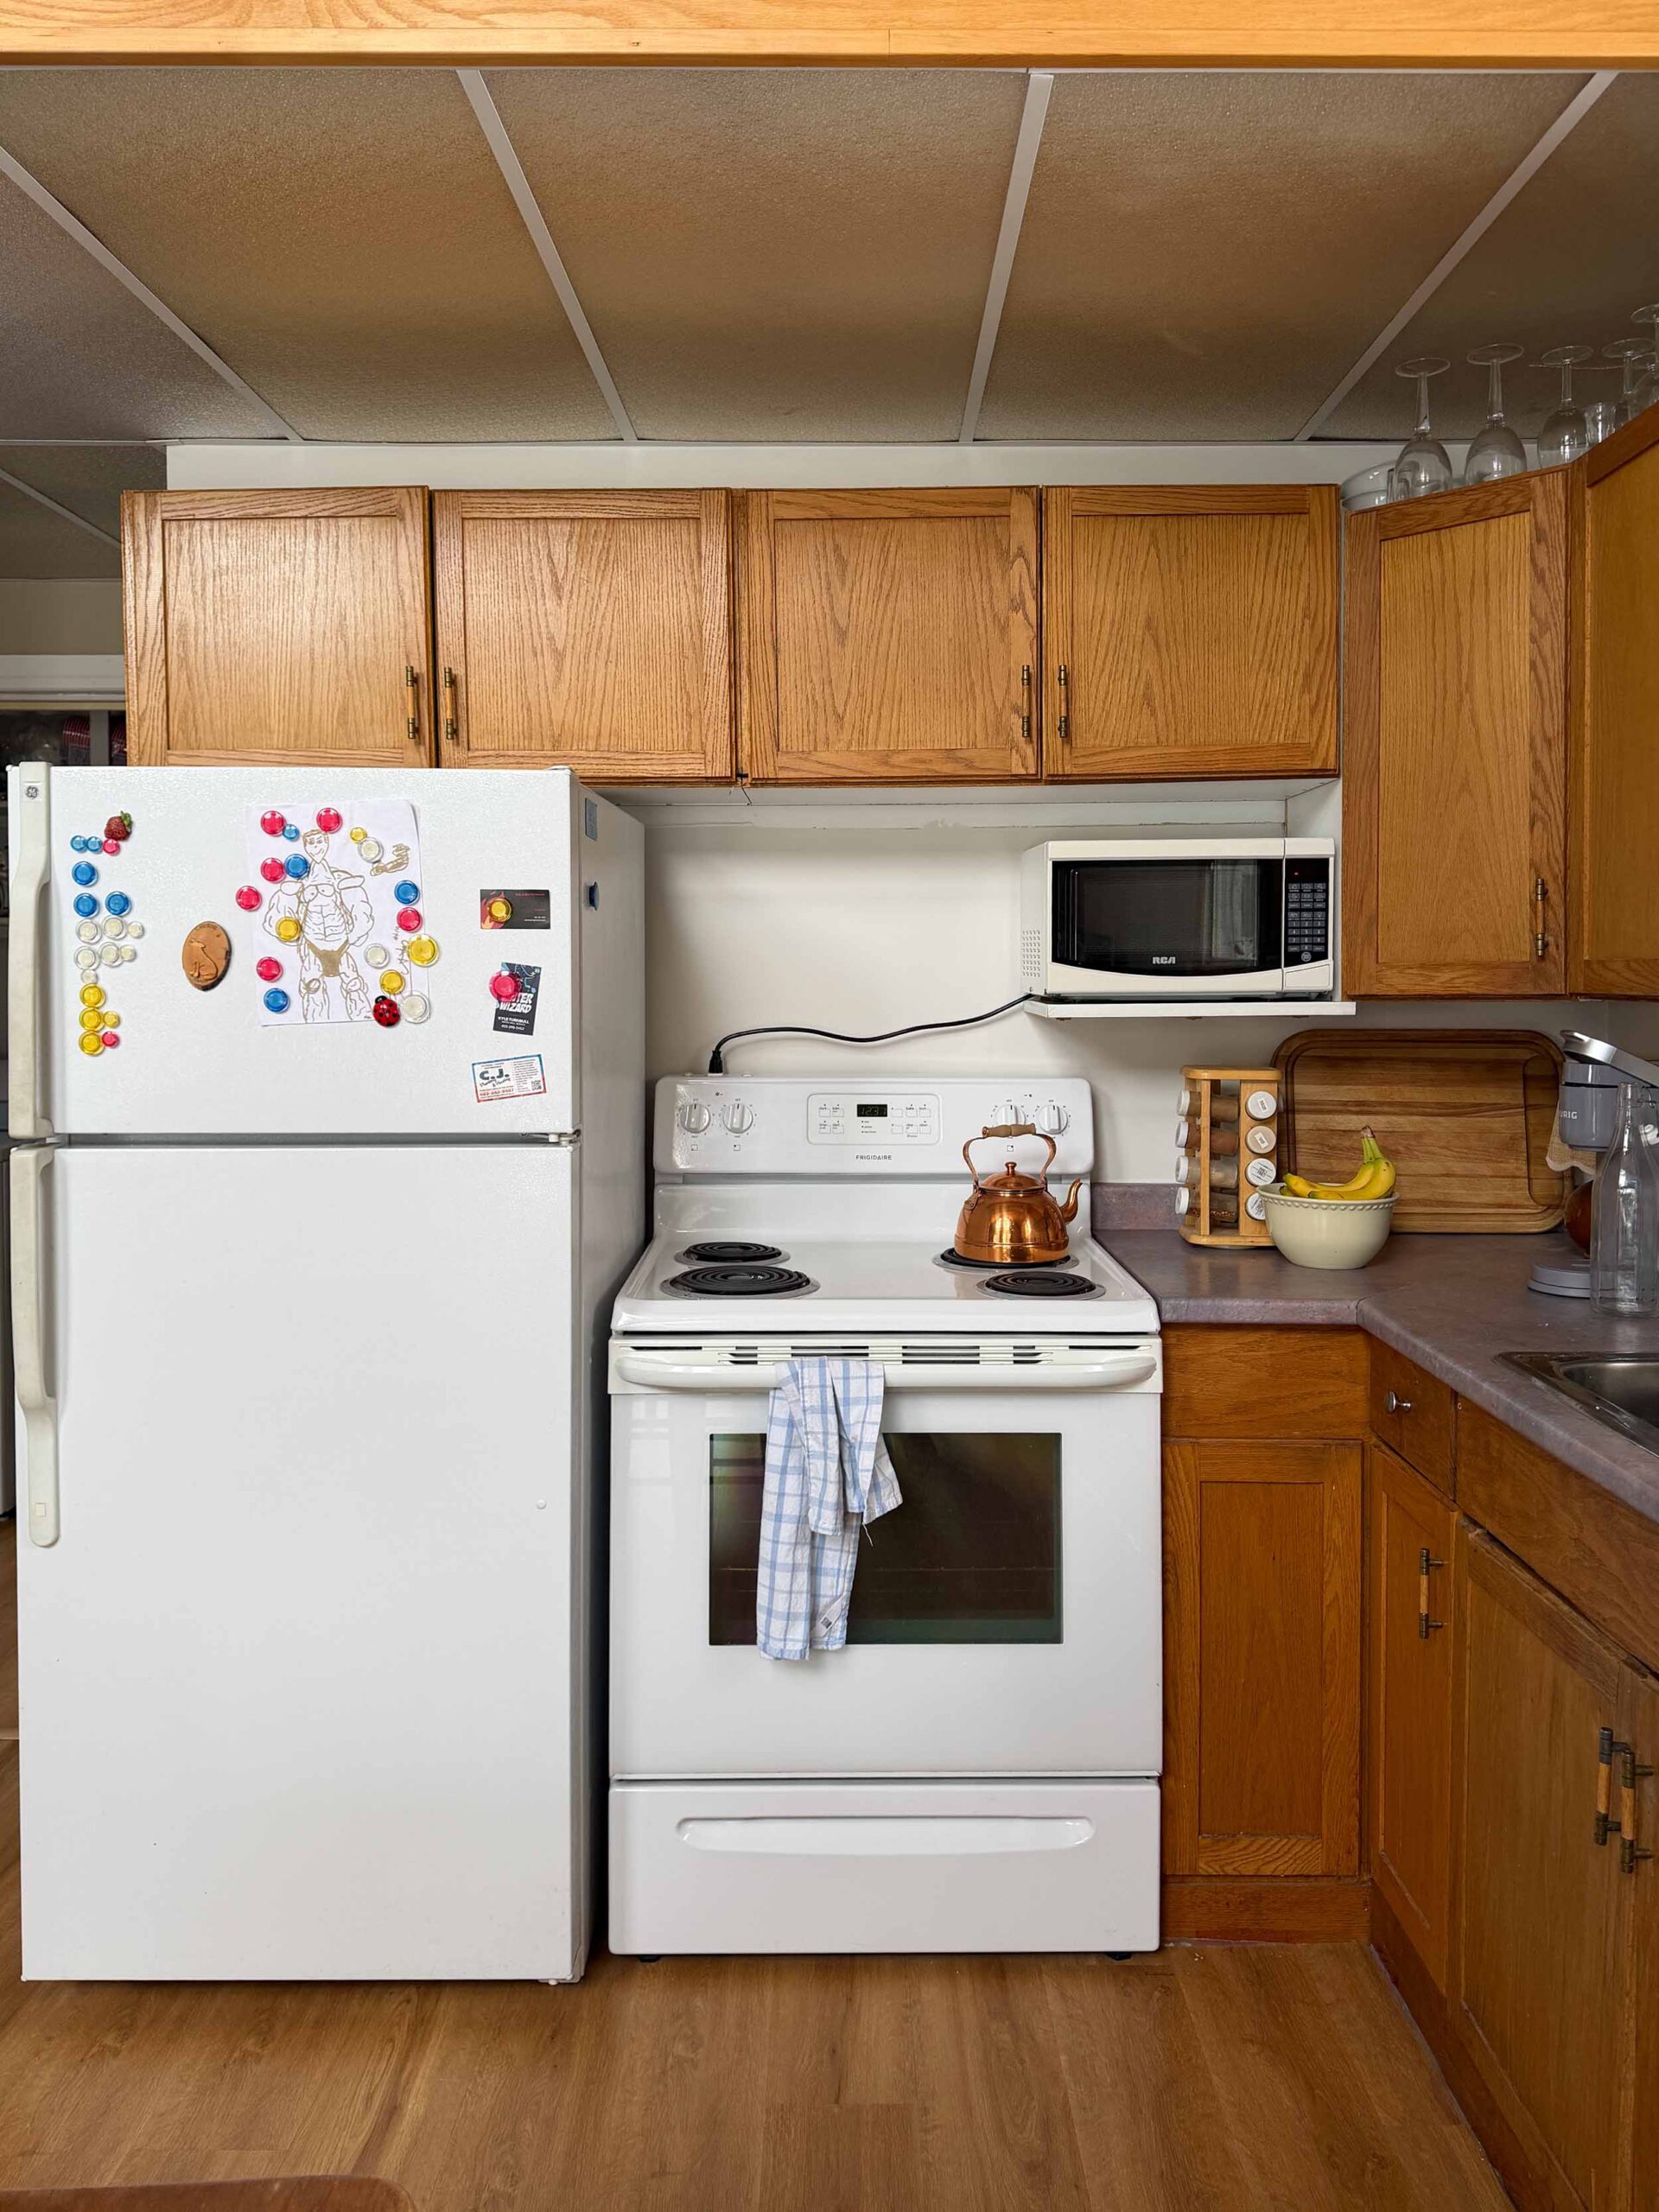
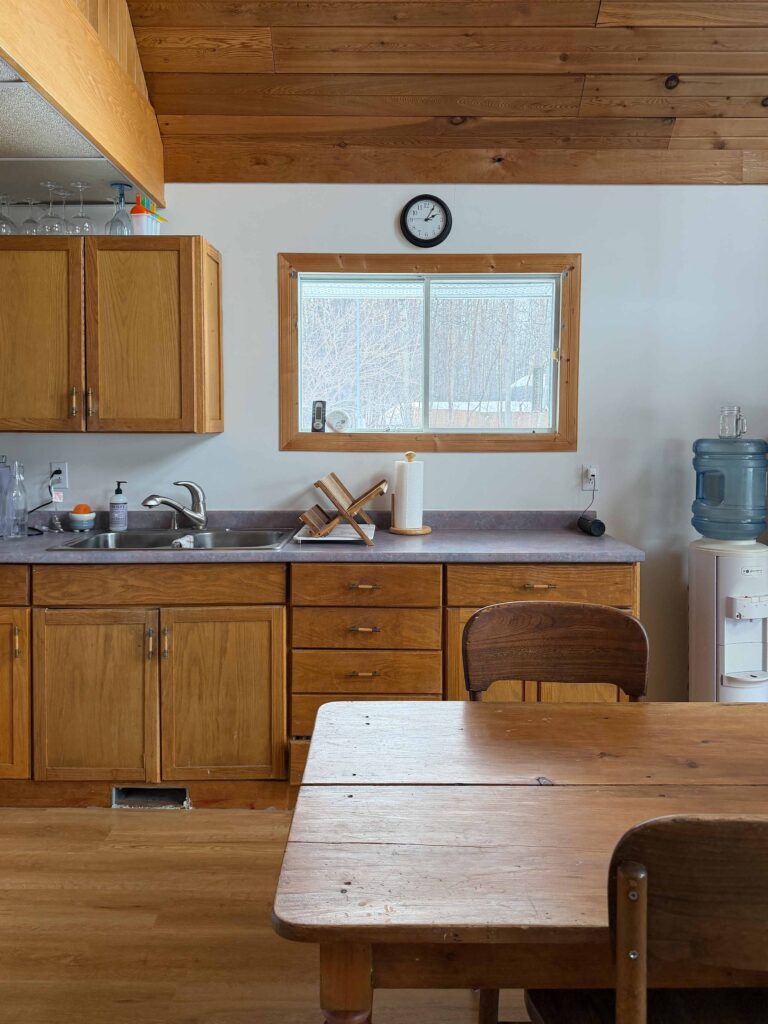
The sink was offset from the window and the main cabinet for dishes was right above the sink. This made it extremely awkward when someone was at the sink and someone else needed a glass or were trying to put away dishes.
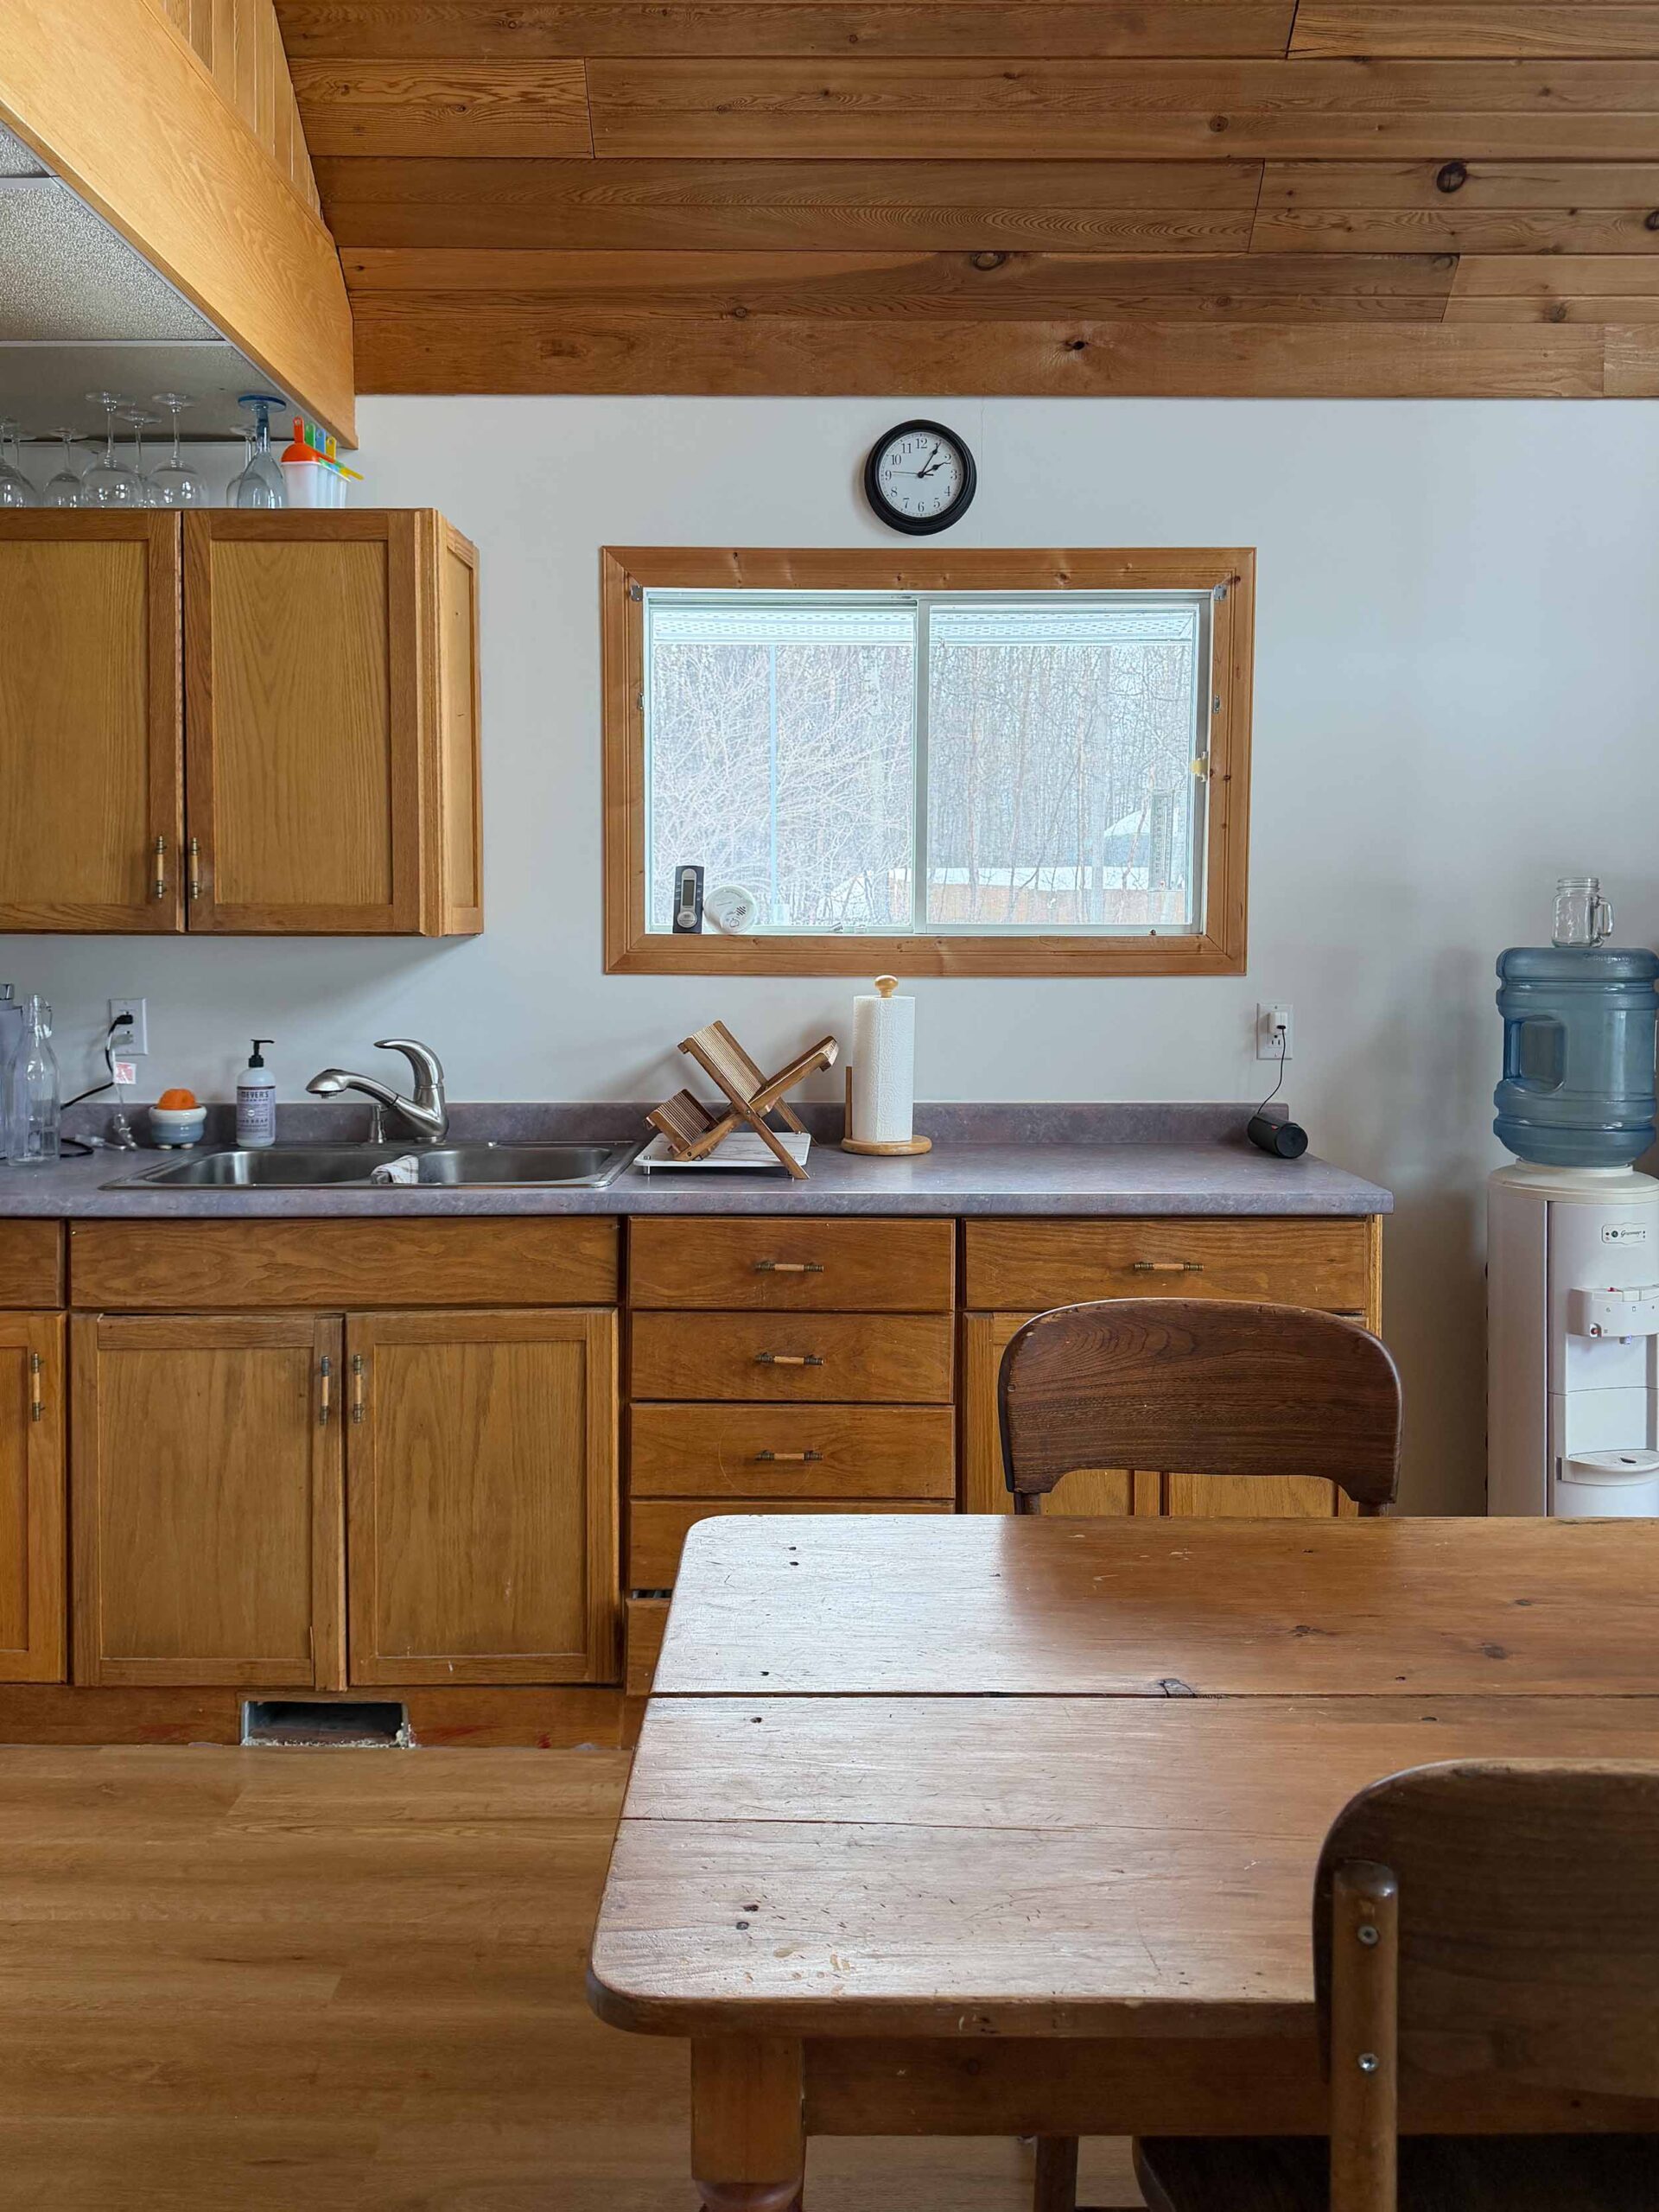
In addition, the old cabinets were in bad condition and poorly built so there really was not a lot worth saving. I built my dream kitchen at home out of Ikea kitchen cabinets, so I knew I could do a full kitchen renovation without breaking the bank!
The Layout After
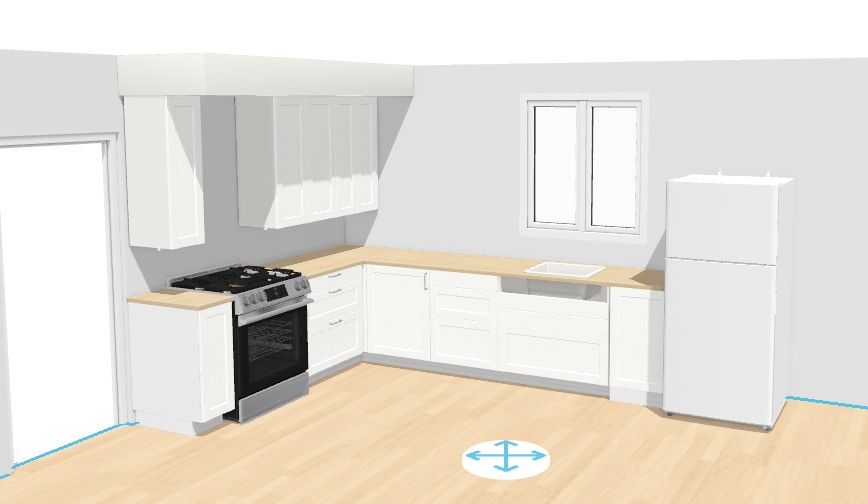
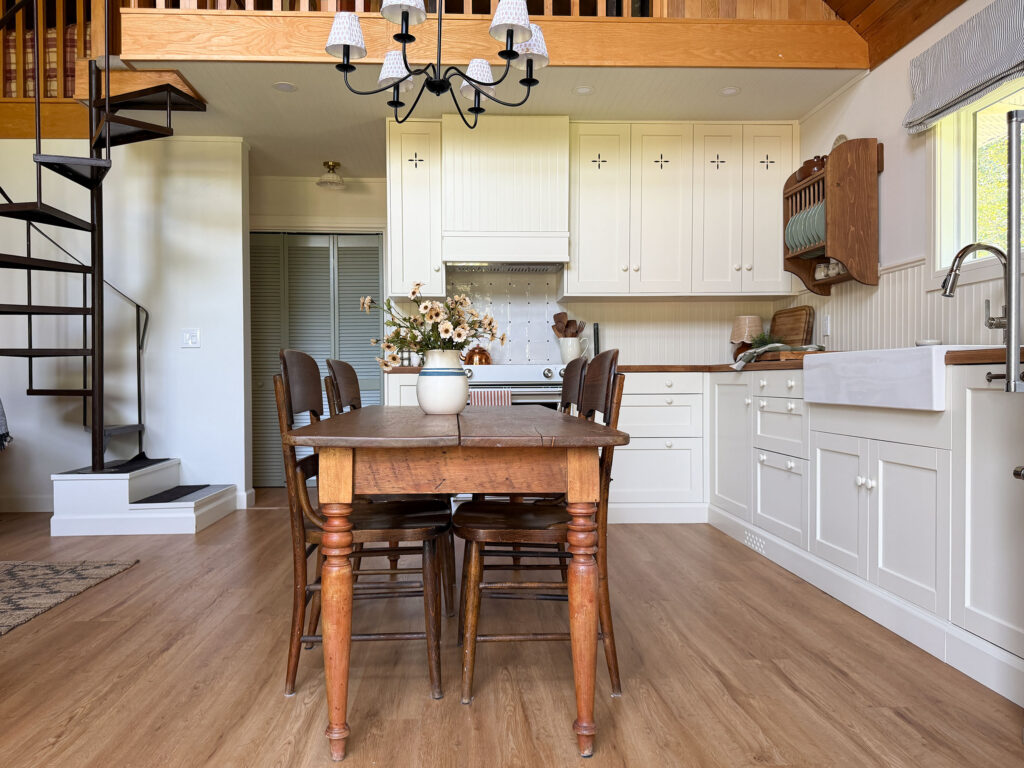
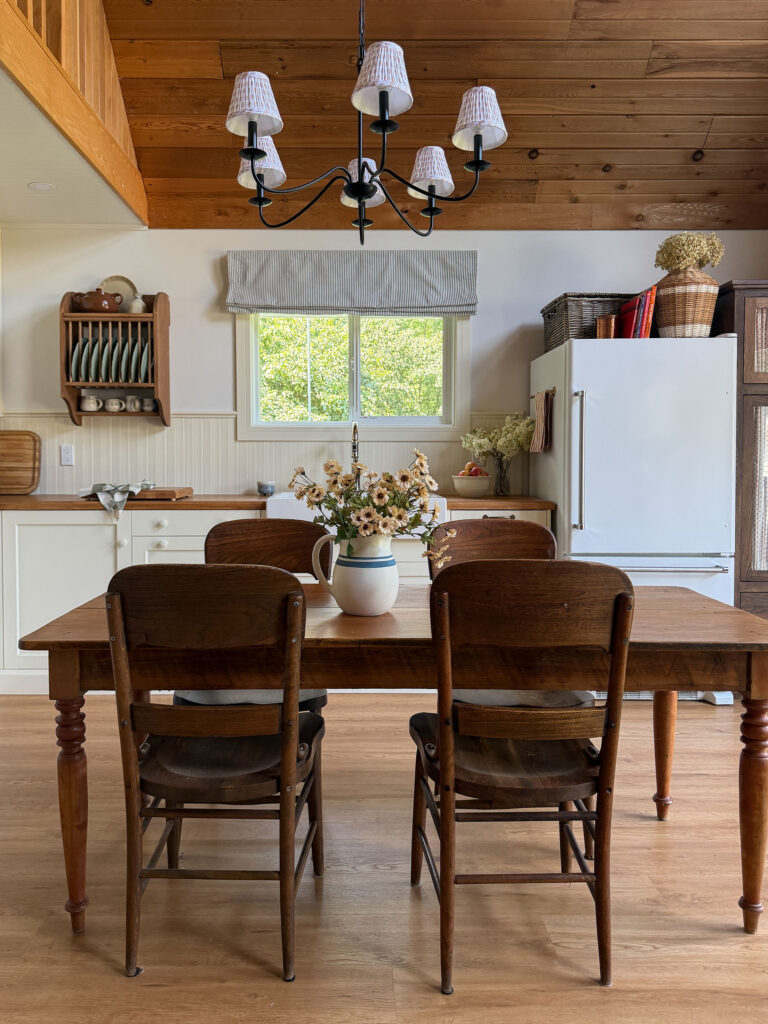
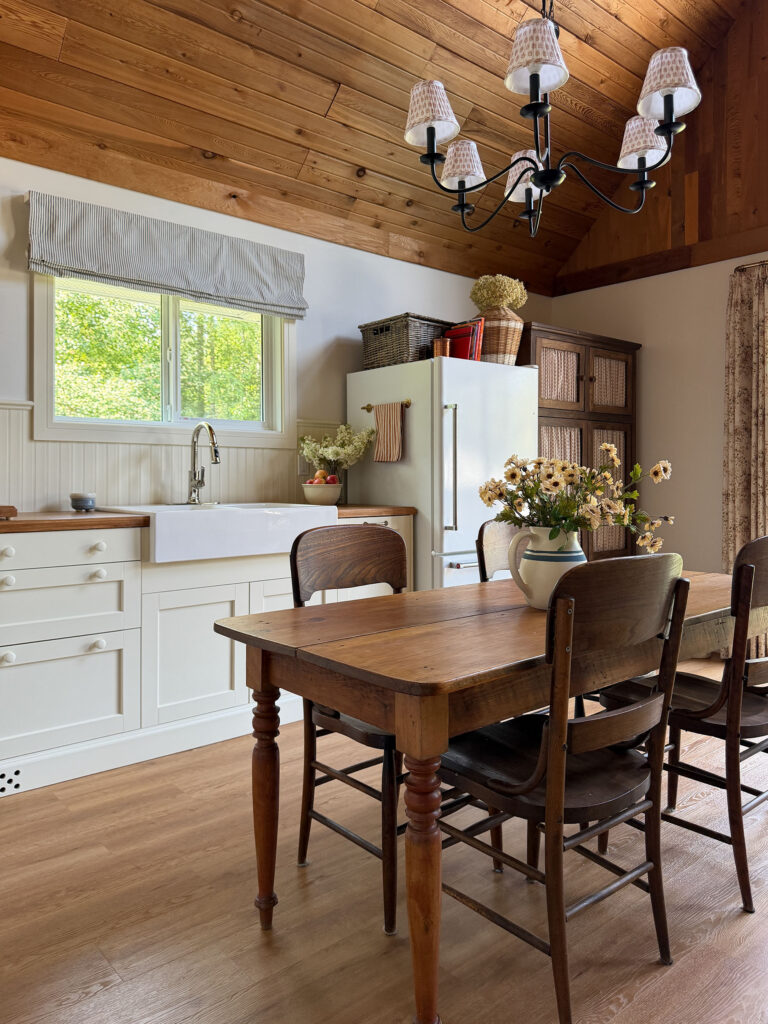
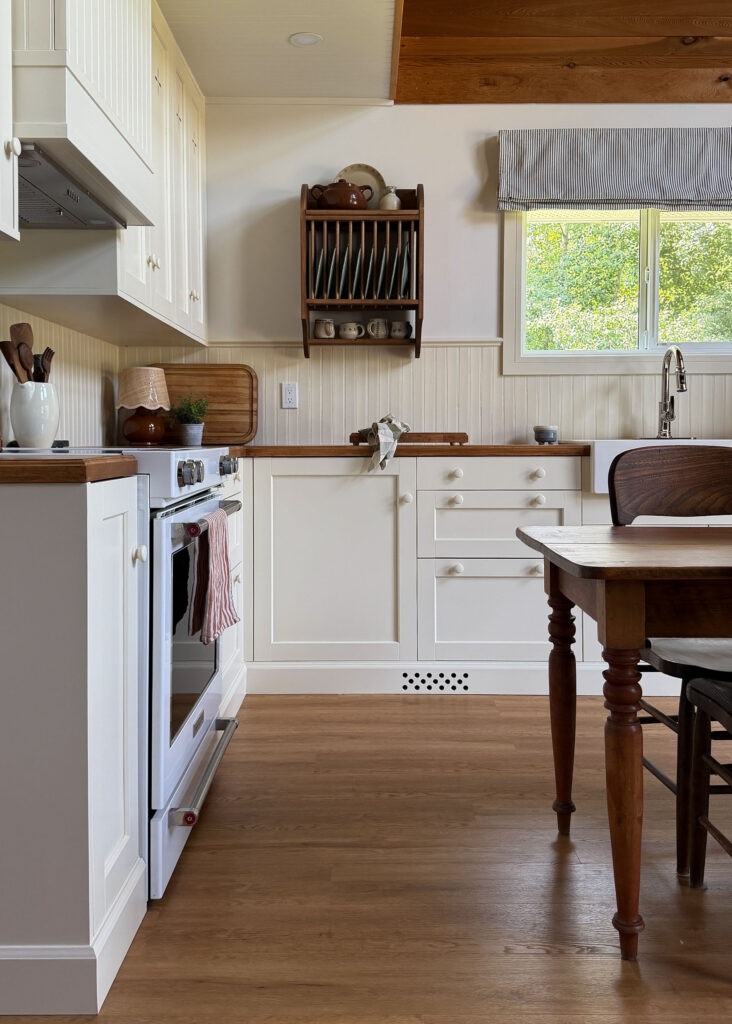
The changes I made to the layout were pretty impactful. The first thing we did was remove the corner banquette and instead make use of the big space in the middle of the room to put a country kitchen style table. This gave us about 8 more lineal feet to work with for the kitchen!
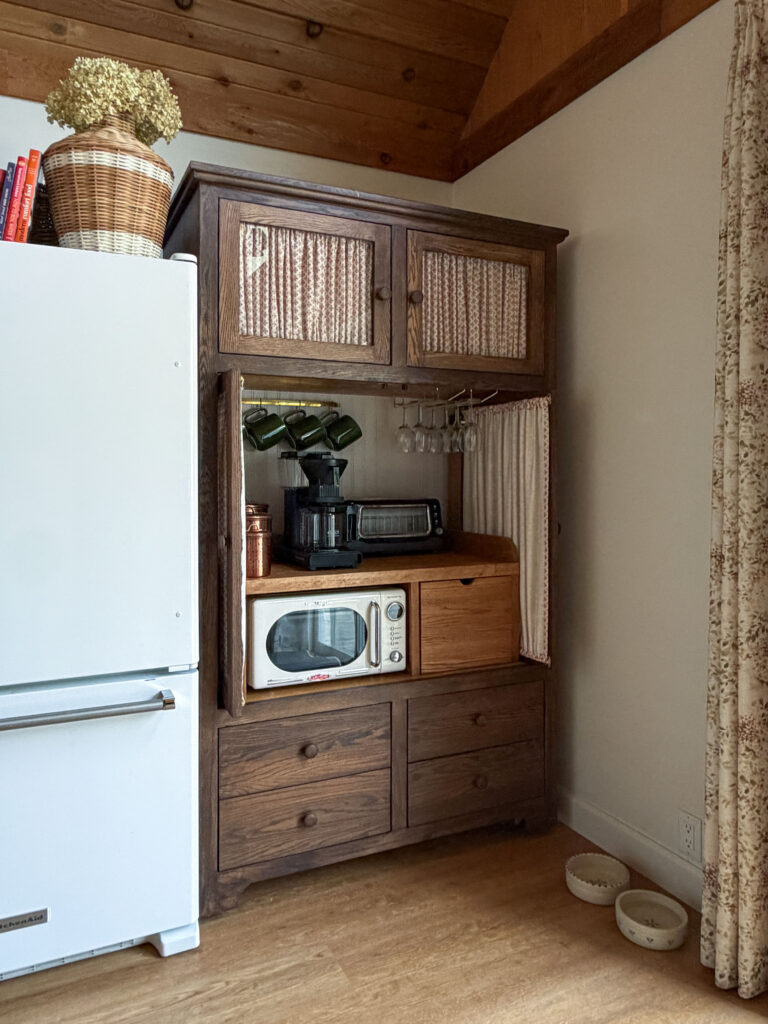
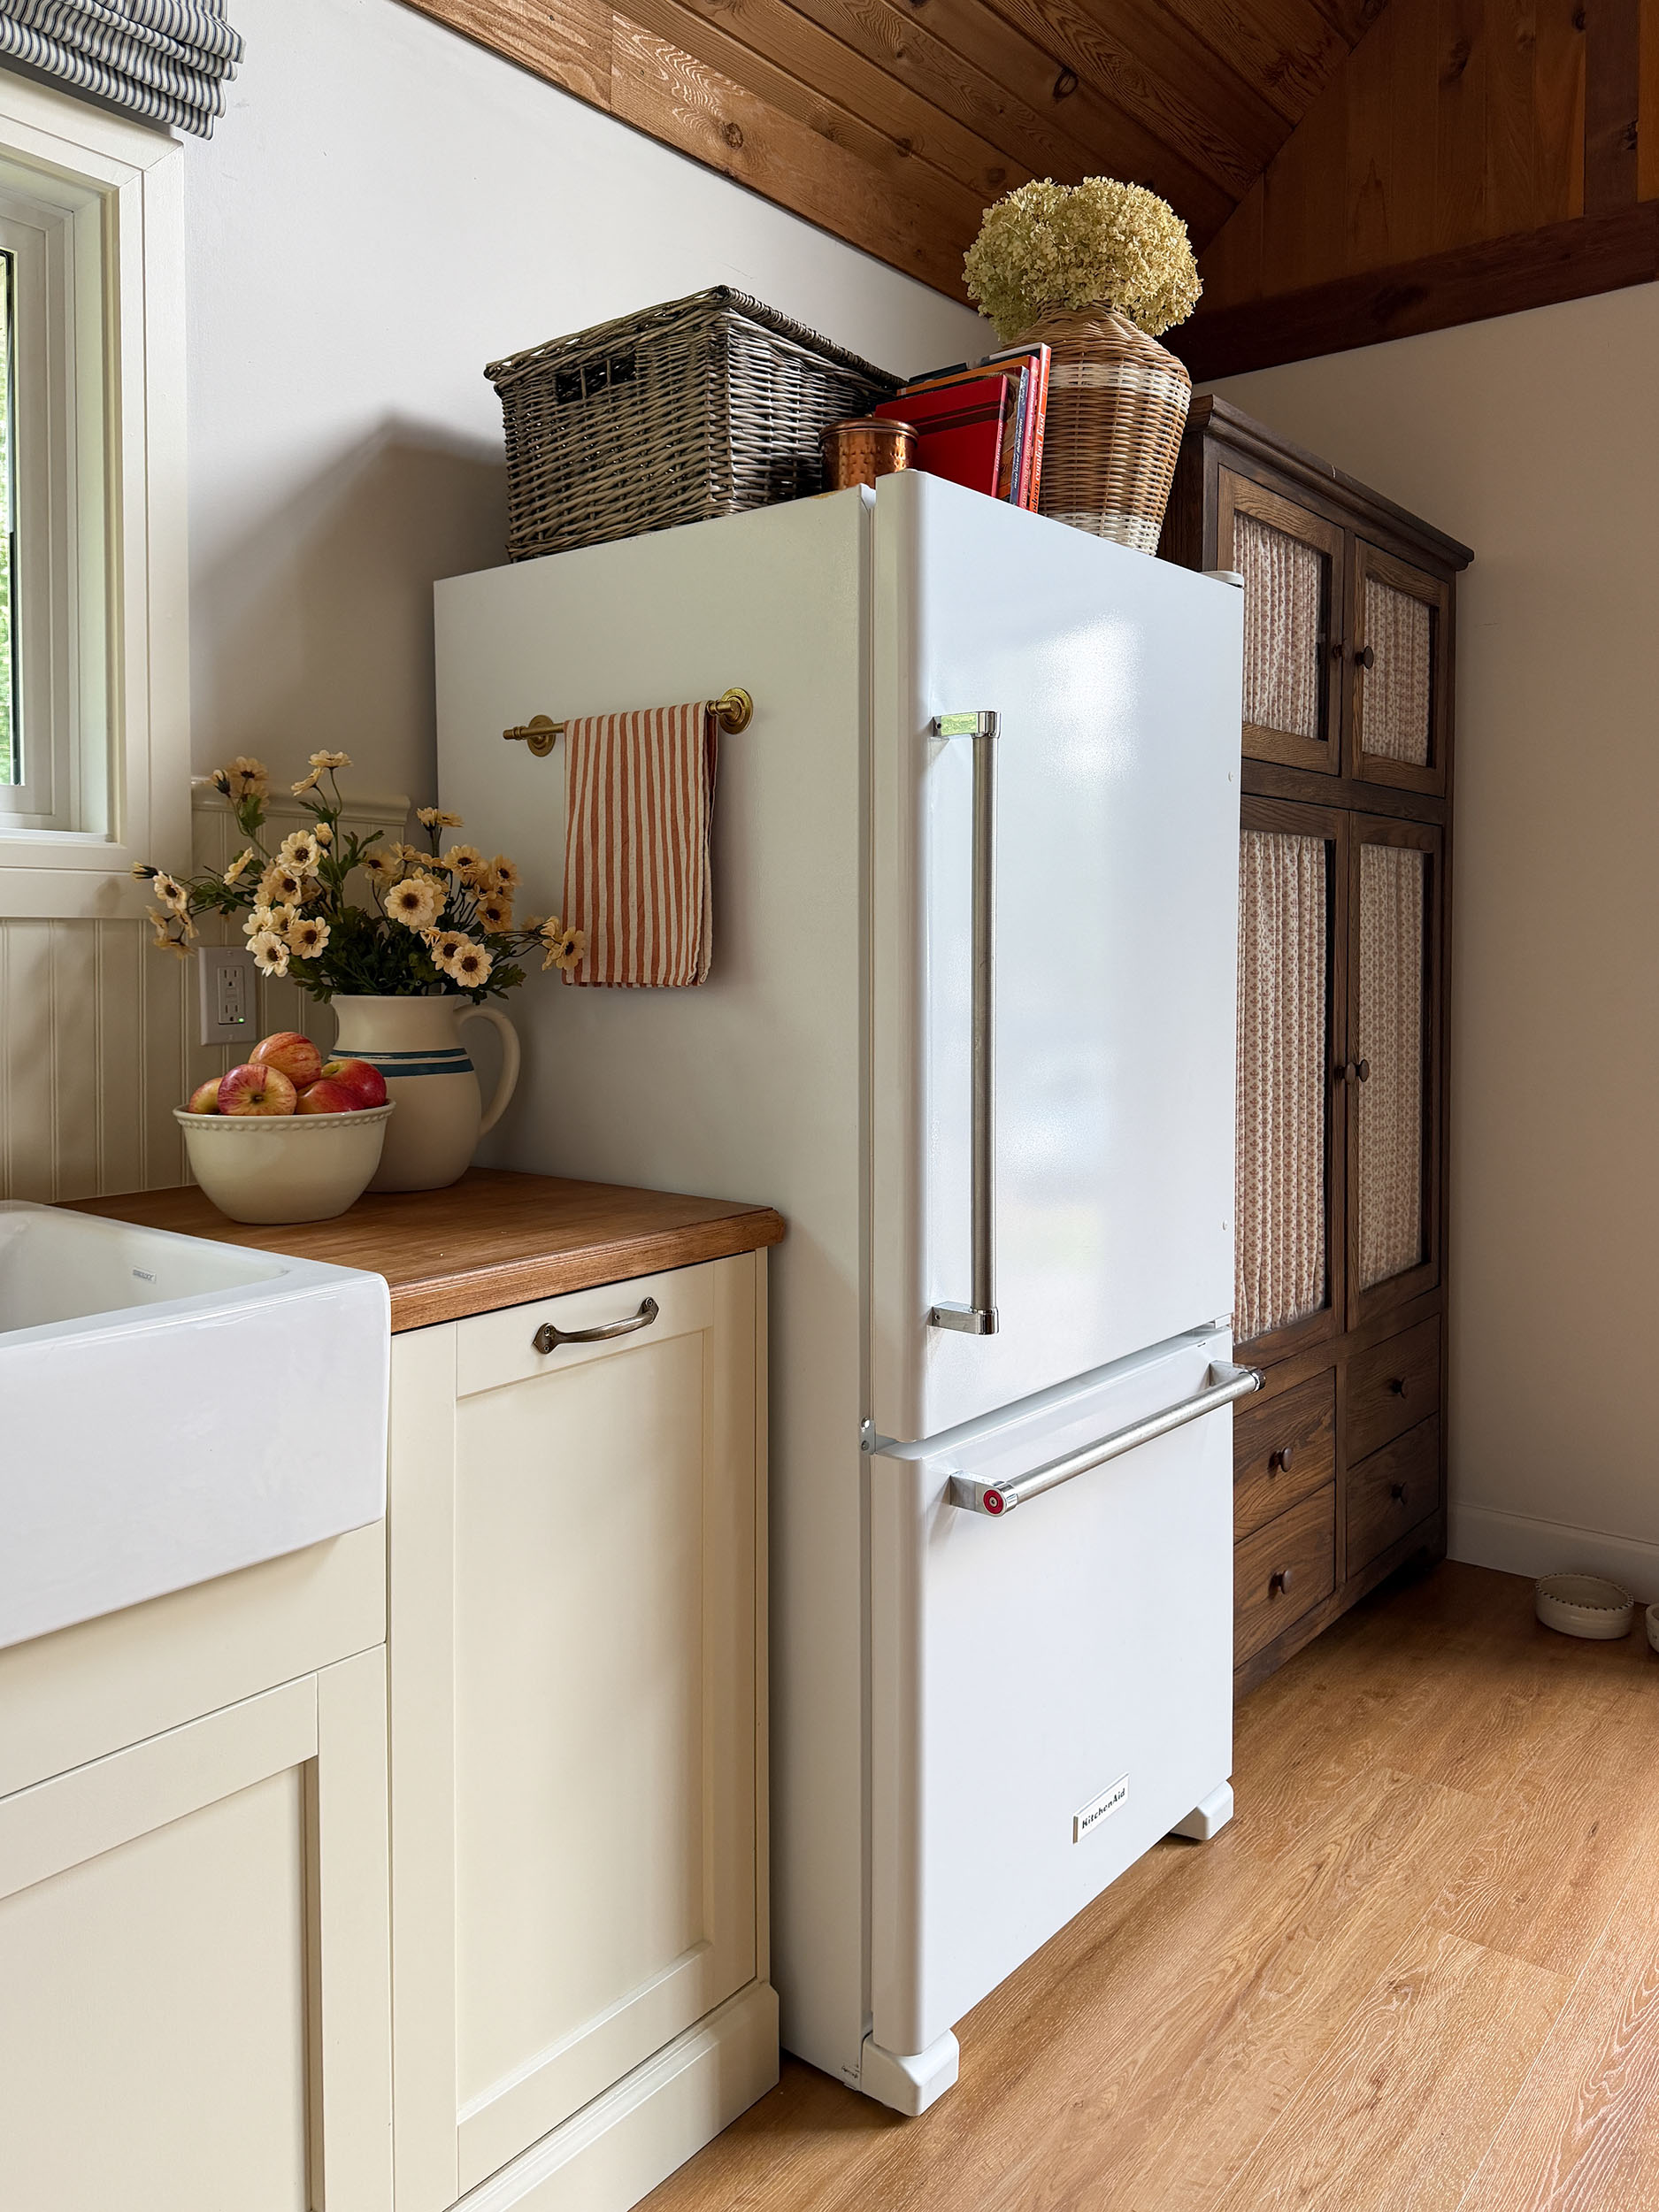
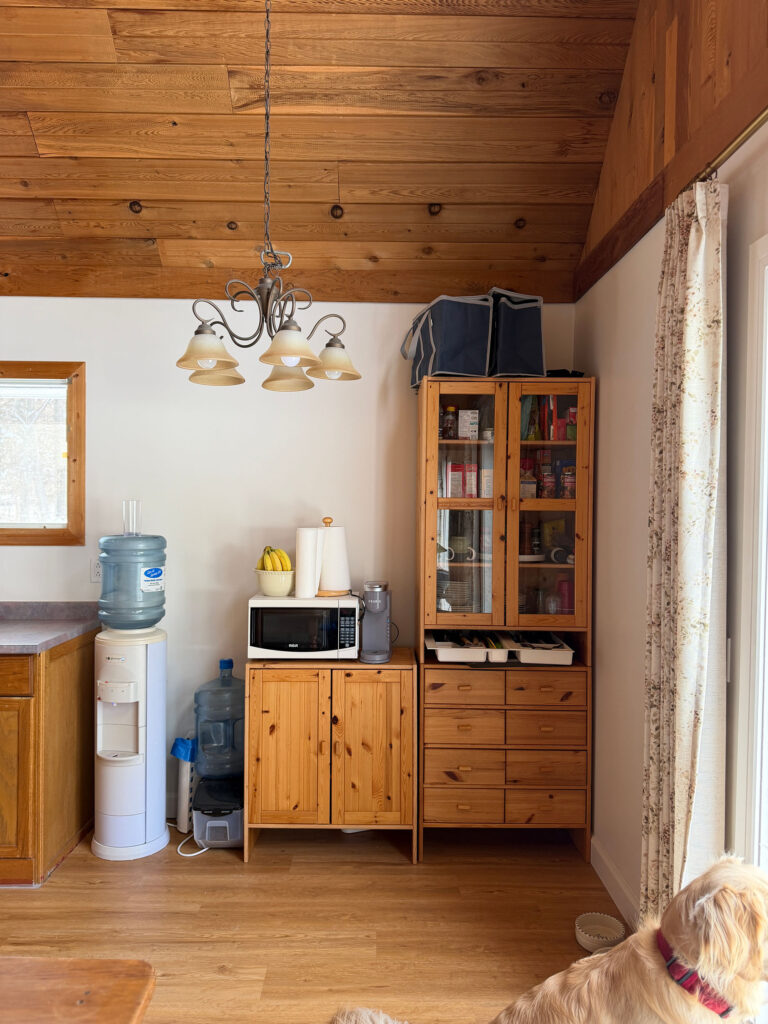
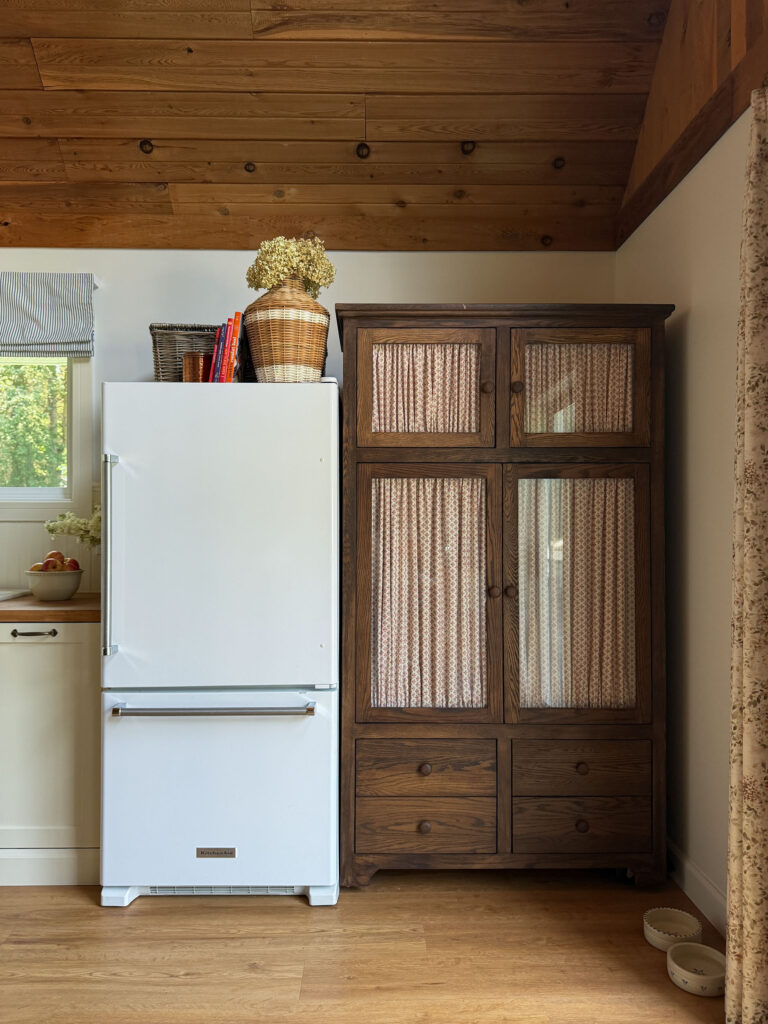
We moved the fridge to that space to separate the fridge and stove. Next, I found an old TV cabinet on Facebook Marketplace and turned that into a coffee bar and pantry!
We moved the sink under the window because… well it should have always been there. After that was done, we filled in the space with base cabinets, using drawers as much as possible. We even squeezed in a little 18″ dishwasher next to the sink!
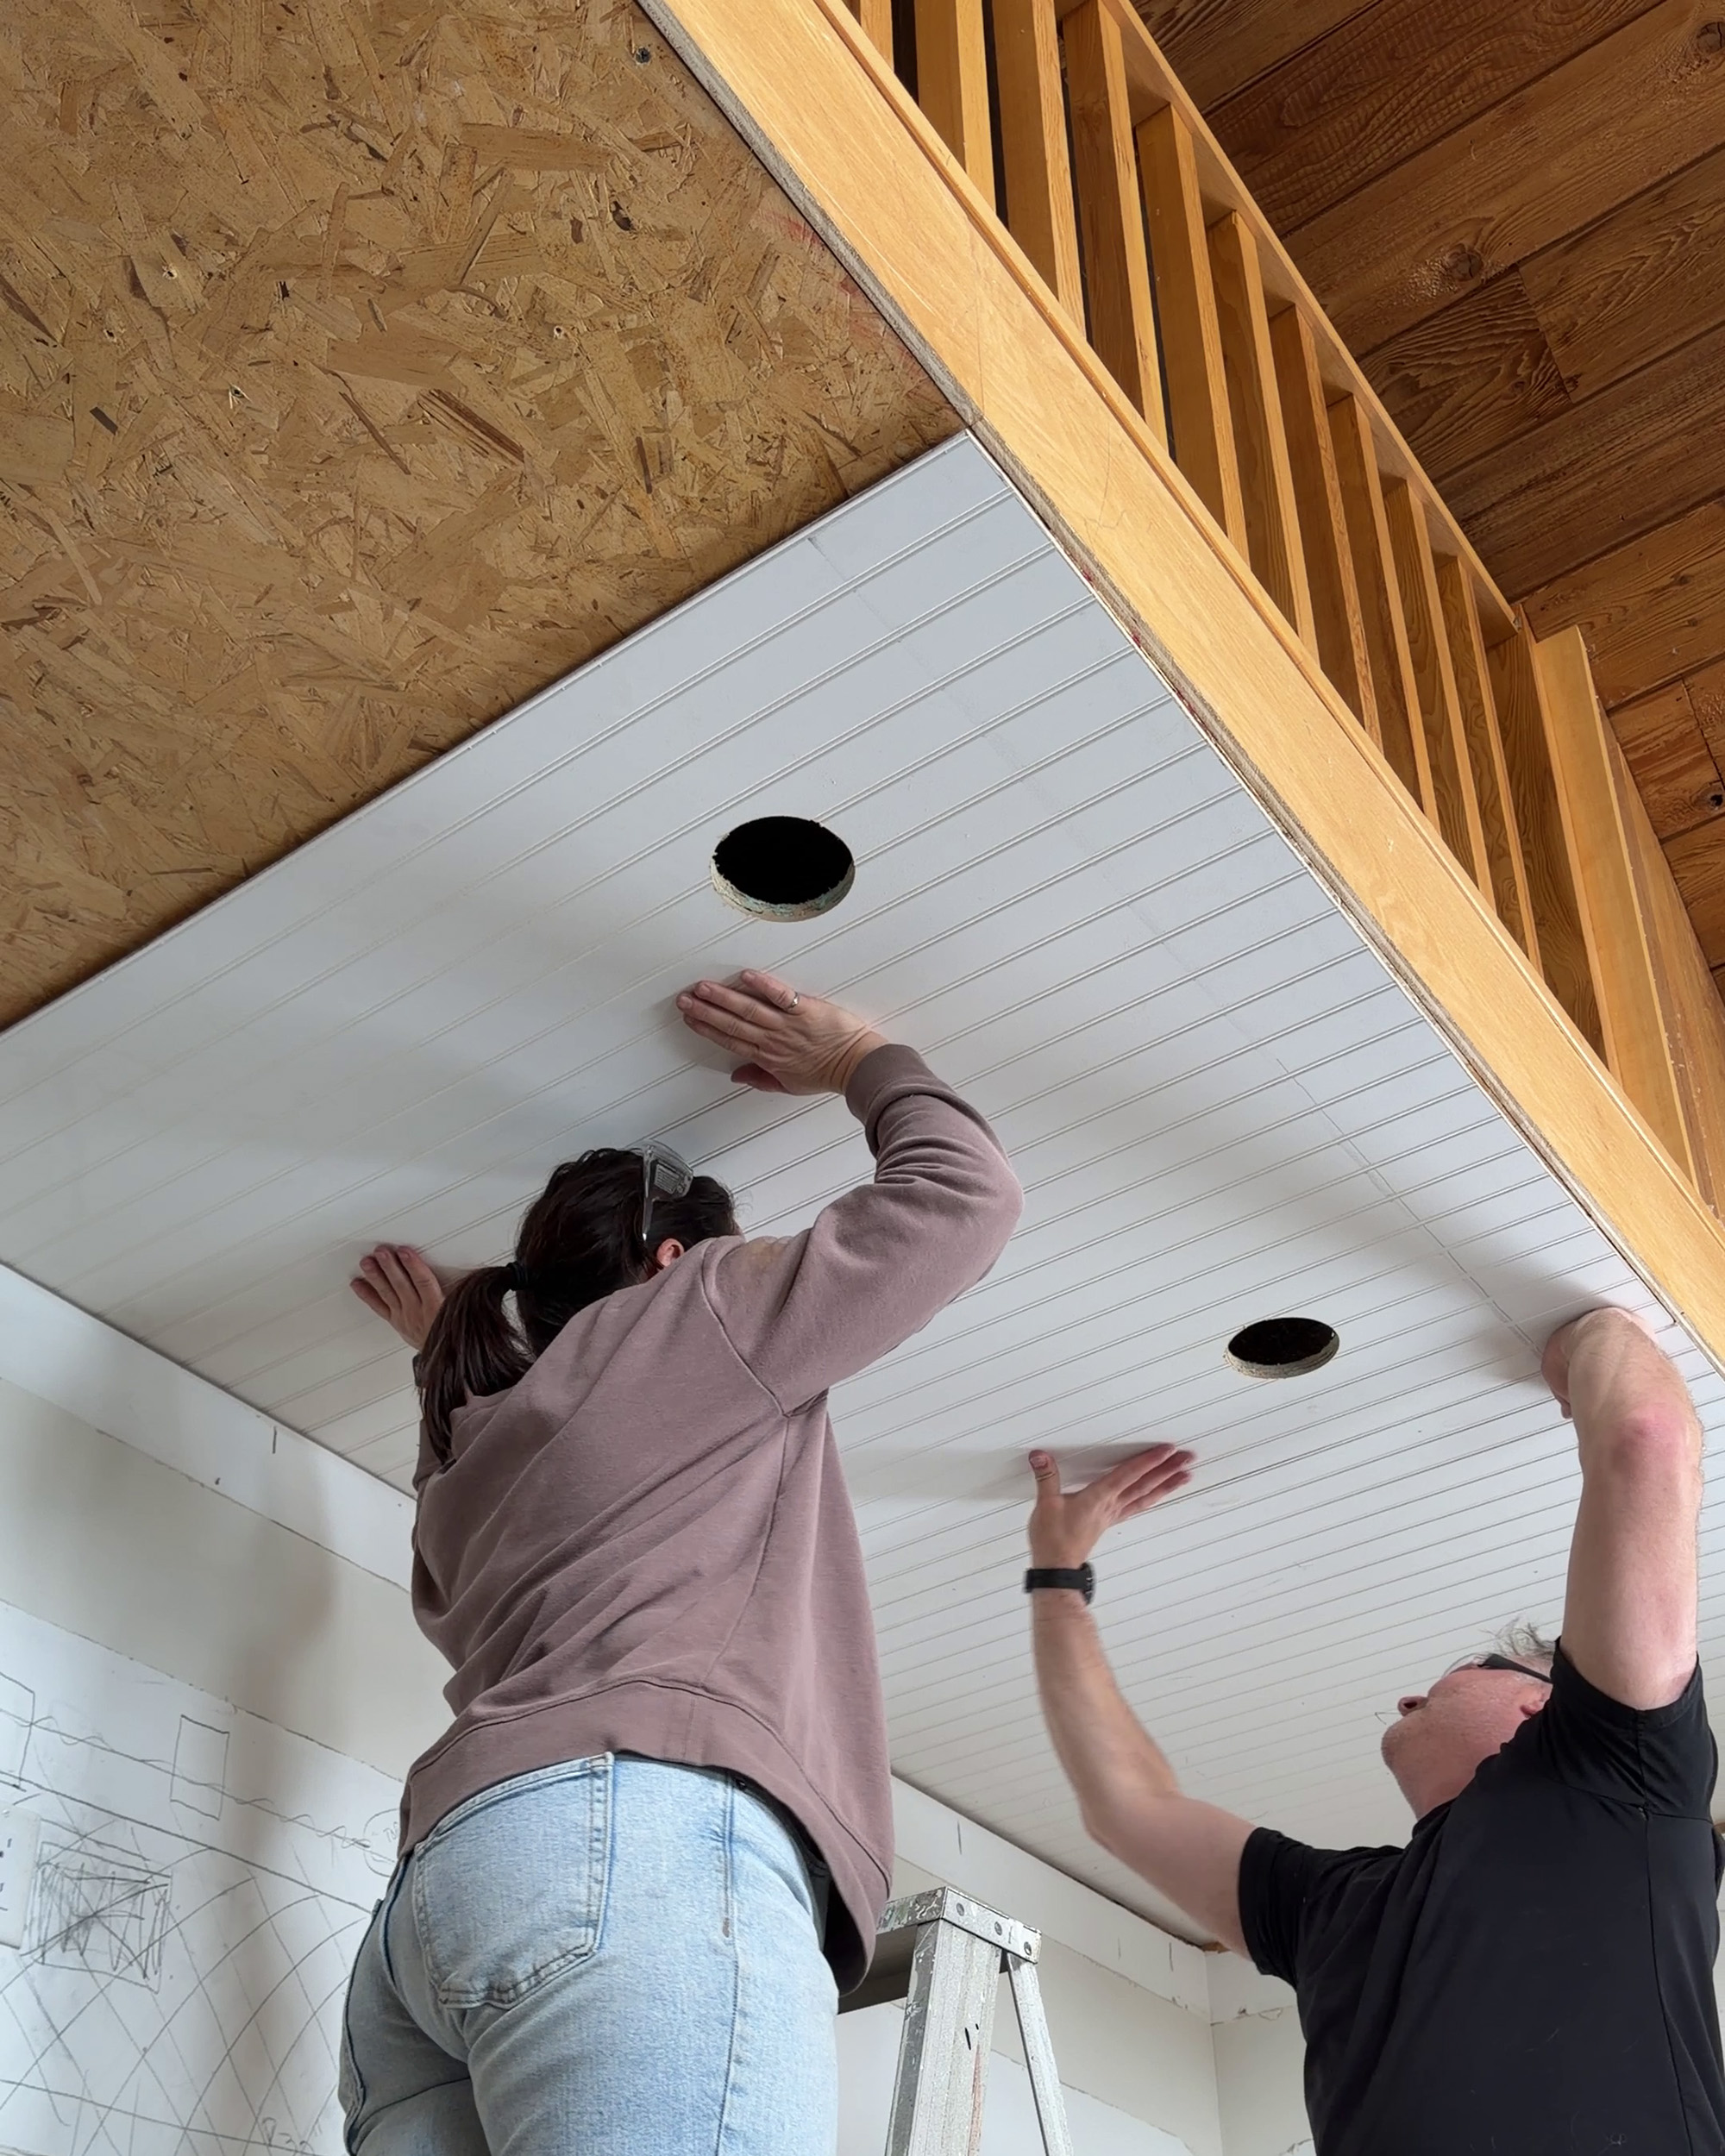
The kitchen and adjacent hallway had a drop ceiling with fluorescent lighting (sometimes called a sunshine ceiling) that was really dating the whole cabin. We removed that and added some subtle kitchen lighting with some recessed lights and used beadboard for some added charm. When we removed that drop ceiling we also gained about 5″ of ceiling space, which allowed us to use 40″ uppers instead of 30″, which made a big difference in storage space too!
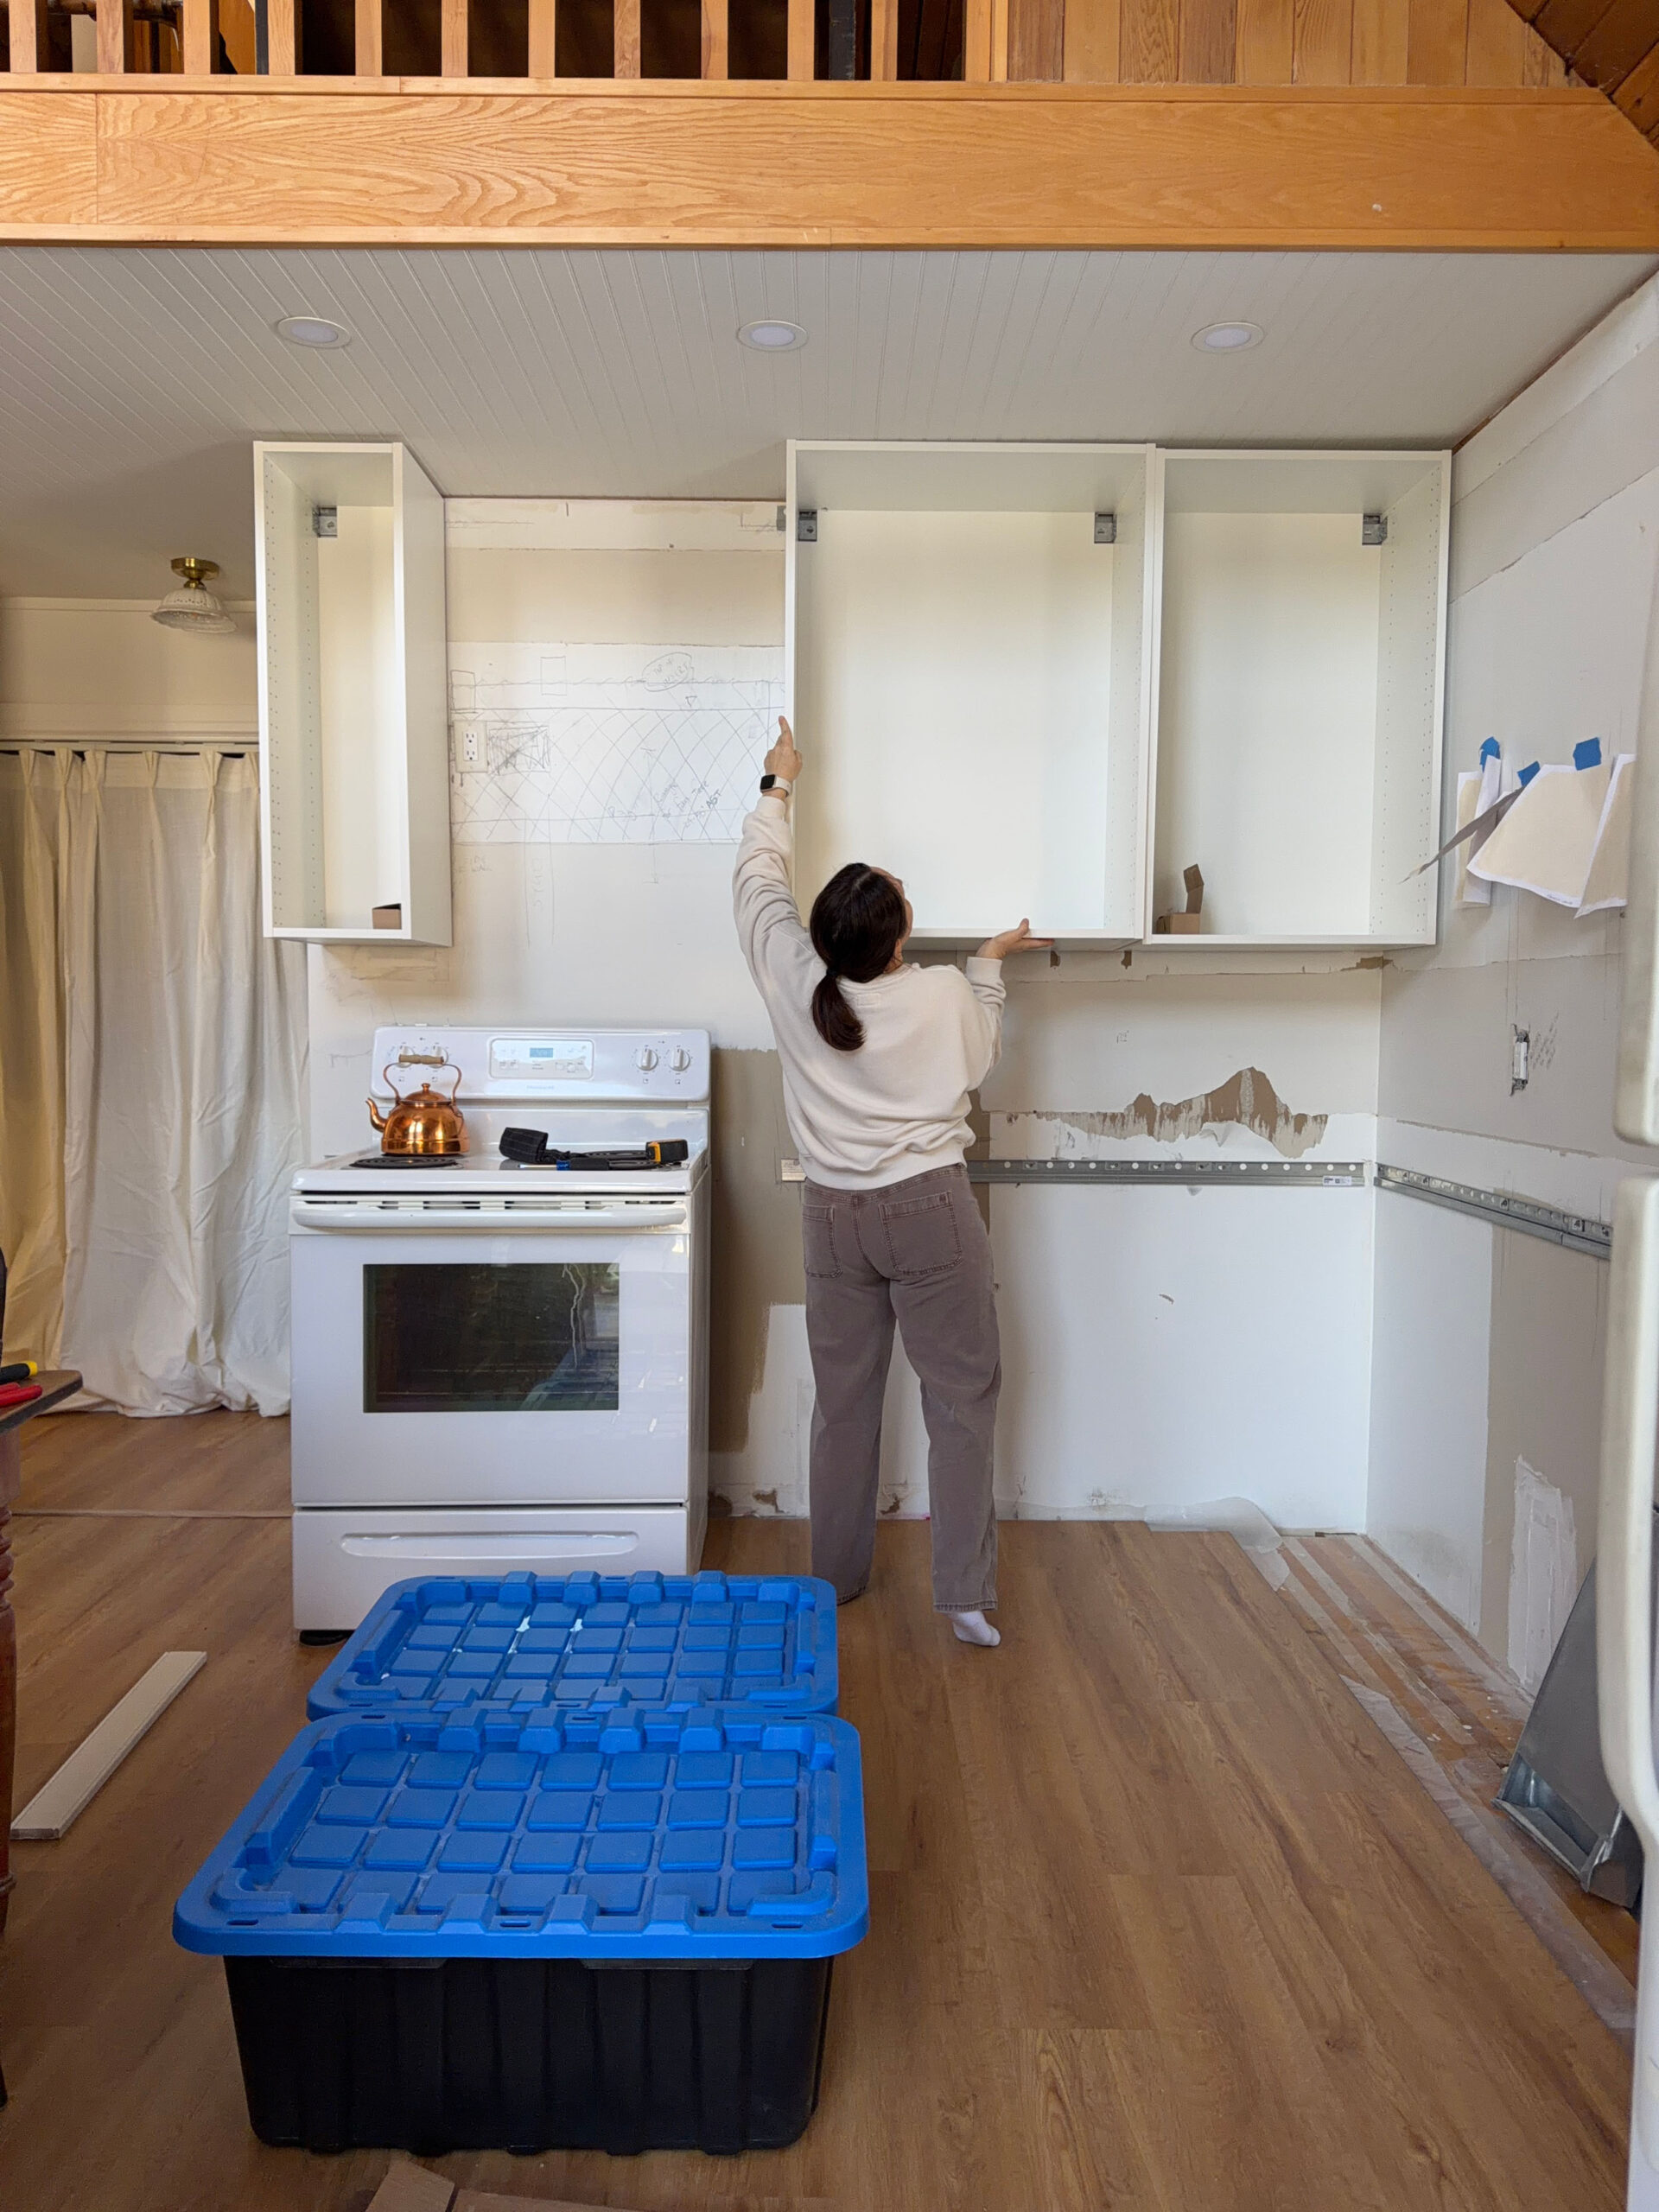
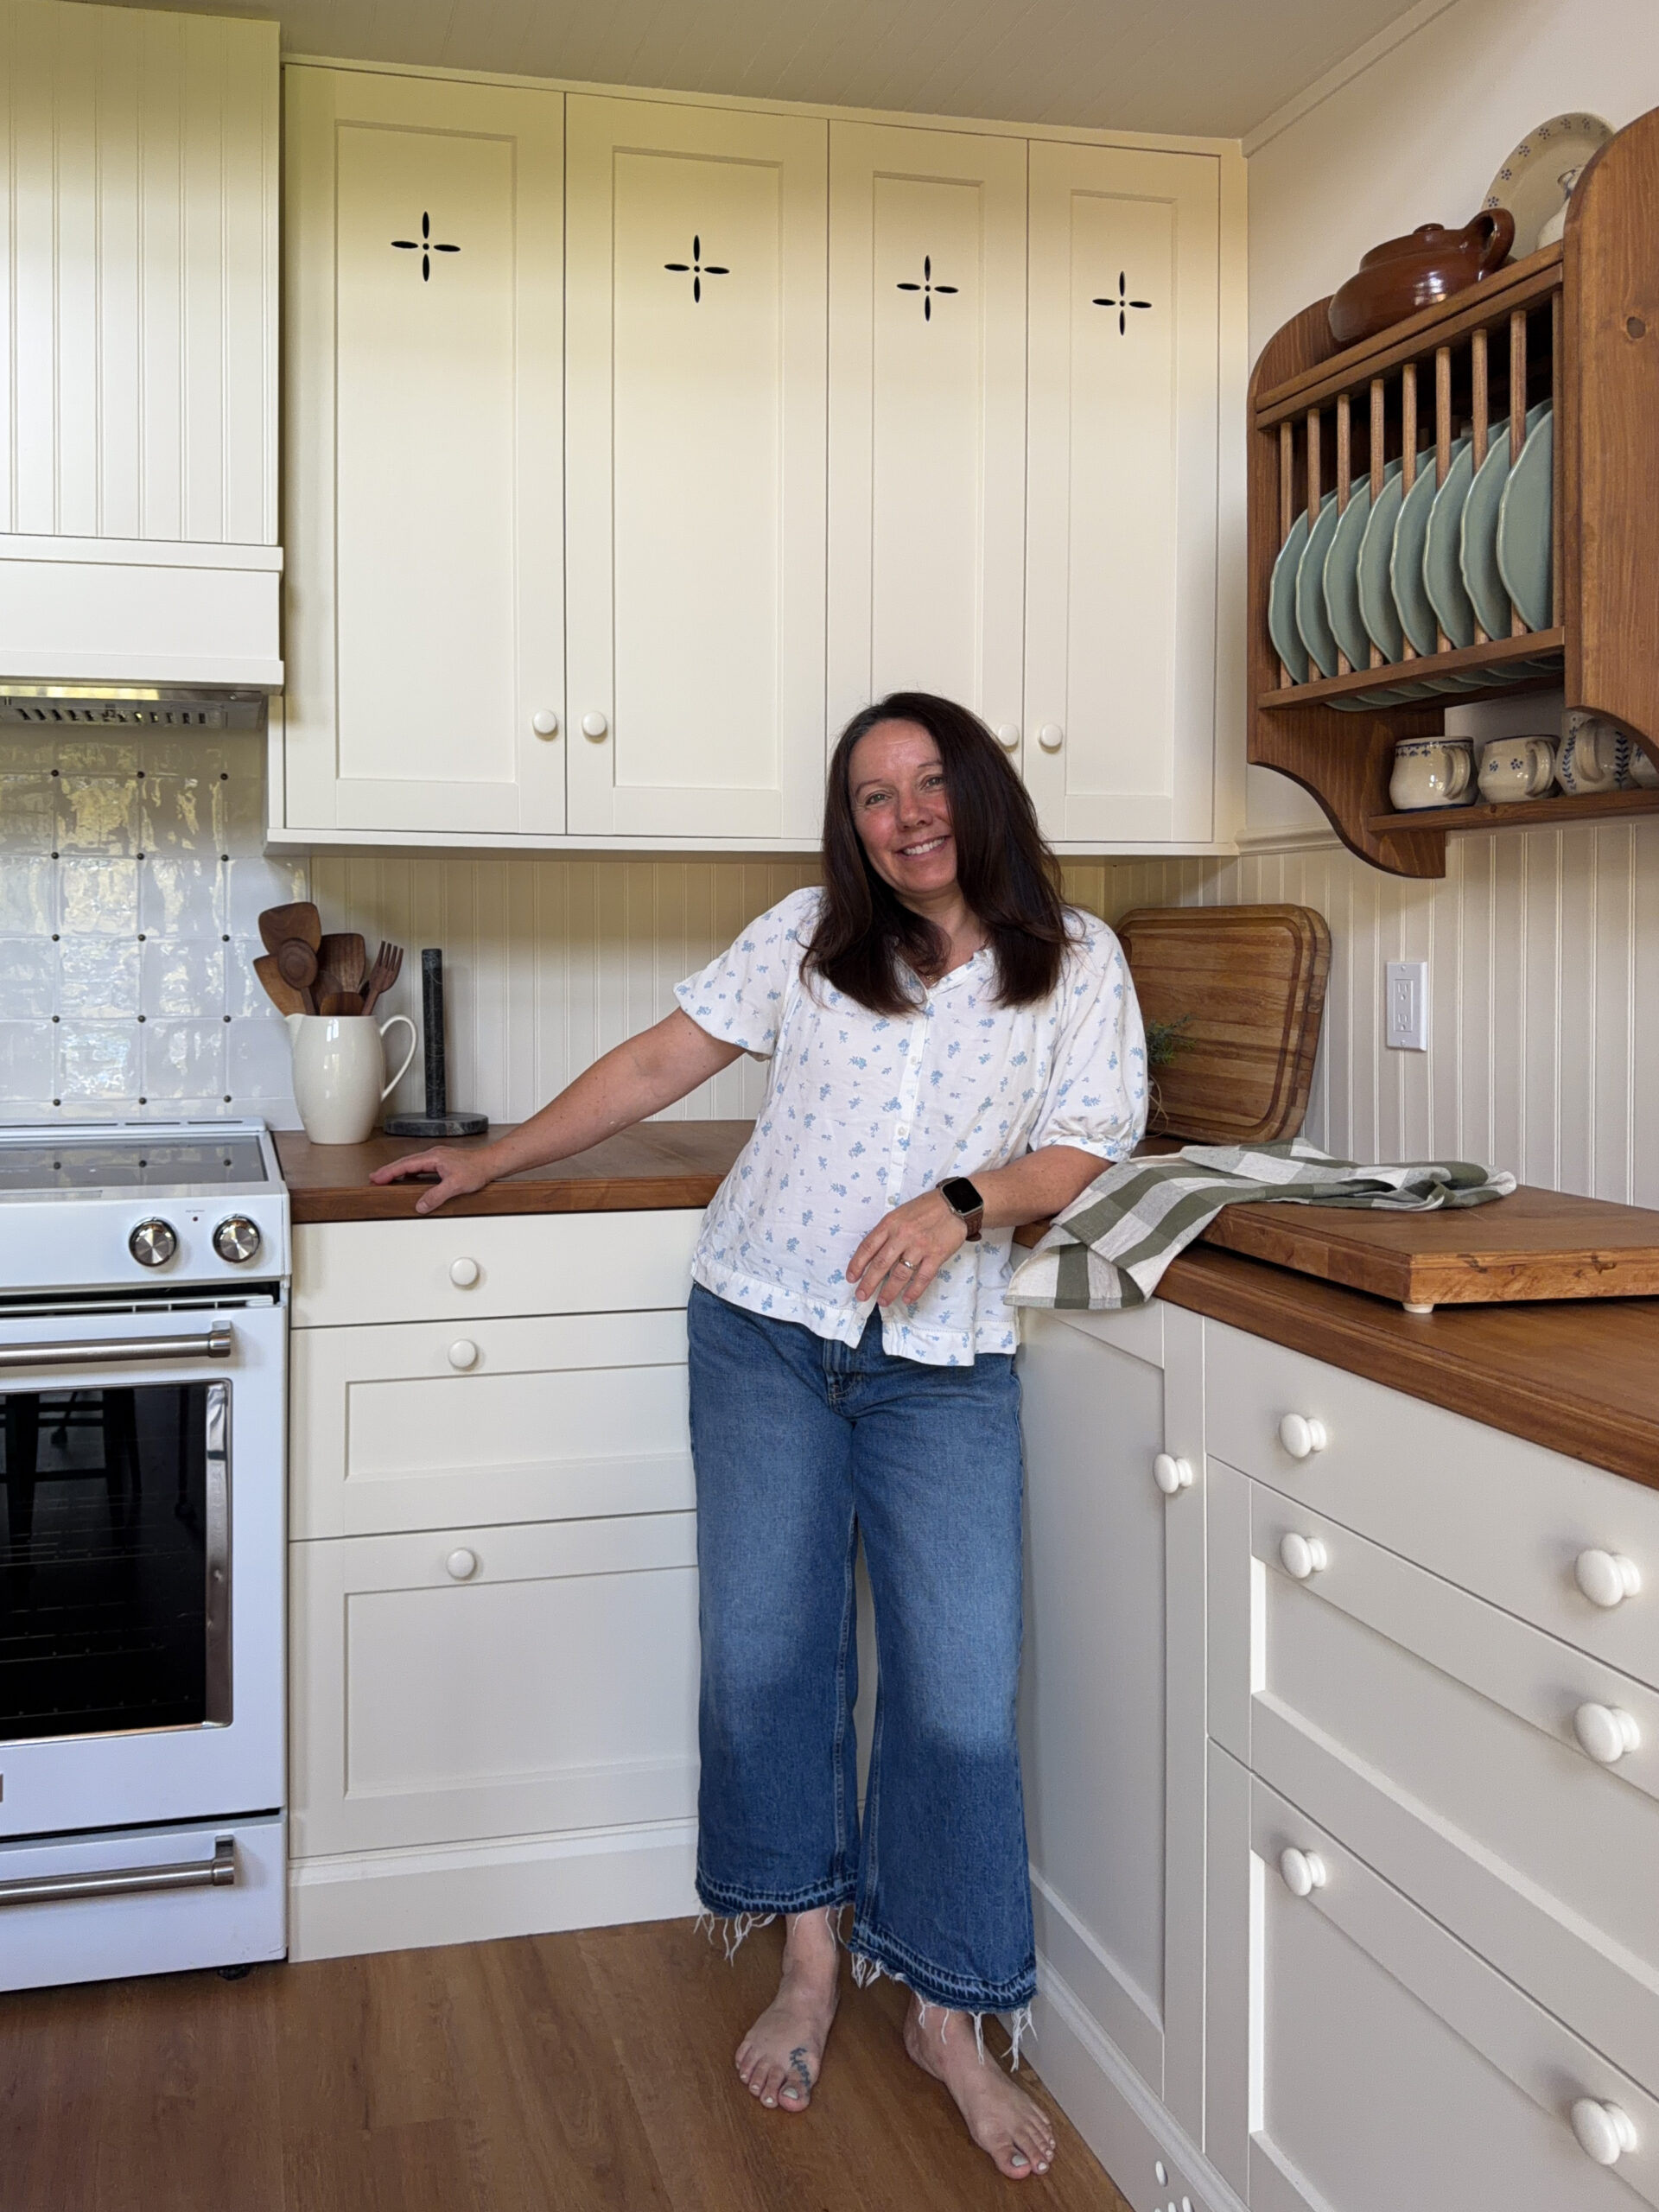
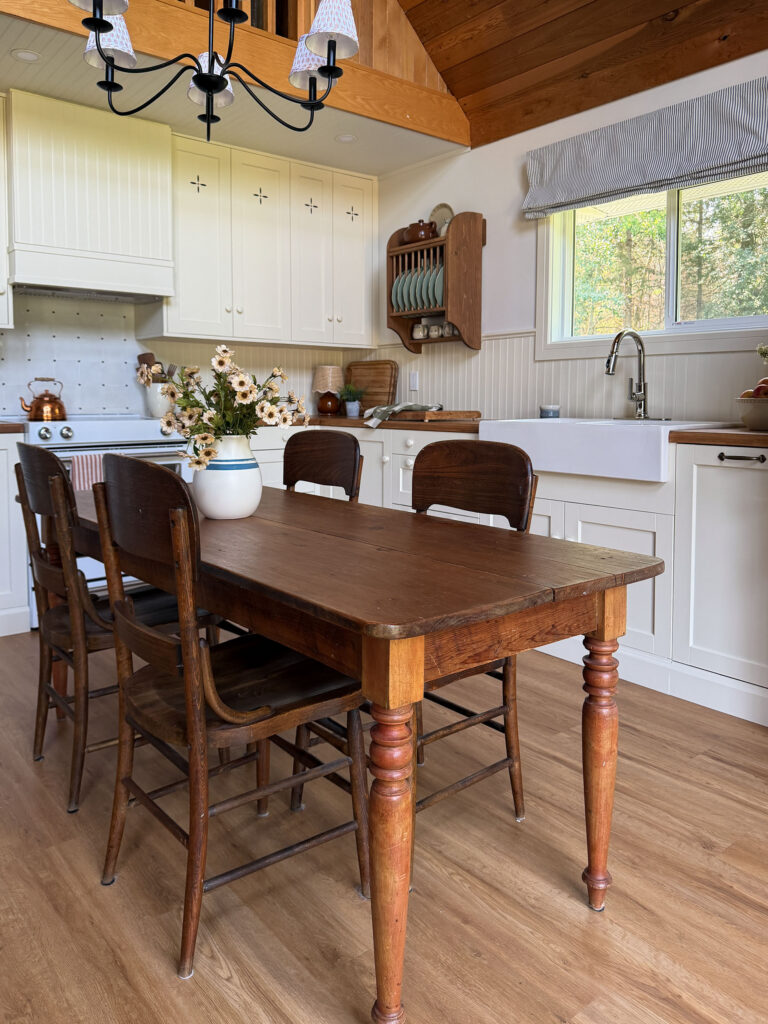
On the stove wall, we added uppers all the way across and built a range hood.
The changes we made to the layout may seem small but they made a huge difference! The old kitchen was overflowing, and when we put everything away in the new kitchen, we found we had room to spare!
About Ikea Kitchens
I’m no stranger to Ikea kitchen cabinets, and have used them in my house quite a few times. I always start my kitchen planning with their online planning tool. I find the Ikea kitchen planner that is on their website quite easy to navigate during the planning stage.
I have used some kitchen cabinets in the same price range as Ikea kitchens from big box stores and let me say there is no comparison on quality. Ikea’s kitchen cabinets are strong, study, have good quality hardware and I trust them for making hard-working kitchens that work in real life.
Certainly they can not be compared to custom cabinets, but I do think they are the best you can get in this price range!
The Ways We Customized our Ikea Kitchen Remodel
We did quite a few things to customize our kitchen beyond just installing the basic cabinets from Ikea. I wanted my kitchen to feel sort of like an old English cottage kitchen, which is one of my favorite kitchen design styles and really fitting for a lake cottage.
The Range Hood with a Secret
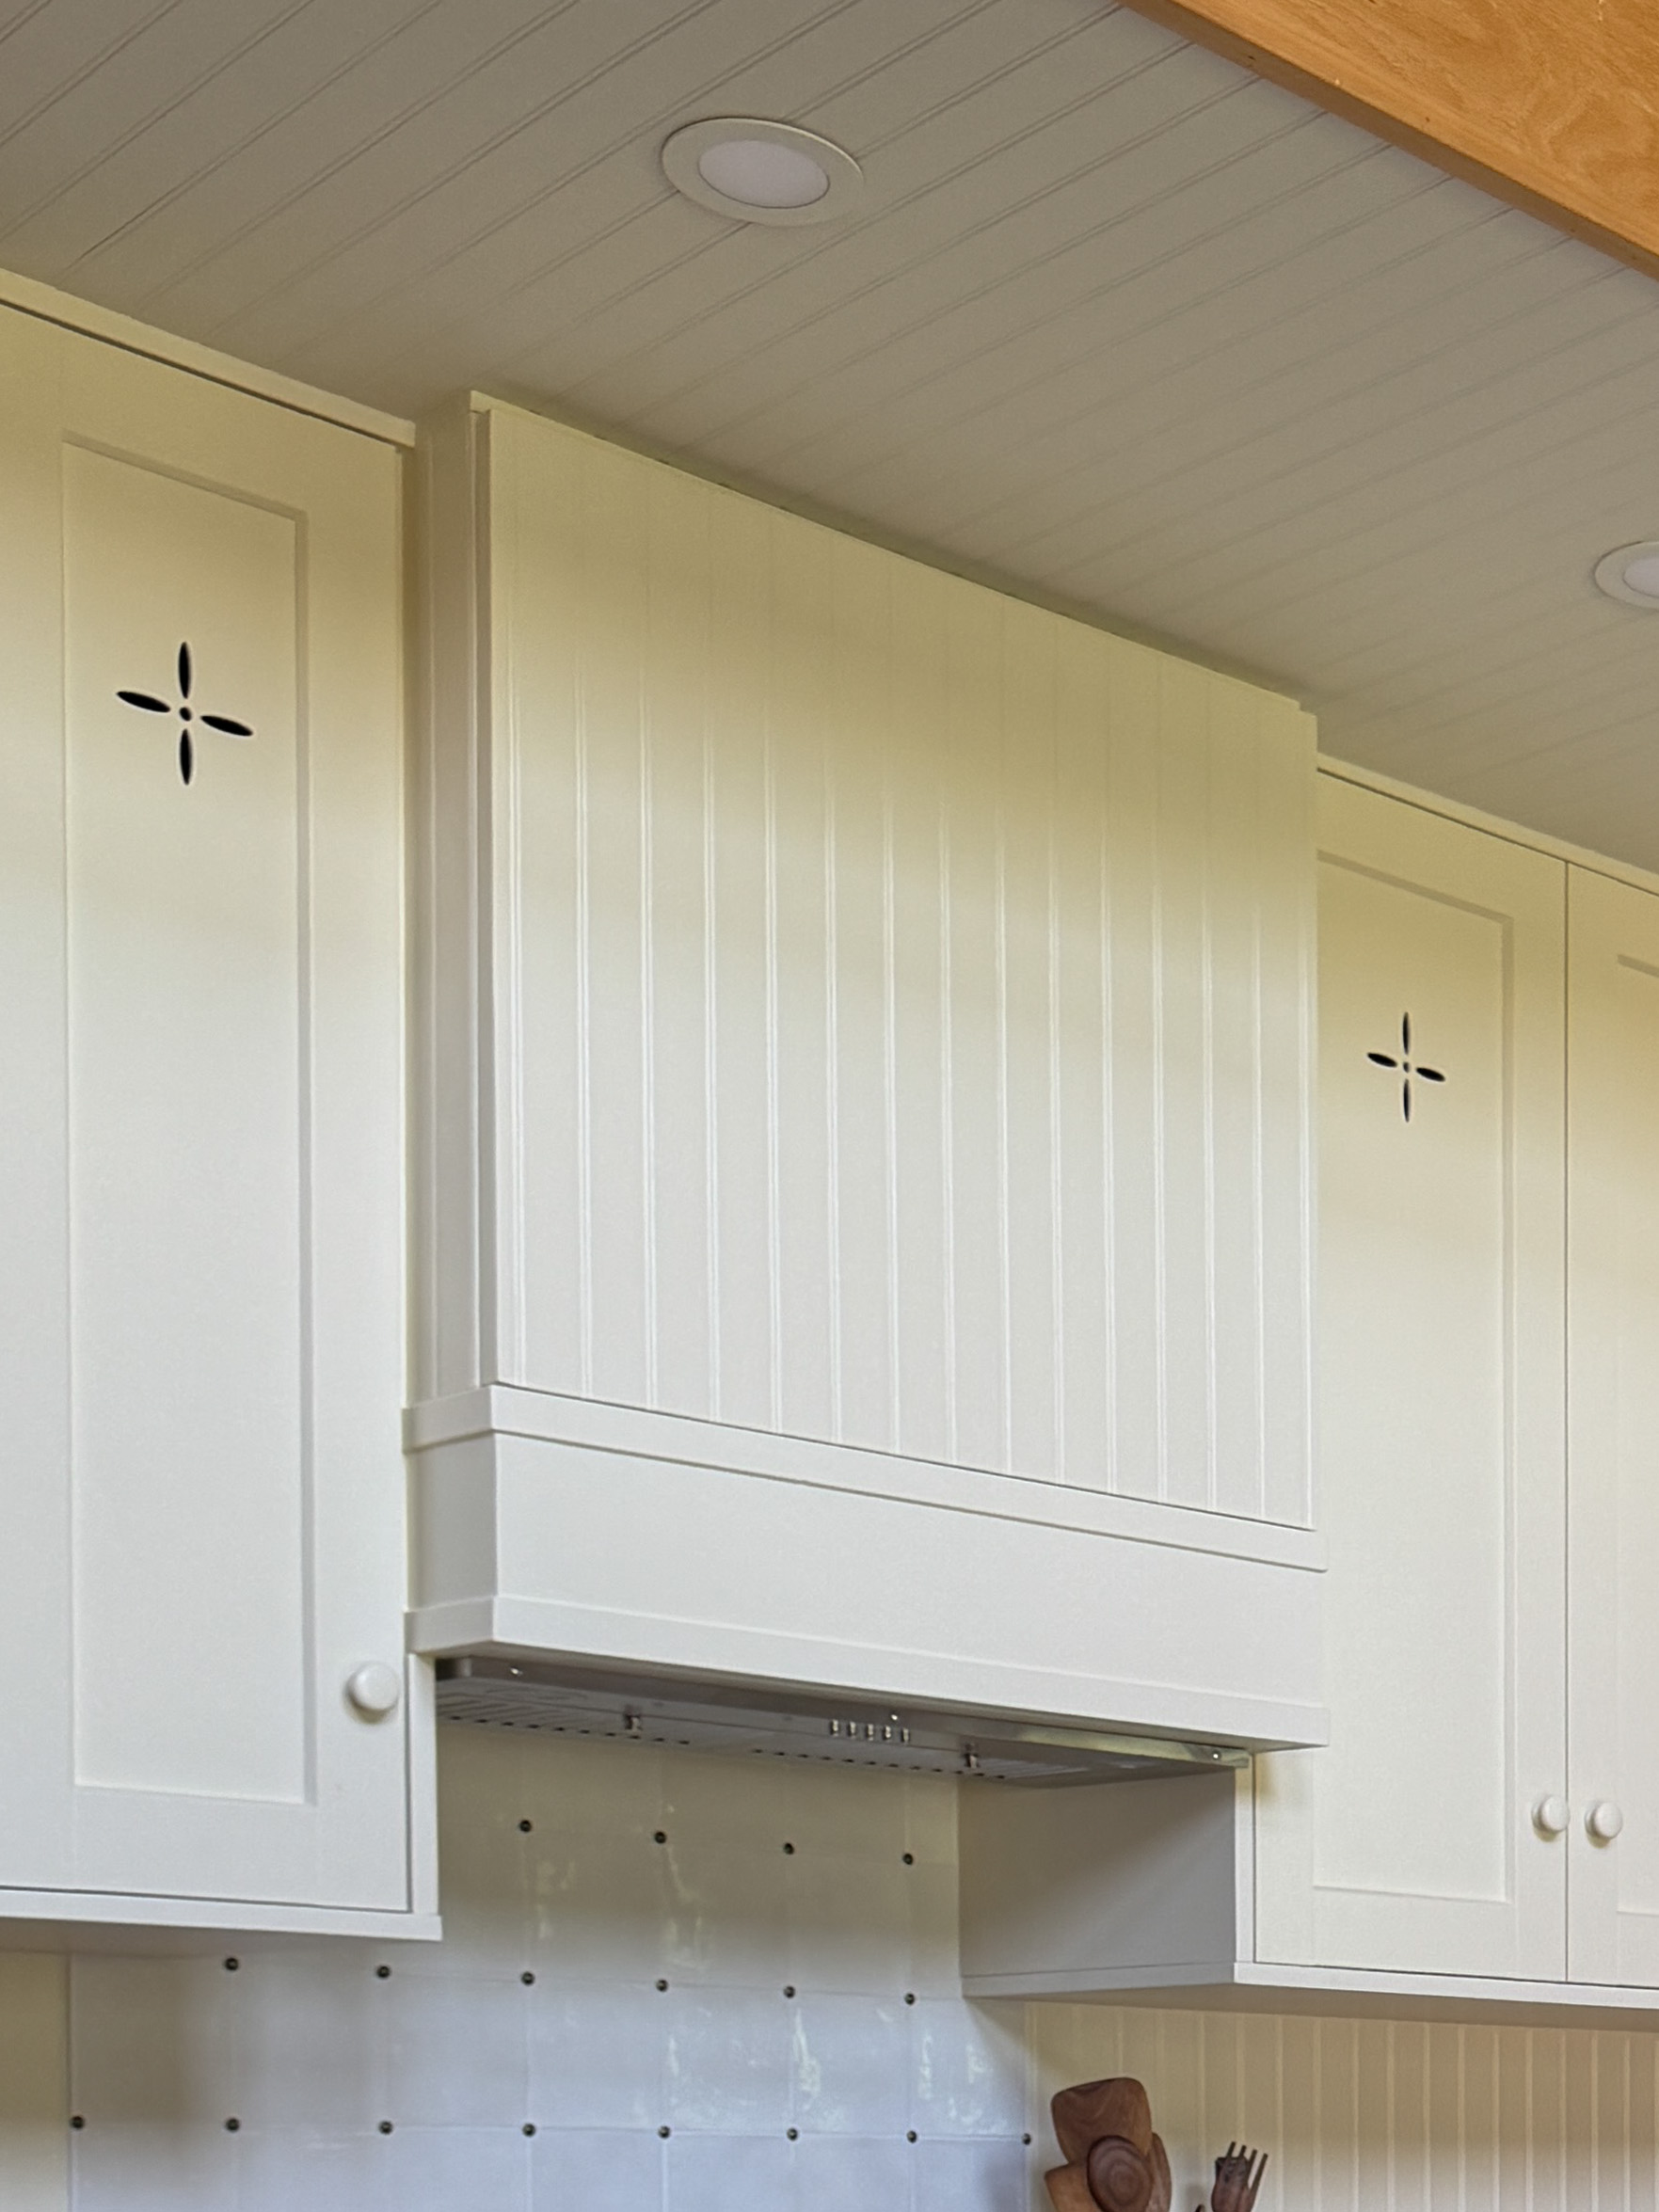
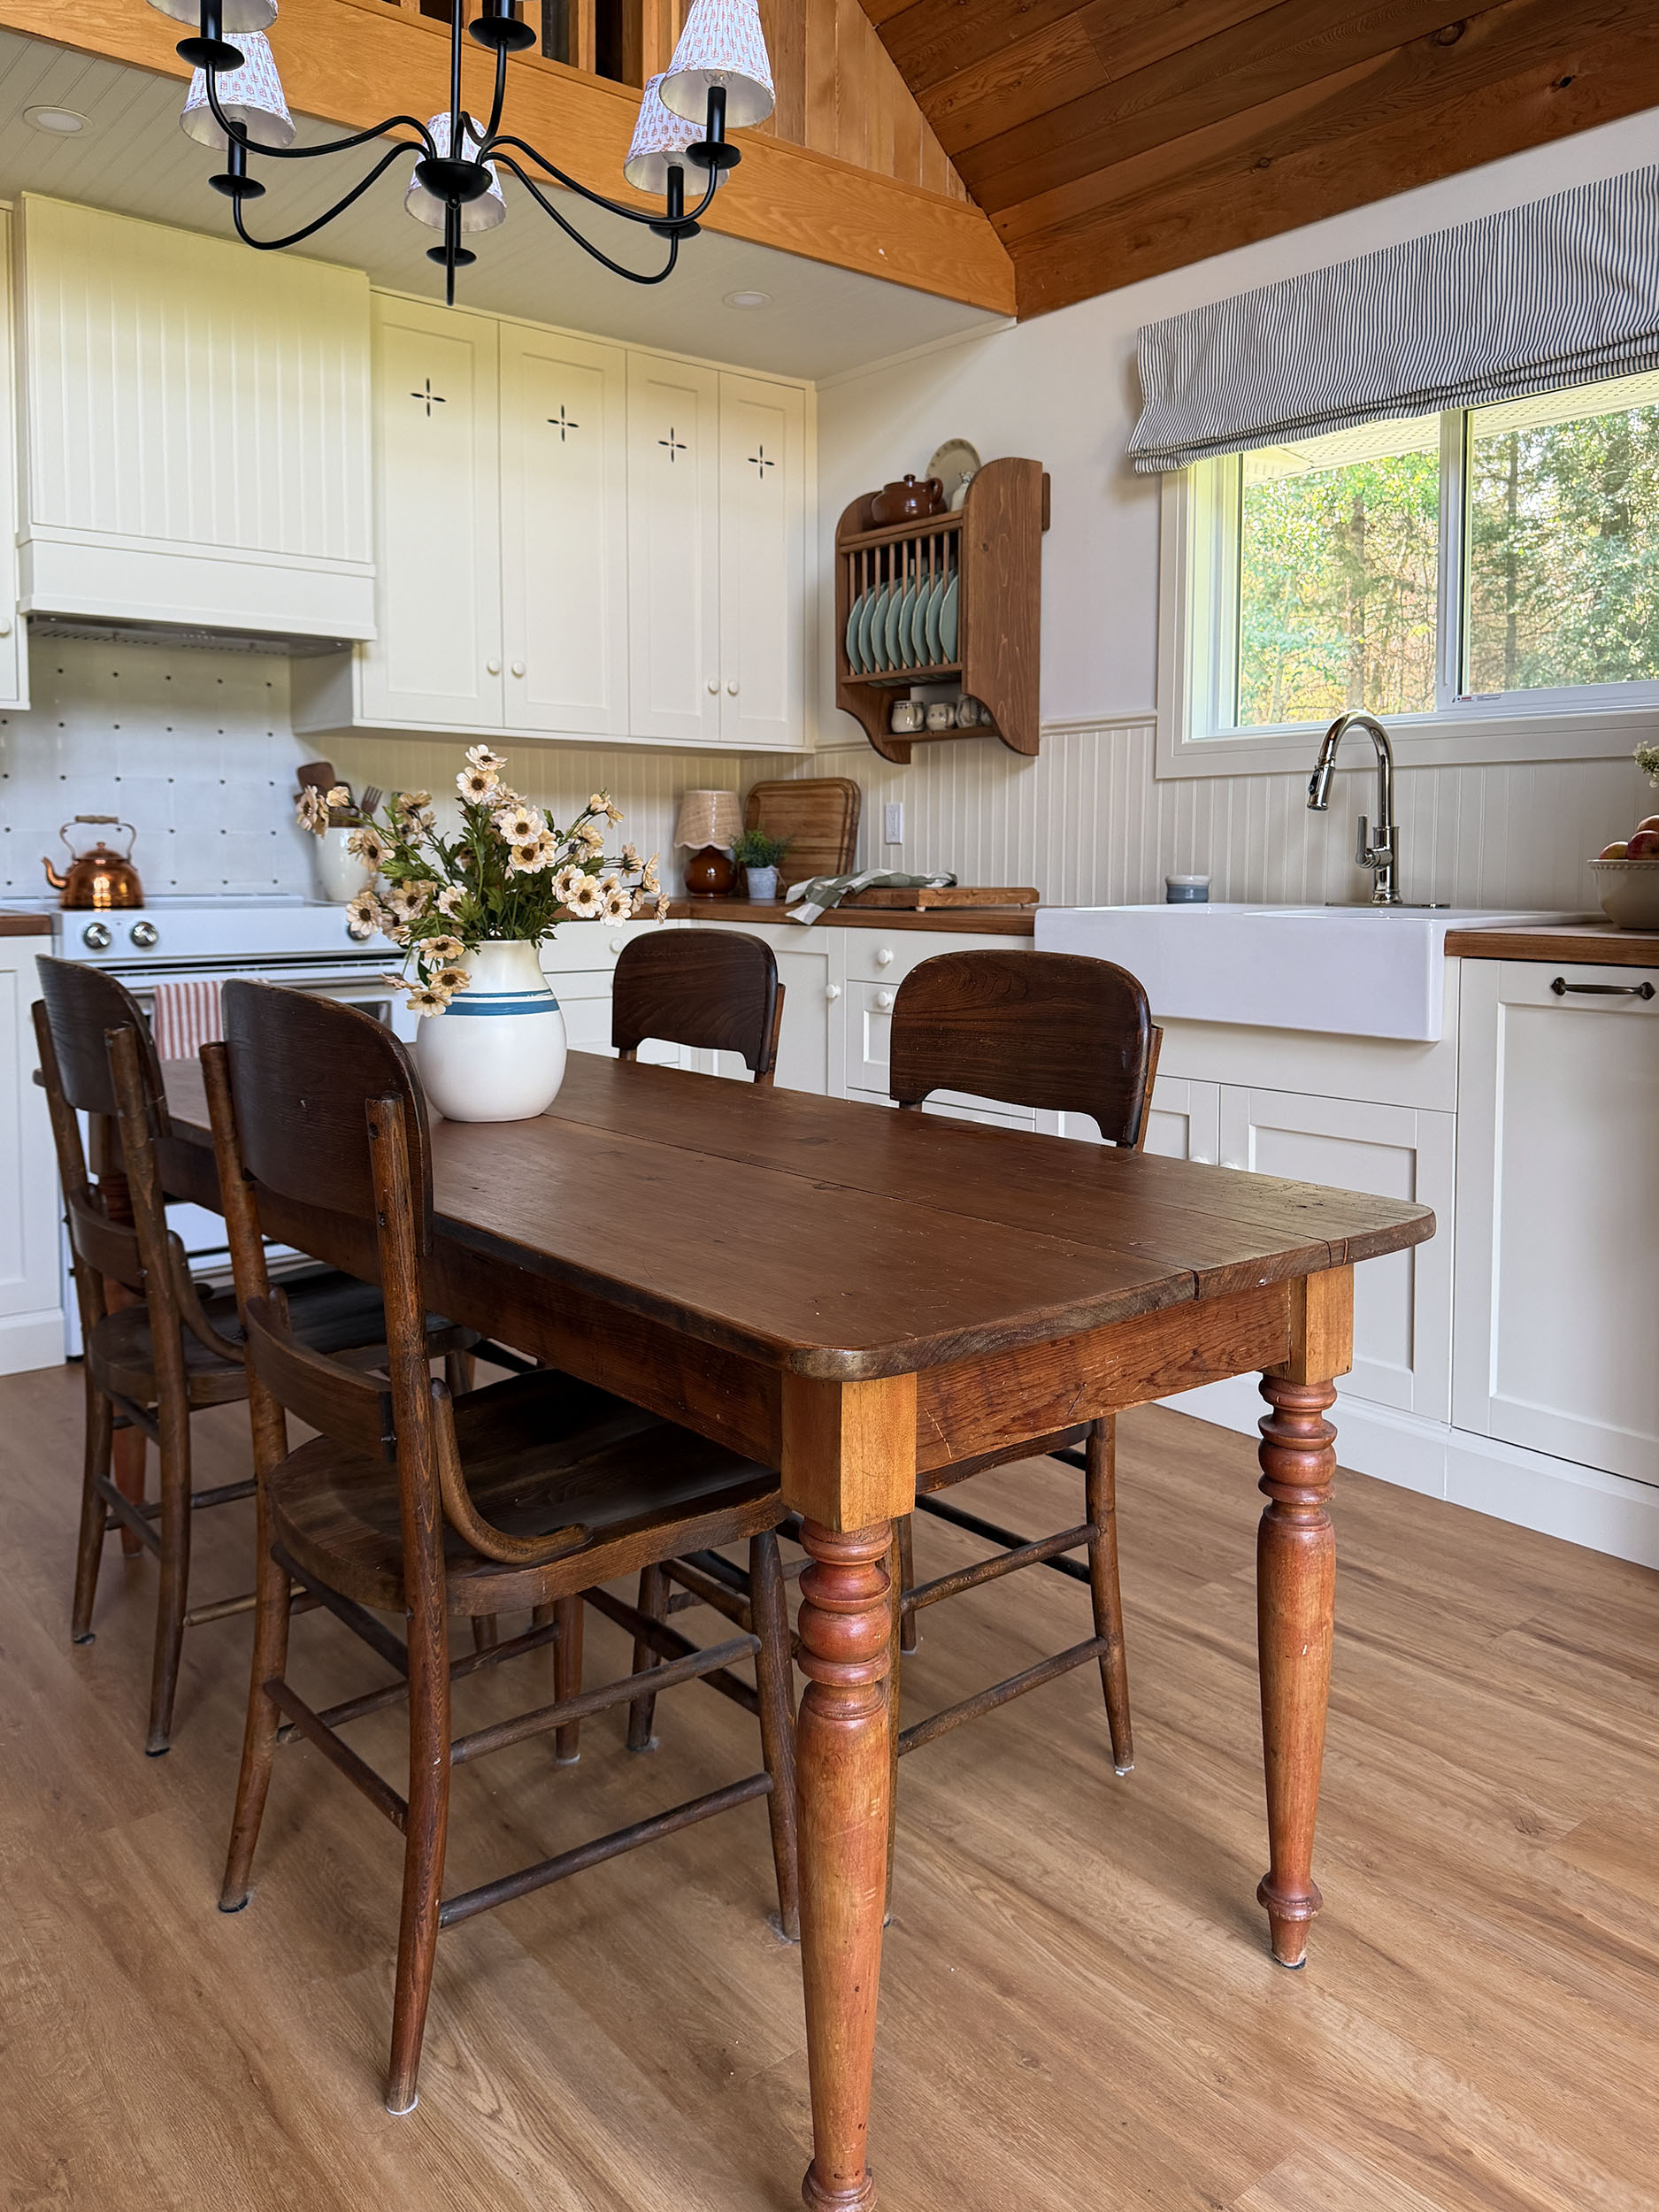
We added a recirculating vent hood above the stove (there was no vent here at all before) but that left some wasted space up there. Instead of just boxing it off, we decided to add a cabinet and build a secret door!
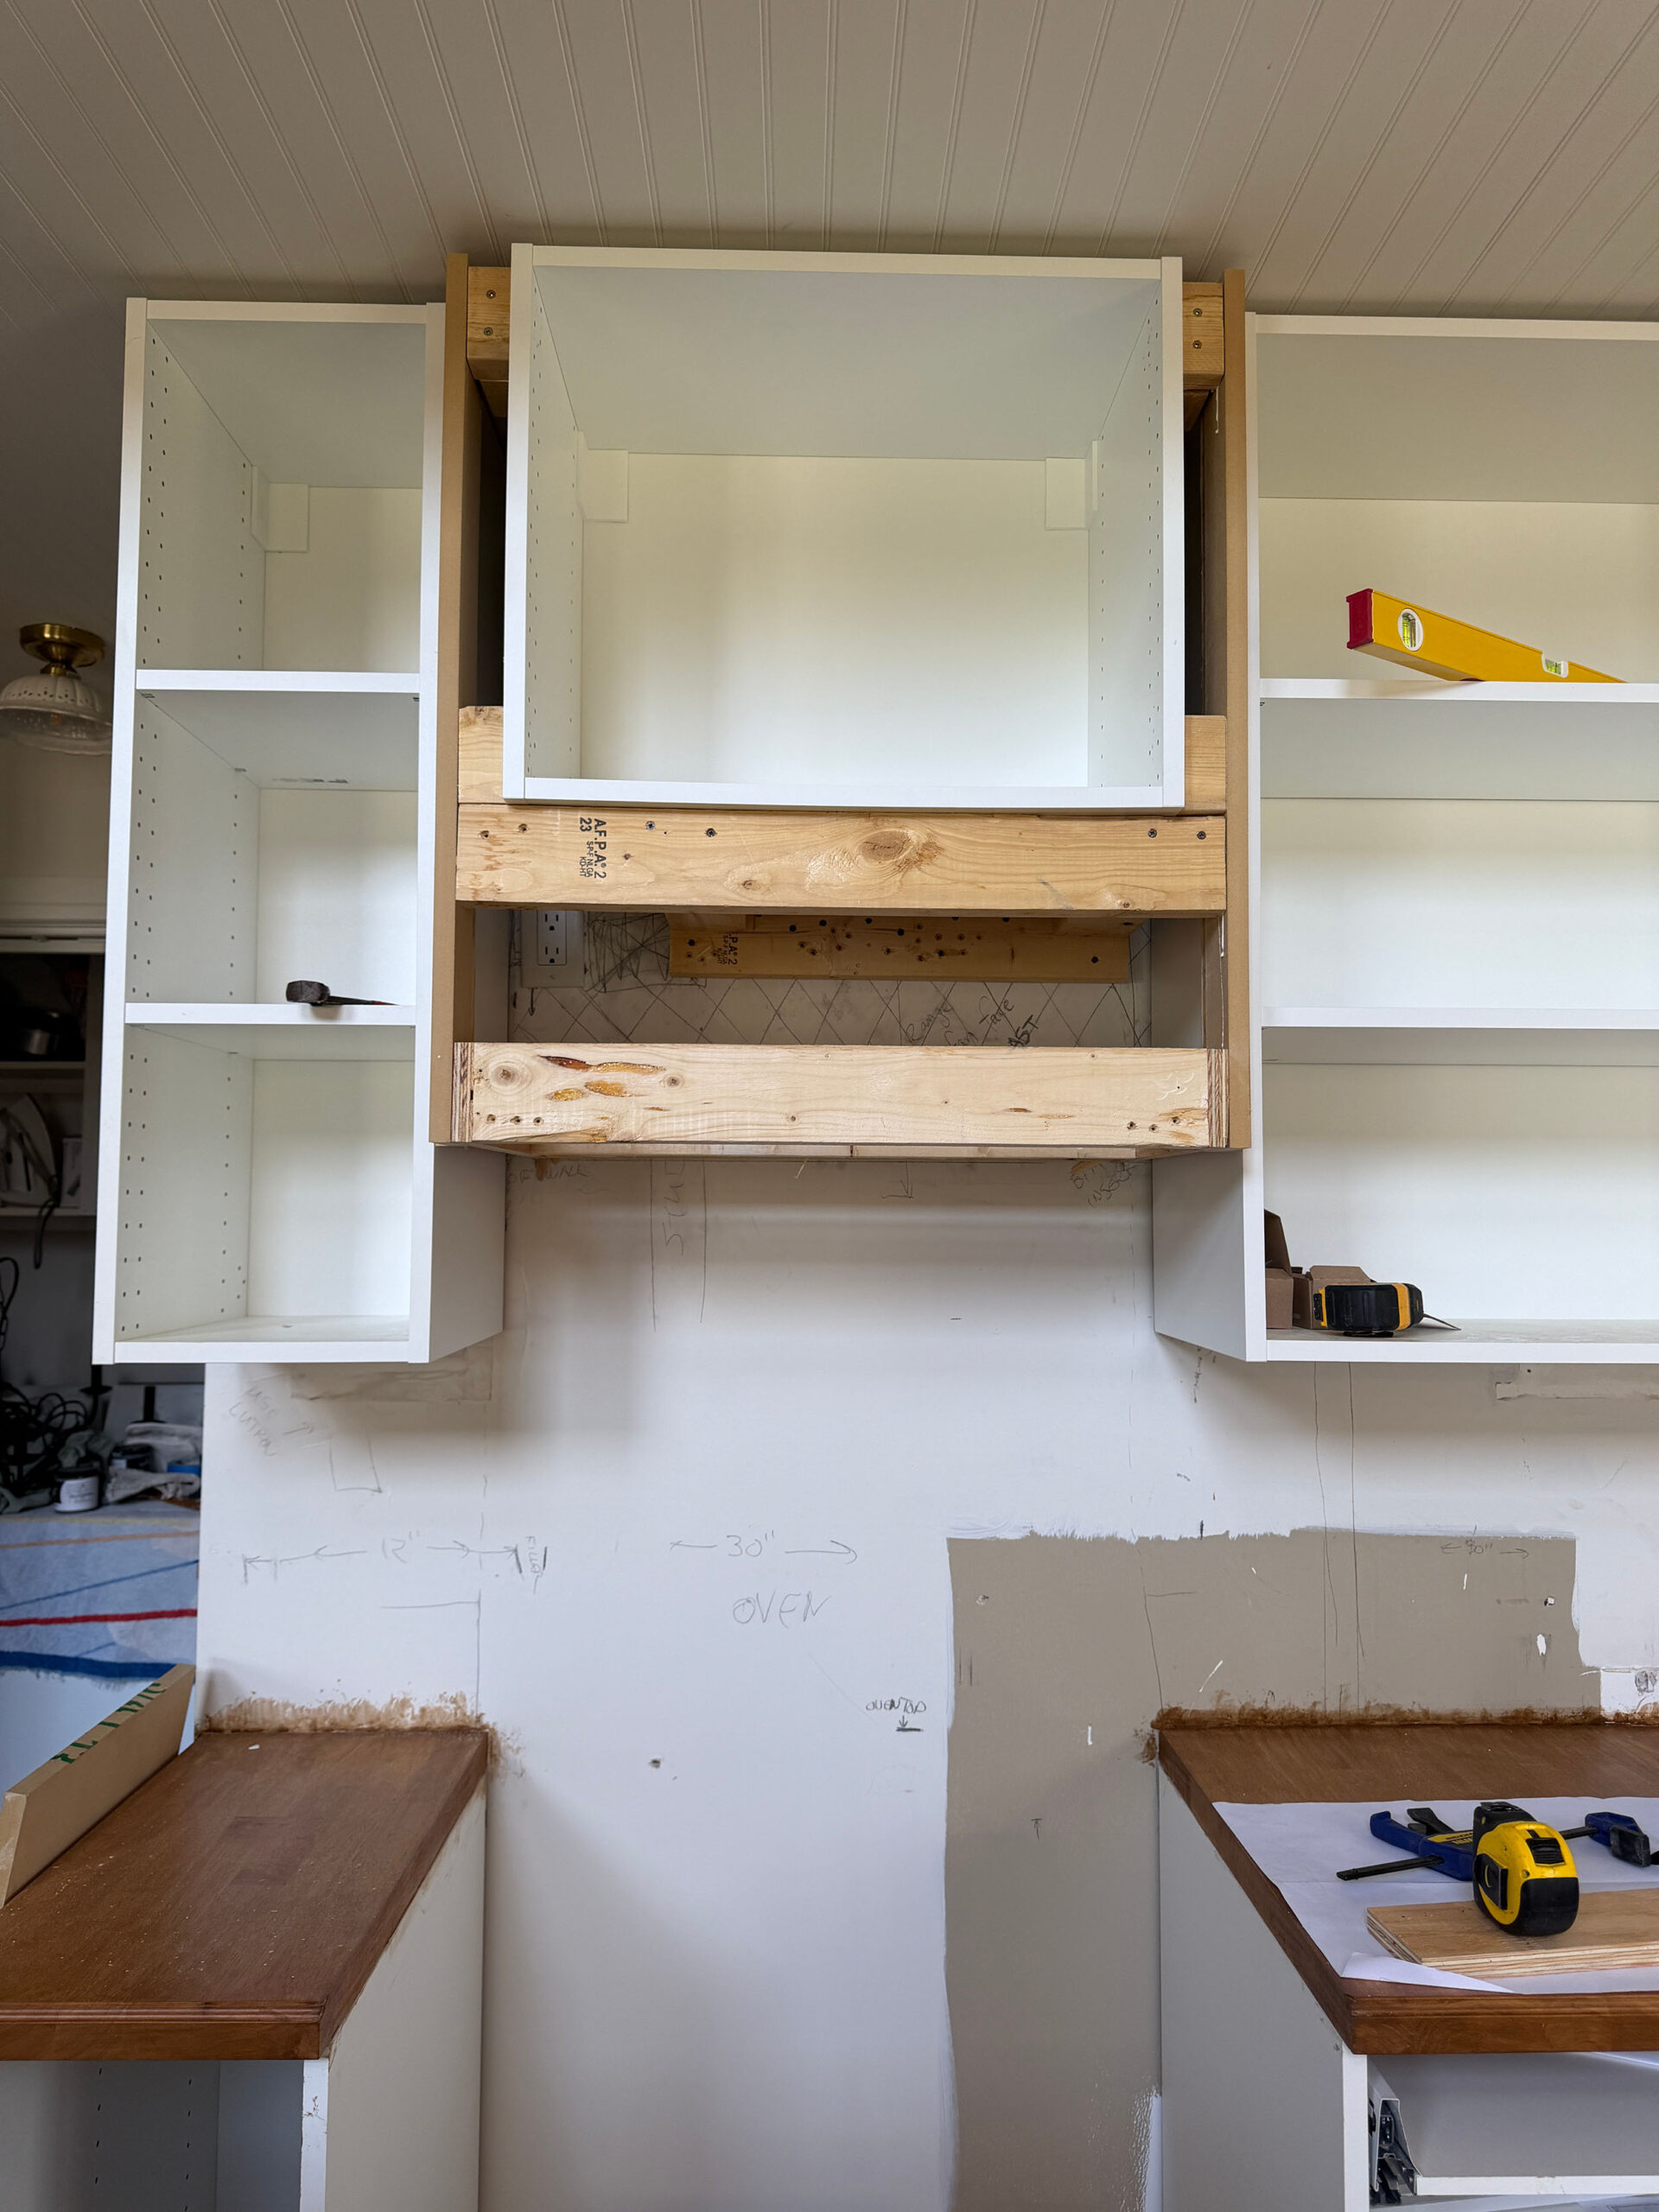
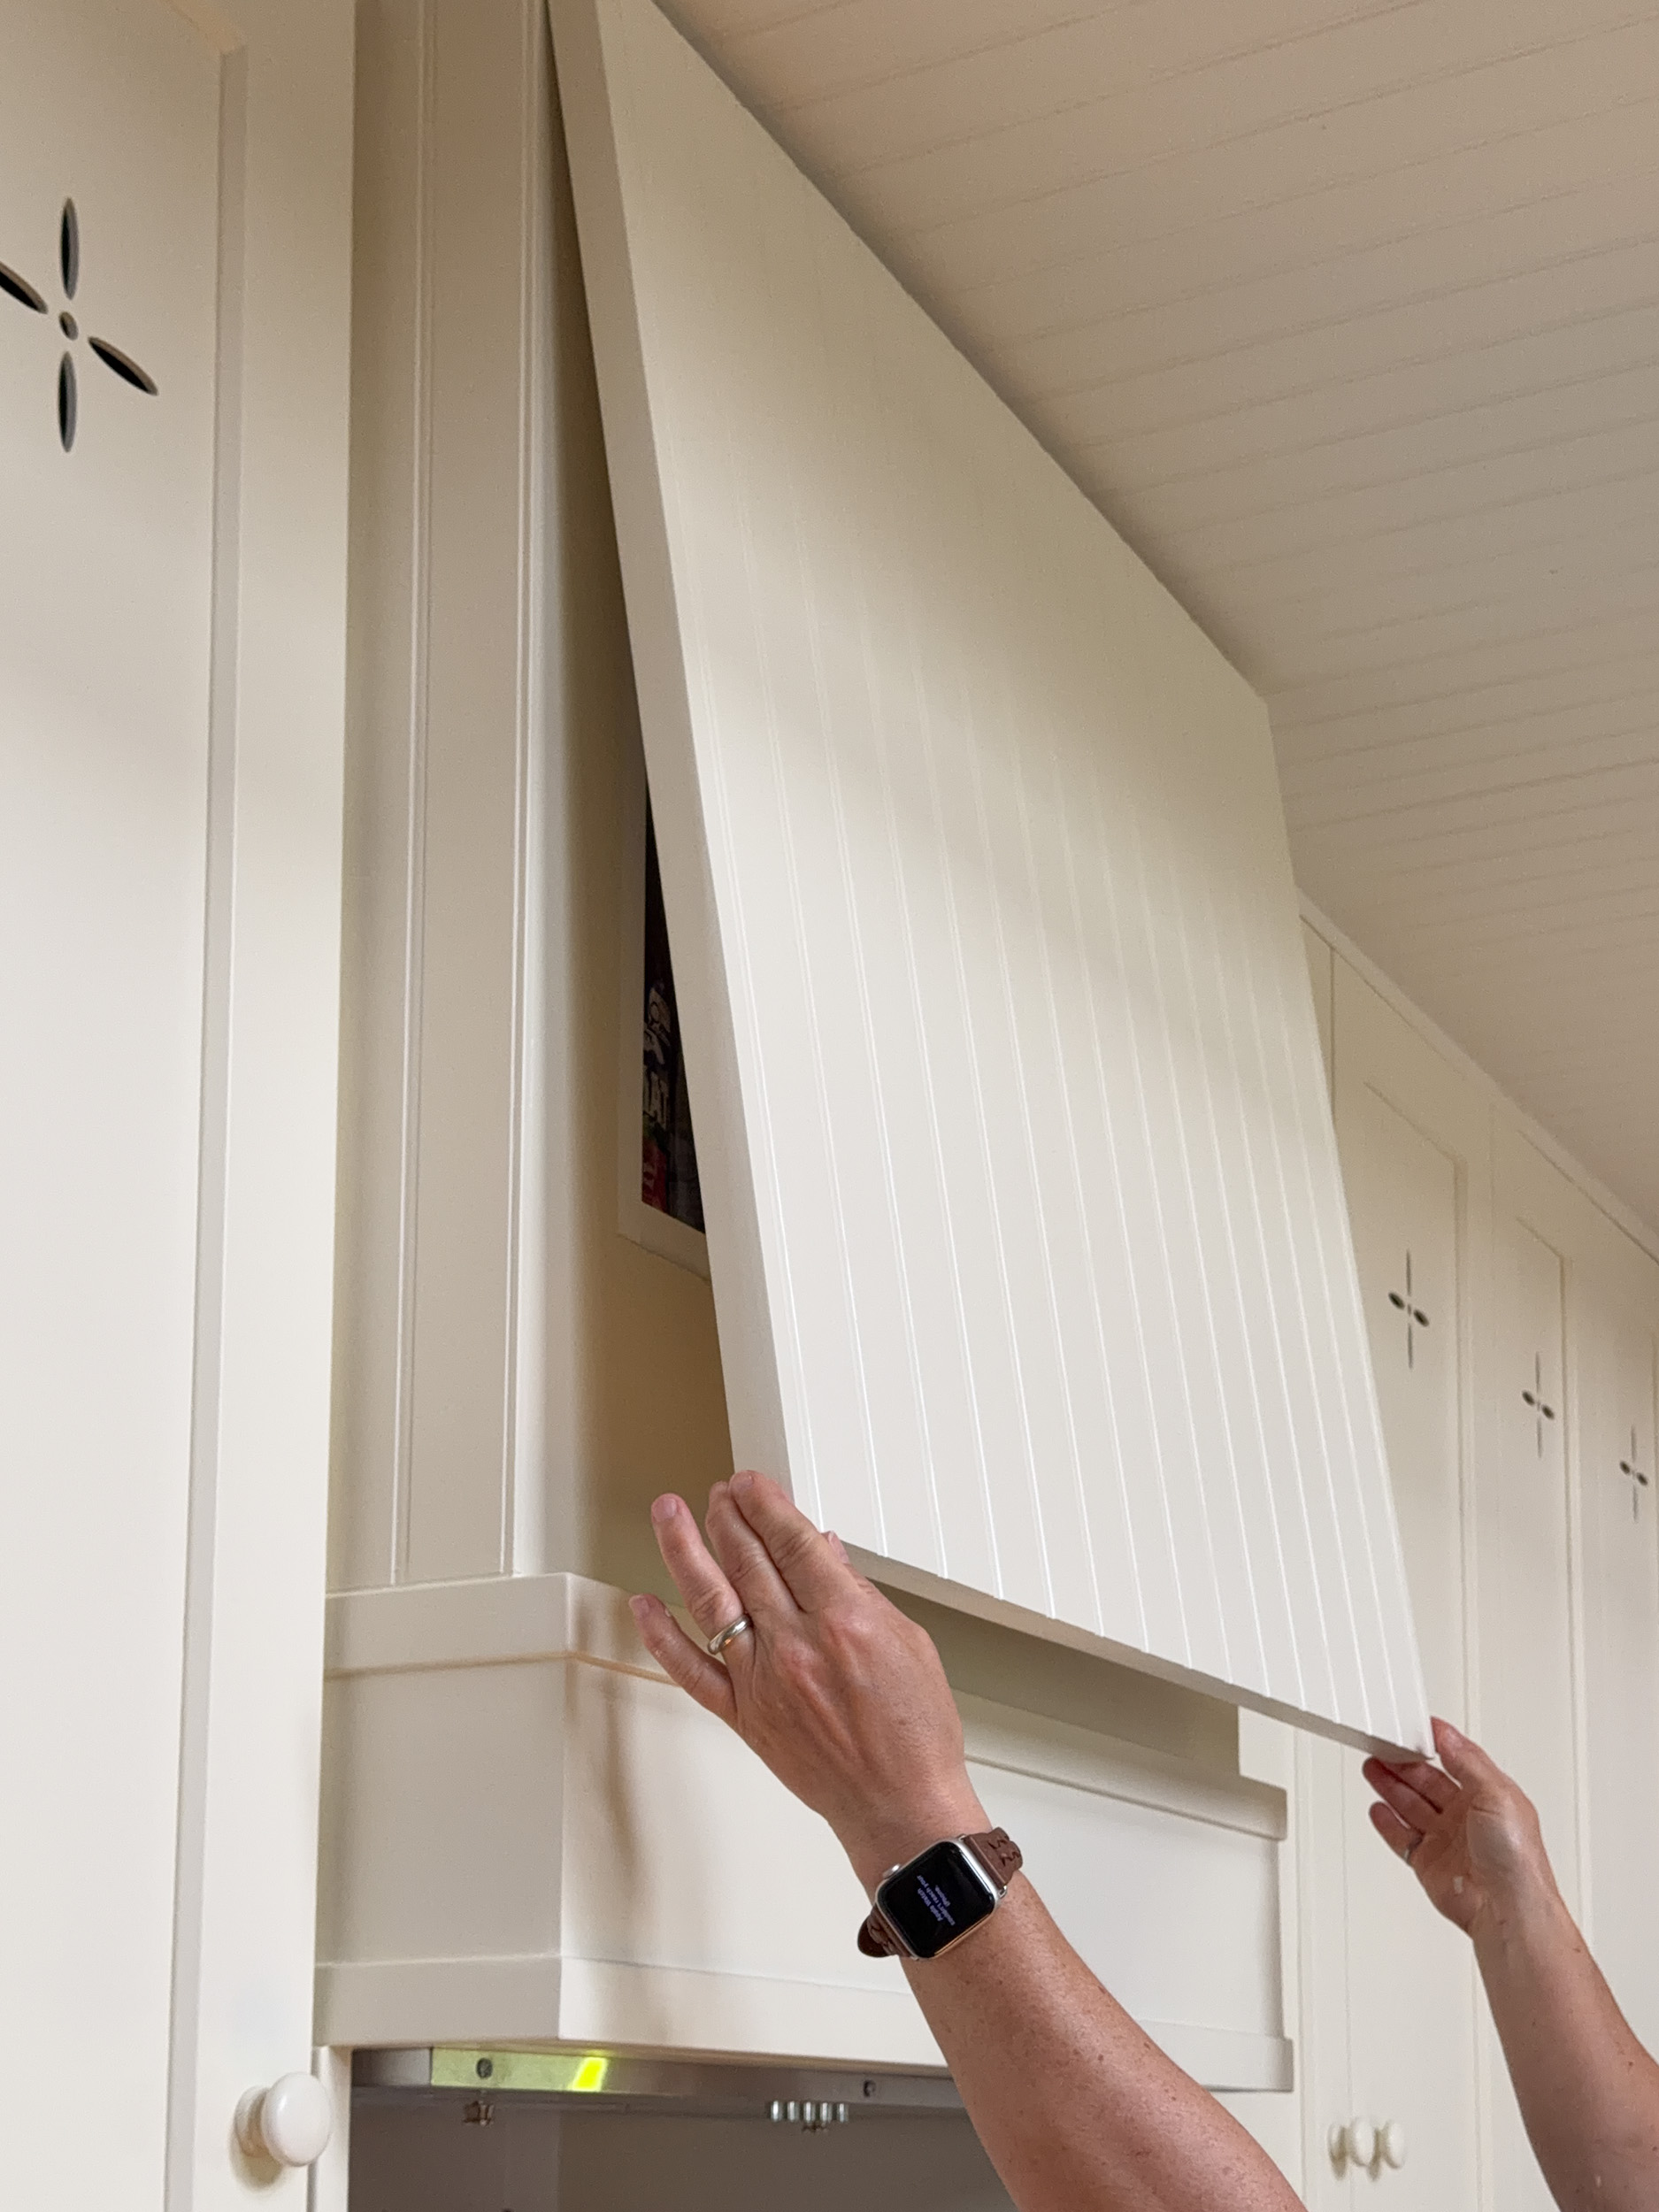
It took a little figuring out how to make it all look good but I’m so pleased with the final result! We covered it in beadboard paneling and hid the seams along the lines of the beadboard, so it really is invisible!
The Toe Kicks
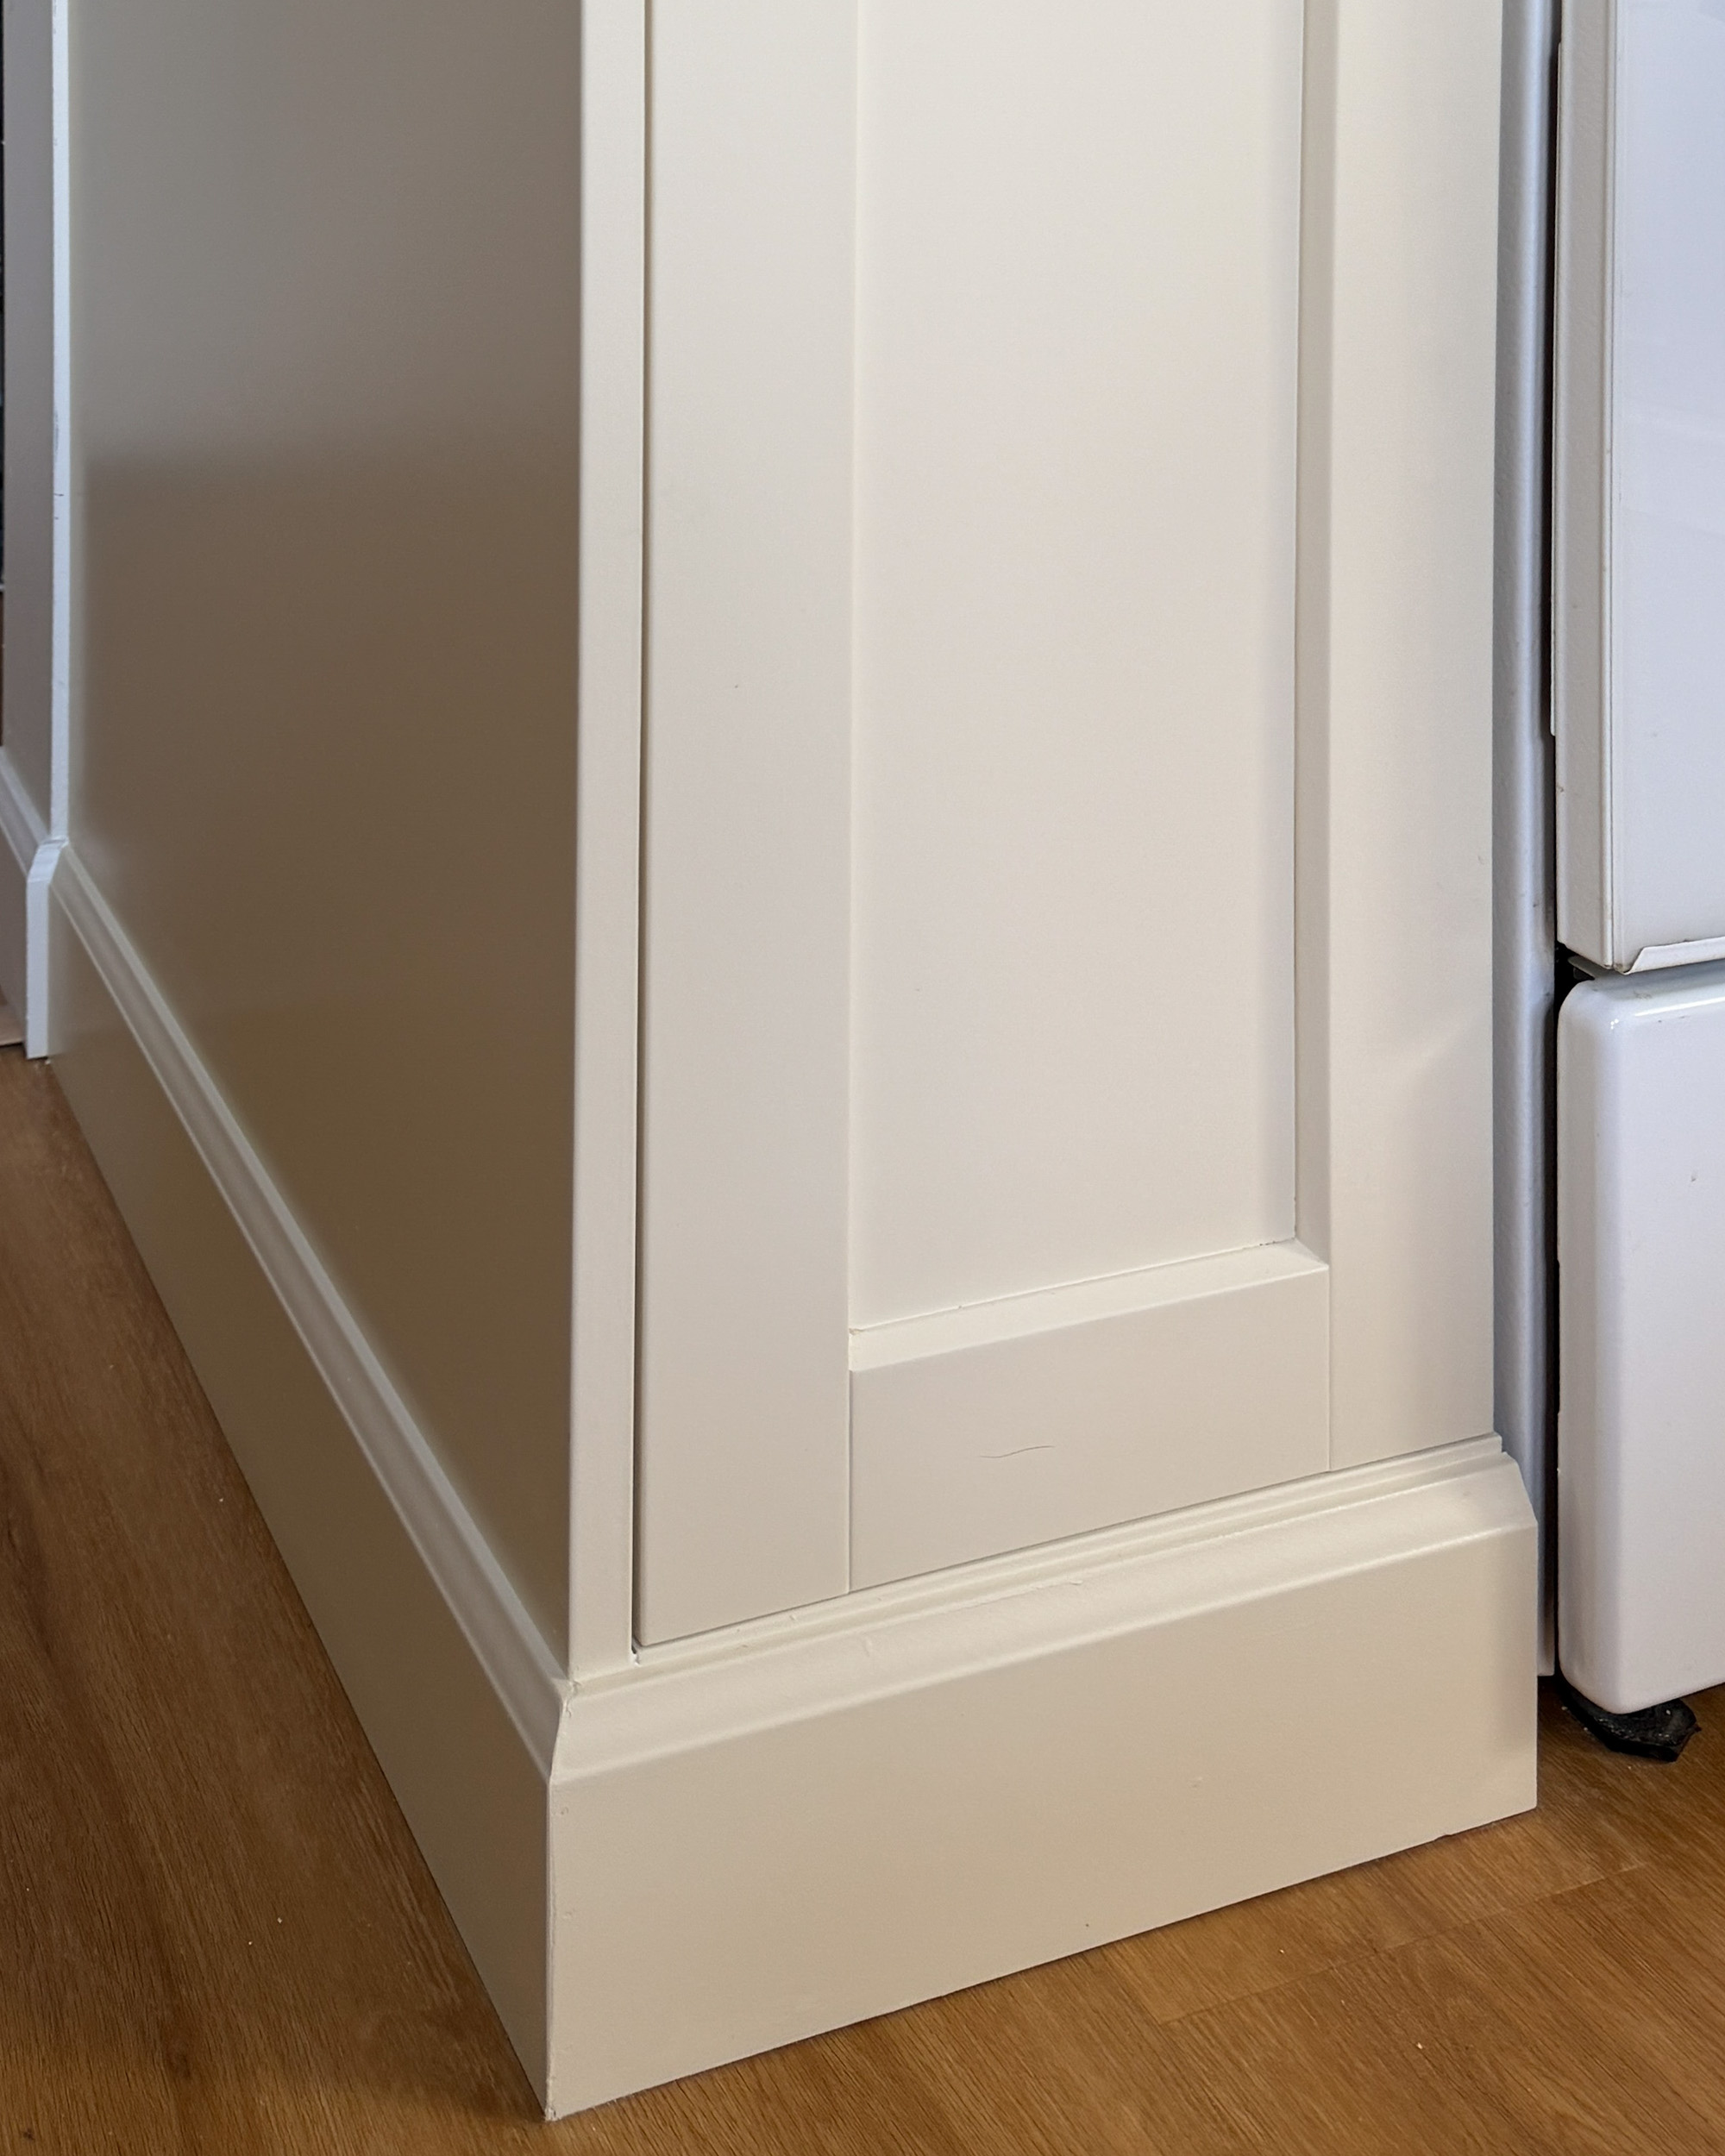
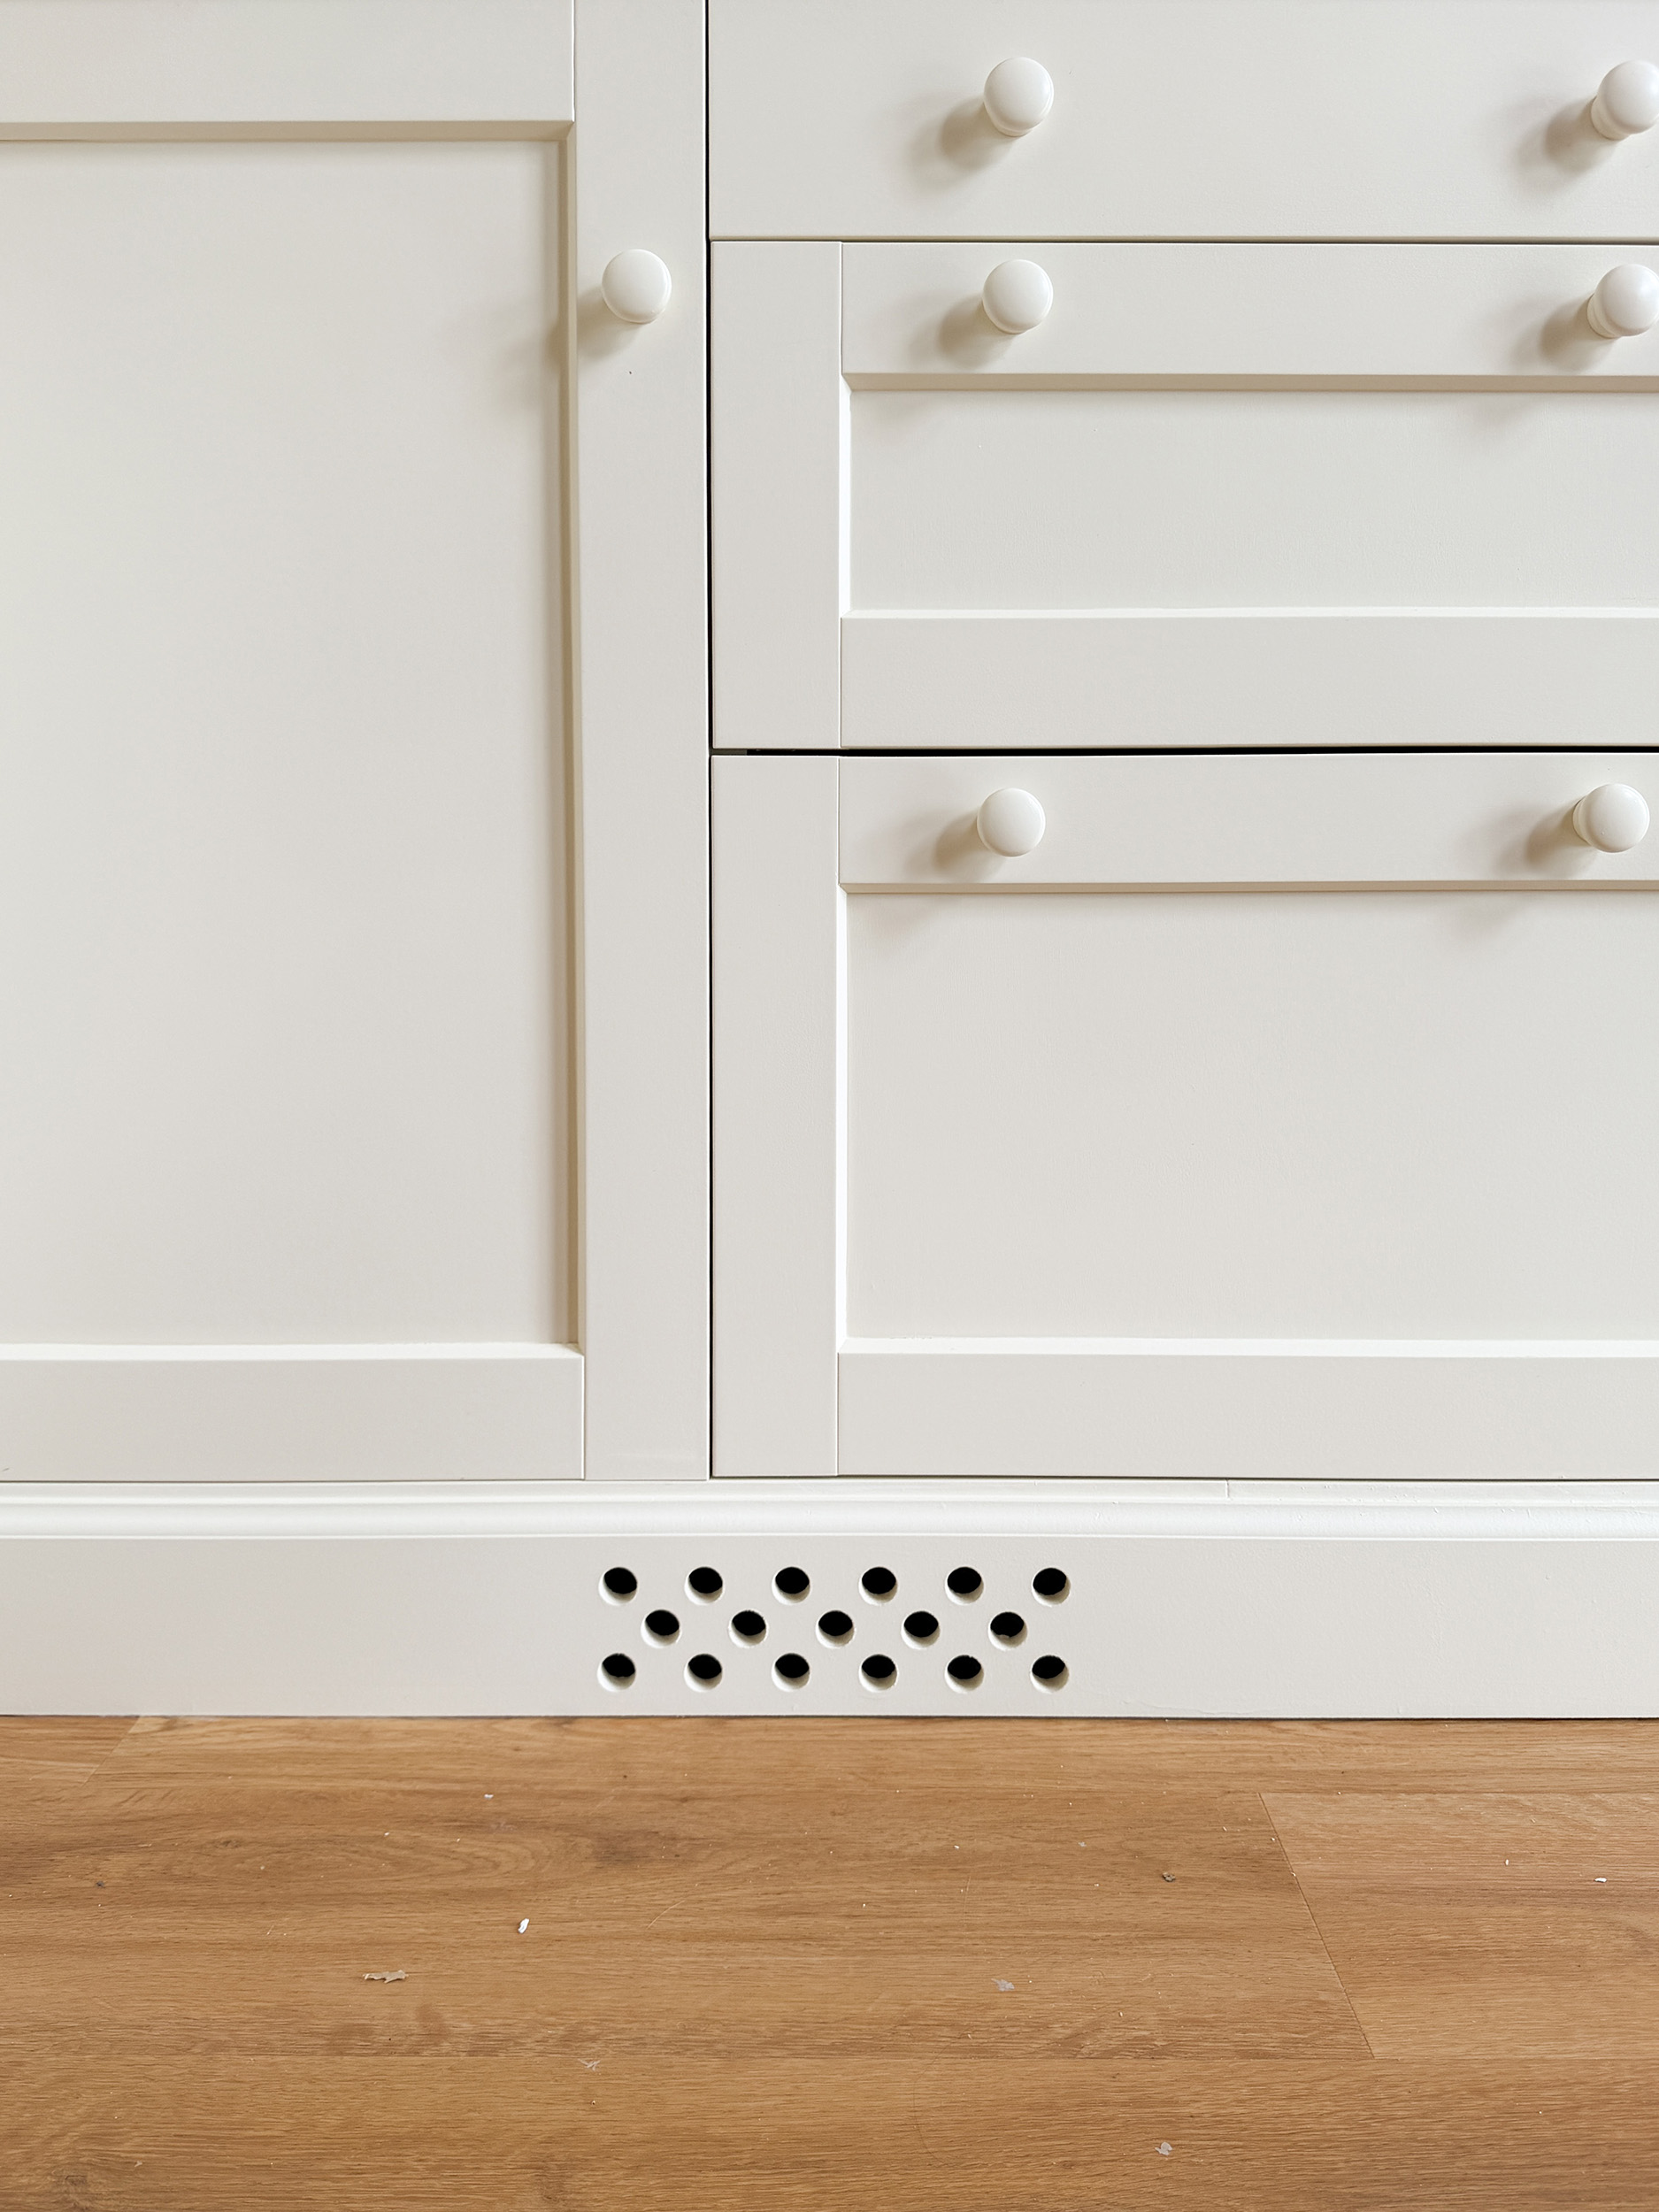
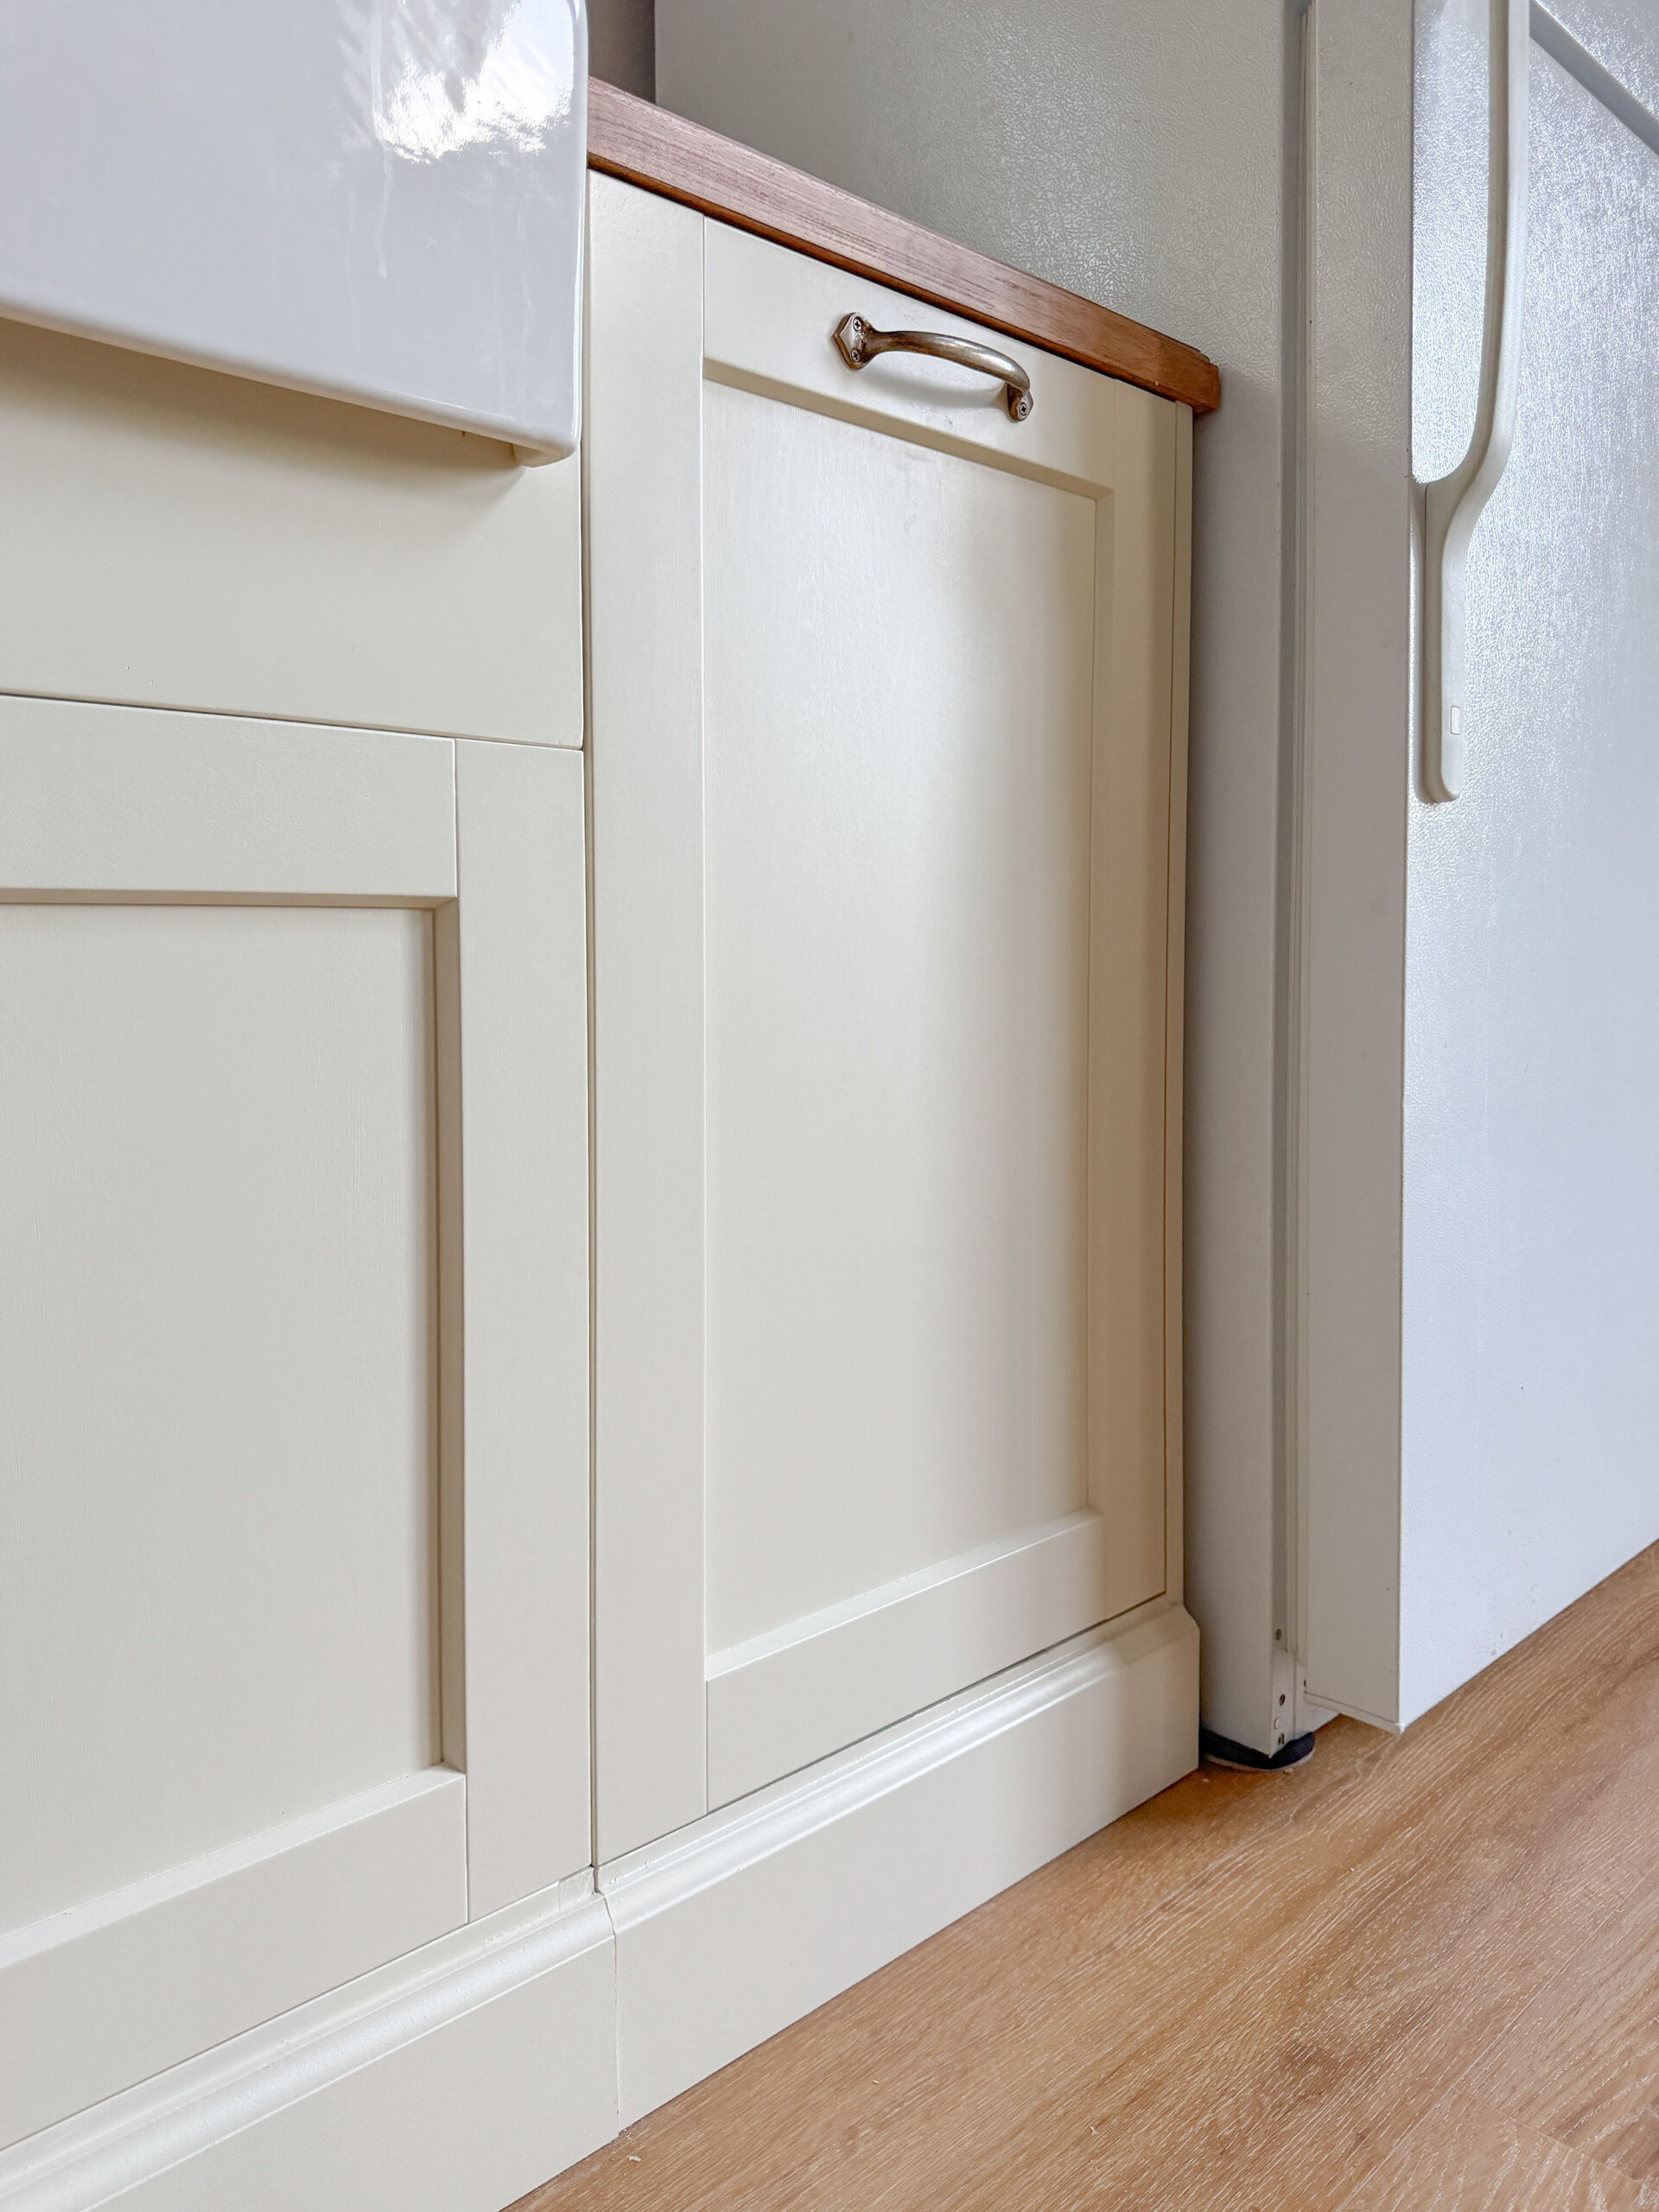
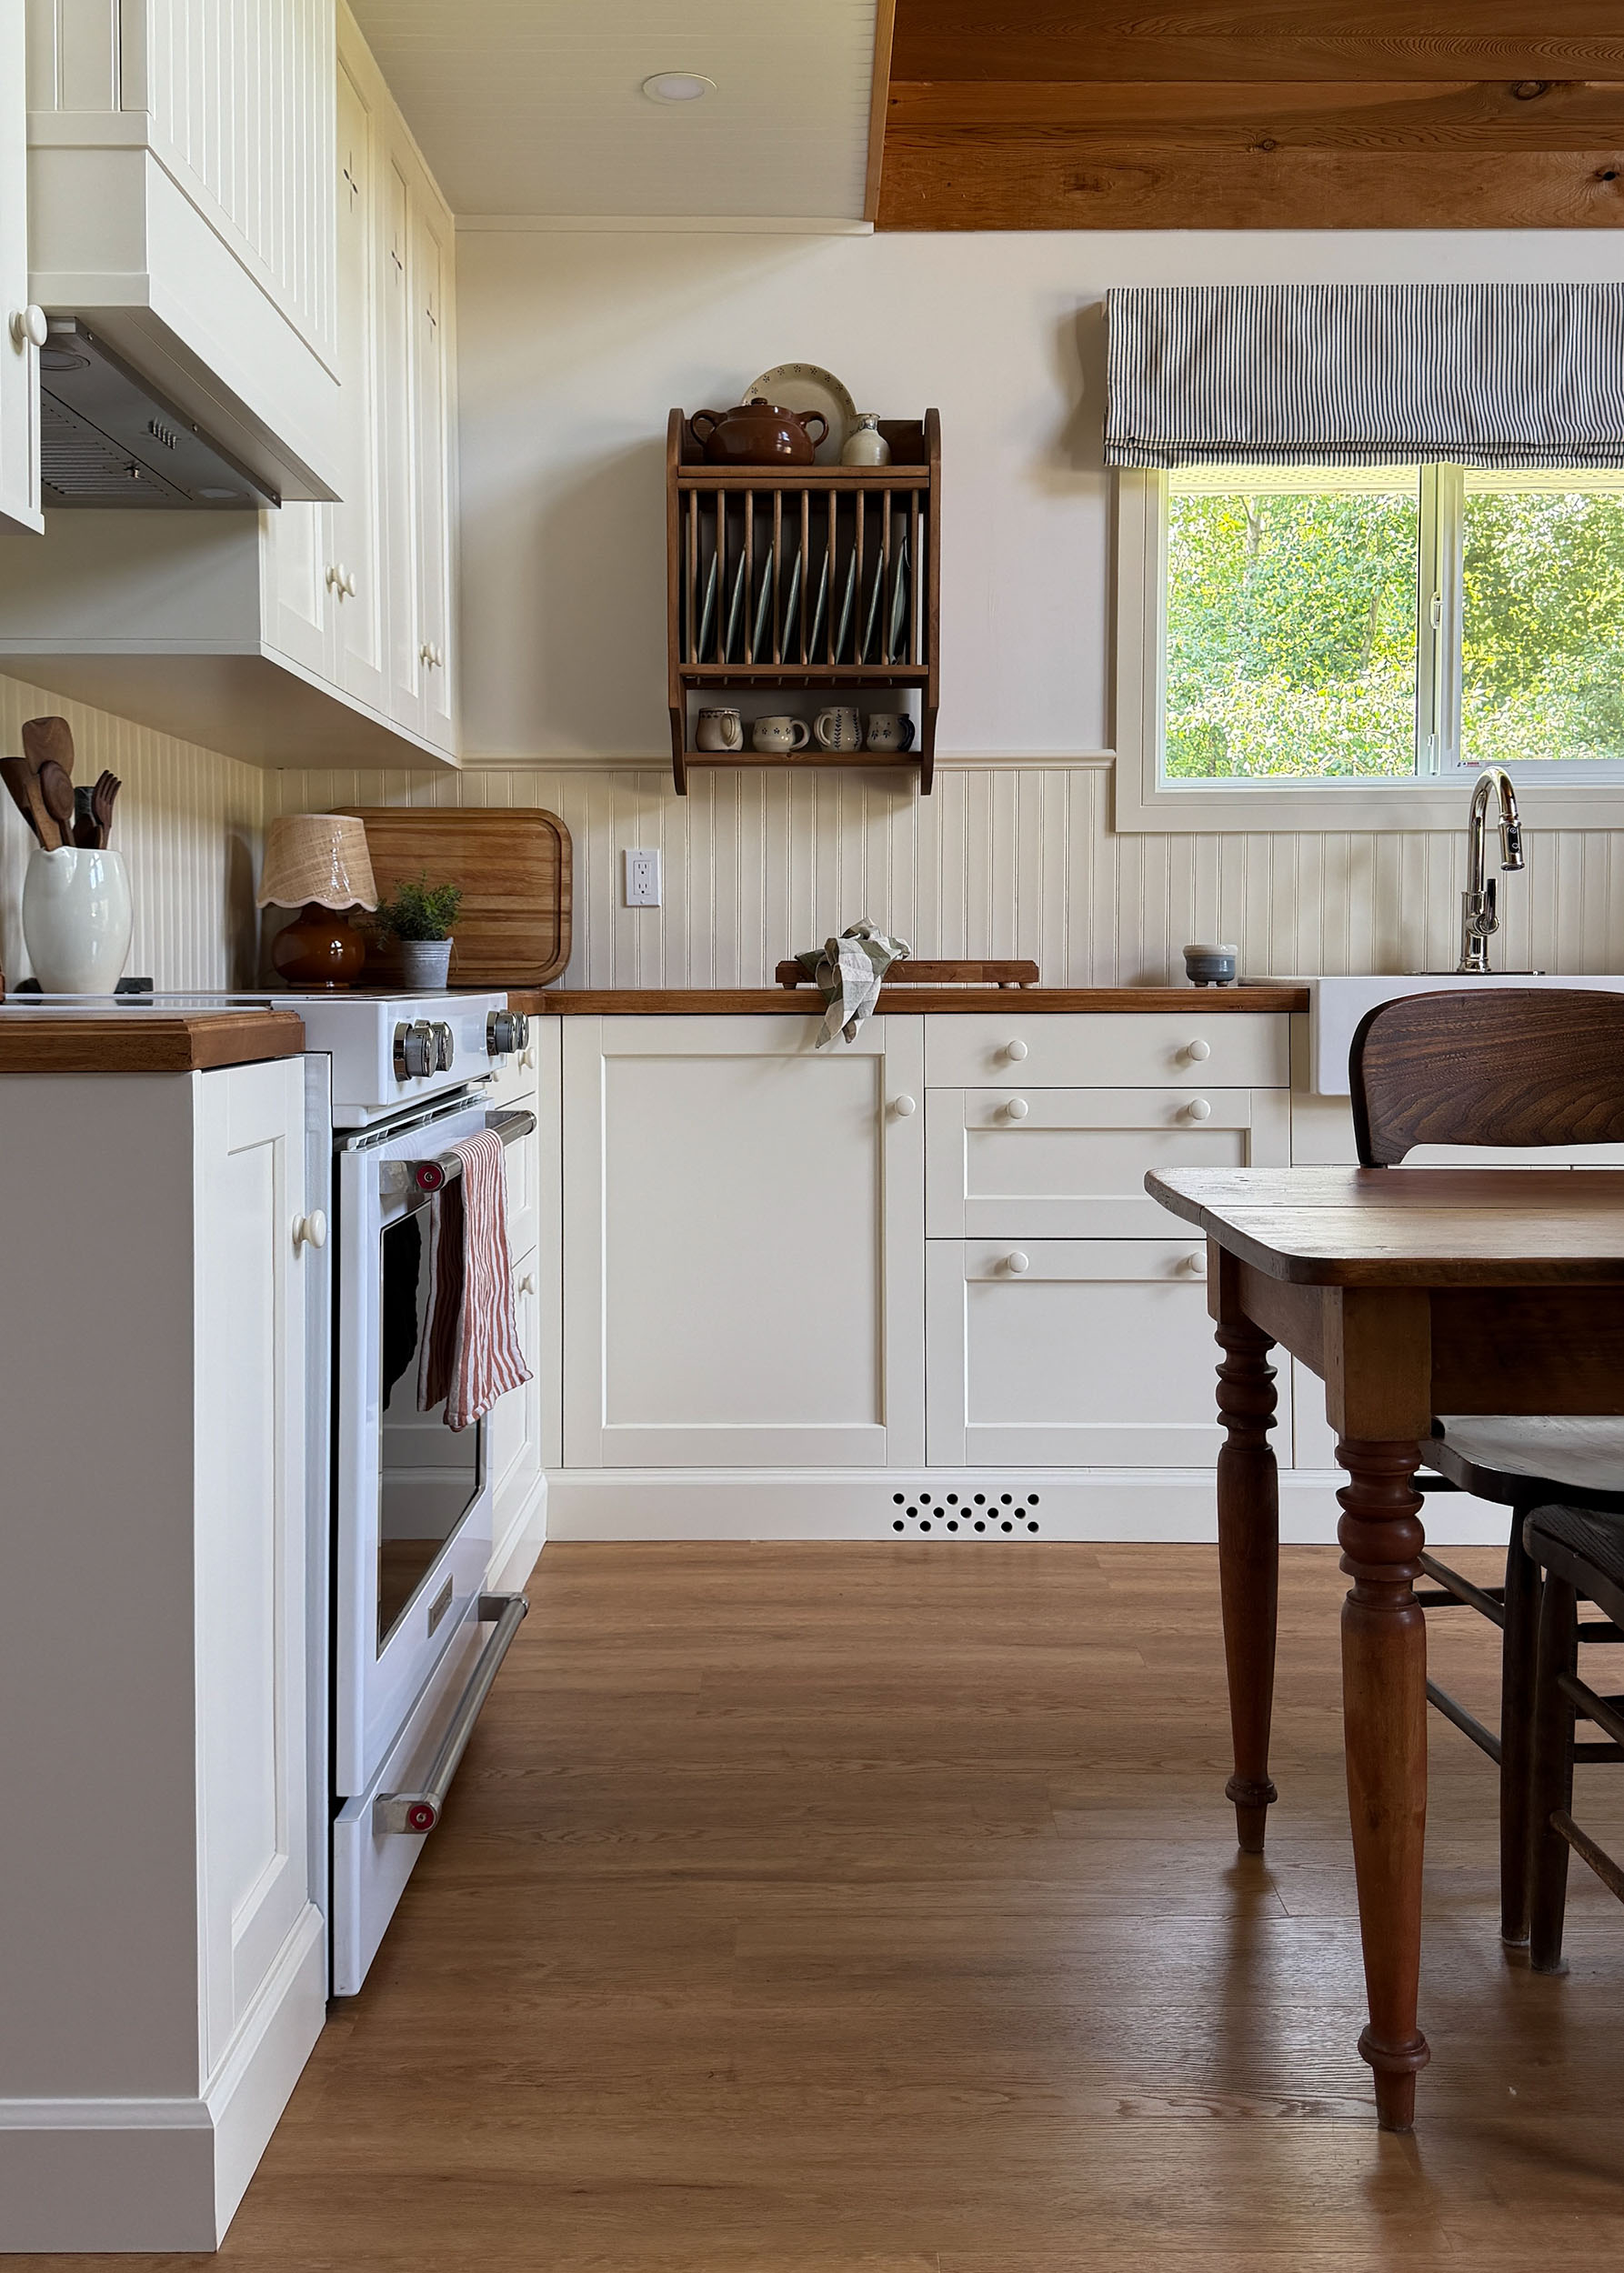
In my opinion, a furniture style toe kick really takes a kitchen to the next level. In our current kitchen, we did flush toe kicks (flush with the doors) which were really hard to do because they had to be scribed to the uneven floor.
This time, I did something a little differently and added baseboard not flush but slightly in front of the doors. This was way easier to do and it looks SO GOOD. I like it so much I might add this to my kitchen at home!
The Upper Door Cut Outs
I have done cabinet door cutouts before in my kids bathroom and loved it, and wanted to do something similar here. However, the last time we just drilled holes in a pattern, and this time I wanted to try something a little more decorative.
The doors we used were these ones from IKEA.
A friend of my sister’s had access to a CNC machine, and was willing to do the cutouts for me. I designed the shape I wanted in SketchUp and sent the file over to her and she was able to load it into the machine. The CNC machine uses a laser to cut out whatever it is you upload to it. It was very cool!
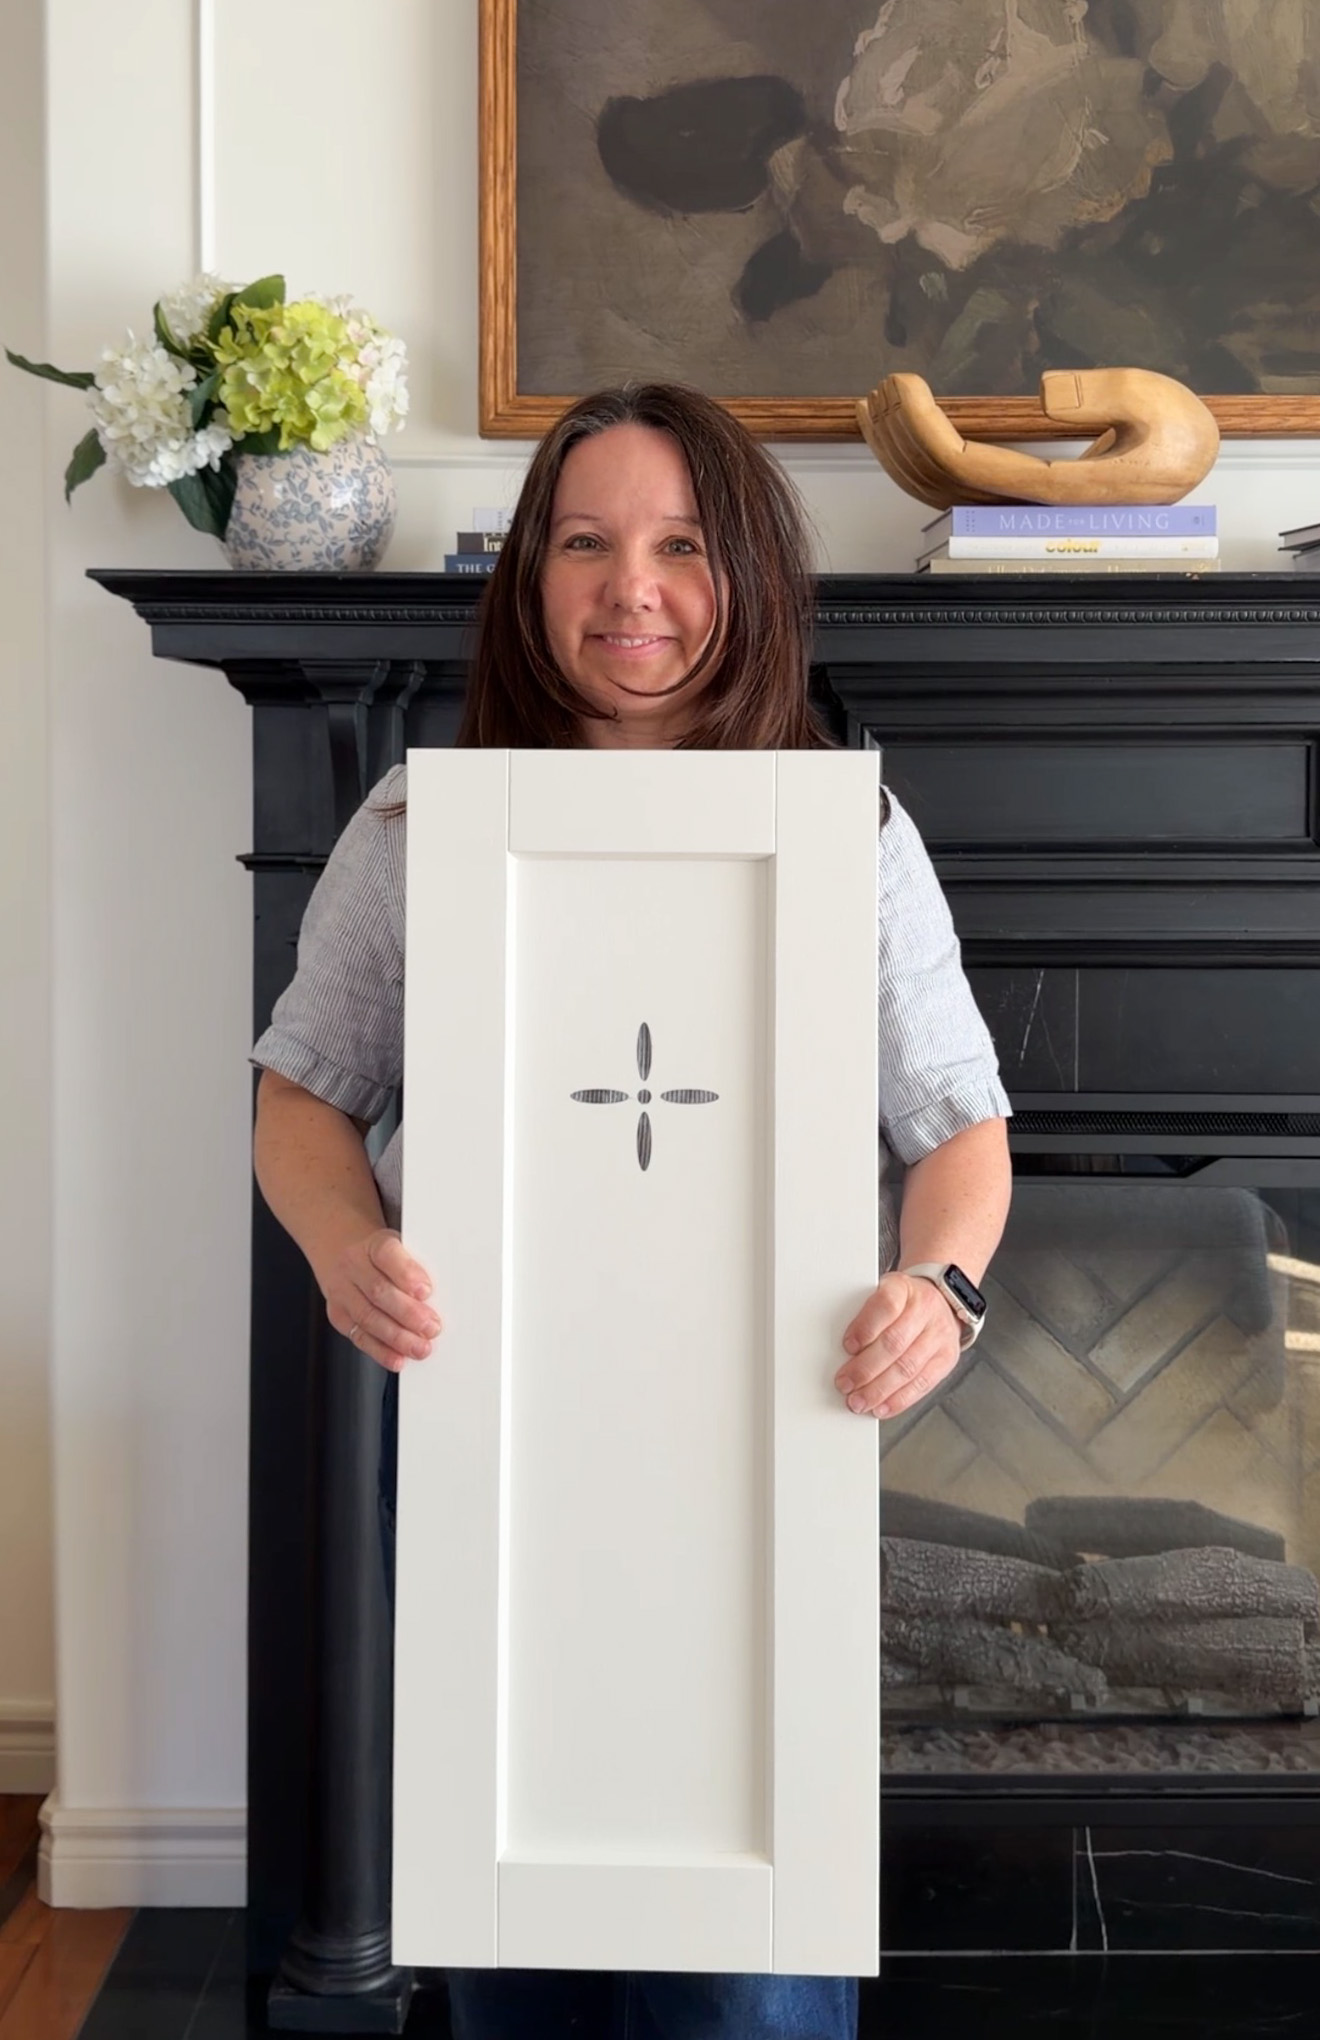
I did these cut outs before painting so that I could sand the rough edges a little and seal them up with paint. I loved how they came out!
Painting the Cabinets
The one thing about using Ikea cabinets is that they have a limited door selection, especially when it comes to colour. And for me, the colour of kitchen cabinets is one of the most important things! I decided I was going to purchase these doors and paint them a custom colour myself.
I wrote a blog post all about painting cabinets here, which goes into more detail. This time though, I did two coats of primer and a lot of sanding to get the doors as smooth as possible. I ended up stopping after two because I still wanted to see a hint of the wood grain in the cabinet doors. I used this primer and Benjamin Moore Advance paint, and the colour is Benjamin Moore Niveous.
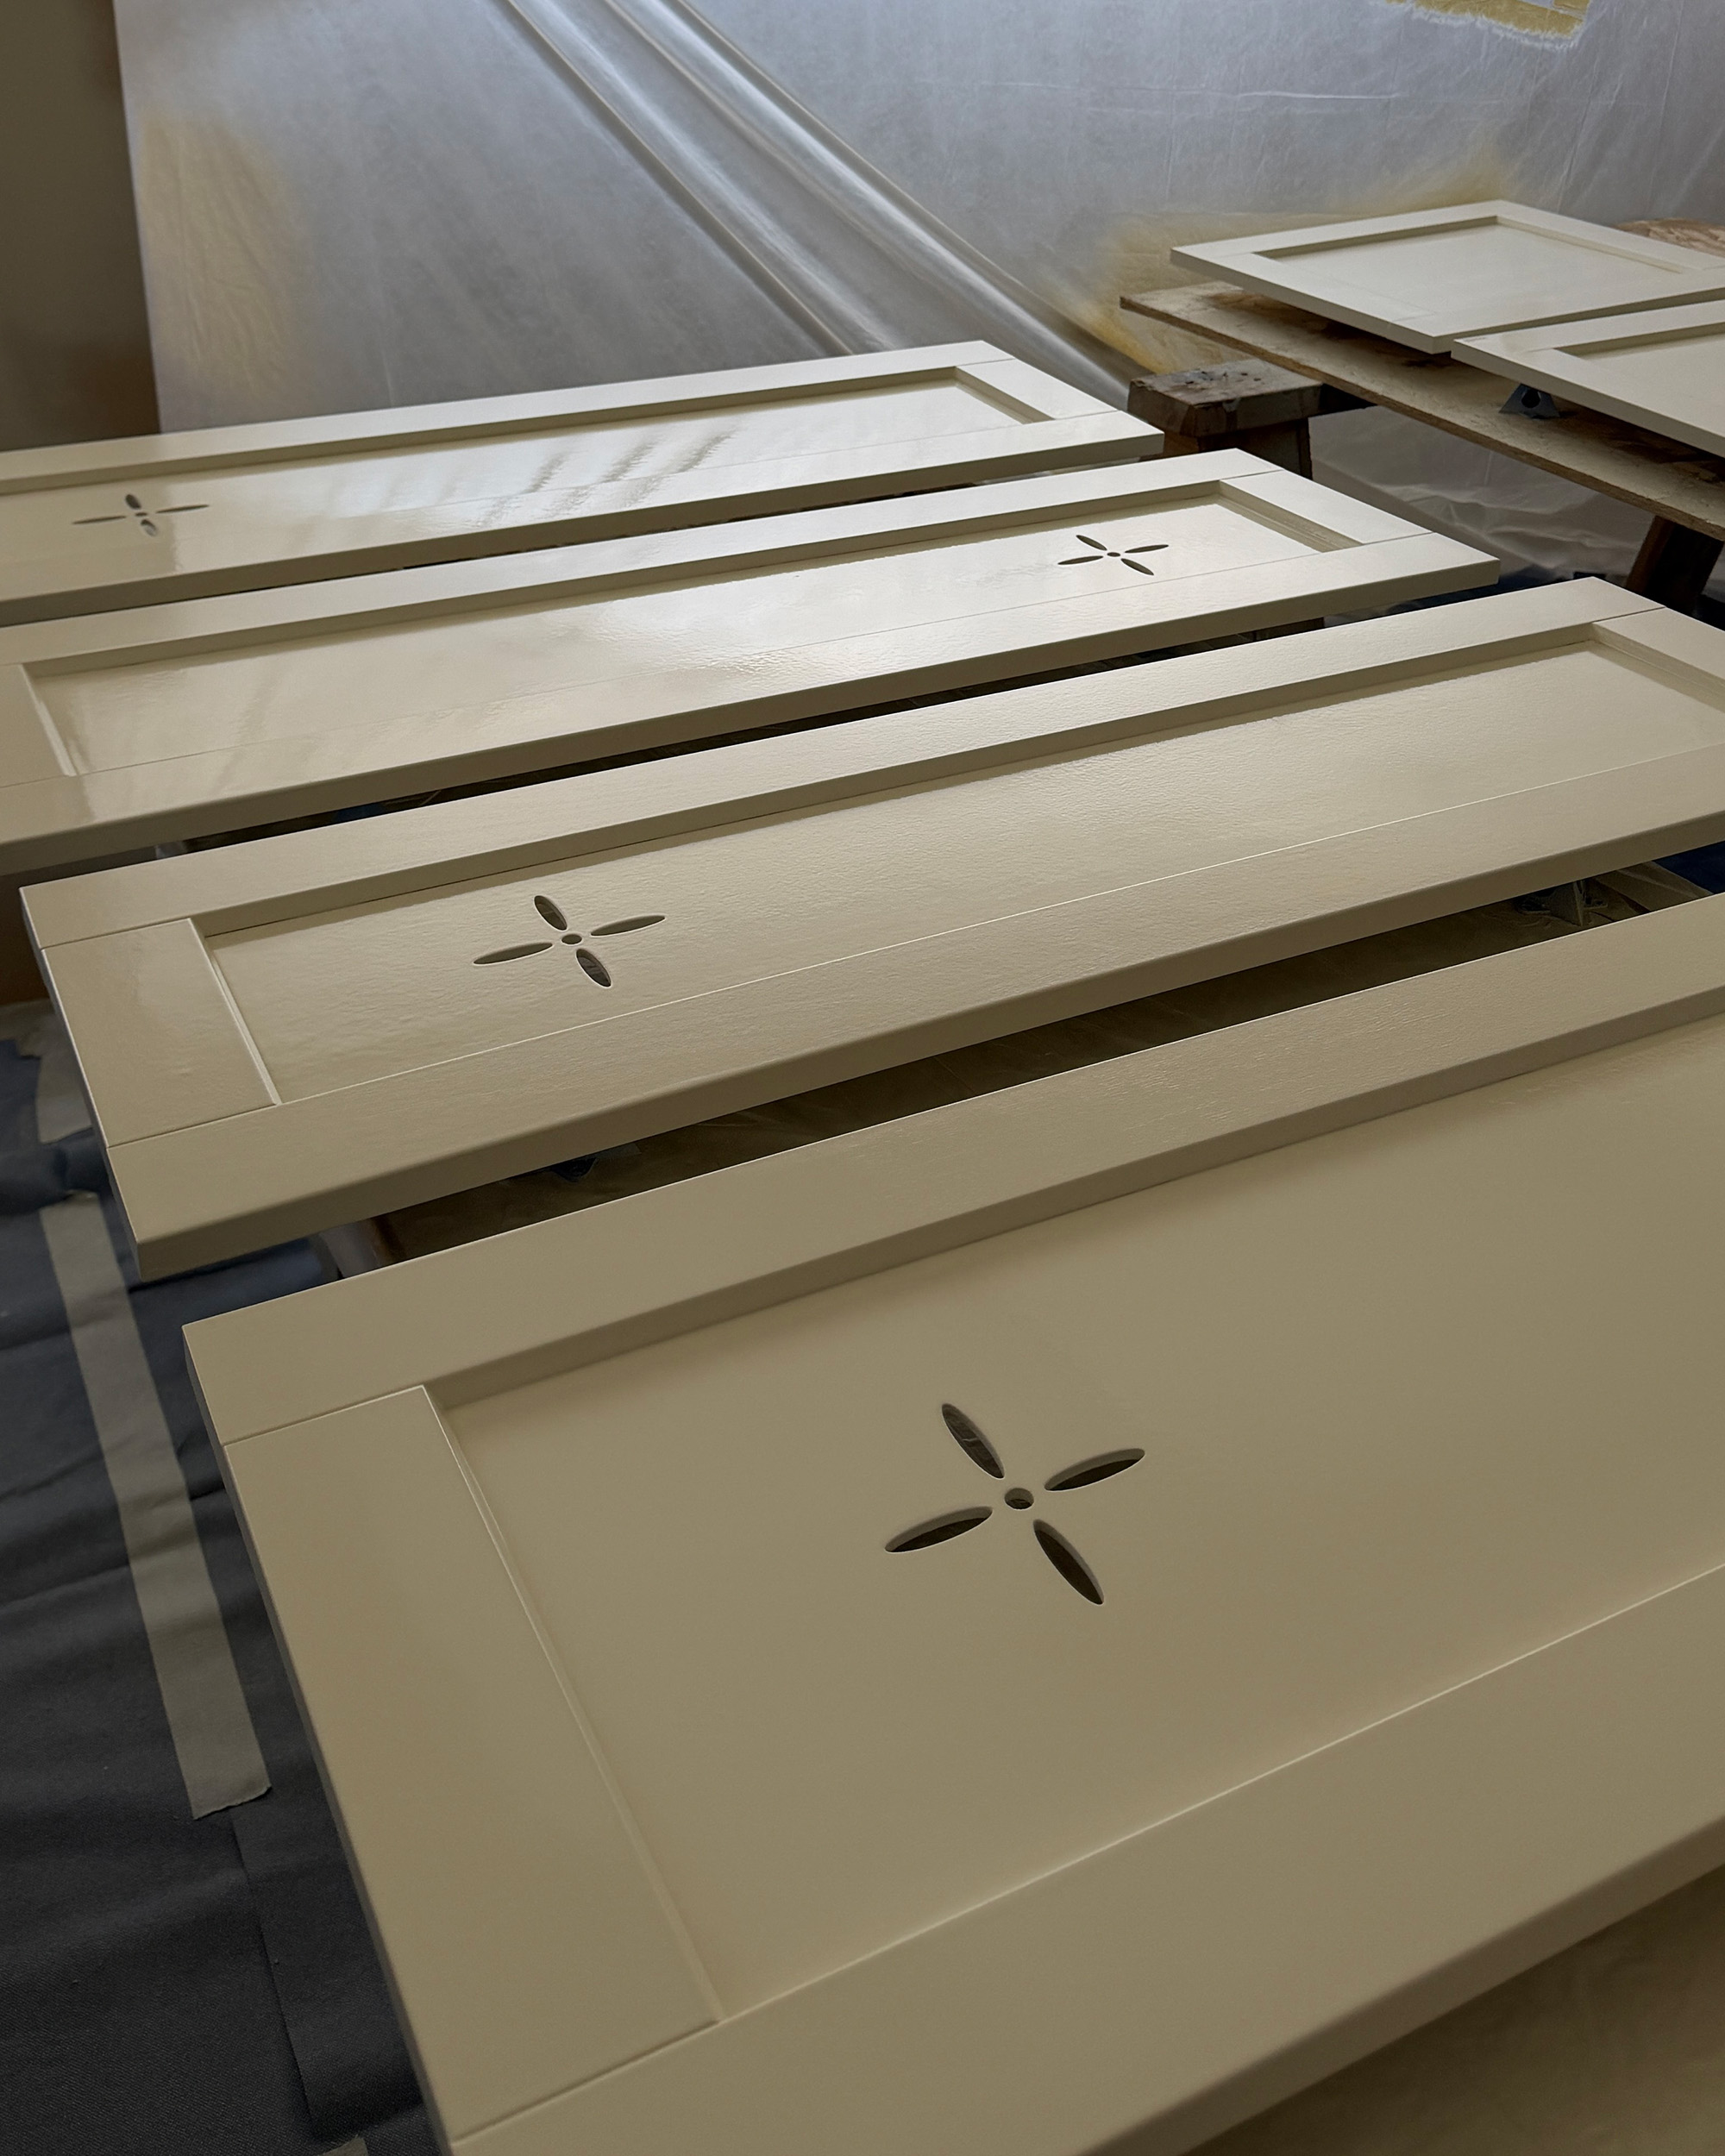
Instead of buying things like cover panels and toe kicks from Ikea, I bought sheets of MDF and we cut those down to create our own custom panels and toe kicks, and I painted it all the same way.
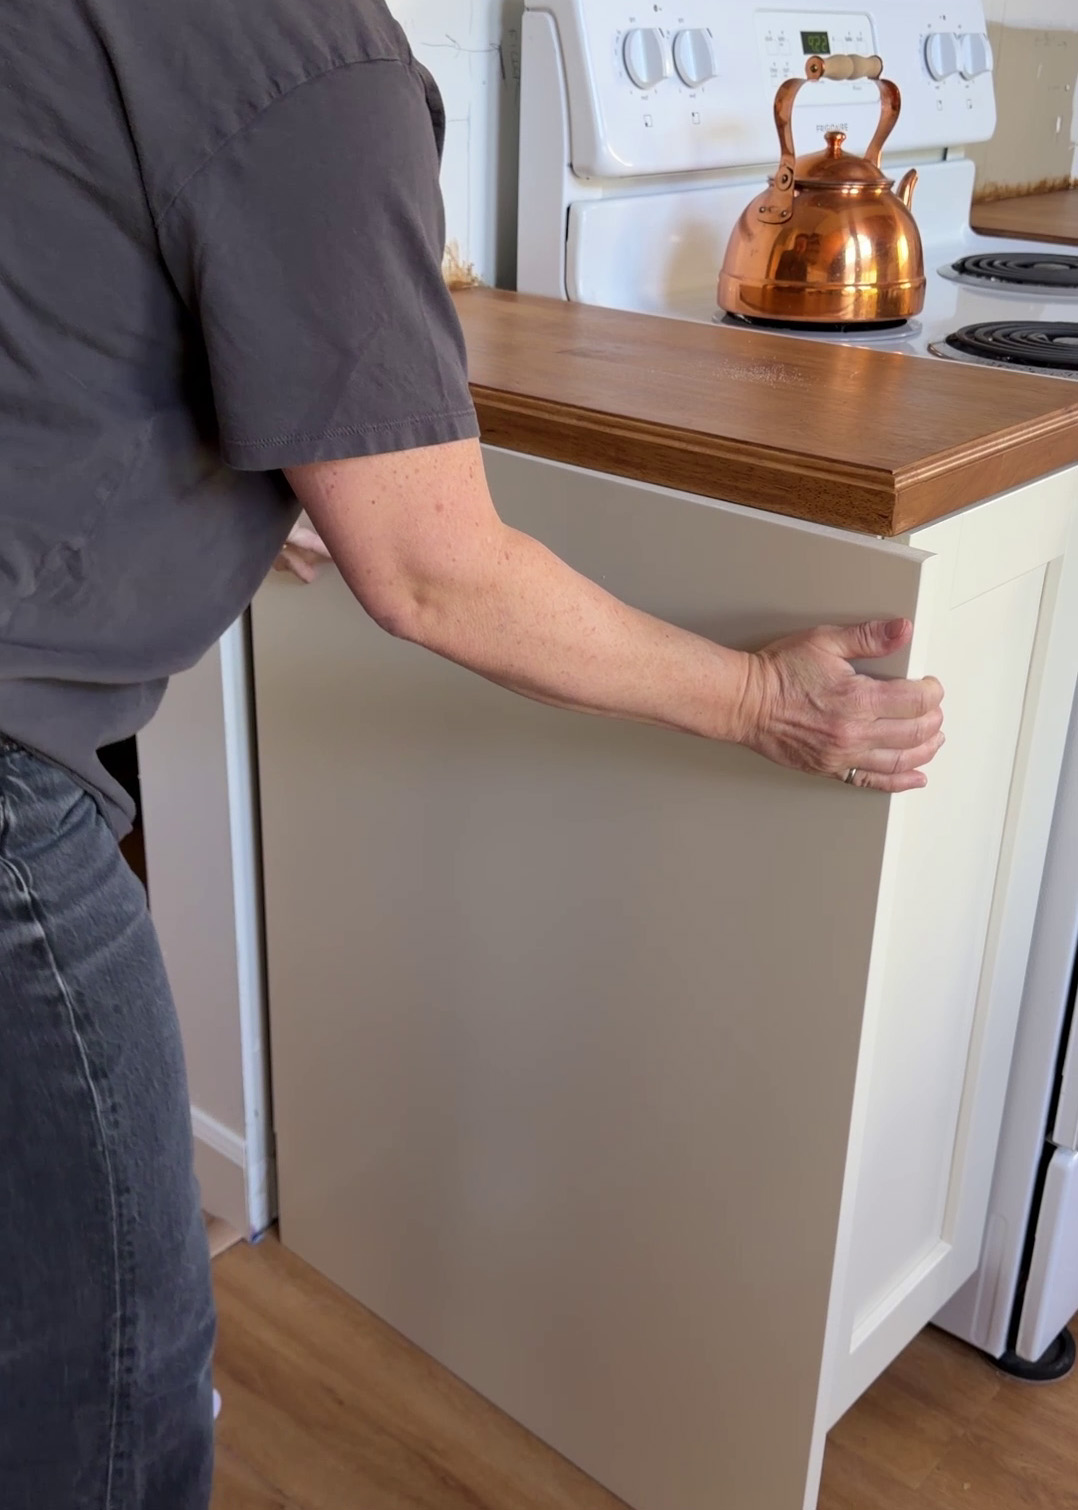
Full disclosure here, this is a big task. Finding enough room to lay all the doors out and spray them, several coats of primer and paint, it all takes countless hours. I was quite happy when the painting was over!
The Butcher Block Countertop
If stone counters is not in your budget, my opinion is that the next best thing is butcherblock. It is natural material and it looks fantastic.
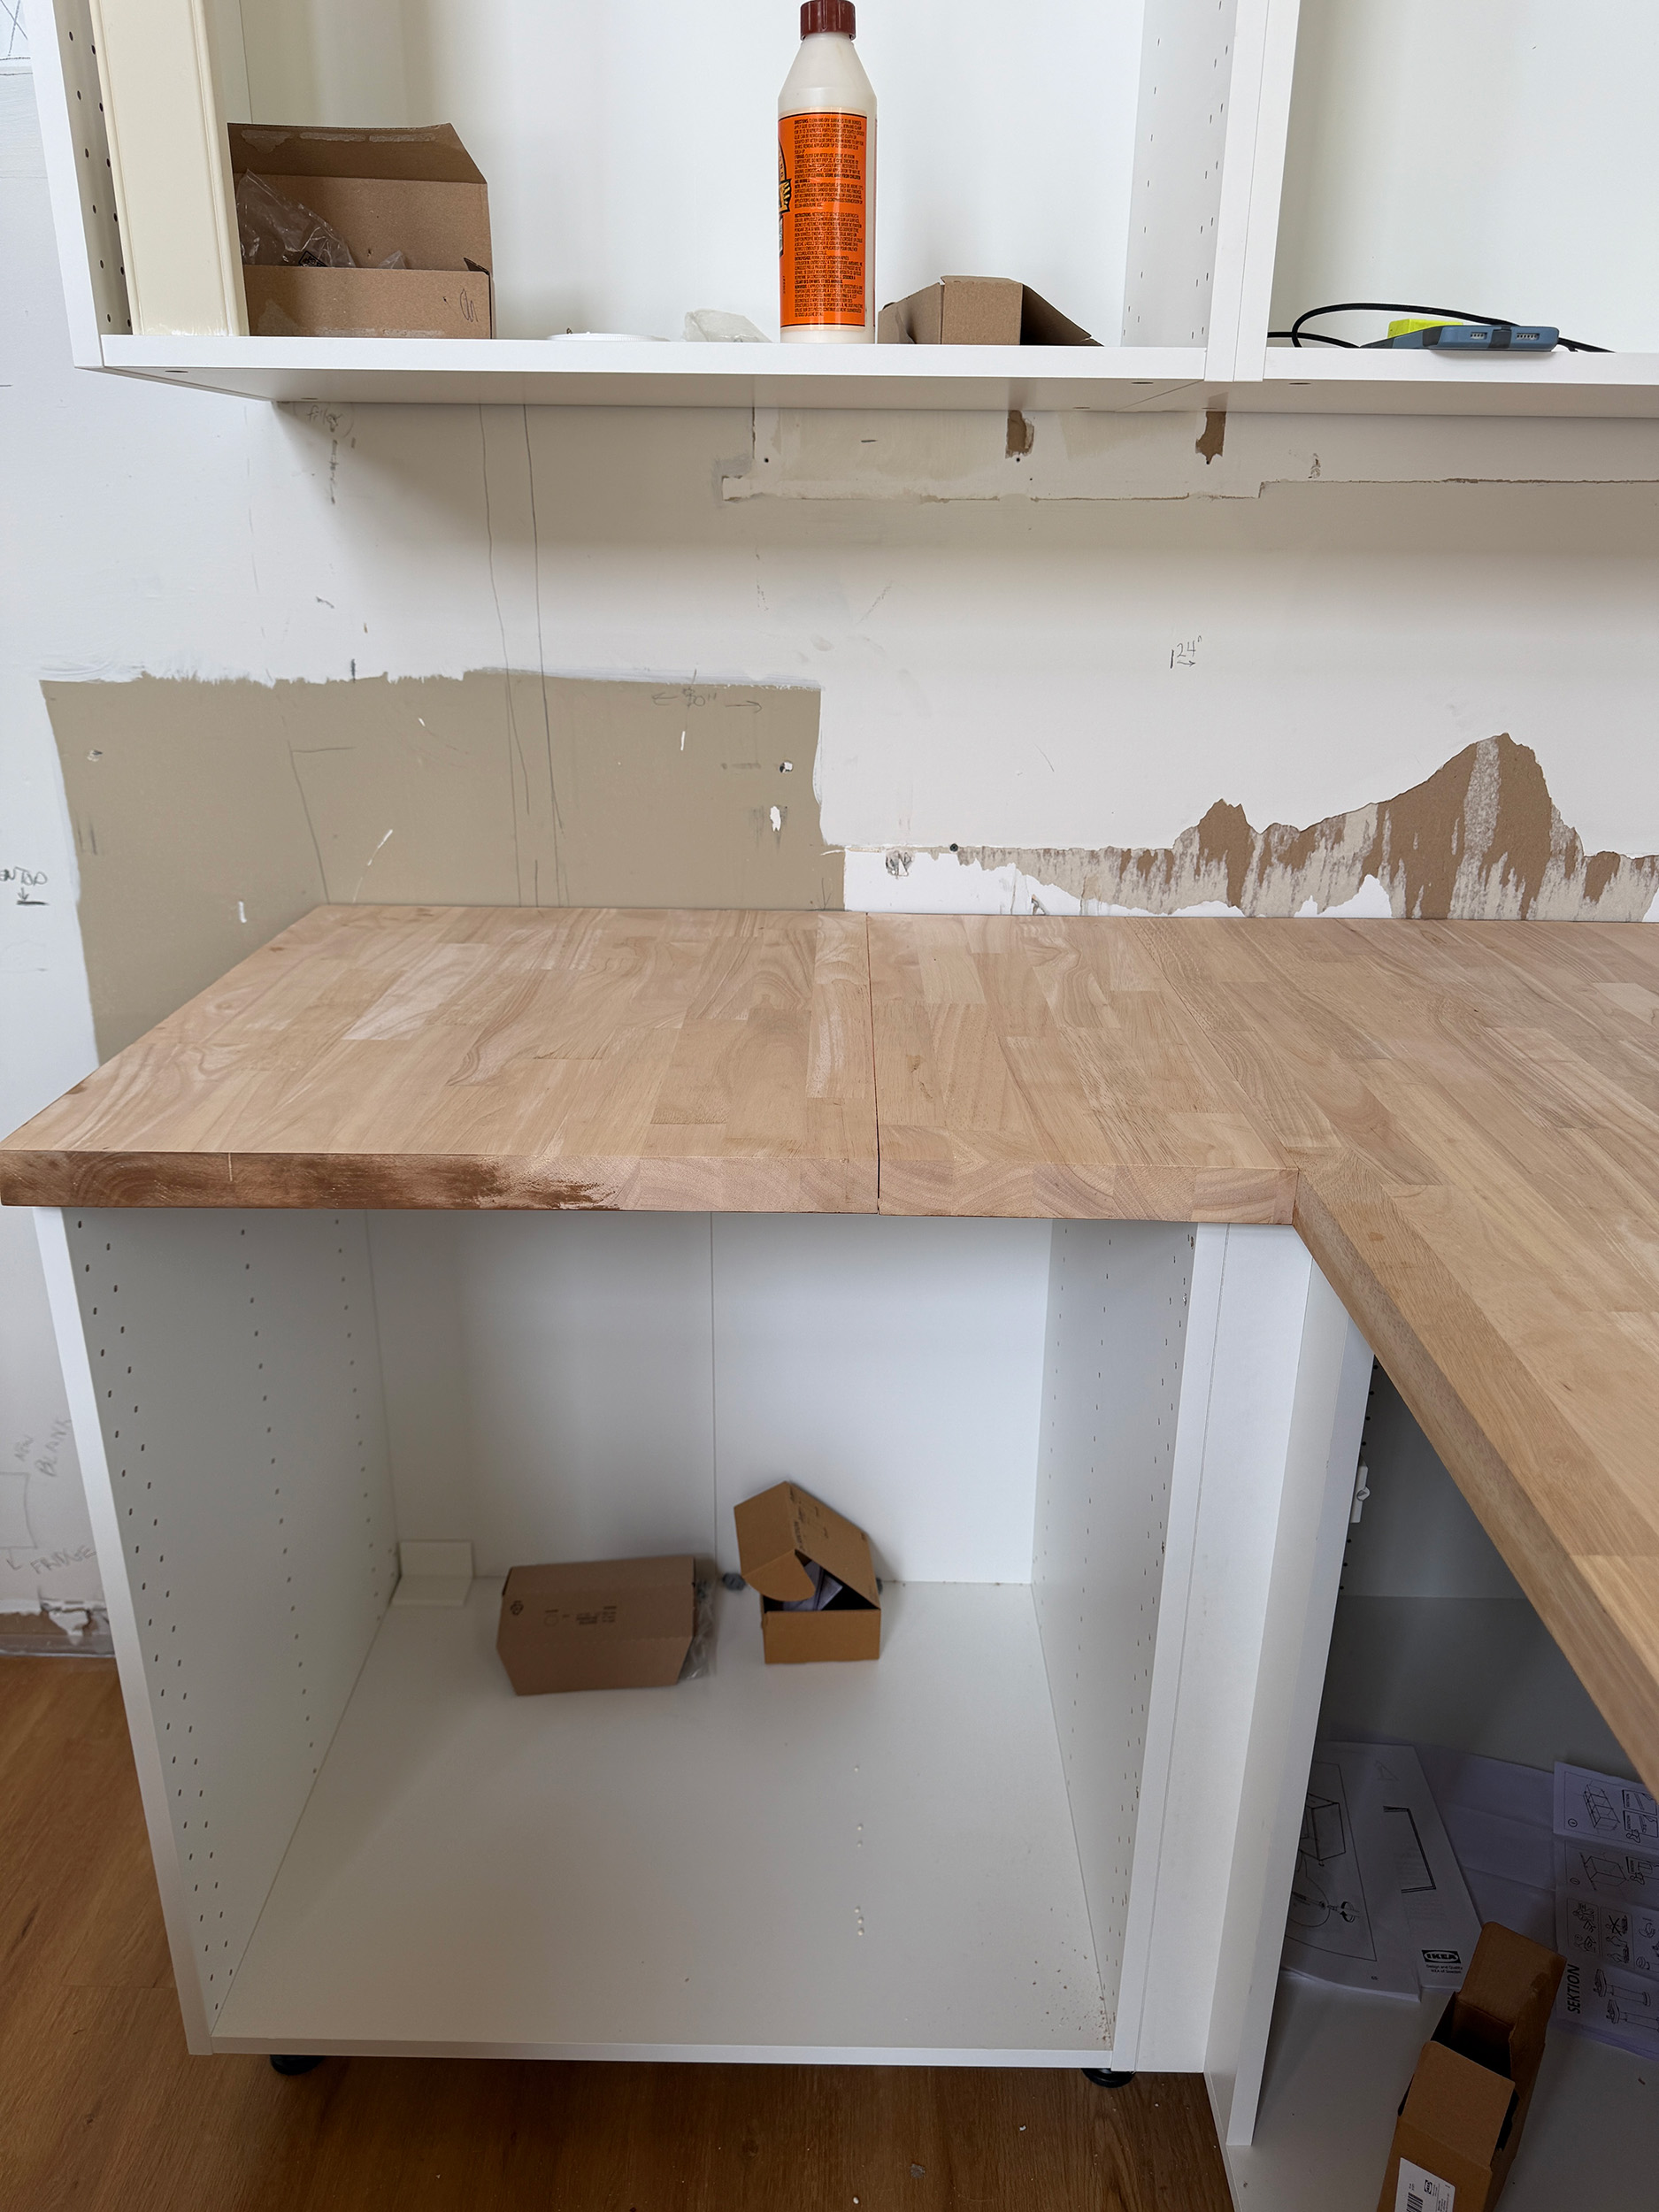
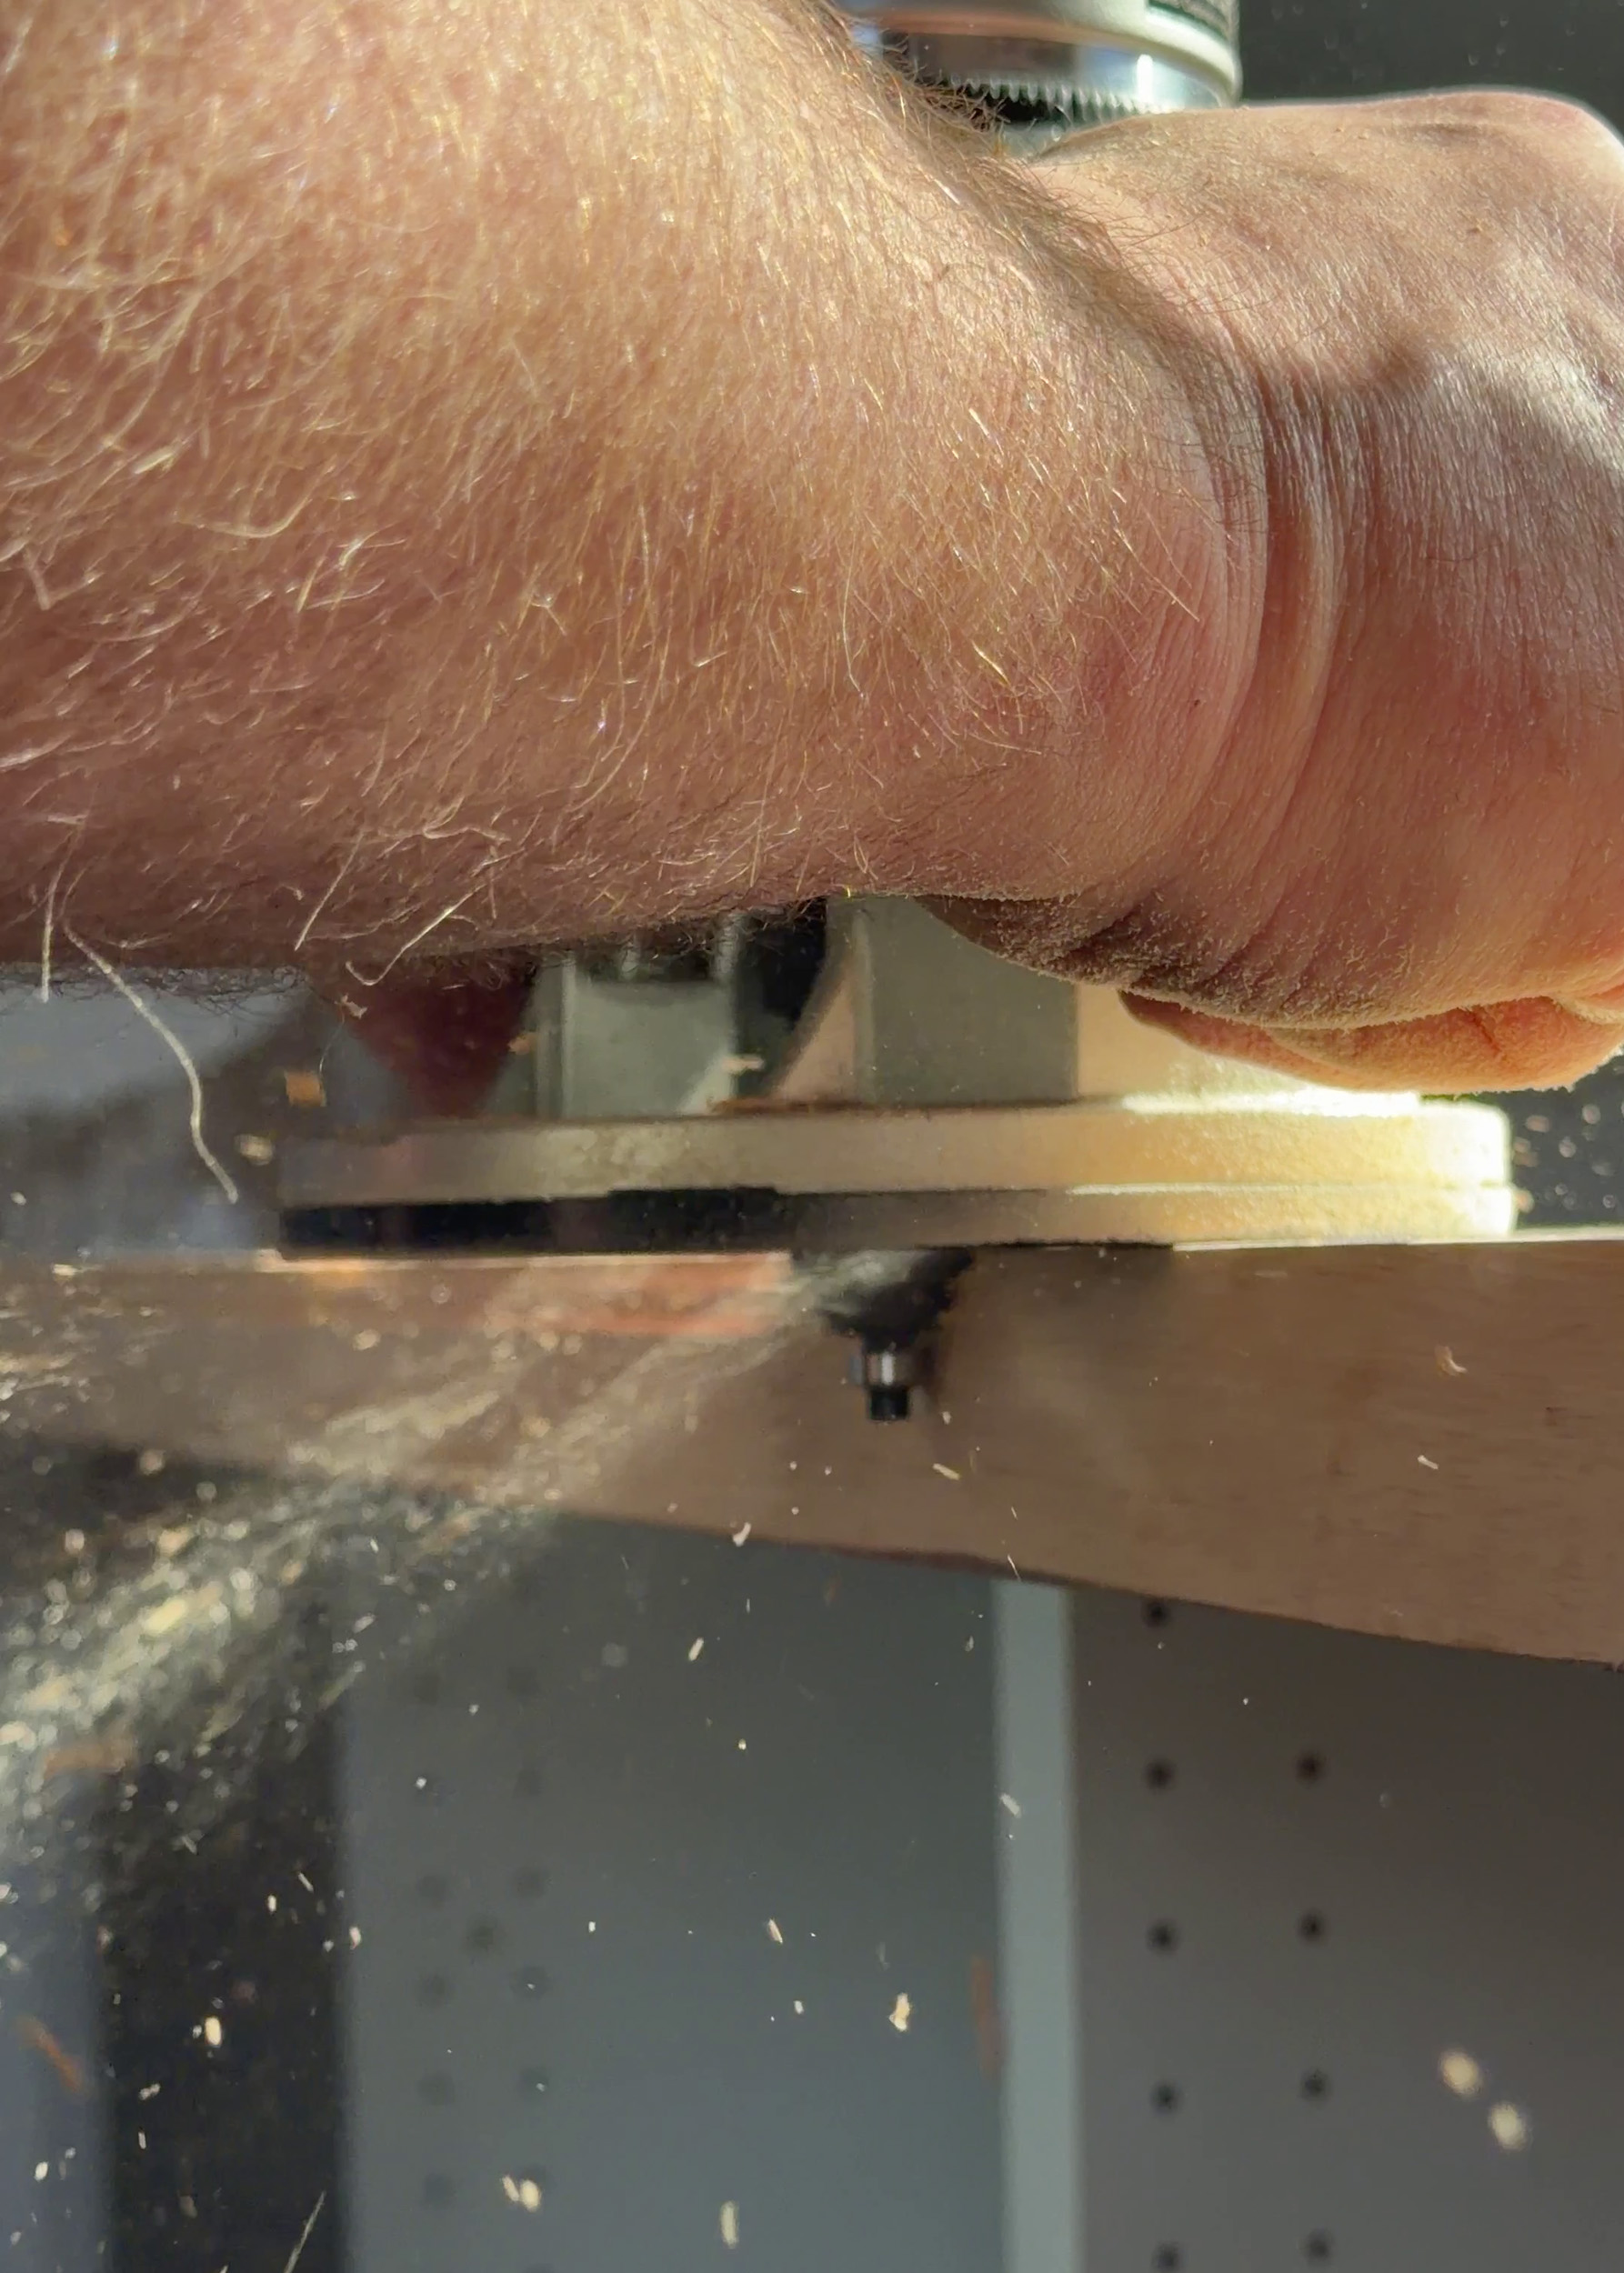
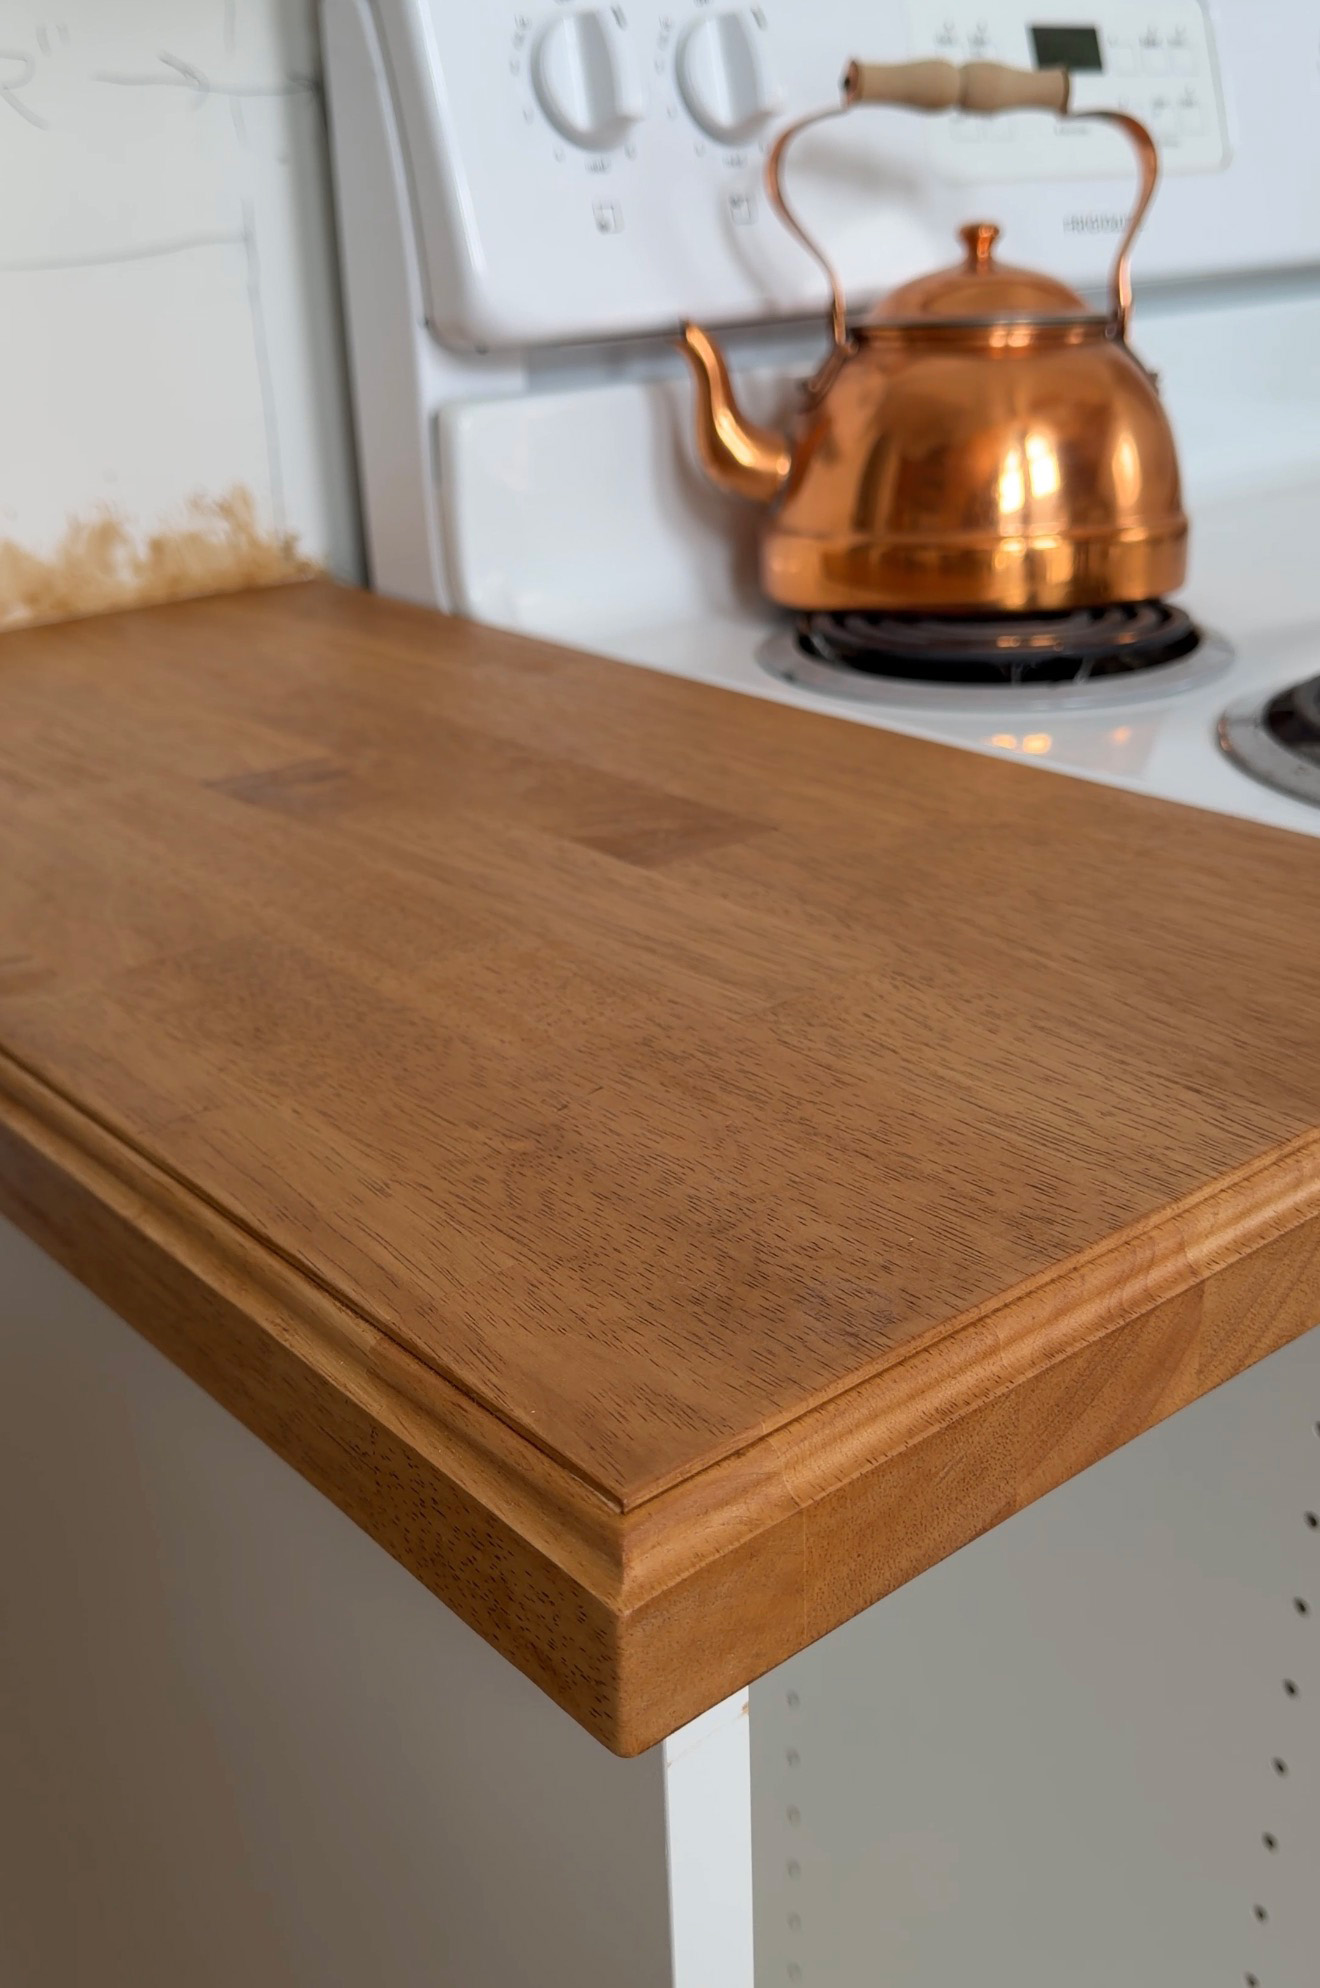
We added an ogee edge to the butcher block and then treated it with OSMO butcherblock oil. We did our bar the same way and have been very happy with how it performs! I did a blog post all about how we do our butcherblock counters here.
The Farmhouse Sink
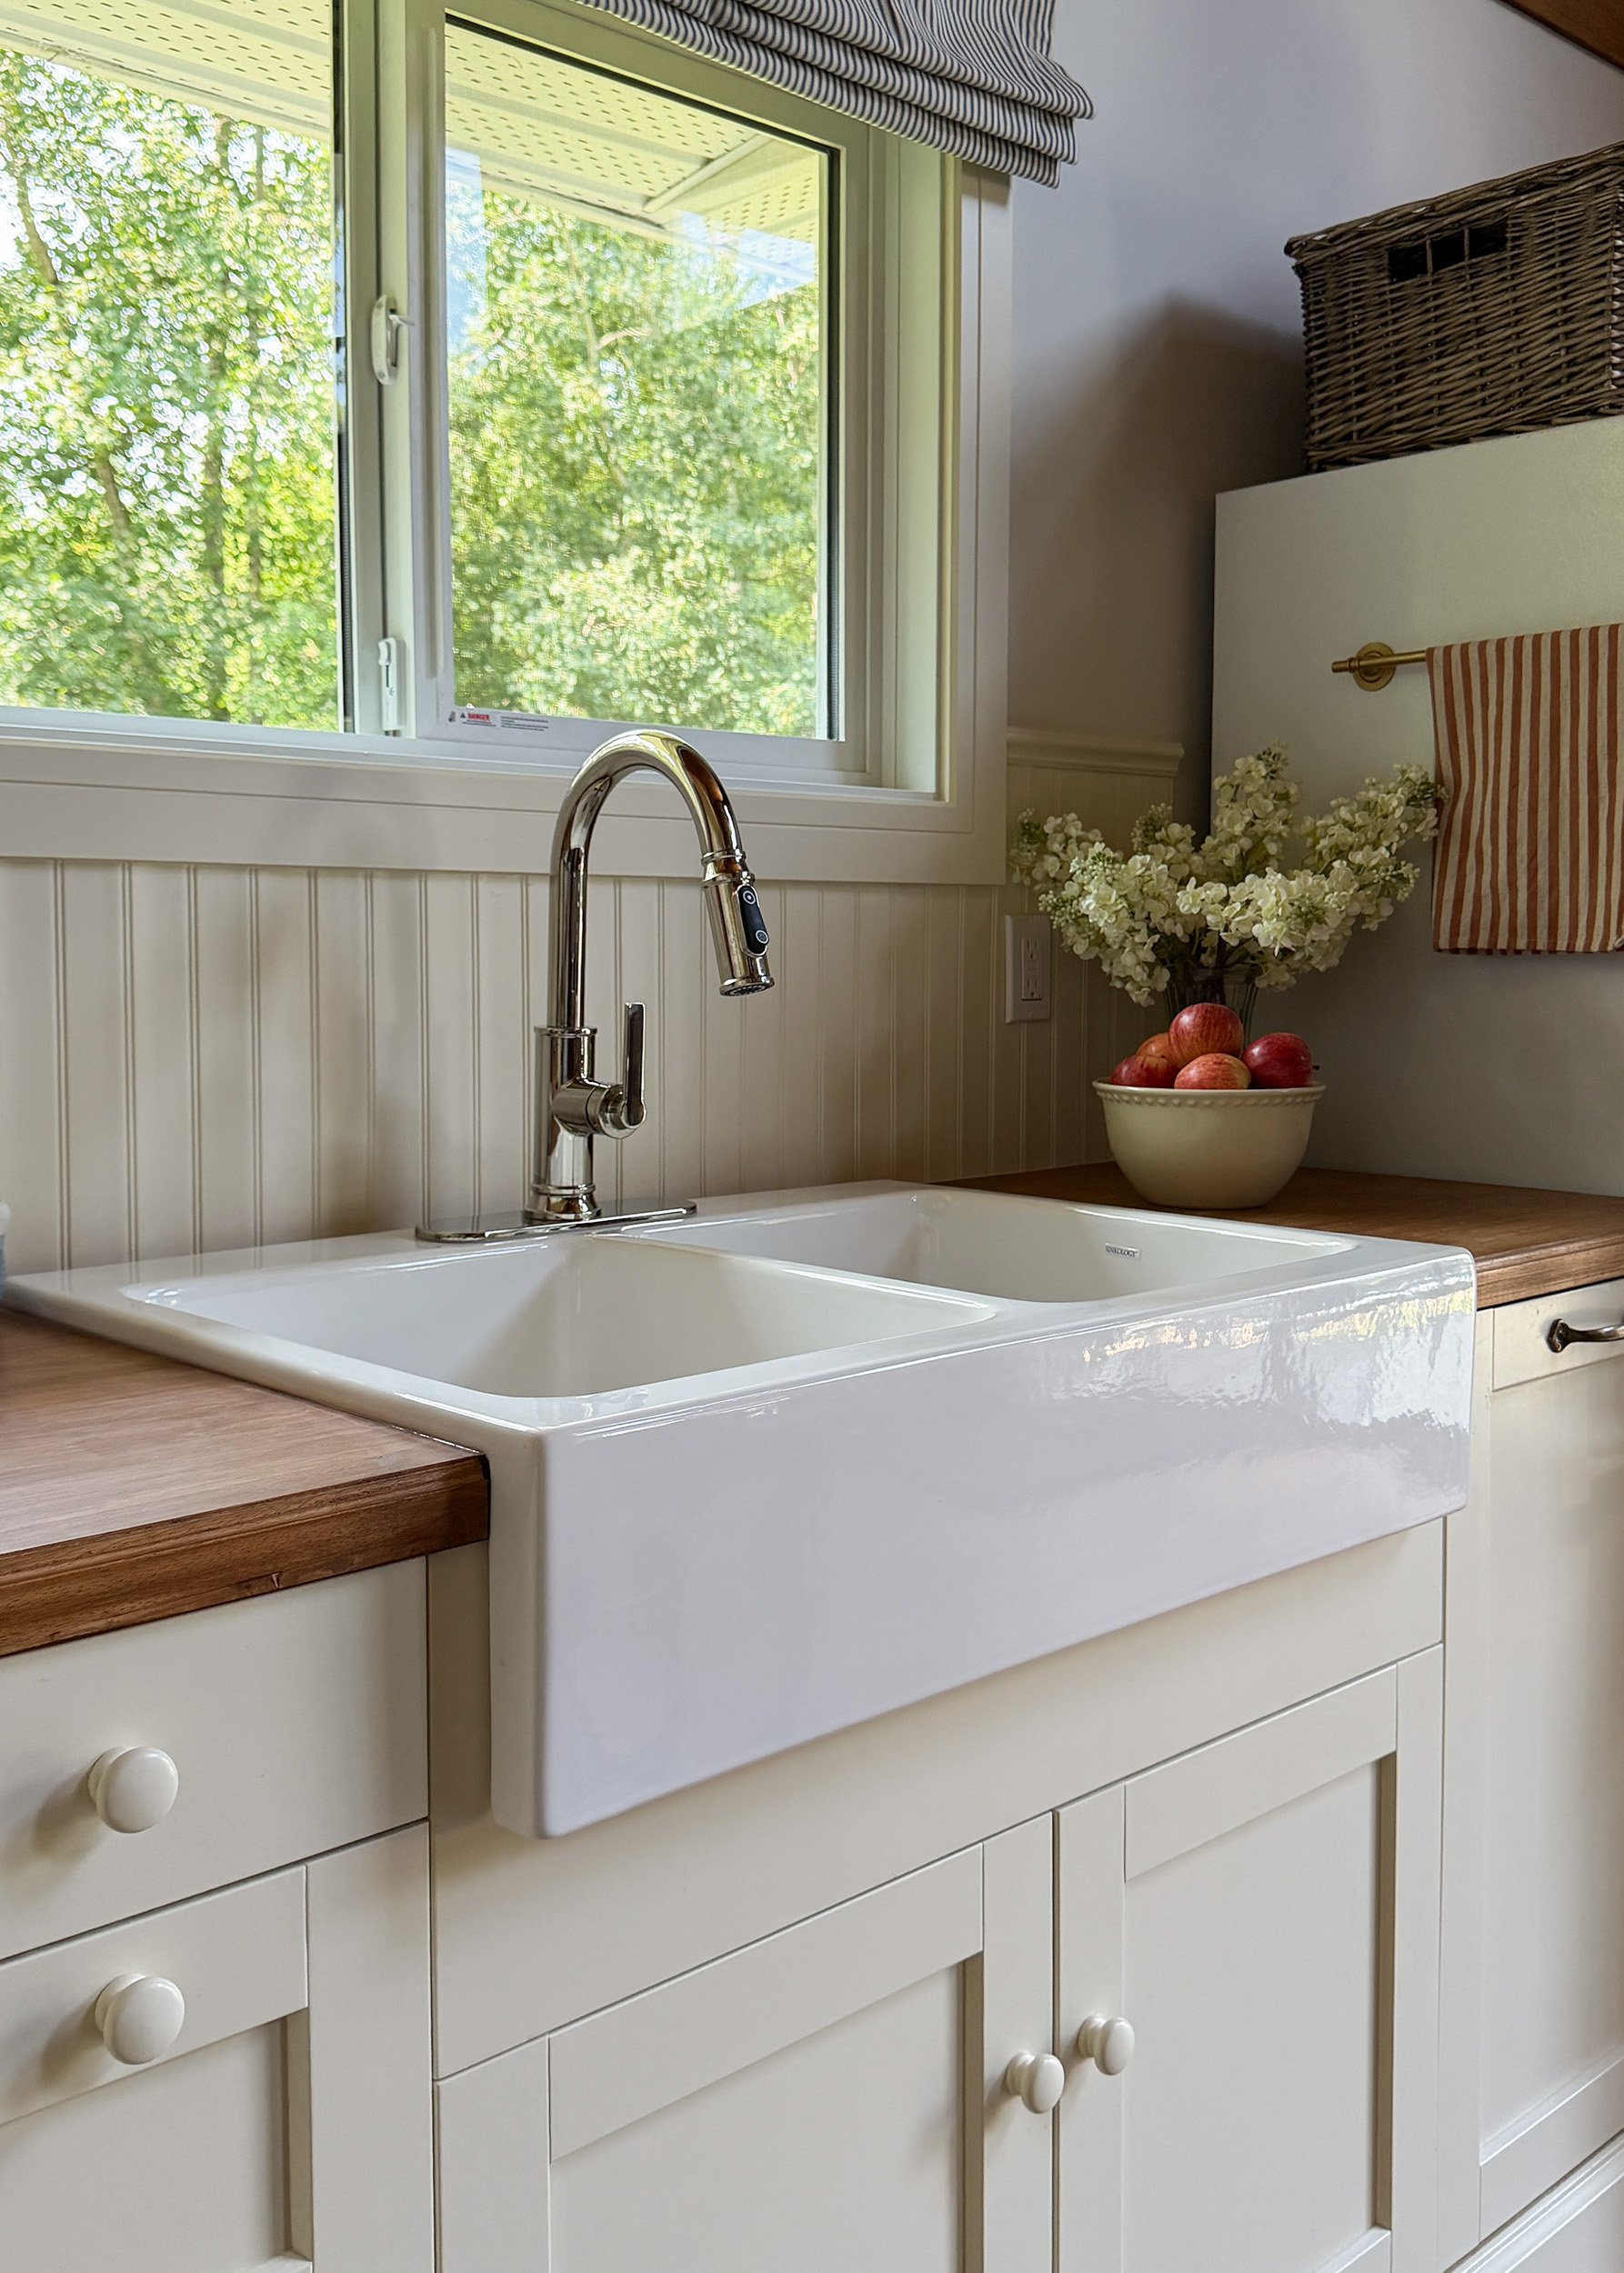
Given the cottage vibe I am going for, I only thought it fitting to use an apron front sink. I searched far and wide for one that was a double sink (as that is my preference) and also a drop in style. Given that we were using butcherblock counters, I wanted to make sure the edges of the counters were protected and stay pretty dry around the sink.
I found one at Sinkology and reached out to them to see if they wanted to partner. They generously sent me the sink and a faucet too, and we are so happy with them both! My husband and I were both talking about how much we like the sink, better than the one we have at home!
The Backsplash
Since we used beadboard to cover the ceiling when we removed the sunshine ceiling, I wanted to repeat that somewhere and decided to do the backsplash in beadboard as well.
I have used MDF beadboard paneling behind a sink before, and it does not hold up well to water and so it’s not the best choice. Imagine my delight when I found some PVC beadboard at Home Depot! It looks just like regular beadboard, cuts and installs the same, but it’s made from PVC so it is moisture resistant.
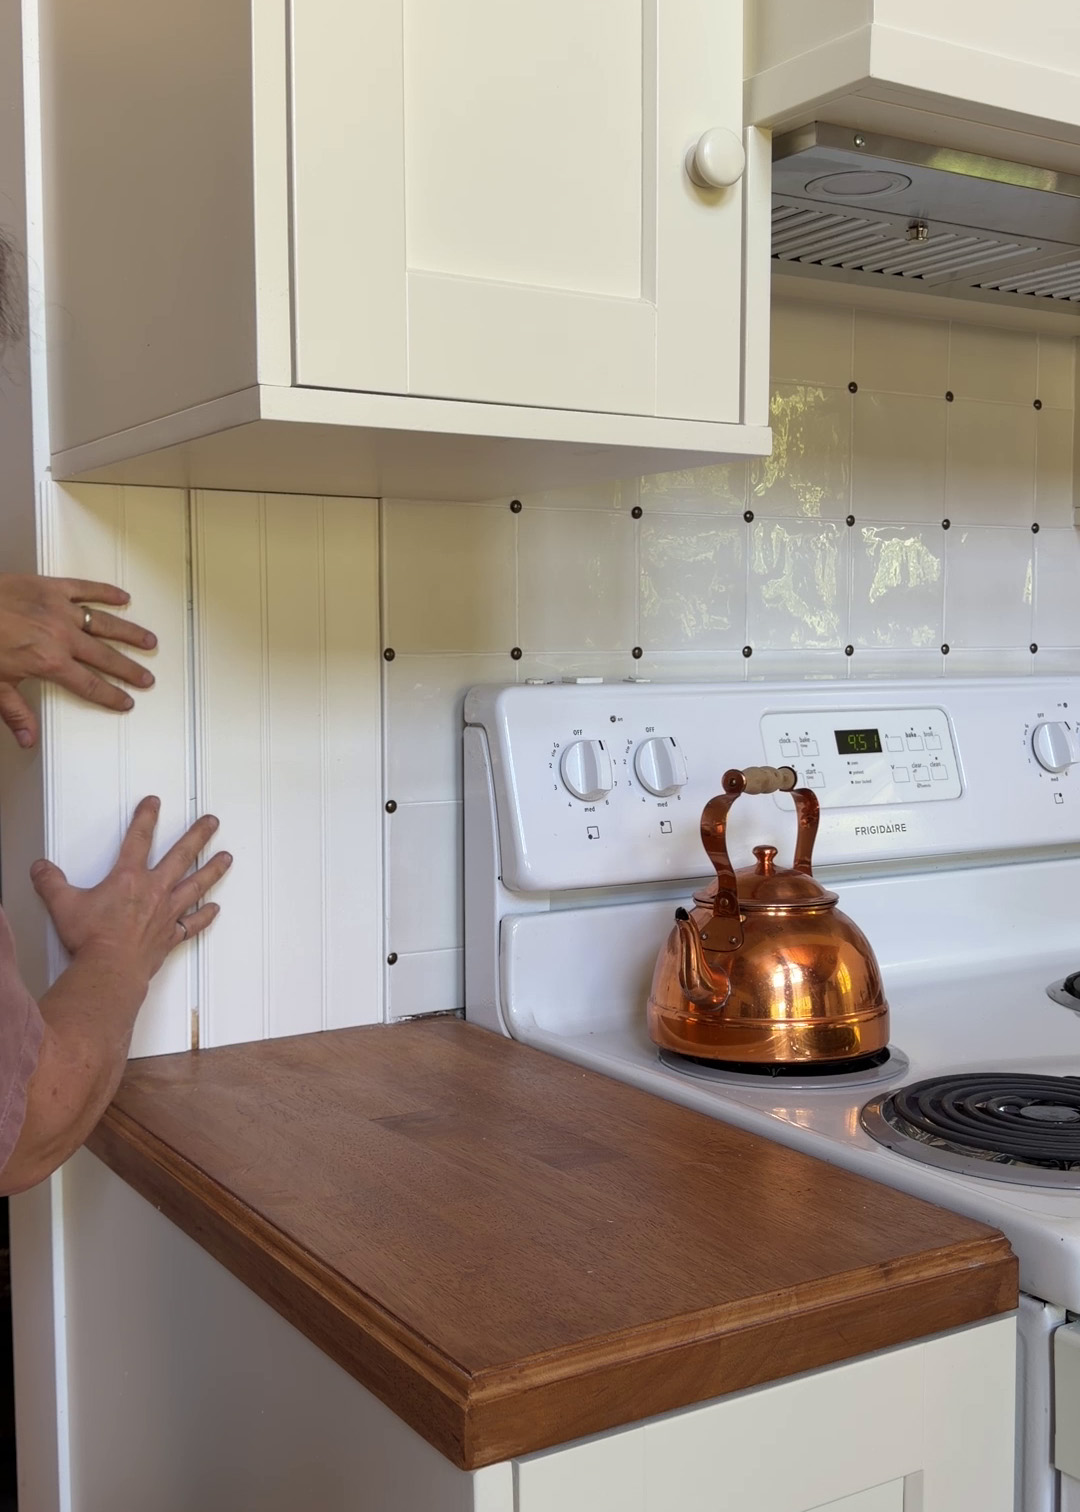
I used that for the majority of the backsplash, but behind the stove I needed to use something more heat resistant.
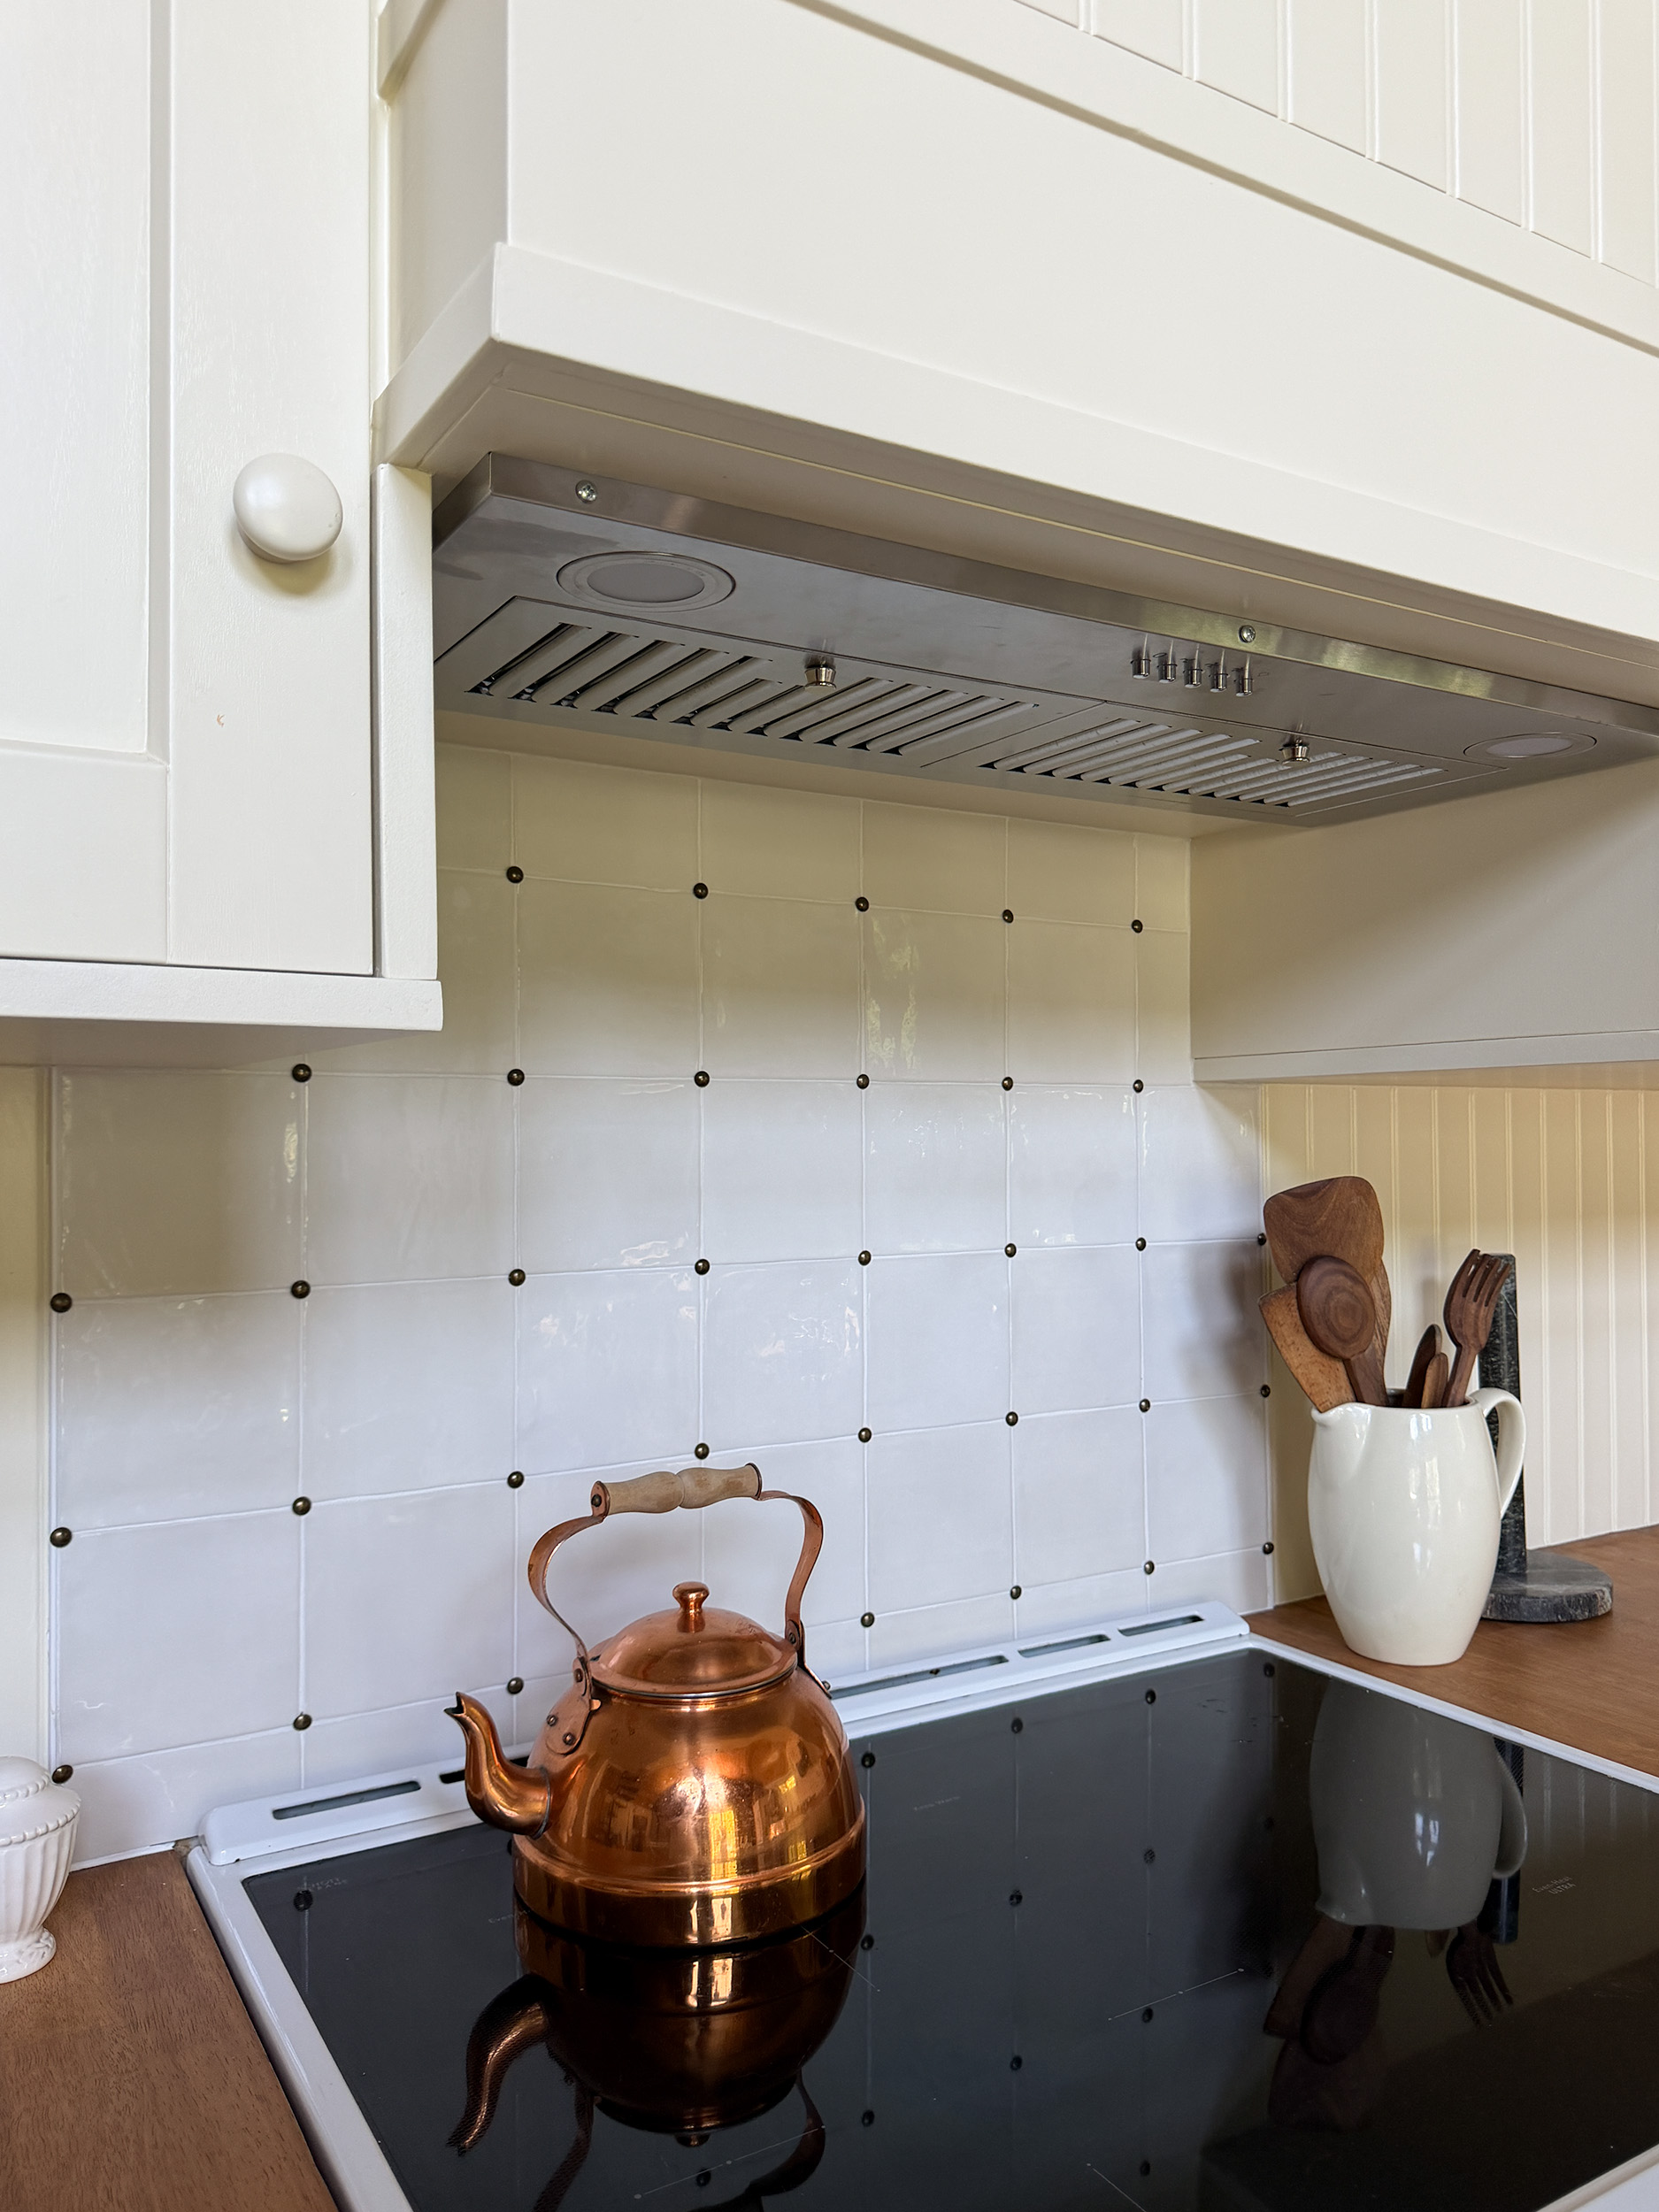
I found an inspiration photo a traditional kitchen I loved on Pinterest. When I zoomed way in, it looked to me like it was just square tile with pins in the corners. So I bought some inexpensive square handmade look tile from Home Depot and some upholstery tacks from Amazon. I installed the tile tight with no real spacing, and as soon as I was done grouting but before the grout set, I pushed the pins into the corners.
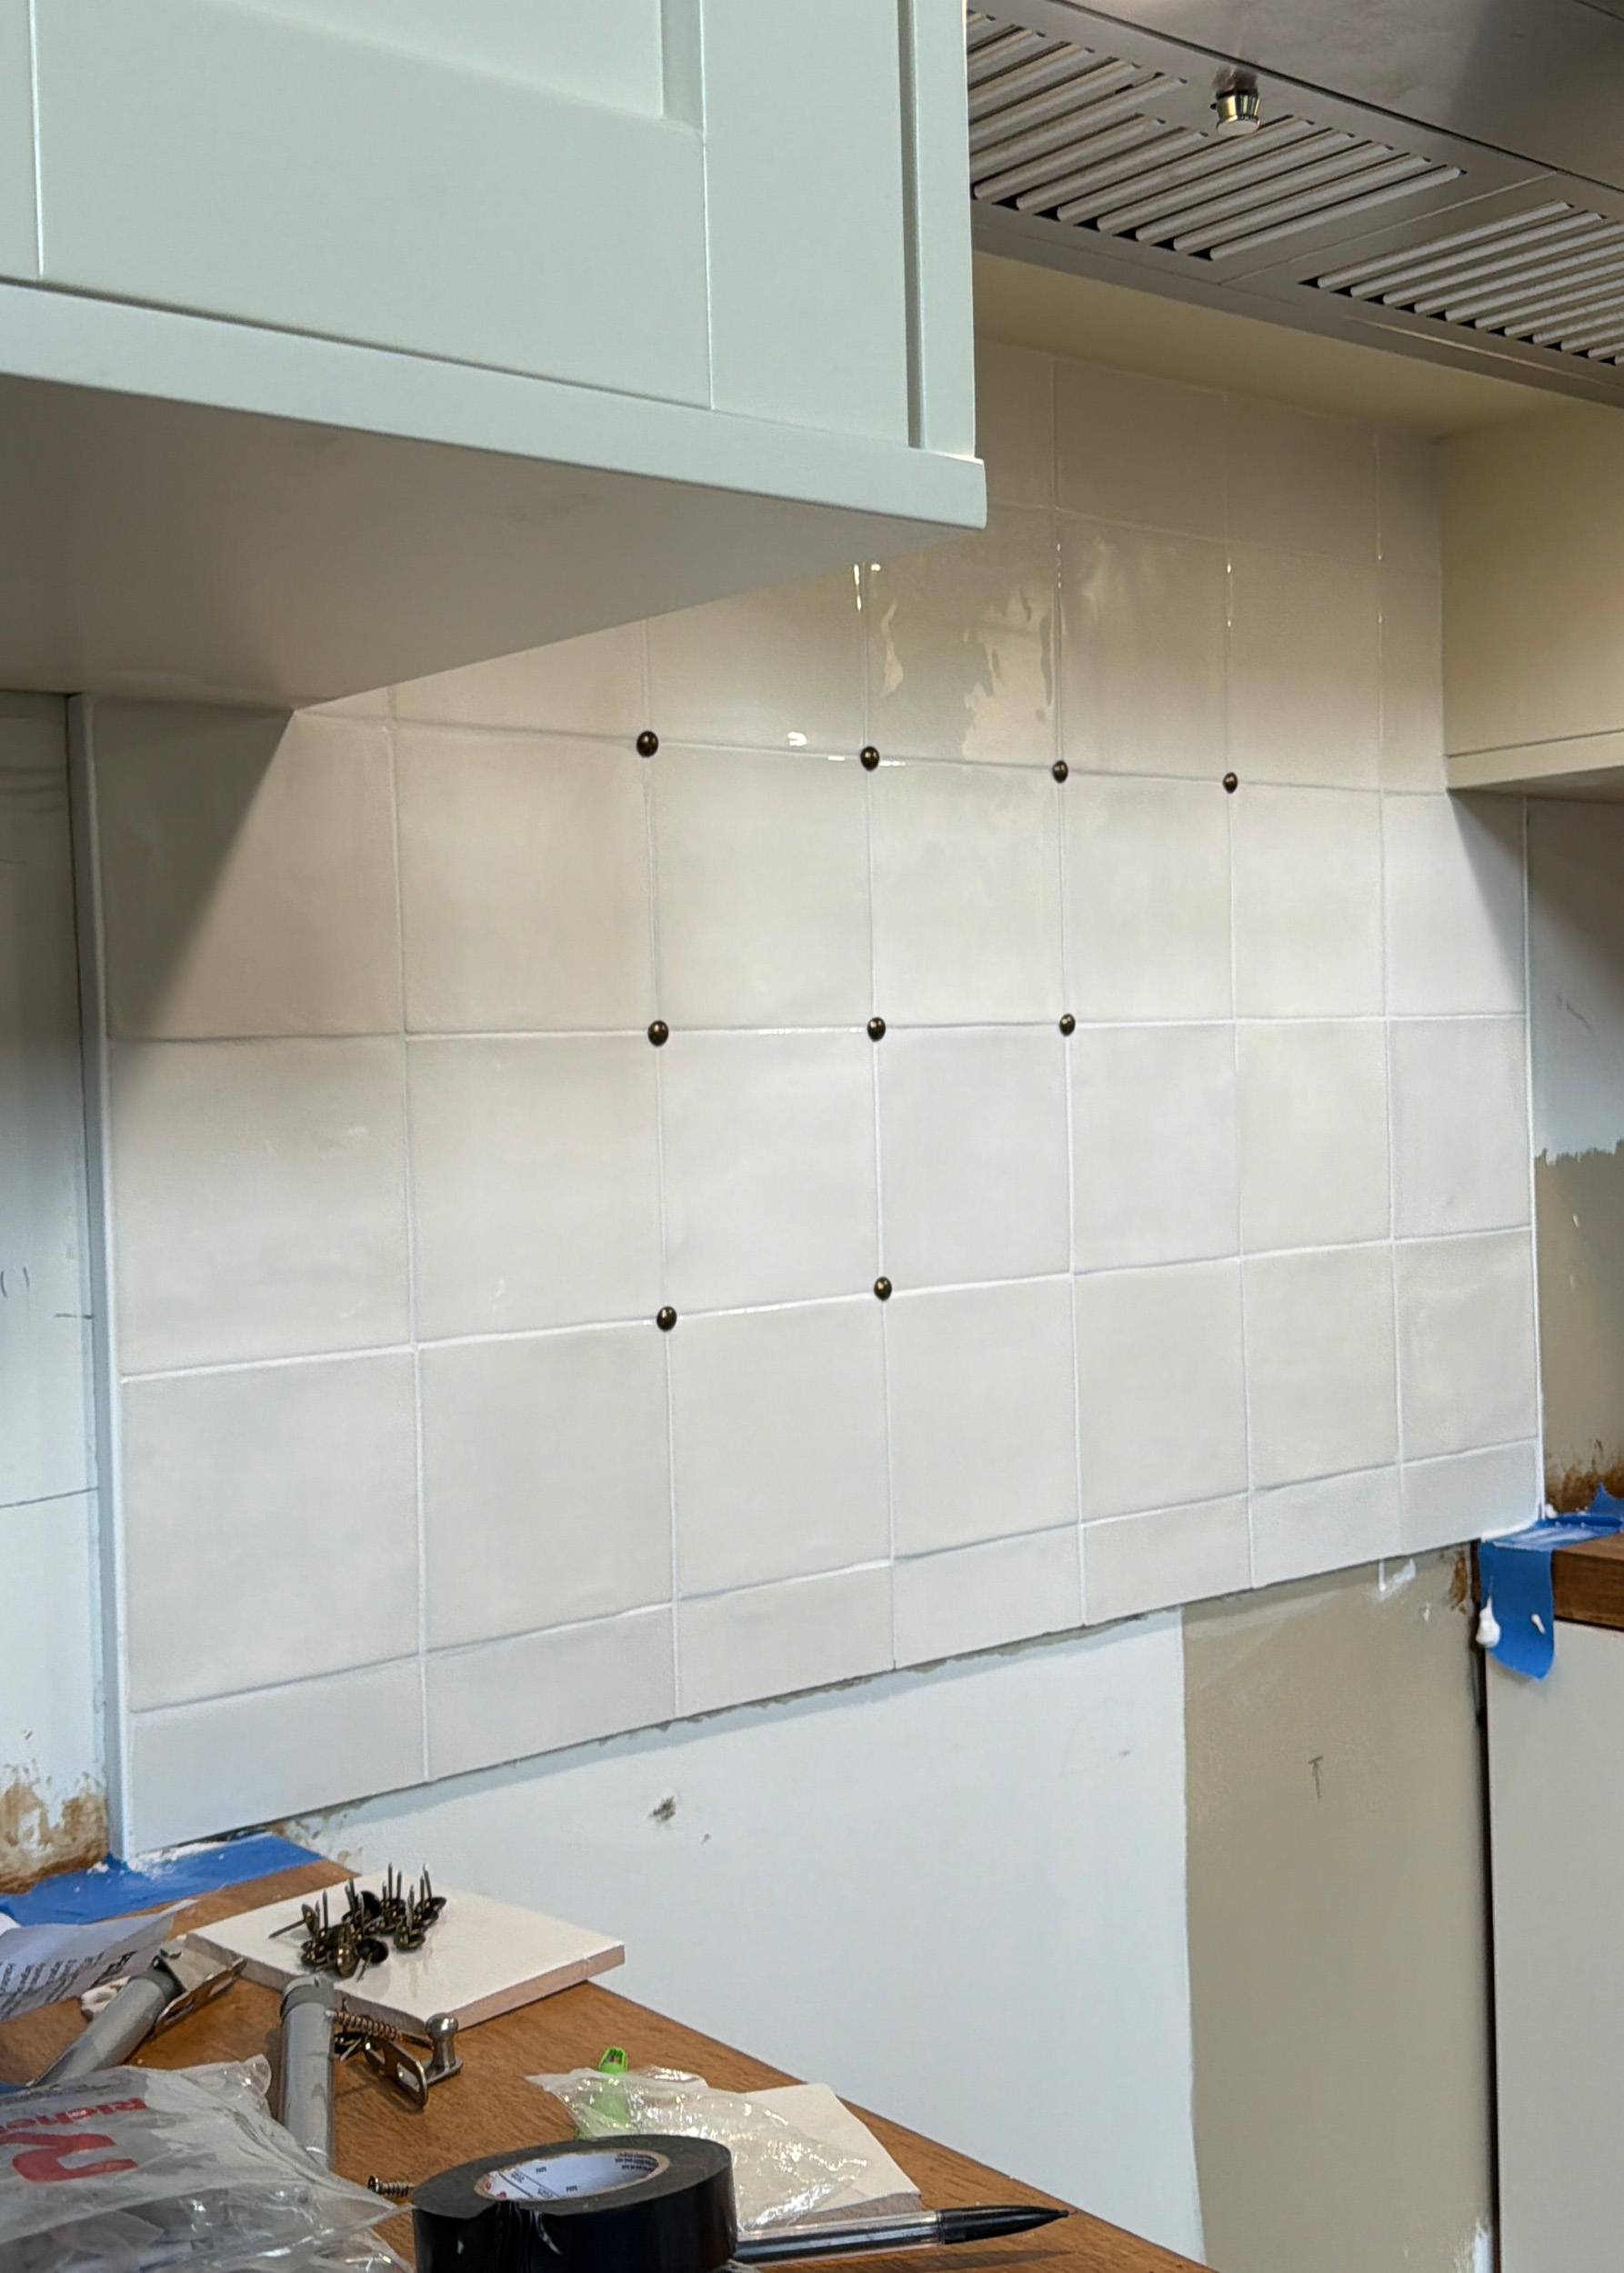
This turned out AMAZING. It was so easy. I kinda wish I had done the whole wall this way because I love it so much!
The Appliances
Somehow we were able to squeeze out enough room for a tiny dishwasher. Its only 18″ in size but it’s just perfect for the cabin. I opted for a panel-ready option (did you know that panel ready dishwashers are not really that much more than a regular dishwasher?)
I installed a removable toe kick under the dishwasher using magnets. I did this in my kitchen at home too about 5 years ago and it’s still working great!
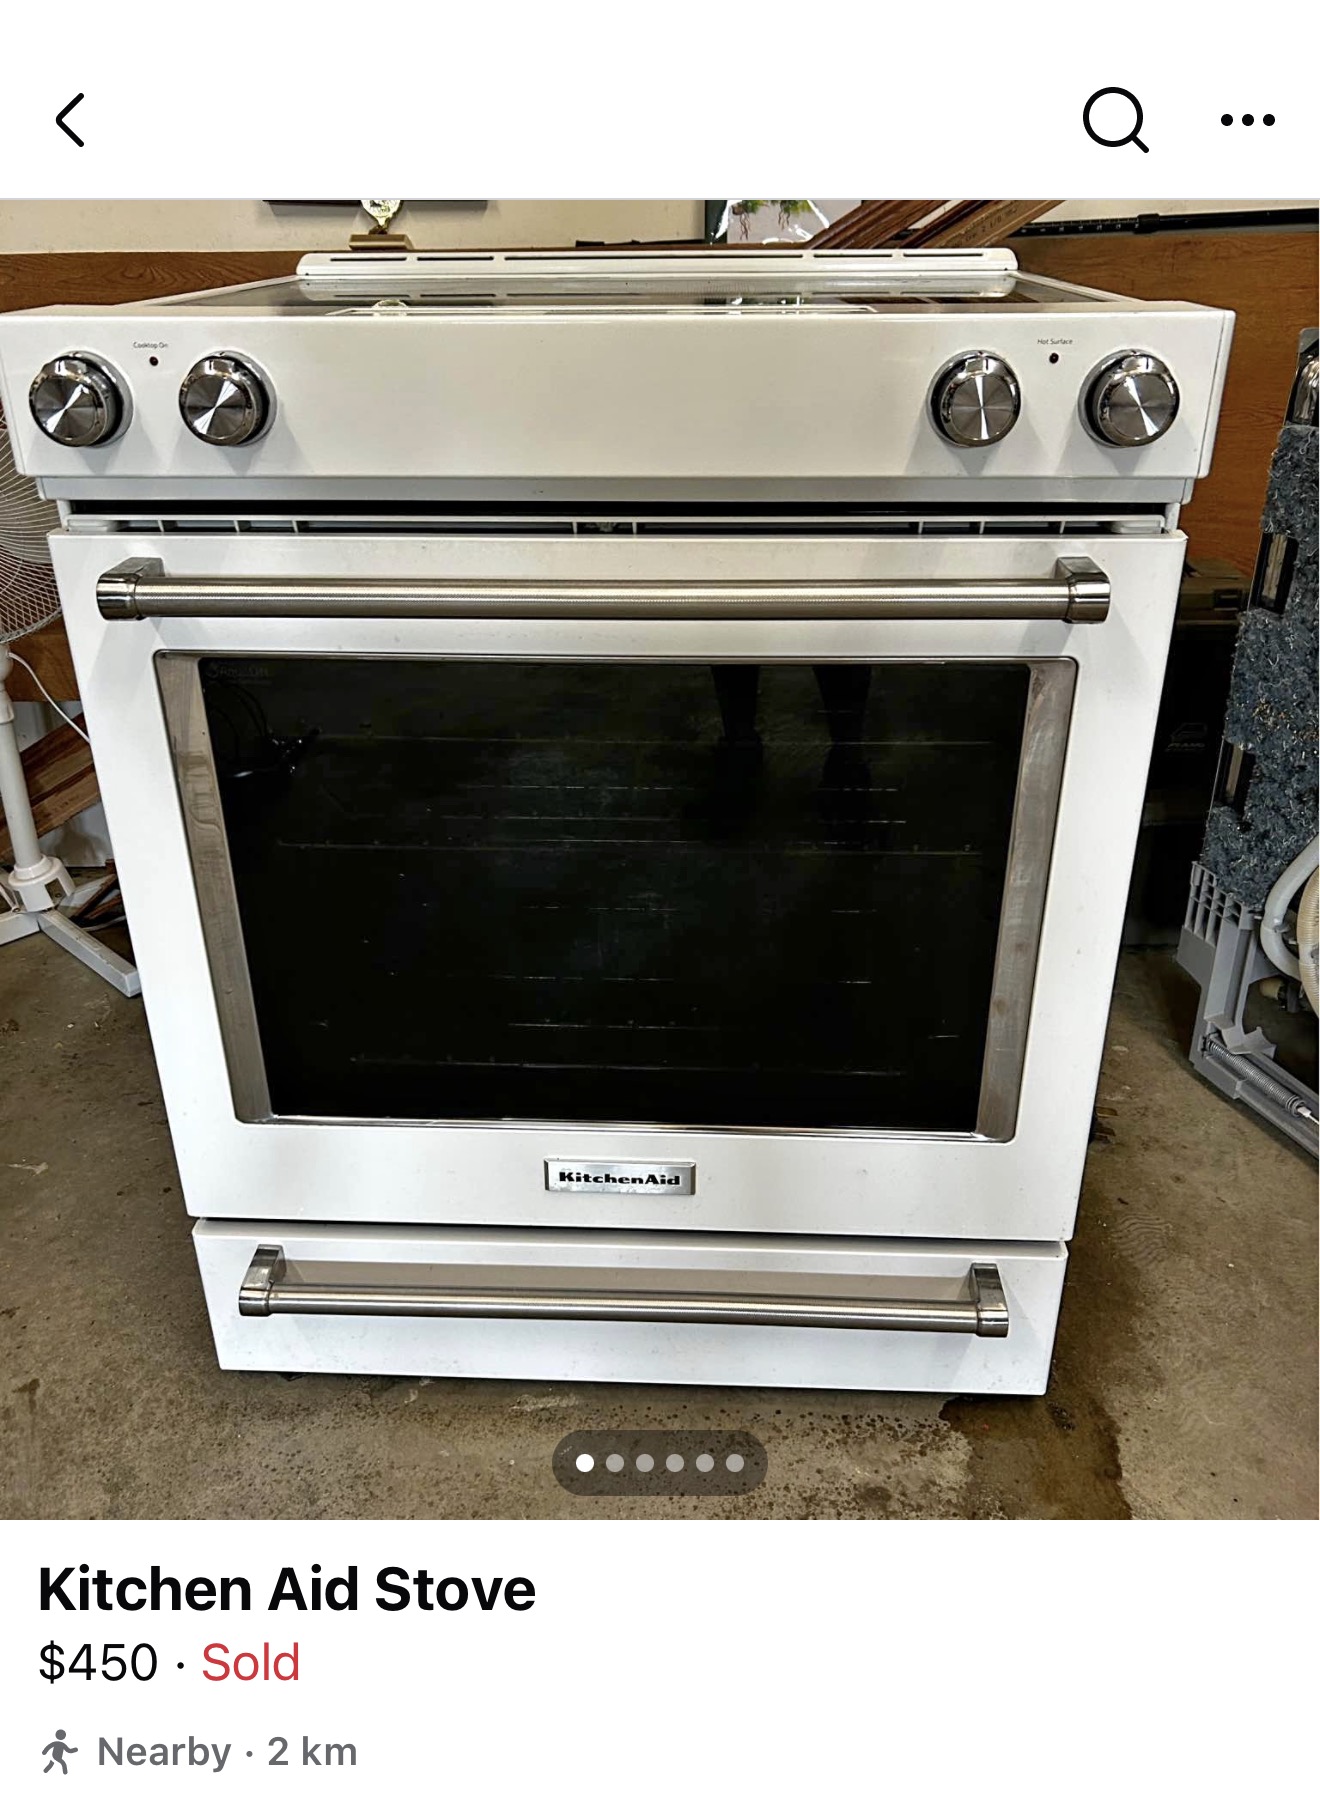
We had planned to keep the old appliances to save money, but when I pushed my old stove in place it covered at least half of the cool backsplash that I installed and I was feeling kinda bummed about that.
NO JOKE the next time I opened Facebook Marketplace the very next morning and found a super cute (used) fridge and stove set from Kitchenaid. I have Kitchenaid appliances at home and love them, so I took a chance and picked them up. I was able to negotiate $750 for both! They have a bit of a retro vibe and are perfect for the kitchen! I’m so happy I got a stove that would show up the backsplash a little better!
The Freestanding Pantry
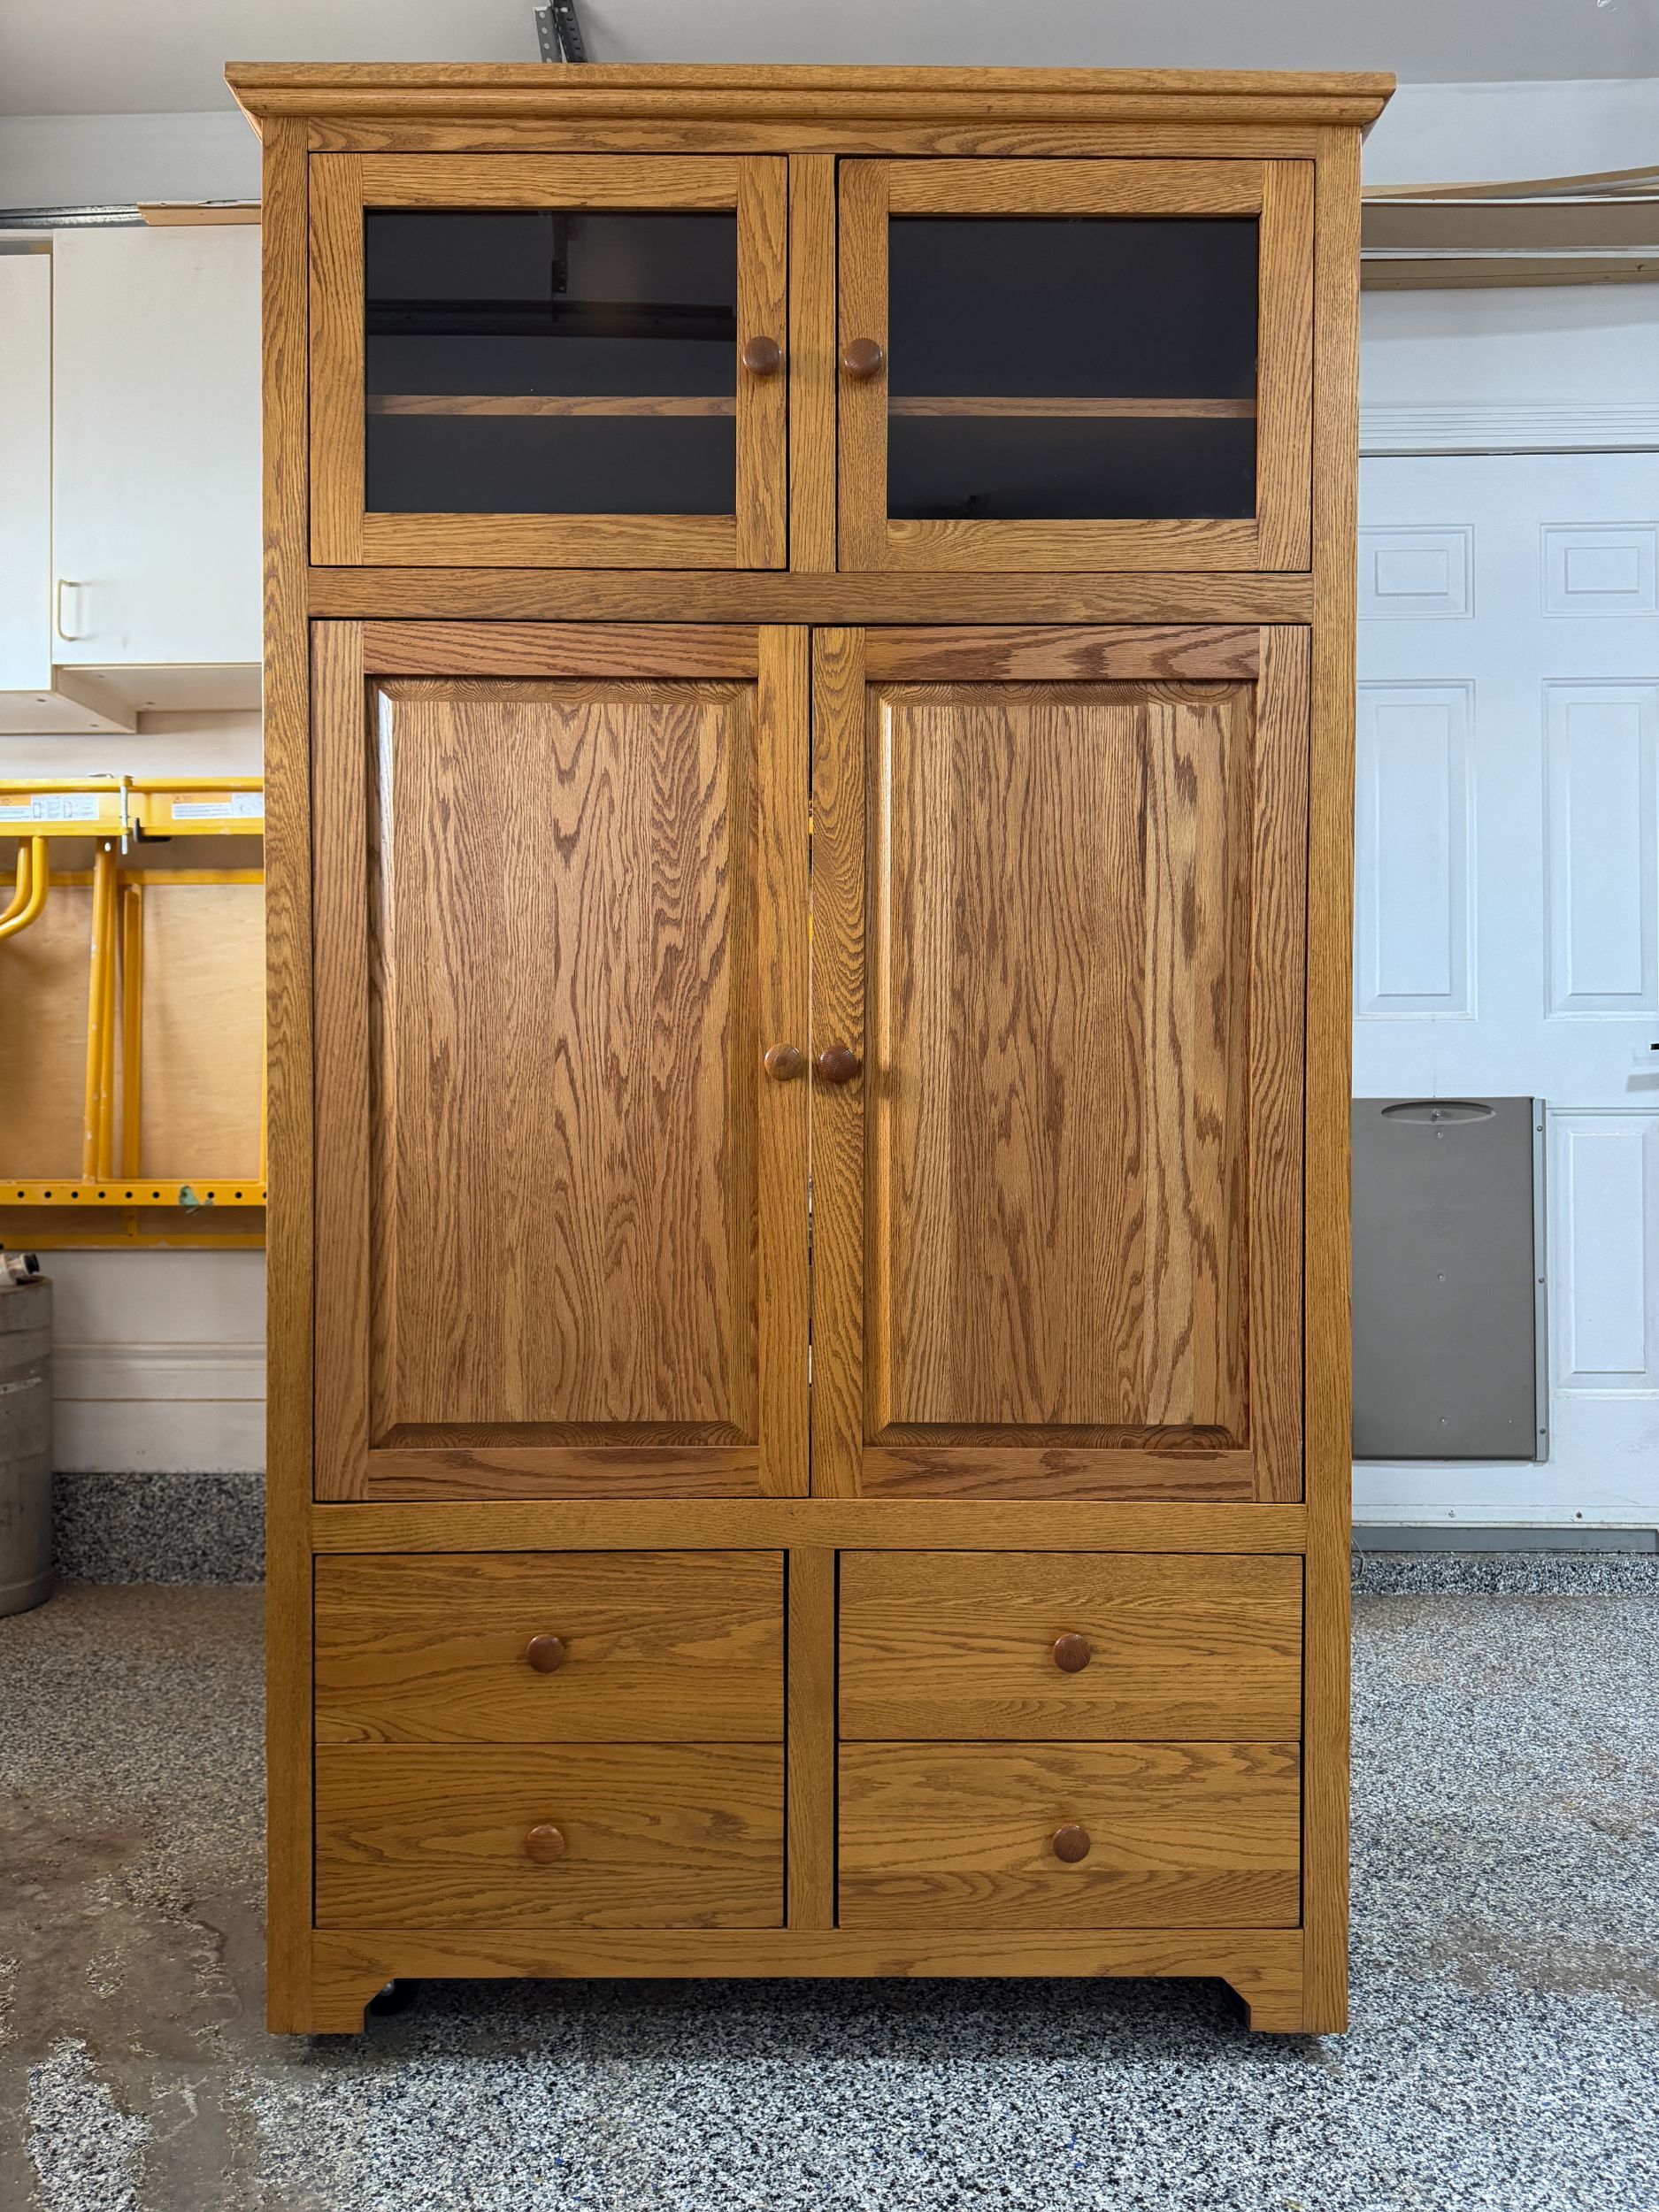
Originally I was planning to add a built in pantry using Ikea cabinets to add storage. I wanted to add tuck-in style pocket doors to it so that I could add an appliance garage. However, when I started researching that type of hardware, I found out that it was really expensive!
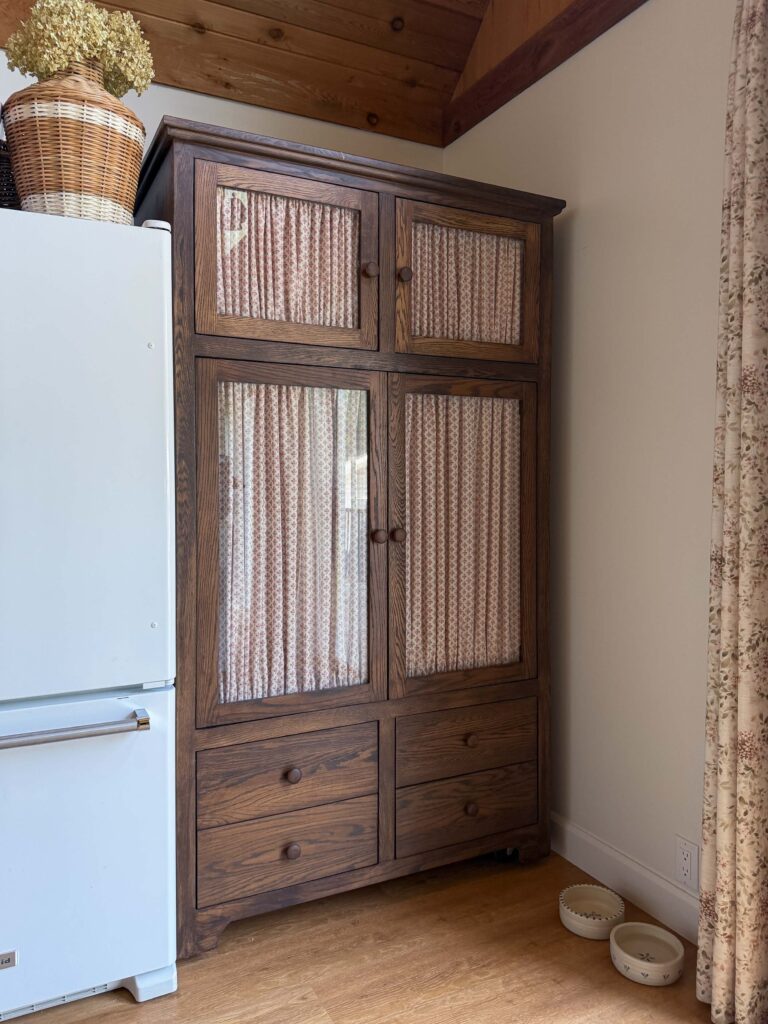
Then I came across an old TV cabinet that had this style of hinges on Facebook Marketplace. The piece was made out of oak and was amazing quality, and only $100! I converted it into a pantry with the tuck in door of my dreams and saved so much money.
I also think the pantry adds a lot of charm and that collected feel that I’m going for in the whole cabin.
The Farmhouse Table
I found the table and chairs both (but separately) on Facebook Marketplace, of course. The table is rustic and quite old and I love it so much. The table was the perfect narrow width to fit in the middle of the floor in a country-style kitchen.
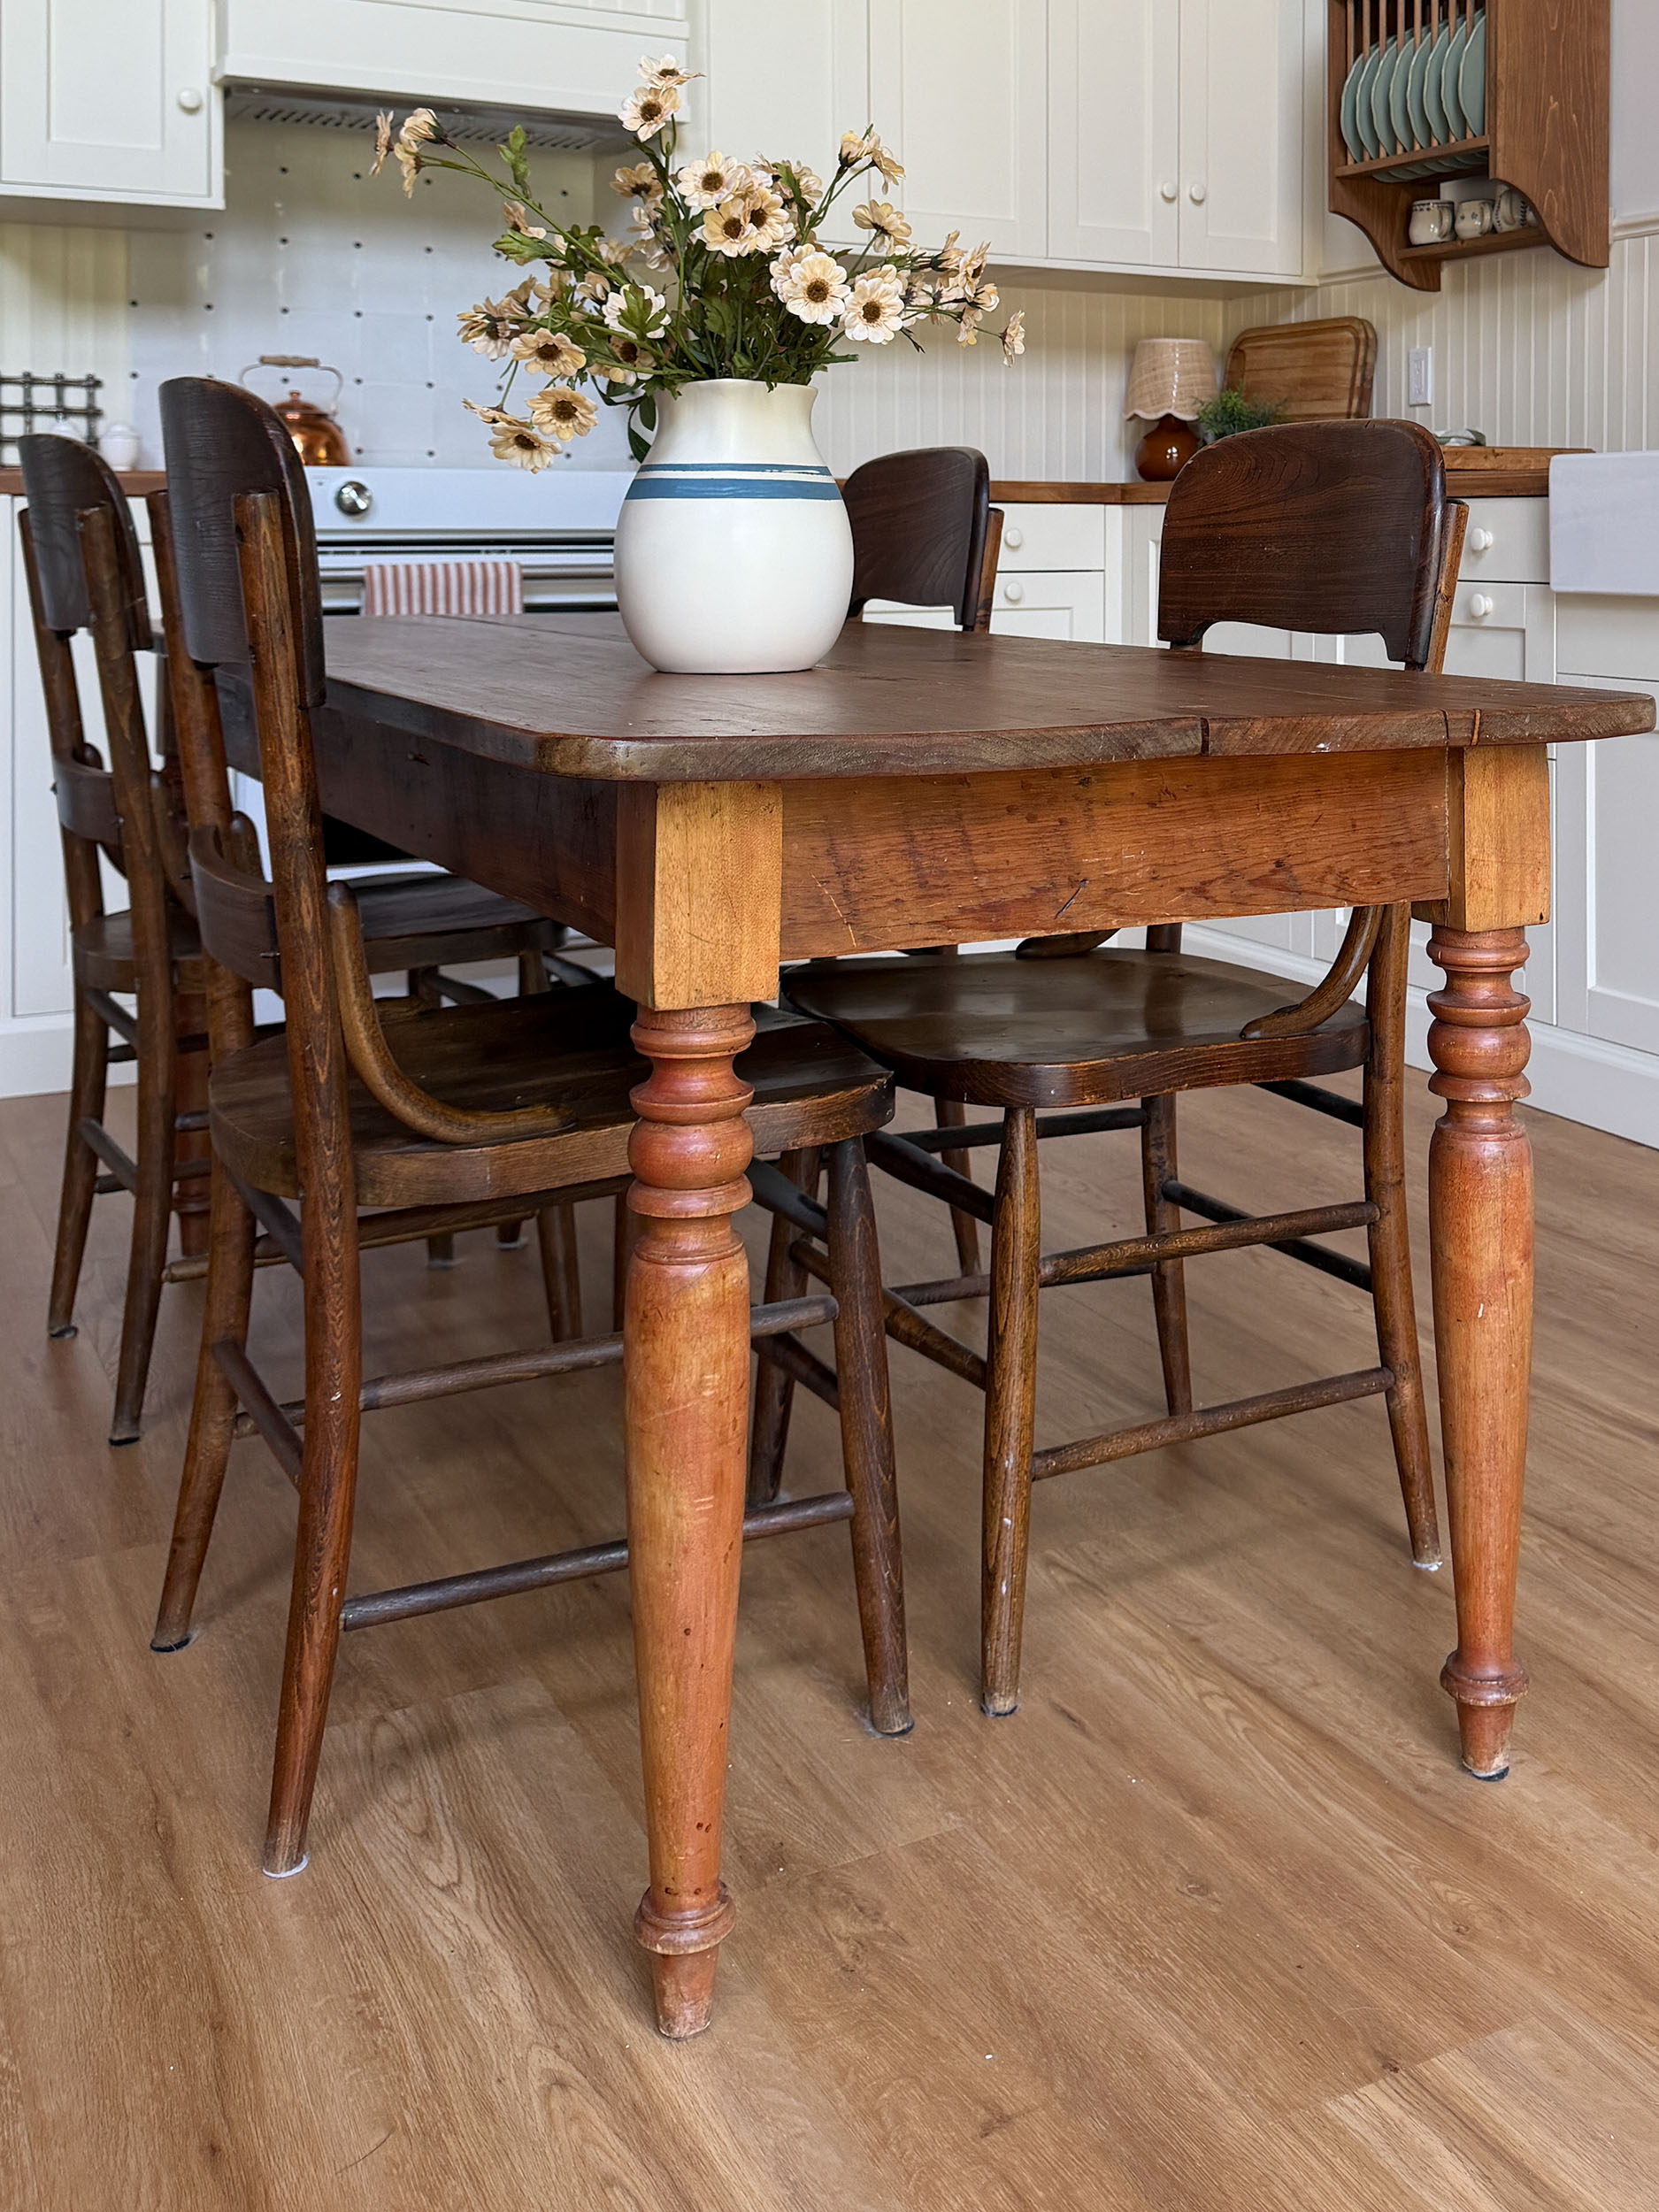
The old kitchen had a corner banquette and while I love a cute corner seating moment, it just was not the best use of the space. There was a literal dance floor in the middle of the kitchen just going to waste, and not enough storage. Using the wall to add storage and function and the floor space for the table made so much more sense.
Lighting
The old chandelier was hanging over the table, and when we moved the table to the middle of the kitchen I also wanted to move the location of the lighting. We could not easily move the electrical in the finished cedar ceiling, so I decided to swag it.
I couldn’t find a chandelier that had a long enough cord, so I bought one on Amazon and rewired it with a longer cord and chain. I then added some cute shades and I’m so happy with how it turned out!
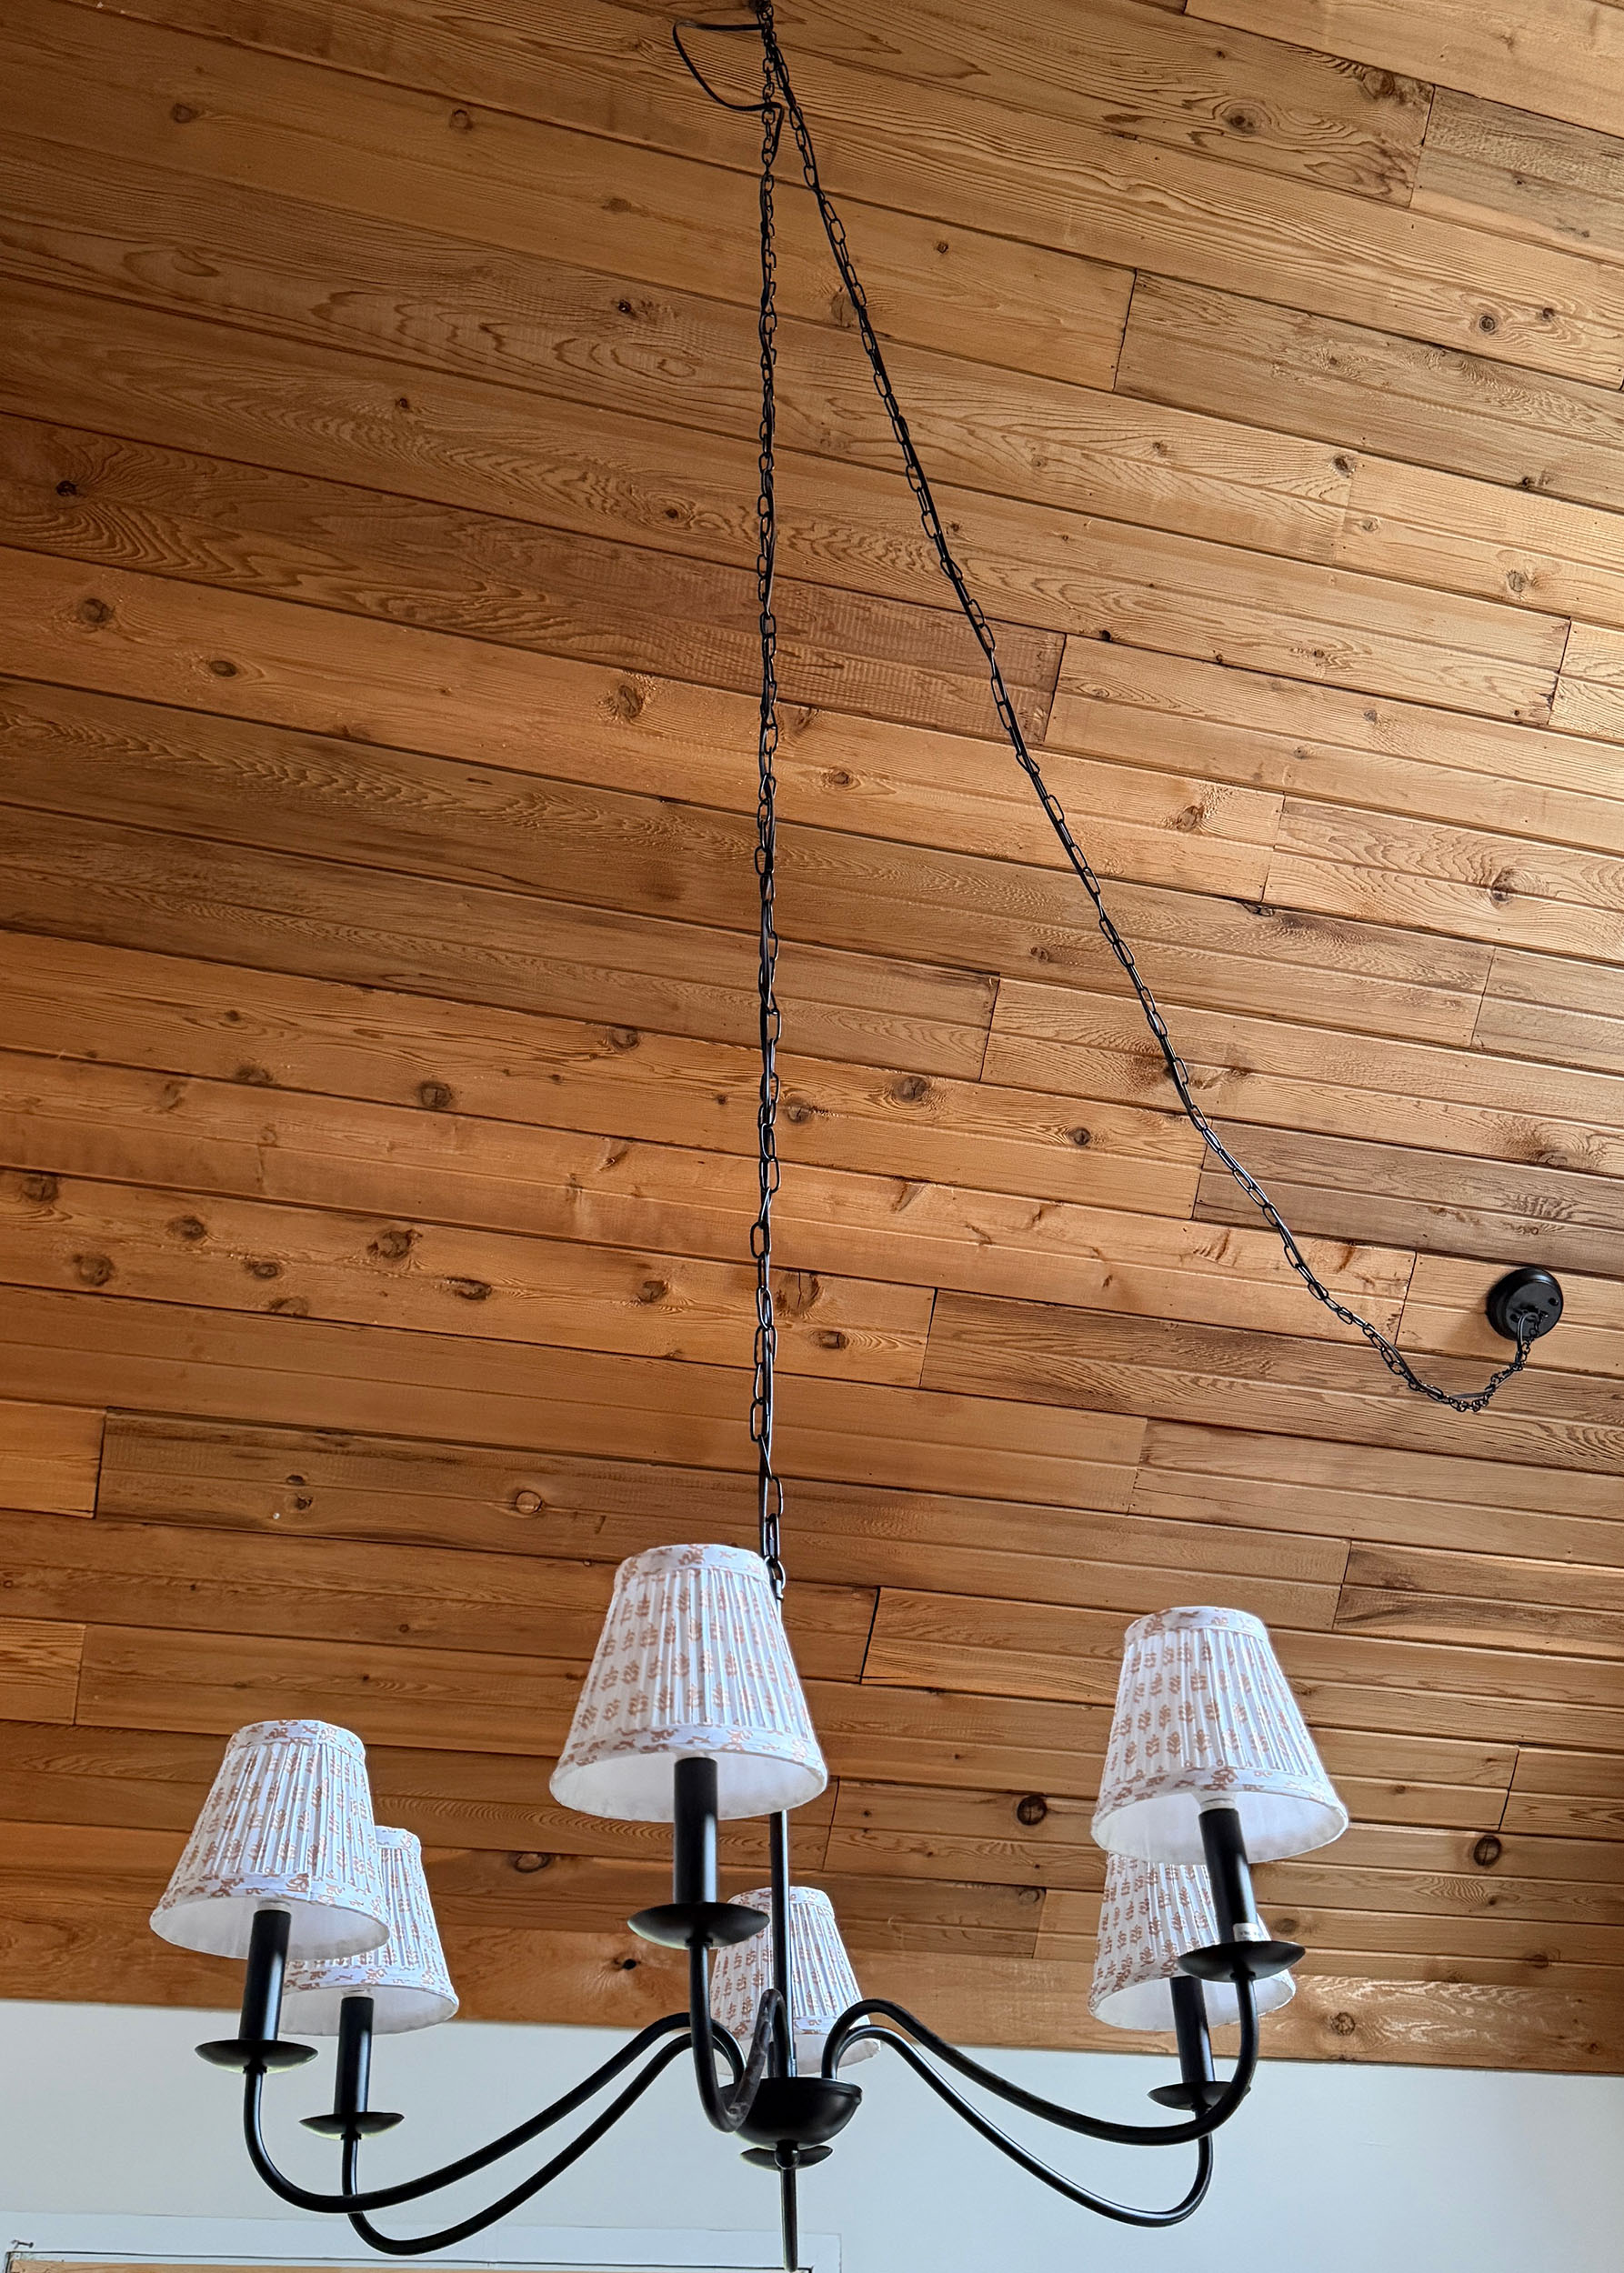
We had to set up scaffolding in order to move that light, so at the same time we replaced the ceiling fan. Setting up the scaffolding and replacing the fan took a full day but it was so worth it!
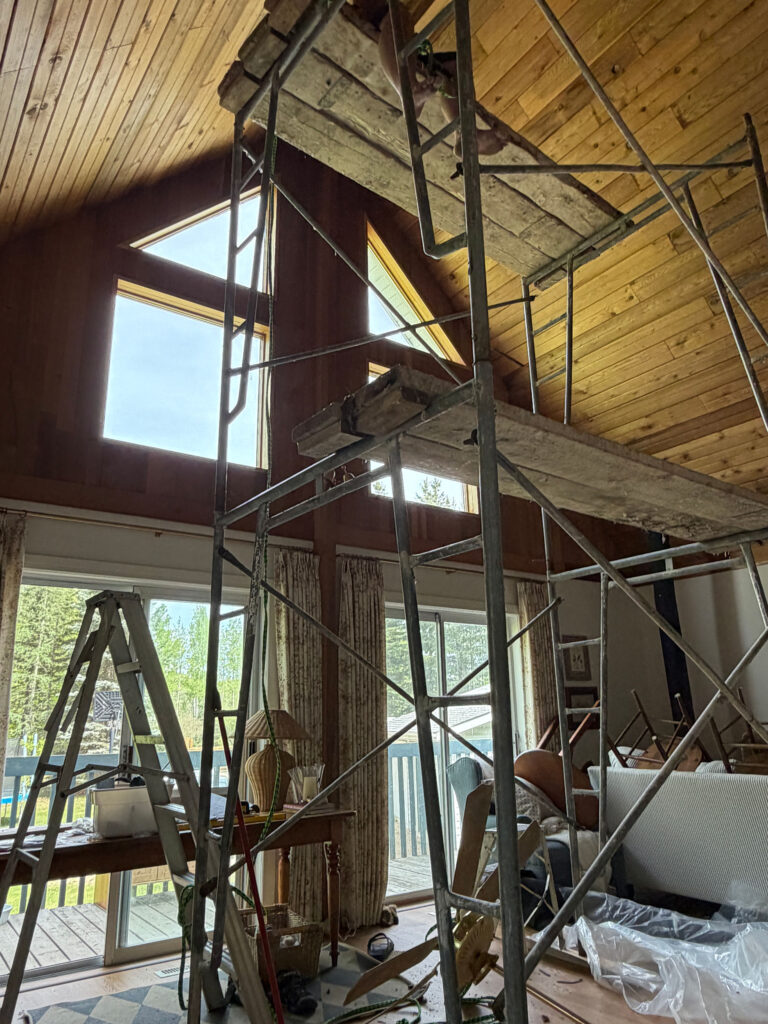
Rejuvenation gifted me that ceiling fan when we did the living room makeover, but because the scaffolding was so onerous to set up, we only just got around to installing it now. It is so gorgeous and its nice having that extra light!
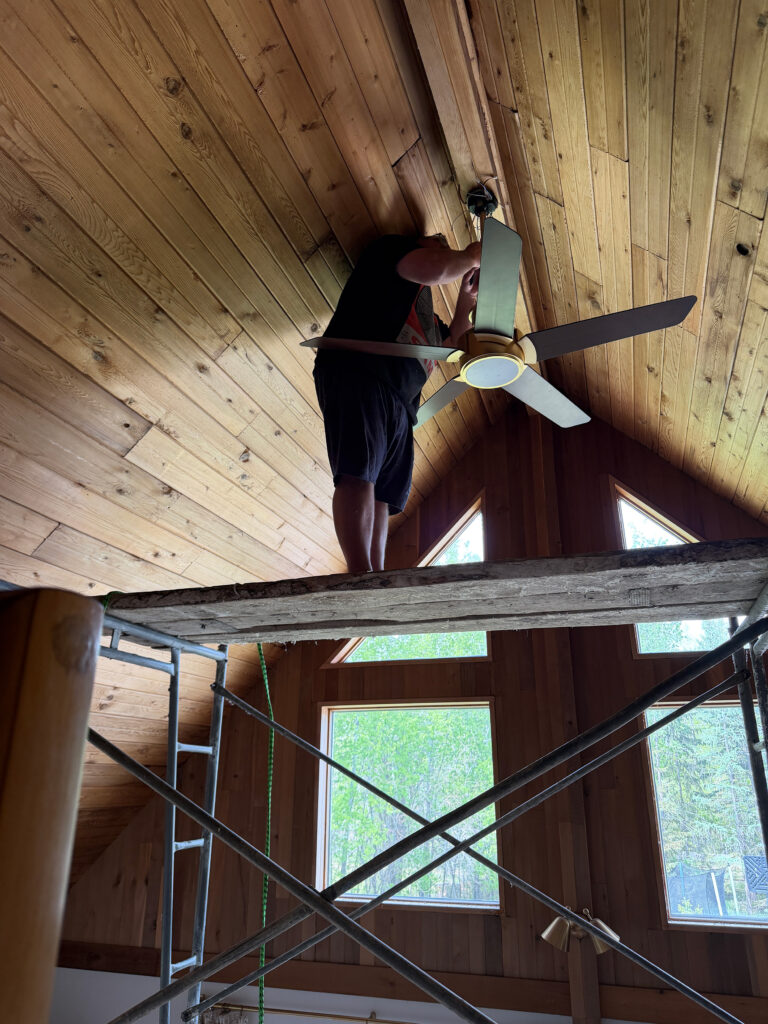
Plate Rack
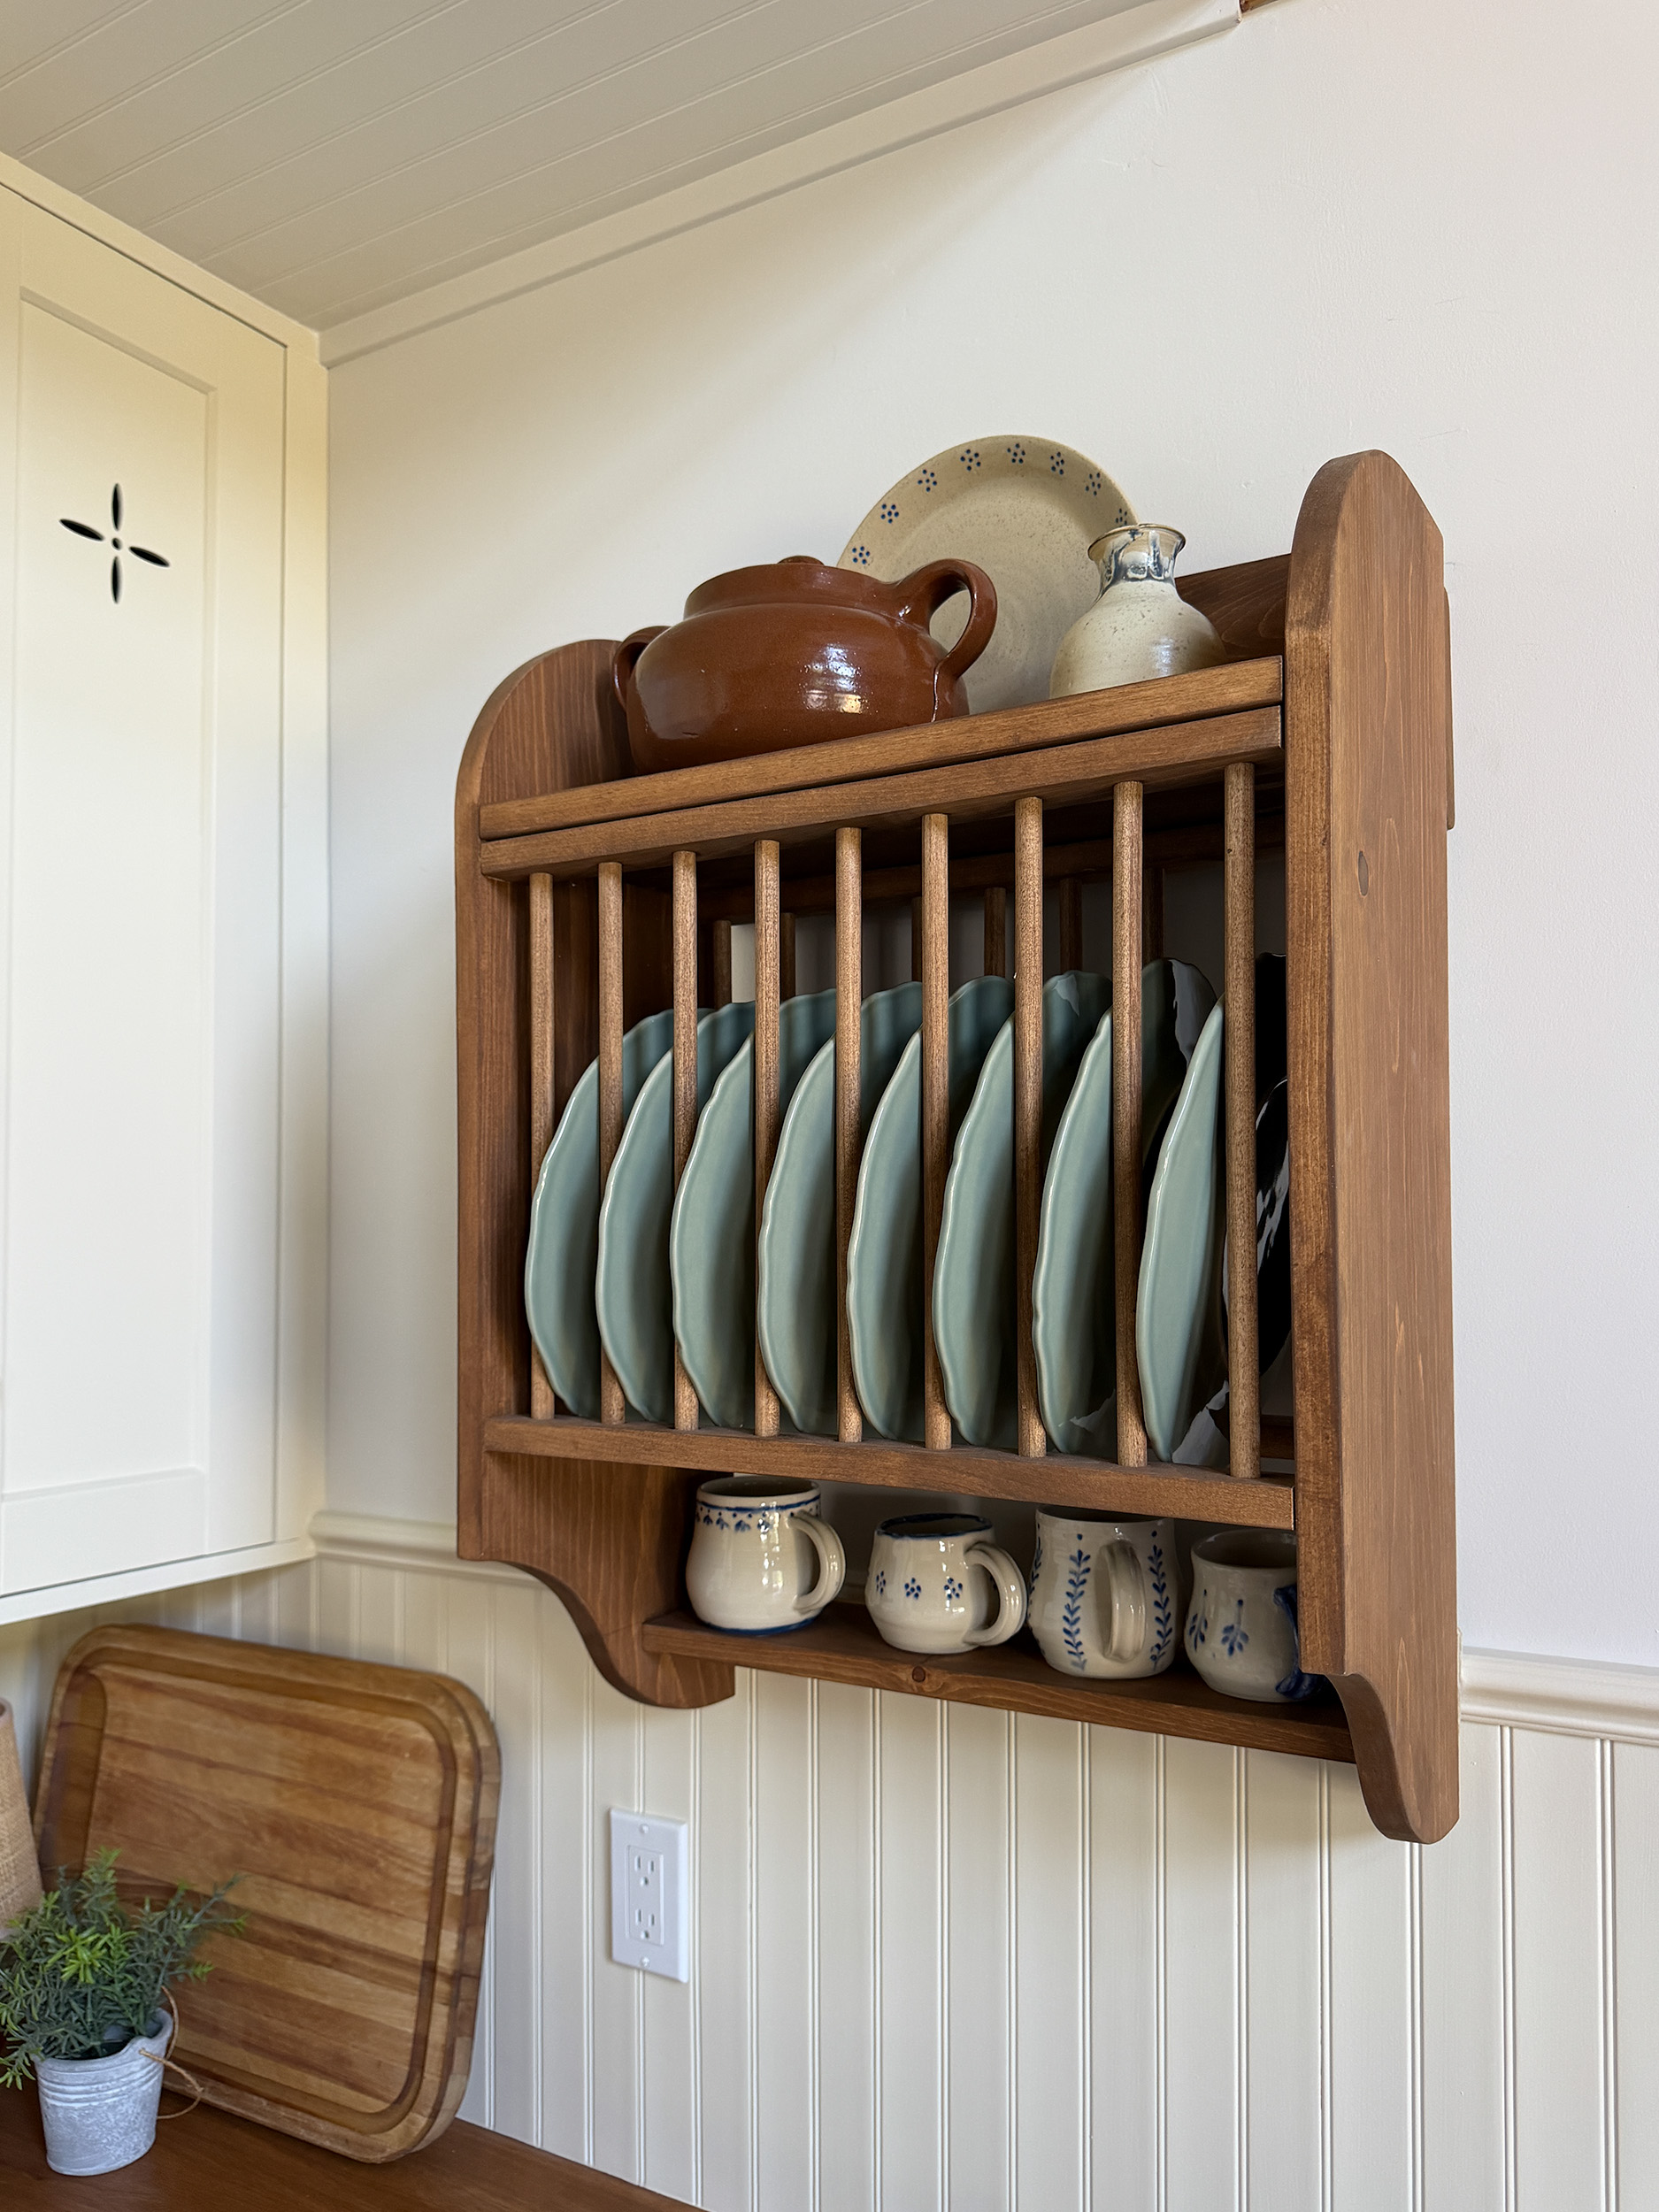
I had a bunch of walls space next to the window that I really wanted to add a plate rack too. After a little trial and error, I came up with a design I liked and built it out of pine from my local lumber store.
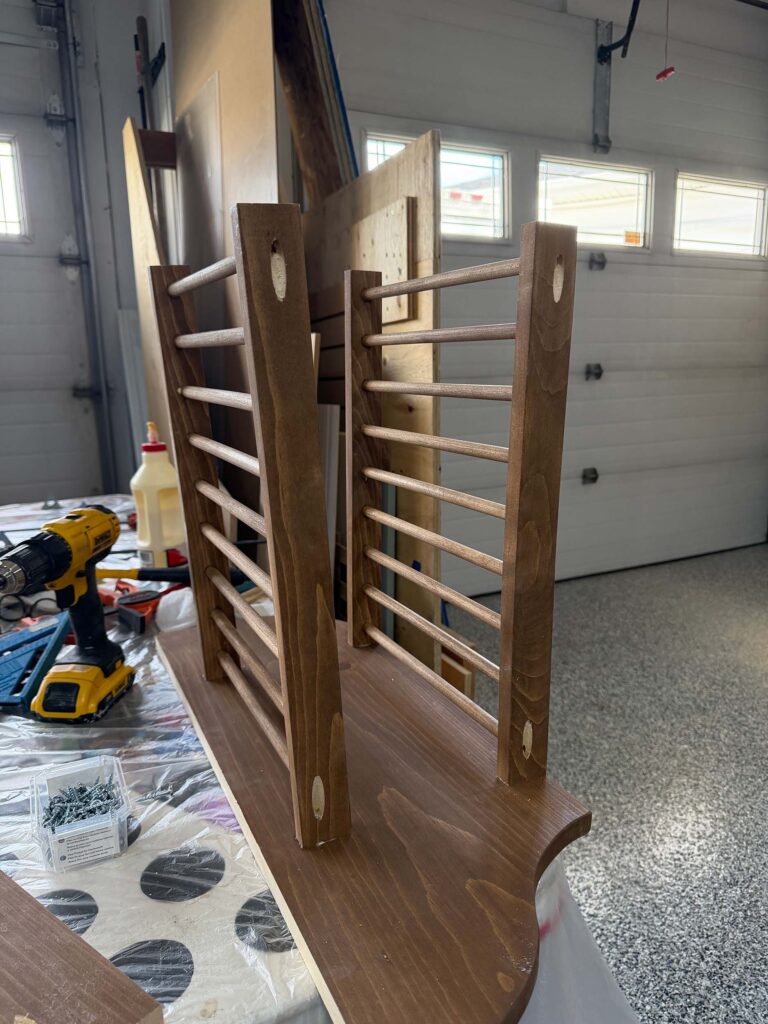
I stained it using OSMO wood wax finish in walnut, which I have used before and love because it is a one-step process.
I plan to do a blog post about how I built it, but it was actually pretty easy and only took me about a day total when it was all said and done!
The Results
Here are a few photos of the finished kitchen! I love it so much! I think I like it more than any custom kitchen I could have purchased, because I put a lot of love and effort and thought every step of the way.
I also had a lot of help! From my wonderful family, especially Darren. From a few brand partners like Sinkology who supplied the sink and faucet, and Rejuvenation who supplied the ceiling fan.
Before and After
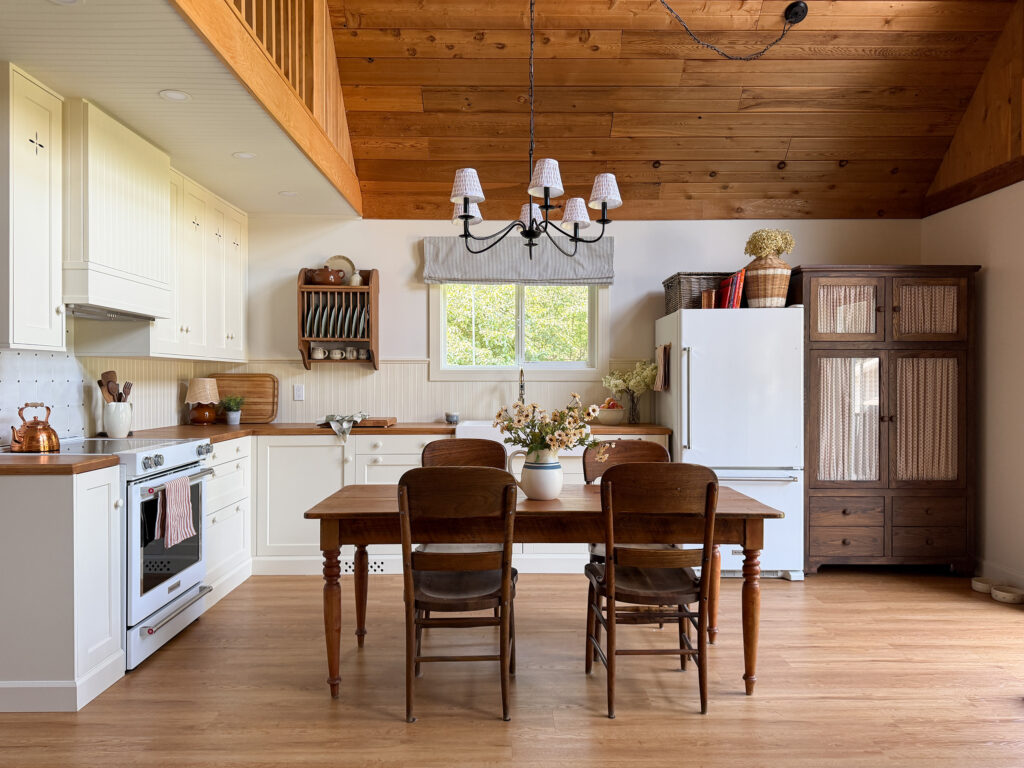
I love a good side by side before and after, so here are some for your viewing pleasure!
Sources
The Budget
If you have ever renovated a kitchen with a FULL GUT like this you know how expensive it can be. It is not unusual for a fairly basic kitchen reno to cost $50,000 or more. So I am beyond pleased with the results and how budget friendly everything was! The prices below are in Canadian Dollars. I estimated a few of the smaller costs like incidentals. I also did not include the cost of the flooring or ceiling fan because those were done as a part of the overall main floor renovation and not specific to the kitchen.
- Cabinets (Bases and Doors) (Bought during Ikea’s Kitchen event!) – $2062
- Countertops $628
- Countertop Oil $75
- Sink $1000 (Gifted to me by Sinkology, but included cost here)
- Faucet $510 (Gifted to me by Sinkology, but included cost here)
- Backsplash Tile Project $60 (I used mortar and grout from leftover projects)
- Beadboard backsplash $255
- MDF for Side panels, Hood Vent, etc. (3 sheets) – $240
- Potlights $125
- Chandelier/ Shades $125
- Miscellaneous Electrical Supplies $300
- Beadboard for Ceiling $240
- Baseboard/ window Trim $250 (estimated)
- Paint $300 (estimated)
- Wood Knobs $18
- Dishwasher $1000
- Secondhand Fridge/Stove $750
- TV Cabinet (for pantry) $100
- Glass for pantry doors $100
- Fabric for pantry doors $204 (gifted from Tonic Living)
- Mini Blind $53
- Mini Blind Fabric $40
- Wood for Plate Rack $118
- Wood Wax for plate rack $57
- Miscellaneous (caulking, plumbing parts, odds and ends) (estimated)$1000
- Window $400
TOTAL $10,010
Sources
I’m beyond pleased with how this turned out! Everything turned out just like I hoped in my head. And best of all, the kitchen functions so much better and has so much more storage than it did before. The previous cabinets were stuffed to the brim, but when we put all the kitchen supplies back in, we ended up with empty cabinets!
Let me know what you think of this transformation! If there are any tutorials you would like to see on the blog, let me know!
Your creativity and attention to detail never gets old. This is incredible!
Wow. I loved your home kitchen, but this is incredible. I really like the Ogee edge on the wood counter, pretty much all your ideas. Thanks for sharing.
Erin, it is my dream cabin kitchen too! Those b/a side by side pictures are great. It’s hard to pick a favorite view… I love the whole project!!
It’s SOOOOO good!! And the low-ness of the price tag is truly impressive. You are amazing.
This turned out amazing. I can tell every detail was thought through. Now that it’s all done I hope you’re taking some time to enjoy it & relax.
Absolutely amazing! The attention to all the details shows, it looks beautiful!
Your talent is endless – you have such a gift! I absolutely adore all of your renovations and get so excited for the reveals! This kitchen is a dream!
Erin, your creativity and talents are gifts. Wonderful job…you are an inspiration. And you have a good husband that pitches in to help!
Beautifully done! I think my favorite touch is the push-pin backsplash. Now that I’ve seen it, why DON’T we embed more textured things in grout? Seems genius.
This is so great, and so helpful! I’d love a deeper tutorial on the toe kick magnet thing, in case you’re in need of good content ideas. 🙂 I’d also love to know more about two details here, over time:
-How do you find the feeling of a toe kick that juts out as opposed to being recessed, does it make it any more annoying to stand close to the countertop chopping, etc? (That’s what they always warn about, but I agree it looks so much better your way with the furniture style one.)
-How do you find the durability of the painted Enkoping cabinet doors over time? I too am annoyed by the limited colours and want to do this style and paint them a custom colour, but I’m paranoid about how it’ll hold up long term (and yet it’s SO much cheaper than even buying third-party doors, let alone getting those professionally painted by someone else instead of DIYing it). I’d love to know if they seem to avoid scratches and chips that make the paint job obvious.
–
This turned out so good and every detail you added was worth it! Moving the sink was completely the right idea and look at all that counter space you’ve created! I’ve been in love with that table since you picked it up as well and don’t get me started on the chairs! I love a creamy kitchen and this has the perfect cabin vibe.
We have flush toe kicks at home in our main house and no one has ever complained about toe stubbing. You just don’t stand that close to your counters! So I would say functionality wise for the toe kicks, we do not notice anything. If anything it’s easier to clean because the dust does not collect in the recessed area. For the painted doors, I have done painted doors before and I do think that using quality paint and prep (primer) makes all the difference. I use BM Advance which dries very hard and is super durable. The bonus is if you do get some damage, you can touch it up. At home we have doors we got from a third party company and you can not easily touch up any nicks because the paint they use is a lacquer so we can not just keep that paint on hand, as it dries up on the shelf. Hope that helps!