Media Room Makeover! (And Budget Friendly Ideas)
Although we are right in the middle of a renovation, we had the crazy idea that perhaps we should start on another room. And while I can not recommend working on two rooms at once, it seems we have managed to pull it off! We just completed a media room makeover chock-full of budget-friendly ideas for a quick, but impactful change!
This post may contain affiliate links. That means if you purchase anything from these links I earn a small commission, at no extra cost to you! This helps support my blog, so thank you!
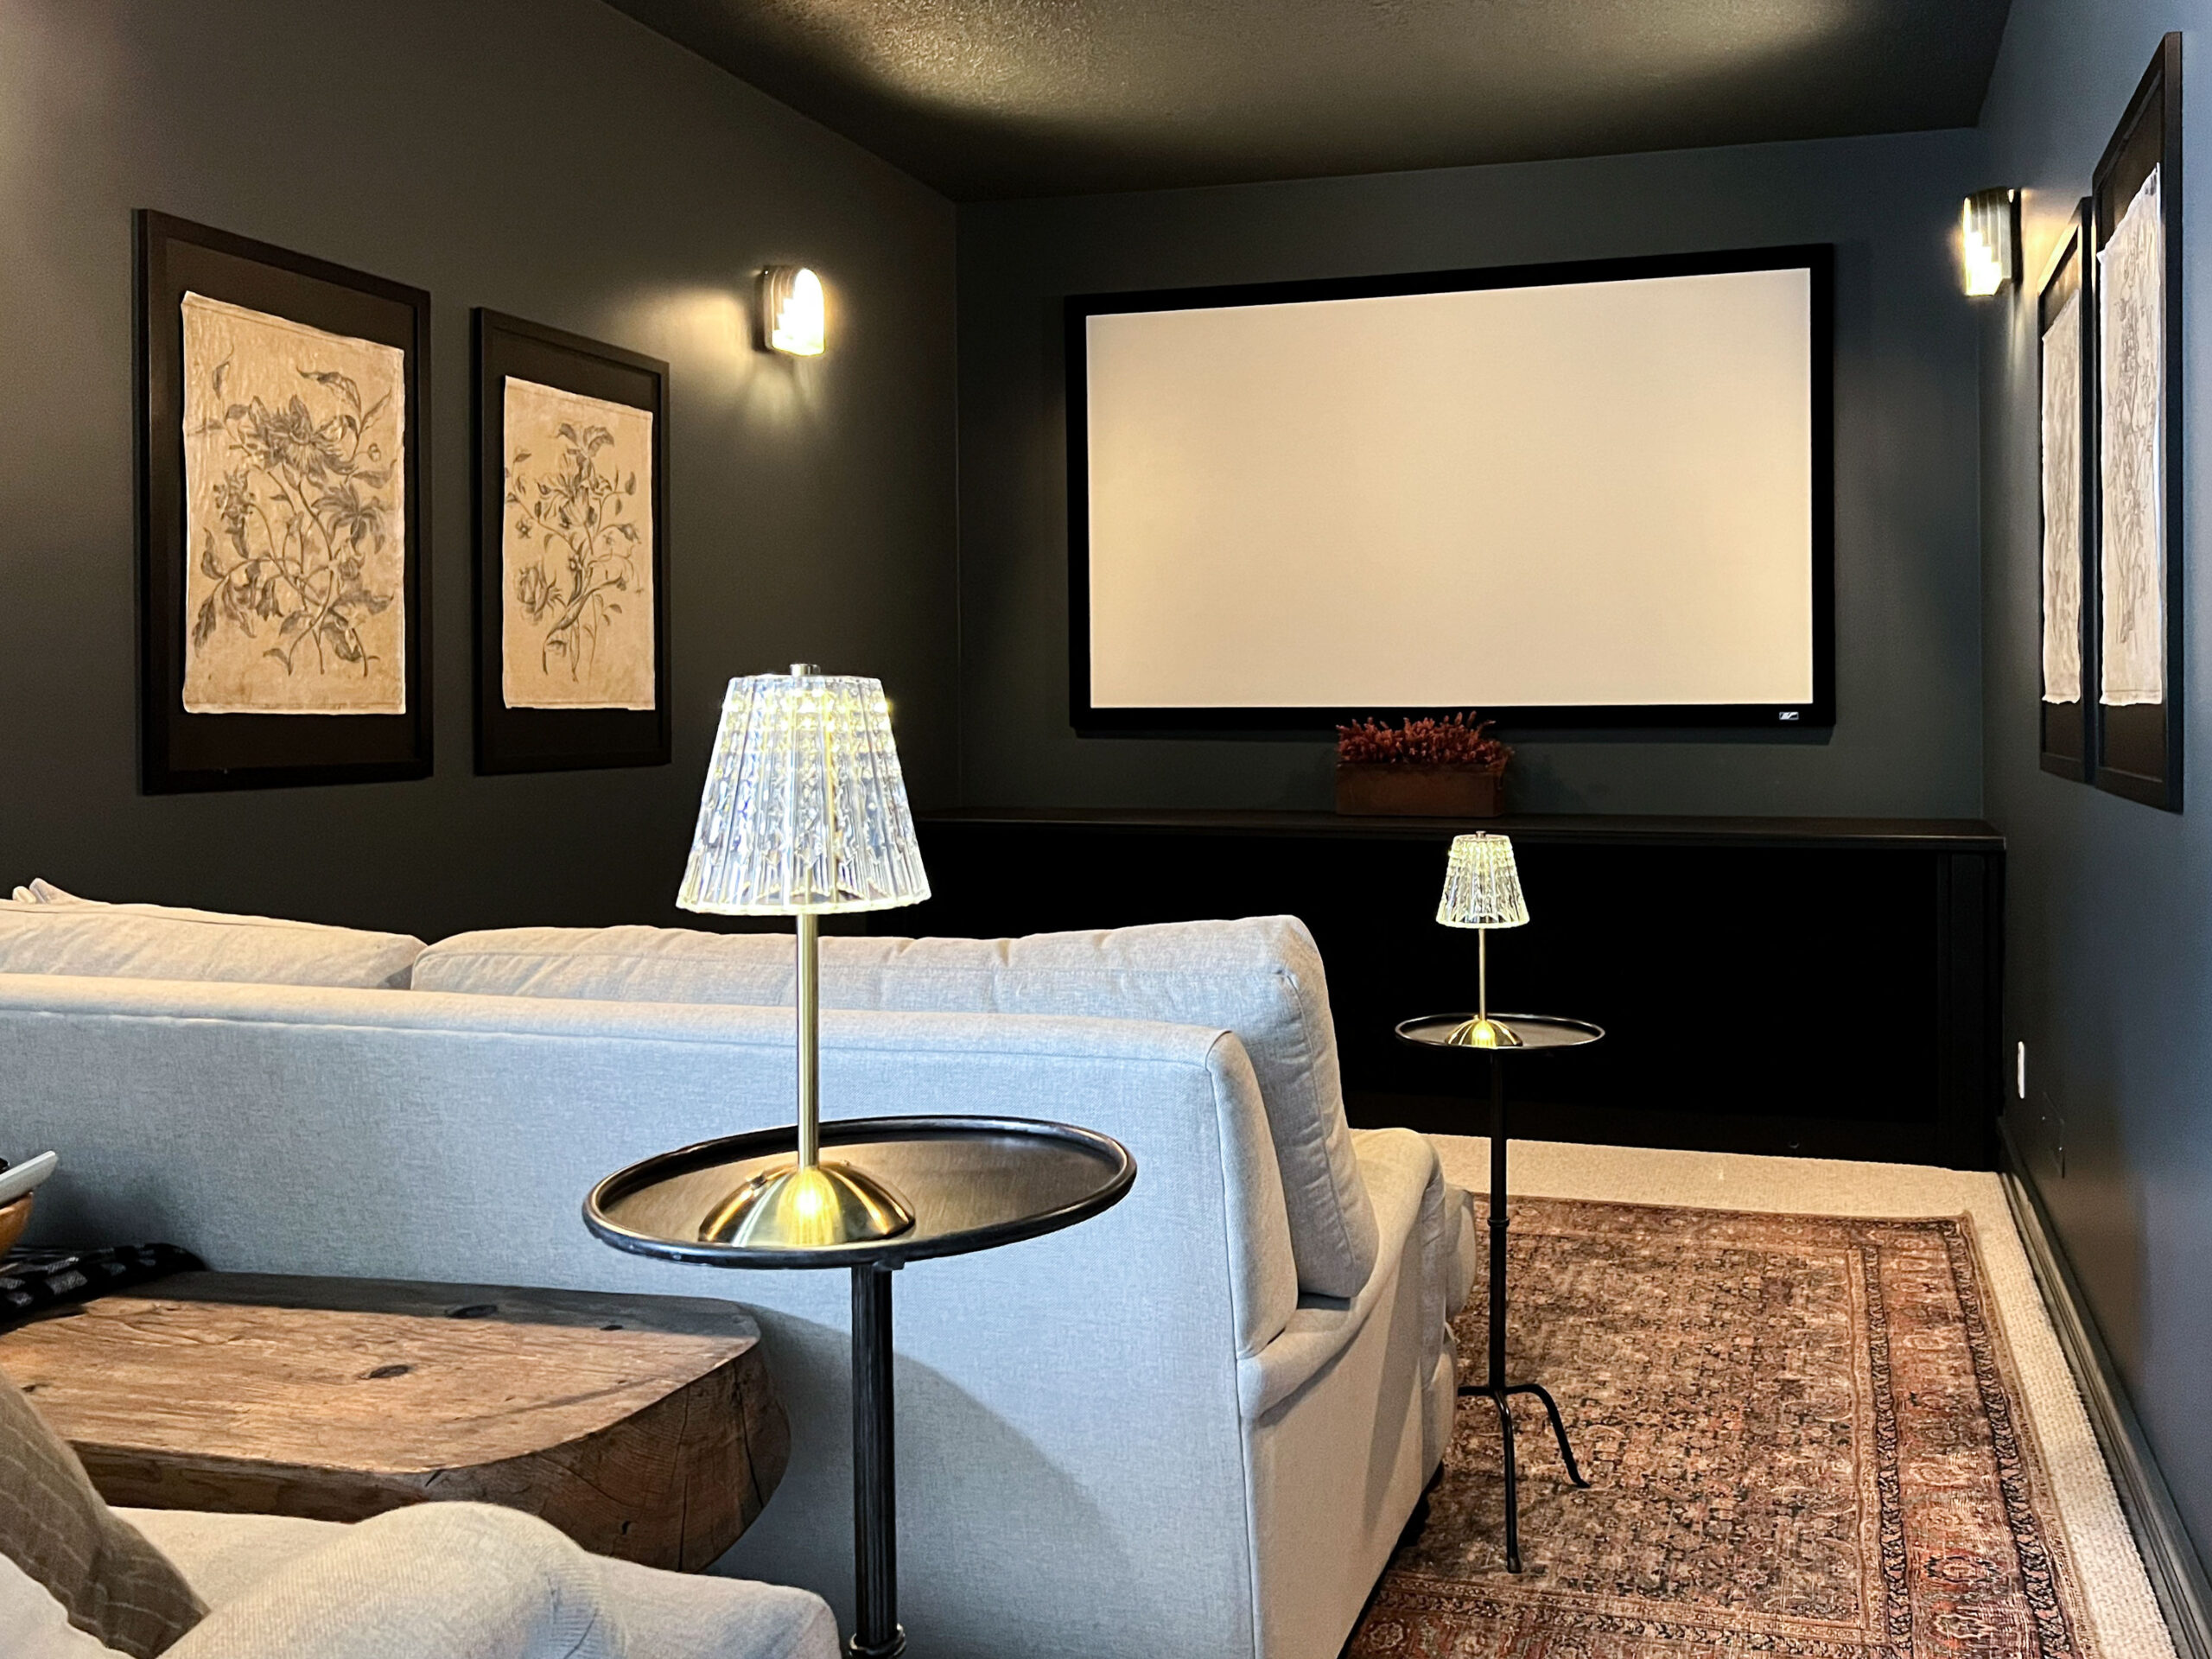
Table of Contents
- The Media Room "Before"
- The Design of the Media Room Makeover (on a Budget!)
- Media Room Ideas on a Budget – What I did!
- Before and After of the Media Room Makeover
- Sources
- Future Plans
- You might also like:
The Media Room “Before”
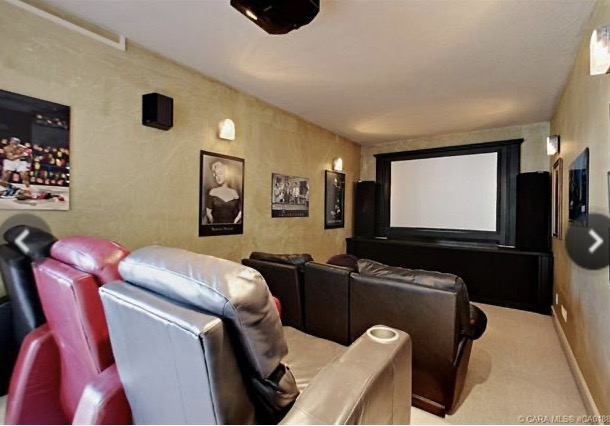
We are very lucky that this house contained a home theater room when we bought it. It is a fairly common thing to find in houses built in my town in the 90’s through to today. It seems that having that movie theatre experience at home is something a lot of people want around here!
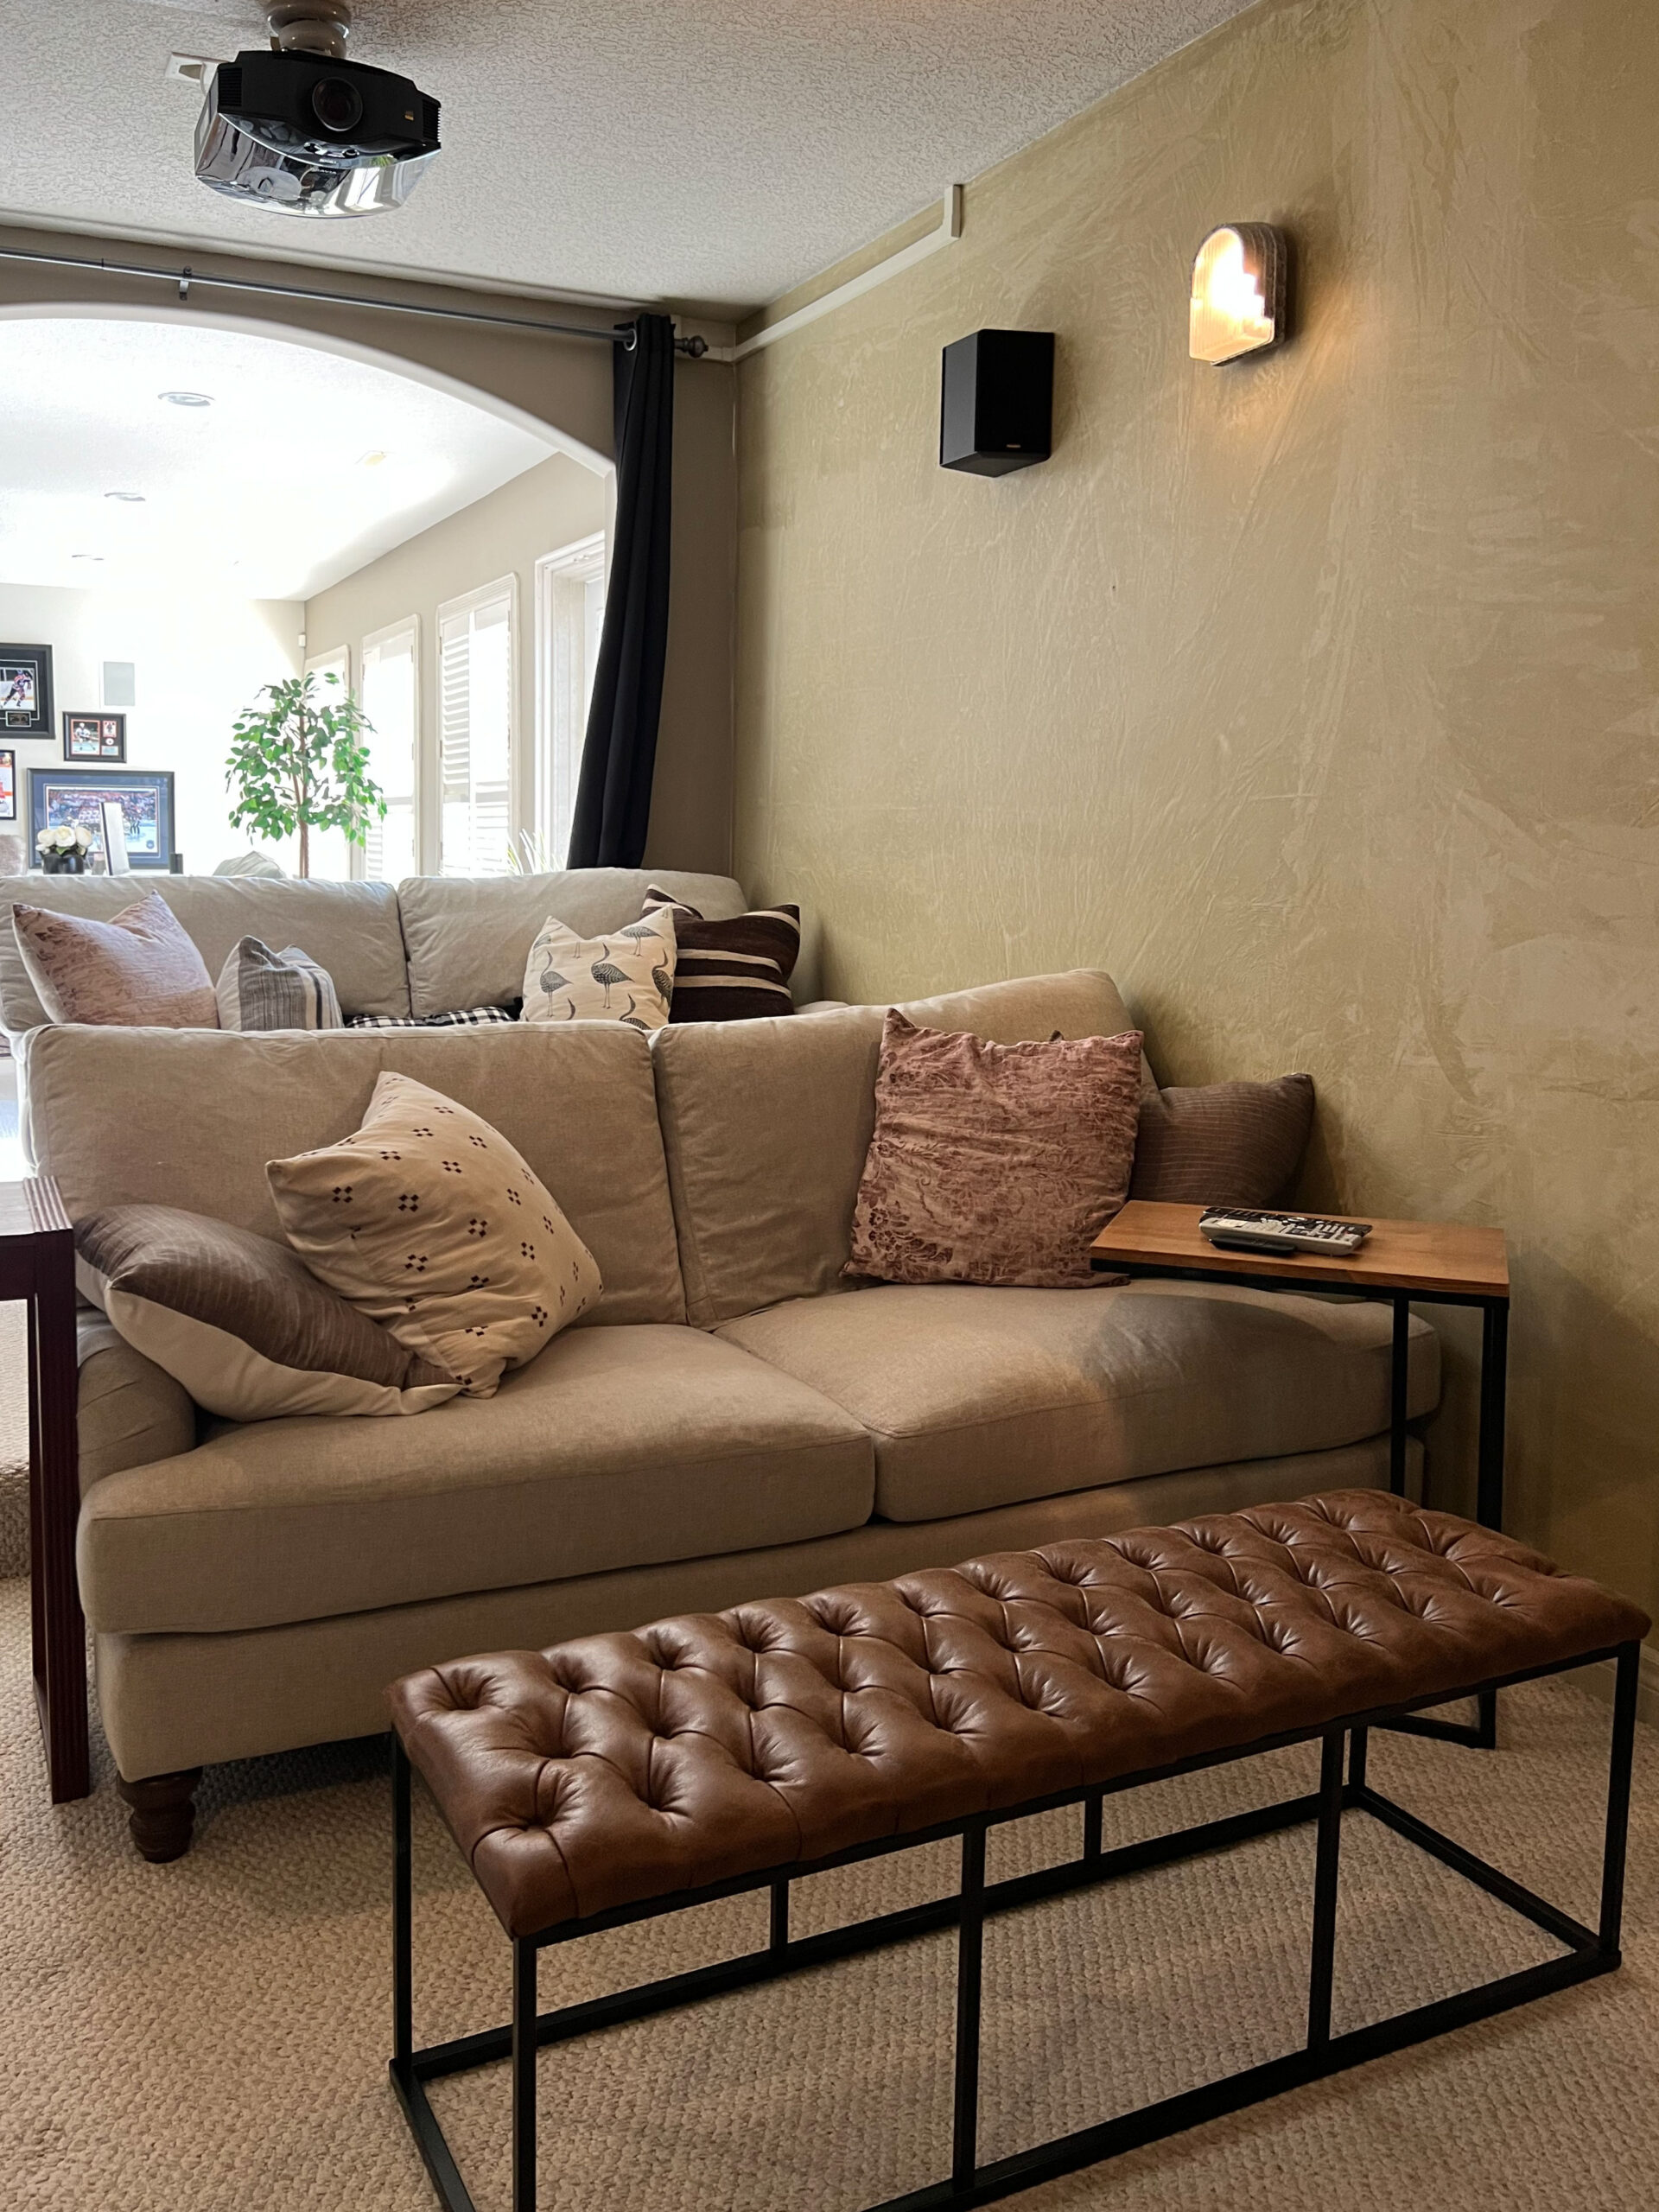
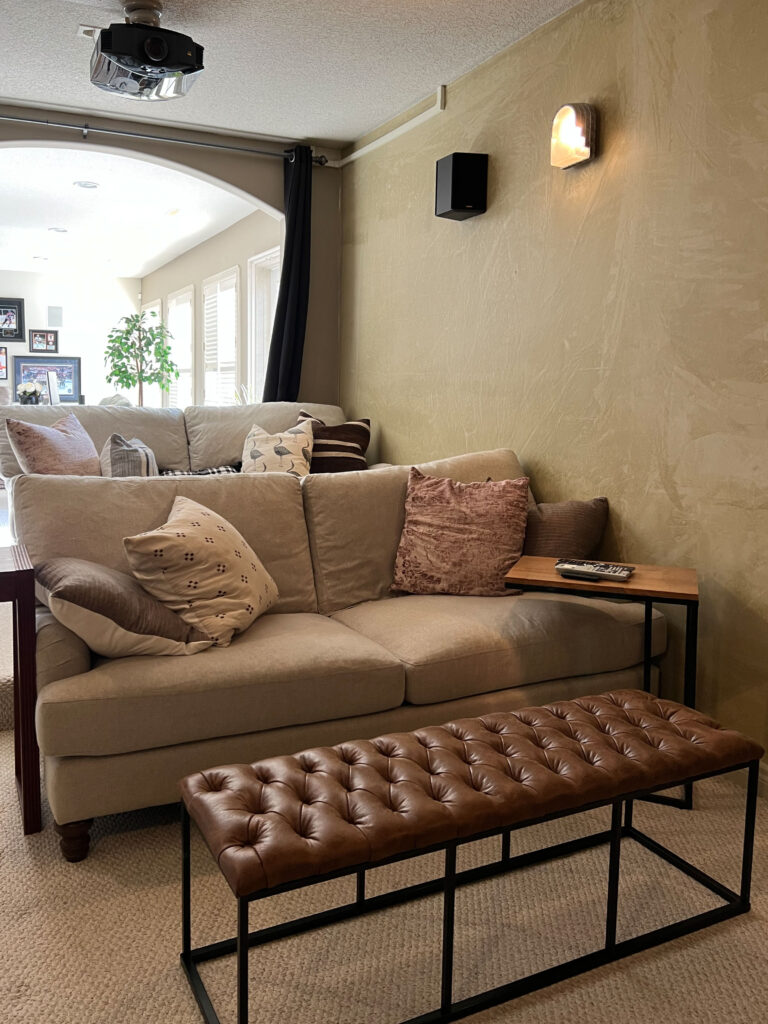
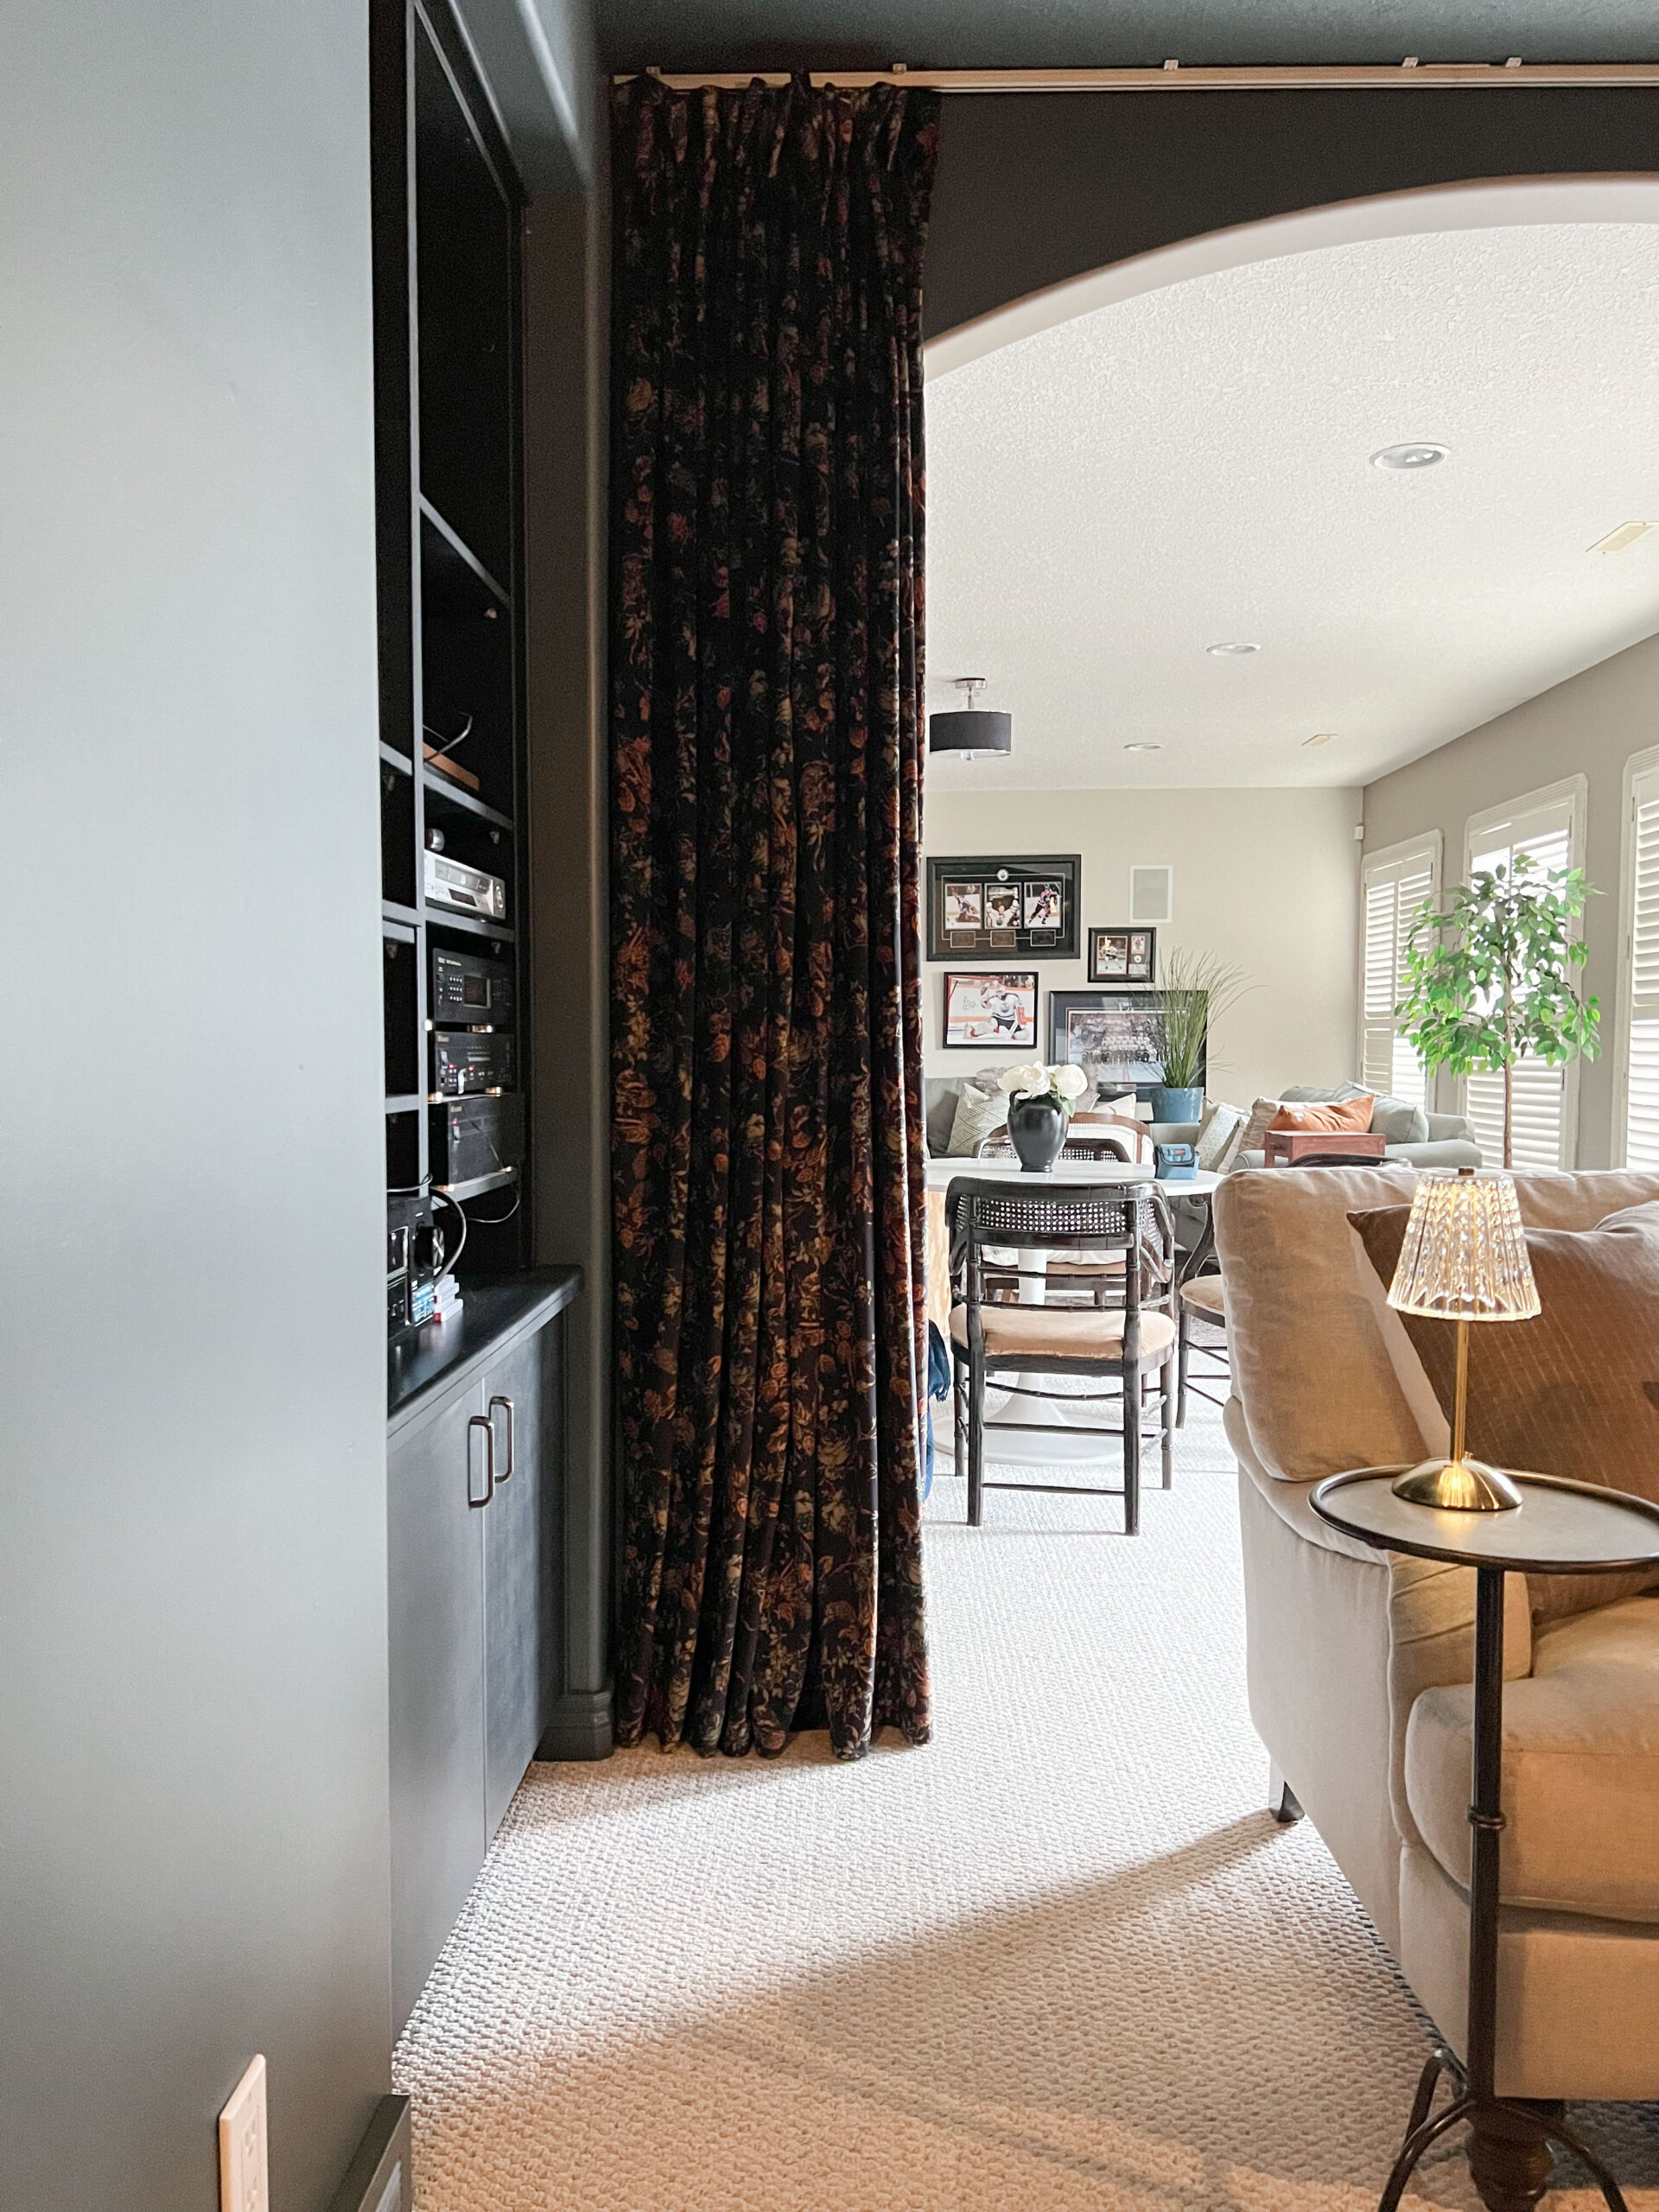
The home media room is in a separate room from the rest of our walk-out basement and has no windows, but it is open to the main area of our basement via an arched opening which has a lot of large windows. A single step down allows you to place your seating arrangement one in front of another.
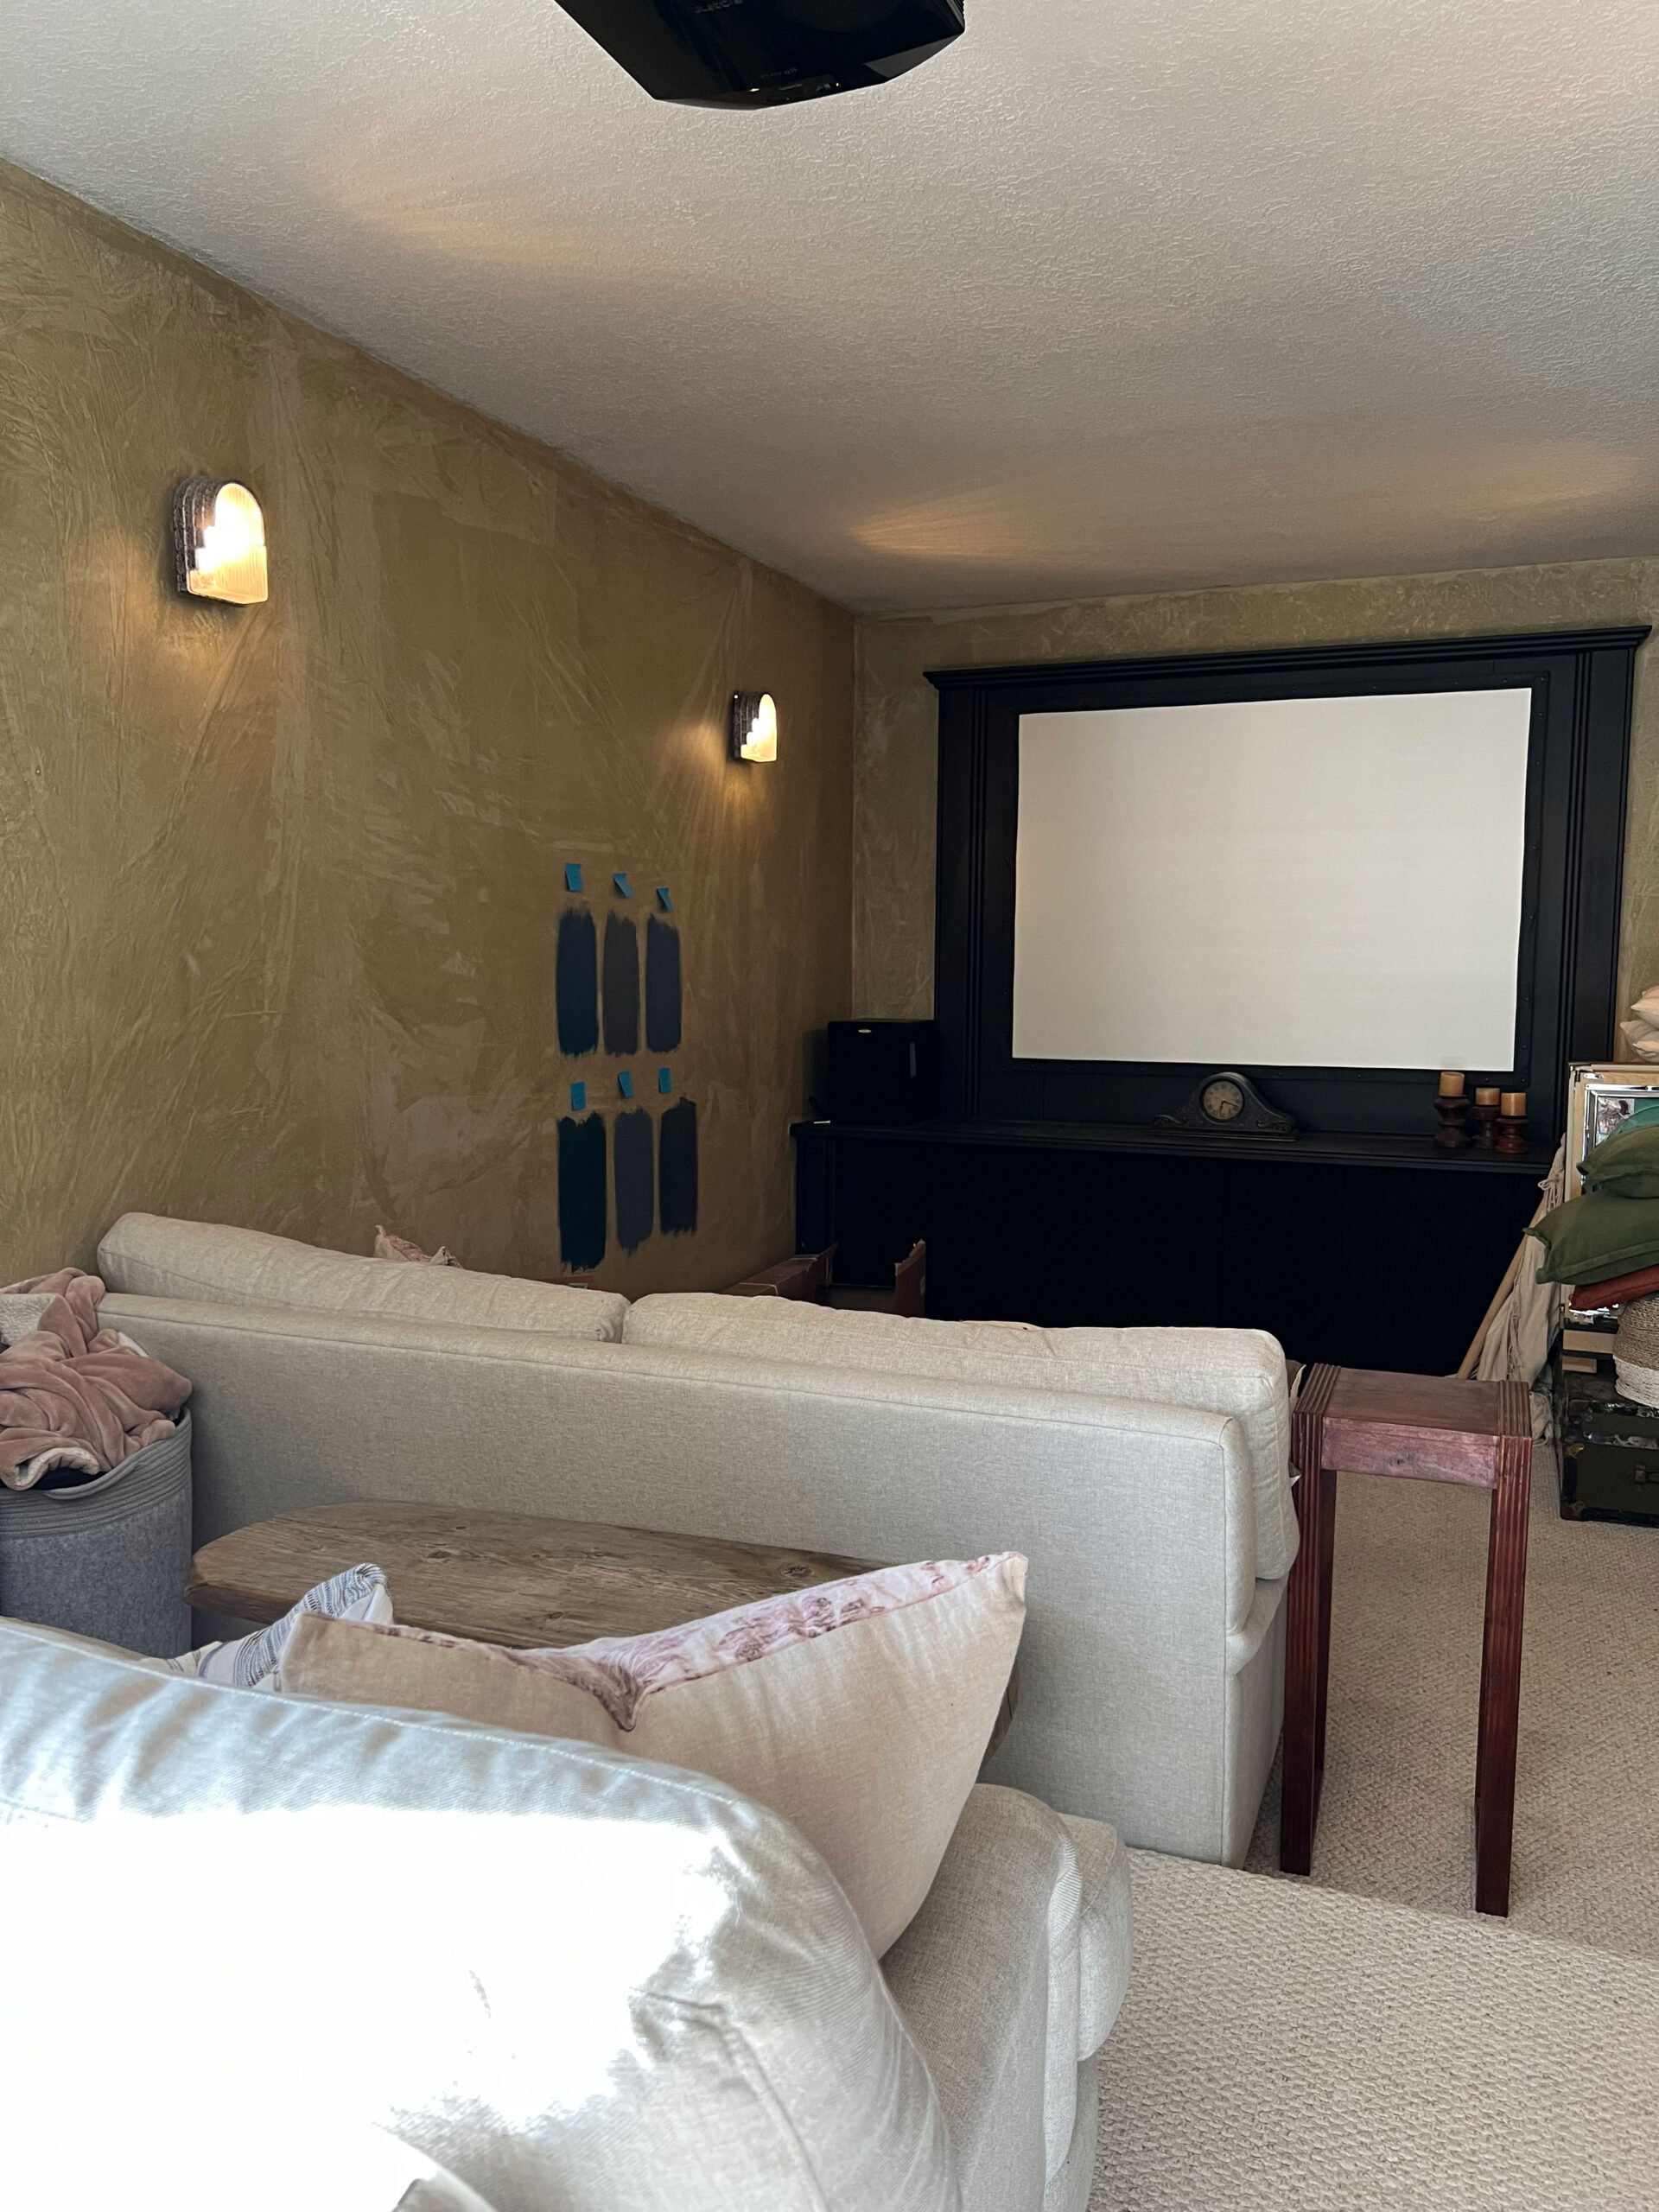
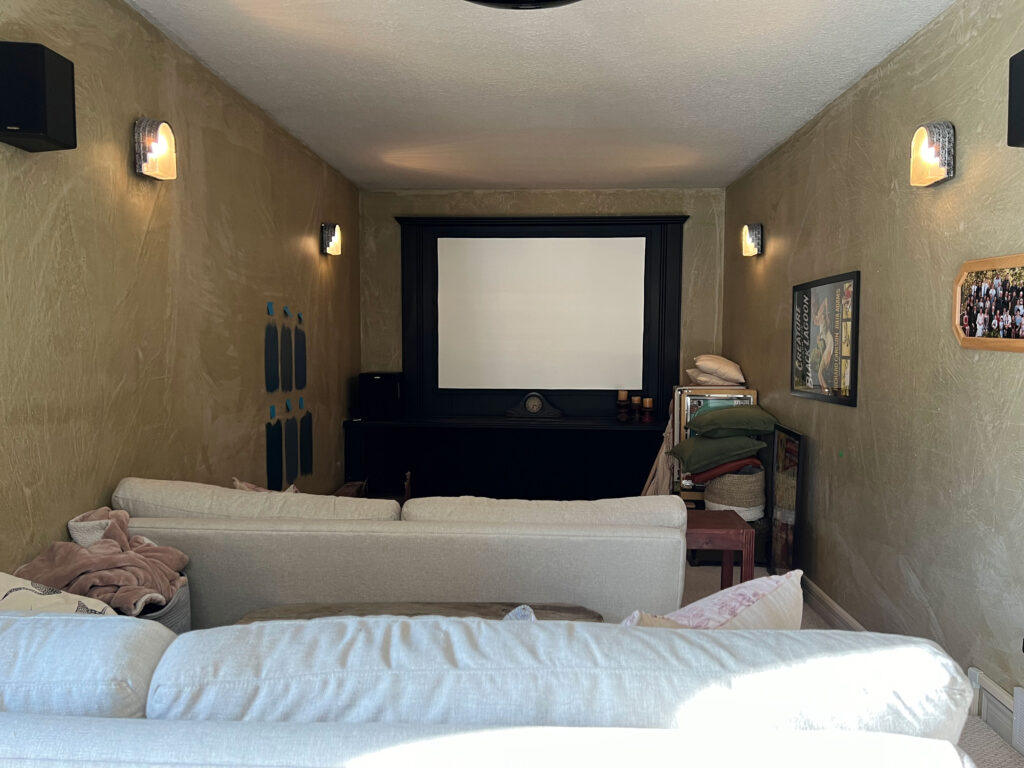
The existing movie screen had a MDF frame around it building it in, which was actually pretty nice. The issue was that the screen itself was original to the home and built with a 4:3 ratio (width to height, so almost a square). If you were around in 1997 you might remember that used to be the shape of our TV’s. Over the years, our televisions have evolved to be a 16:9 (width:height) ratio to better align with the screen size that are used for movies.
Because of this, in order to project modern shows and movies onto our screen, we needed to watch them in a 4:3 ratio which meant that movies and TV shows filmed in 16:9 (ie – all of them!) were distorted. Because of that we rarely used this bonus room.
It seemed a shame to have a whole room dedicated to movie nights and never to use it! We finally bit the bullet and bought ourselves a new big screen with a 16:9 ratio. We knew that the framing around the screen would have to come down to accommodate the screen size and so we should probably paint whatever mess was behind there before we put a screen back up.
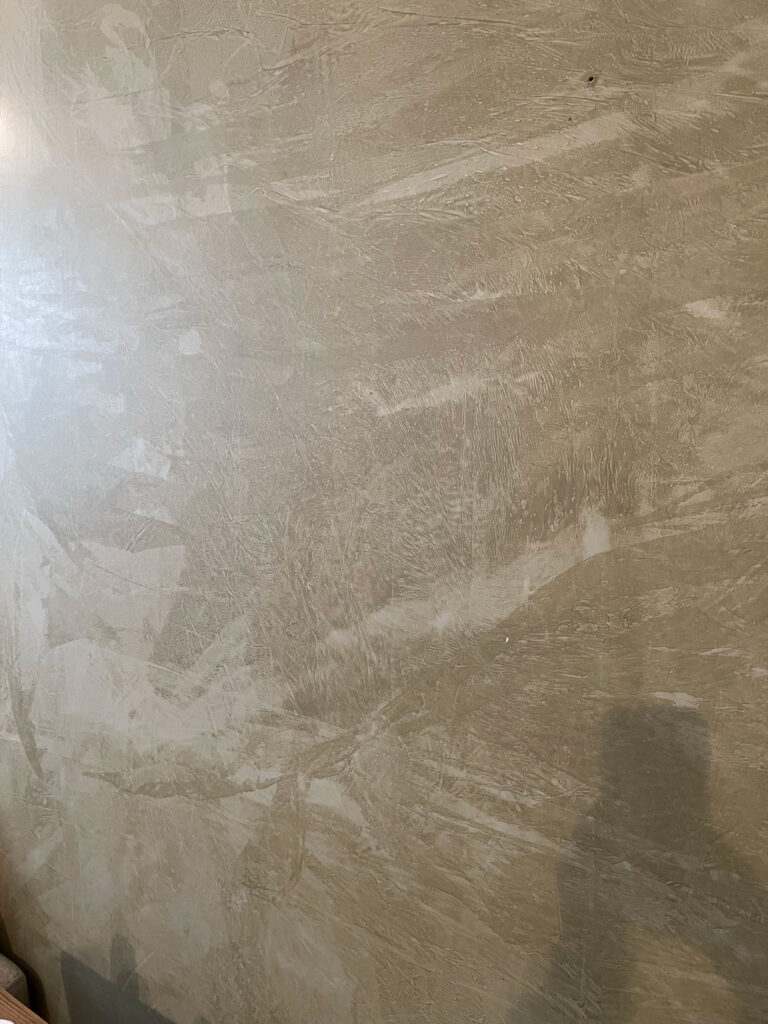
Looking at this room you could just tell that paint was going to be such an impactful change in here! The walls were covered in a 1990’s brownish-yellow faux finish that was straight out of Debbie Travis’s Painted House, circa 1994. It was hugely dating this room and it needed to be updated!
The Design of the Media Room Makeover (on a Budget!)
I wanted to keep this makeover budget friendly because, well quite frankly, the bathroom ensuite is sucking up all of our extra funds at the moment! However, whatever we do in this space I wanted to work for the long haul and while I may revisit this room at some point and ADD to the room I don’t want to REDO anything. Ha!
Looking around on Instagram, Pinterest, design mags and all my usual places for media room ideas left me feeling a little uninspired. Most consisted of a more modern media room with theater seating consisting of rows of leather recliners. In fact, when we bought the house the owner wanted to leave their existing leather theatre seats with the house but that really is not our personal style. There was a serious lack of more traditional cozy theatre spaces out there to be inspired by.
I kind of had to look inward on this one. I found a few moody media rooms on Pinterest but other than that, I just went with my gut on the design of this media space! I didn’t even make a mood board this time (who even am I?) But I did think a lot about what the must-haves are for us for a cinema room and I put them together in a bit of a priority list:
- comfortable seating (and room for the whole family!) – for us this is in the form of a comfortable sofa
- not too much light – for our projector to work we need a pretty dark space
- a place to put your feet up and to place your drink and your popcorn
- a large screen and good sound for the ultimate cinema experience
We didn’t need to buy any new pieces of equipment besides the screen for our home theater setup. The average cost of those things can vary from very starter level to thousands and thousands.
If you are looking at creating a theatre room in your own home, I won’t go into things like surround sound speakers or a projector screen versus smart TVs or any of that techy stuff. I’m going to assume that you are here for the design side of things!
I made a few small changes in this space to make our theatre room work a little bit better for our family and feel a lot cozier overall. Let’s get into what we did, and hopefully, it will give you a few home theater ideas for your own home!
Media Room Ideas on a Budget – What I did!
Paint
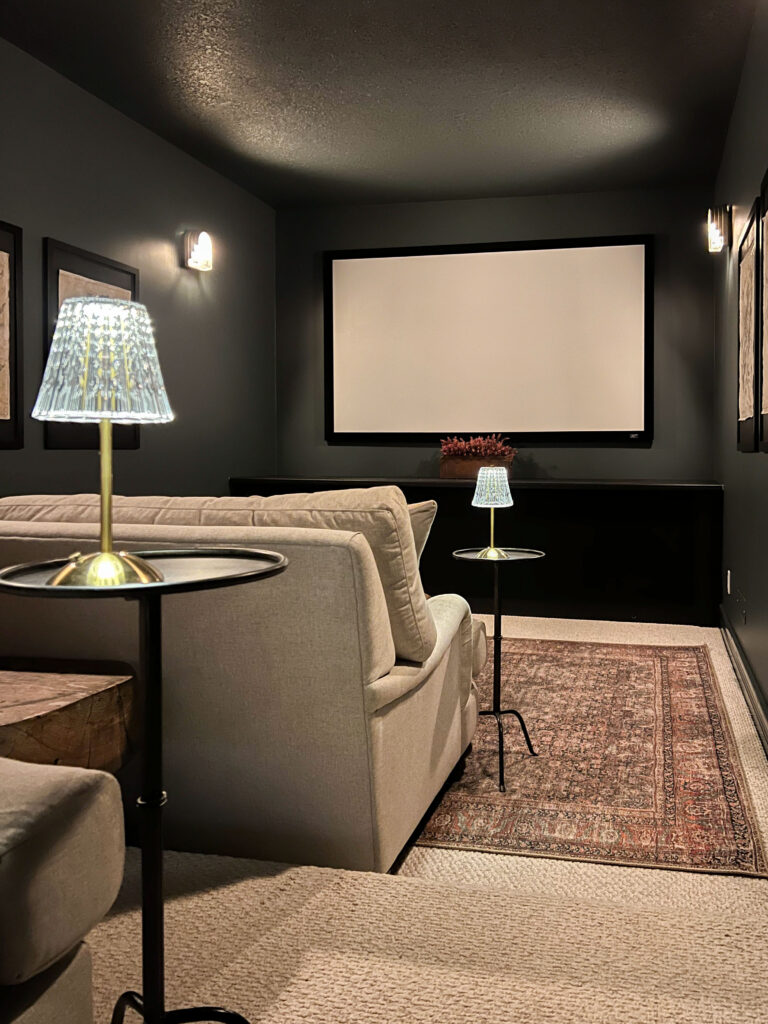
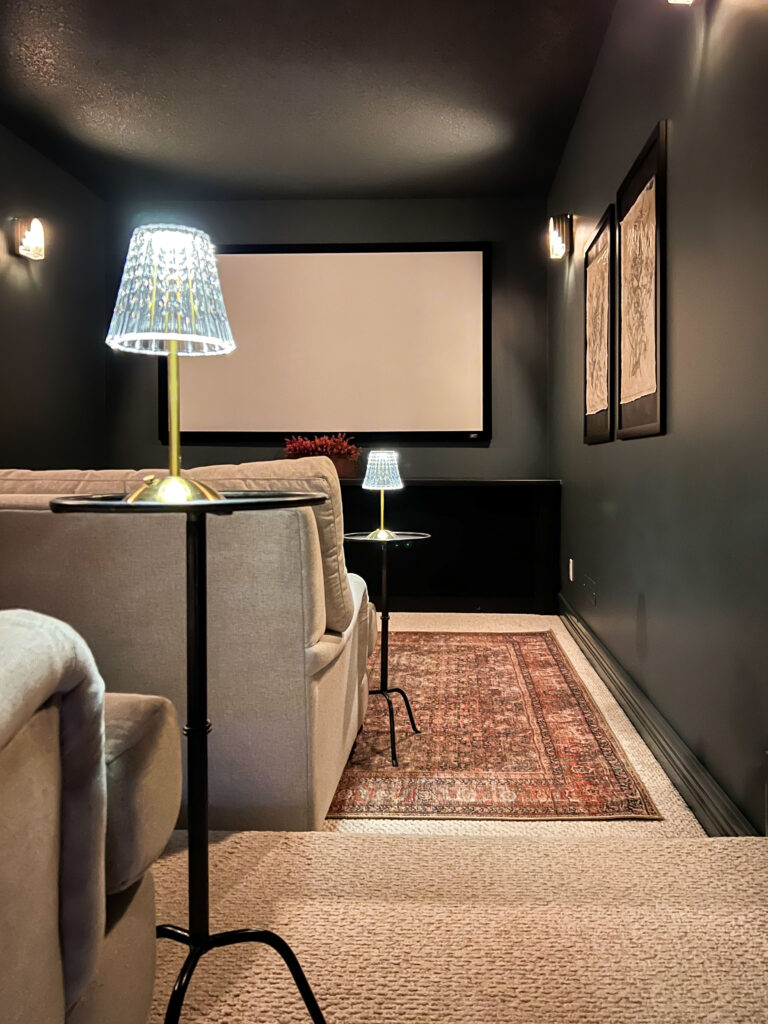
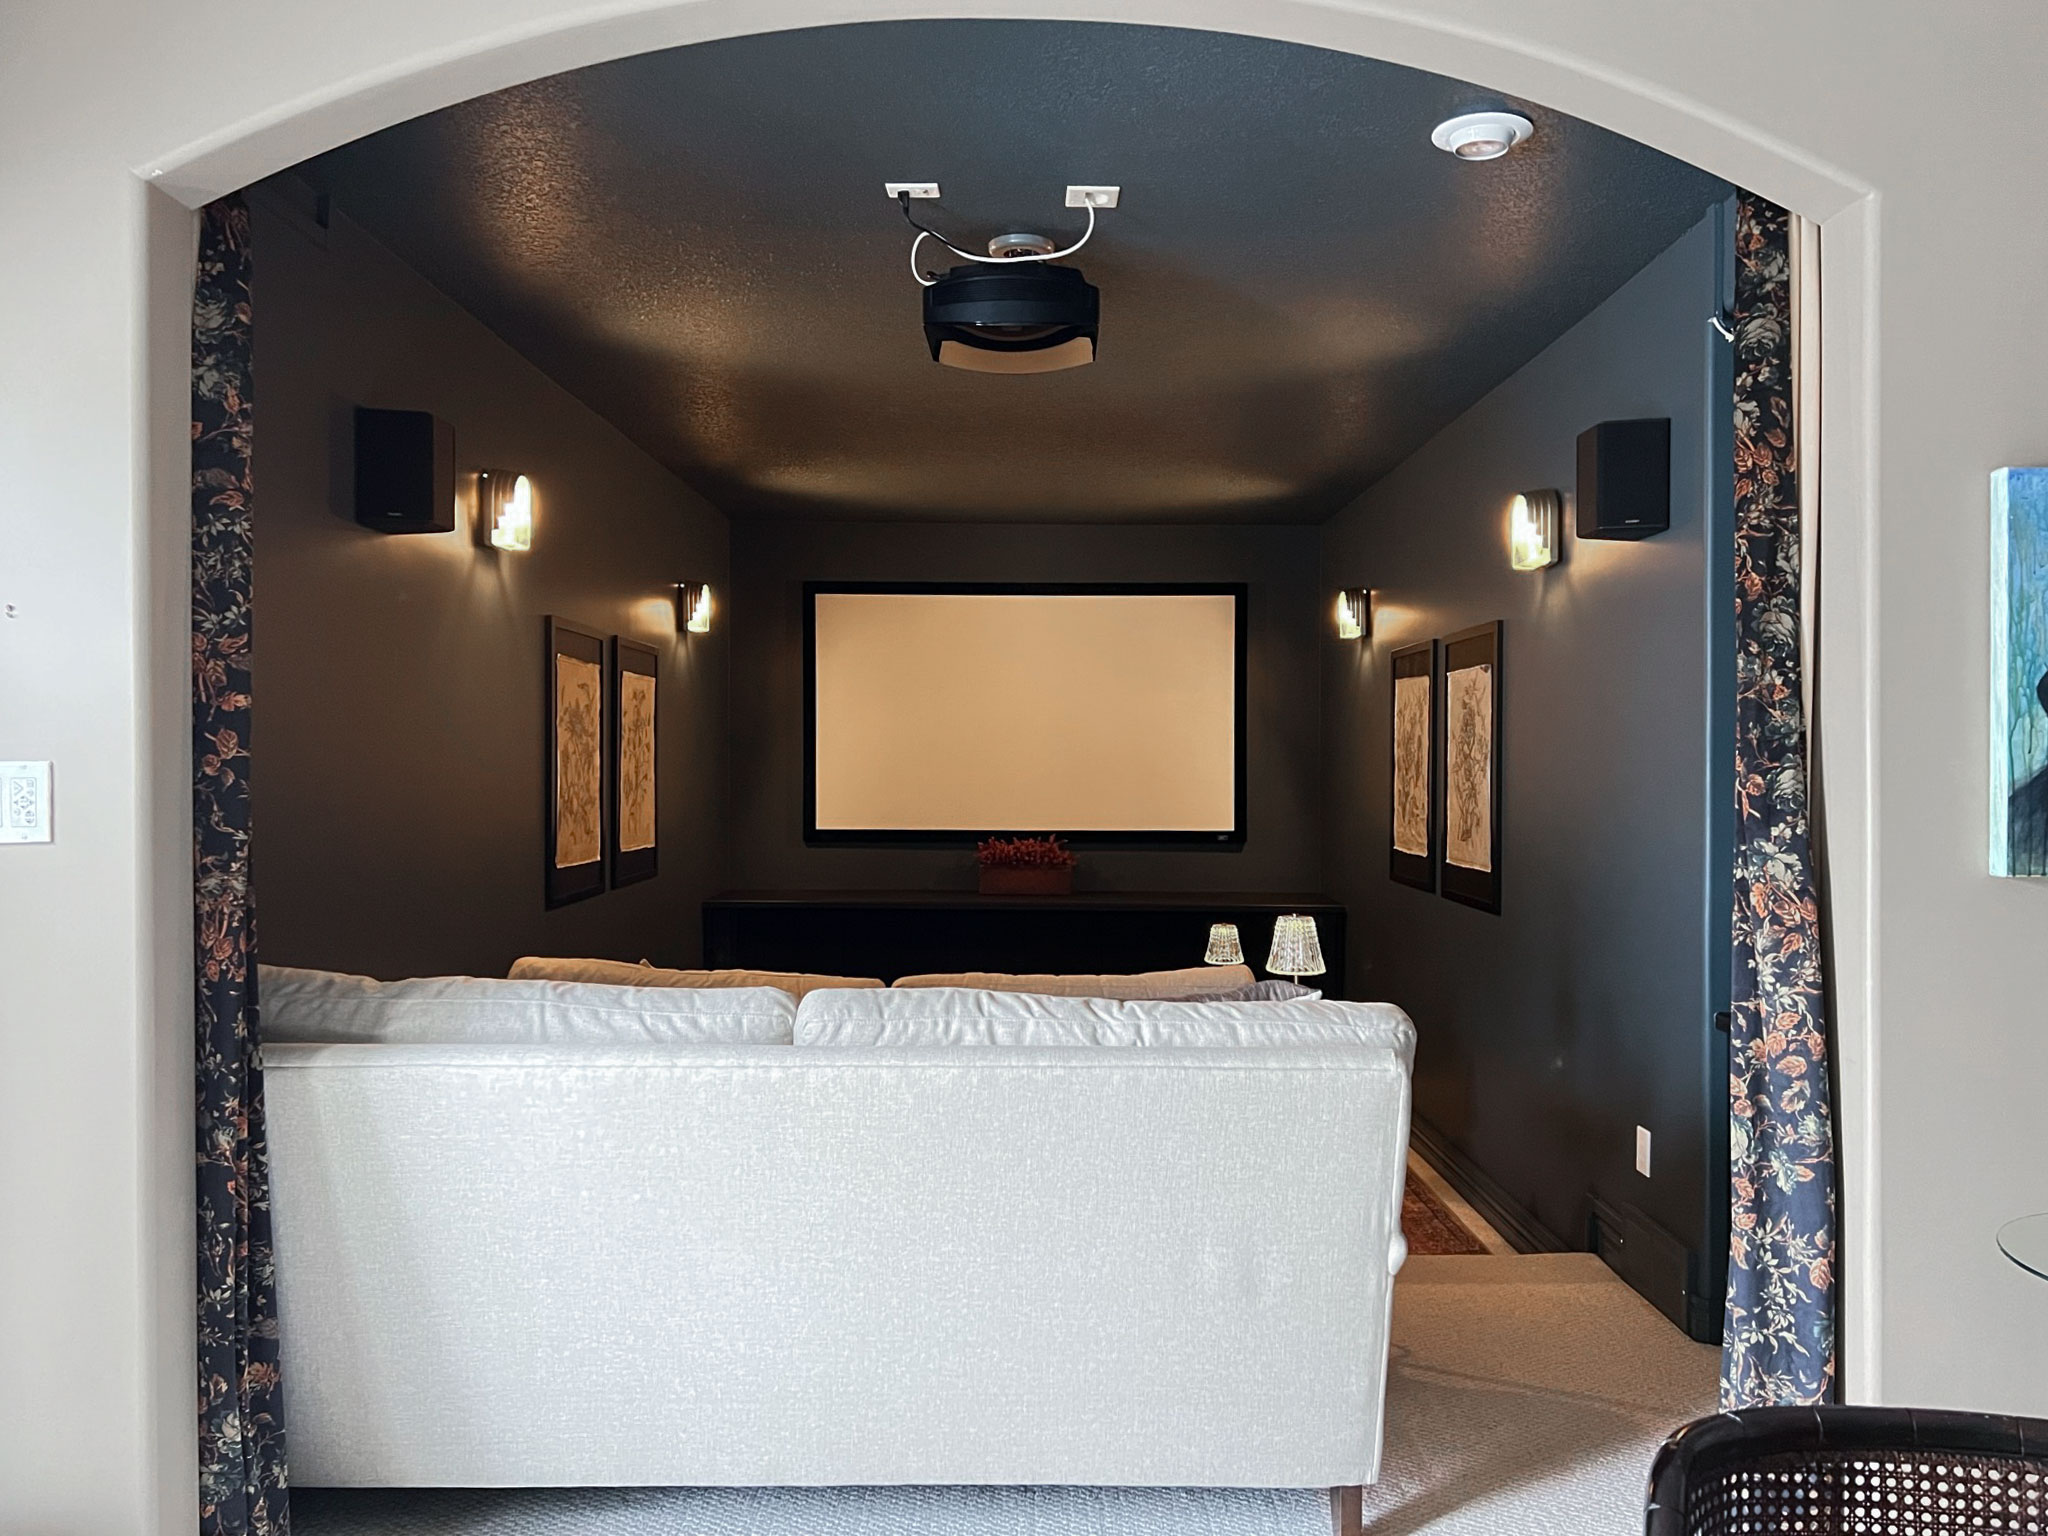
Once the screen was swapped out, we repaired the walls and then everything was given a coat of paint. We chose Valspar Cobalt Cannon for this makeover. In a dark room (especially a movie theater) dark colors are such a good choice. If you have a projector, brightly coloured rooms can reflect light onto a screen. So if you are considering tapping into your dark side, a media room is the perfect place to try it!
Paint is such an easy way to change up a space and is the number one thing I would recommend for anyone working on a tight budget. This doesn’t even look like the same room!
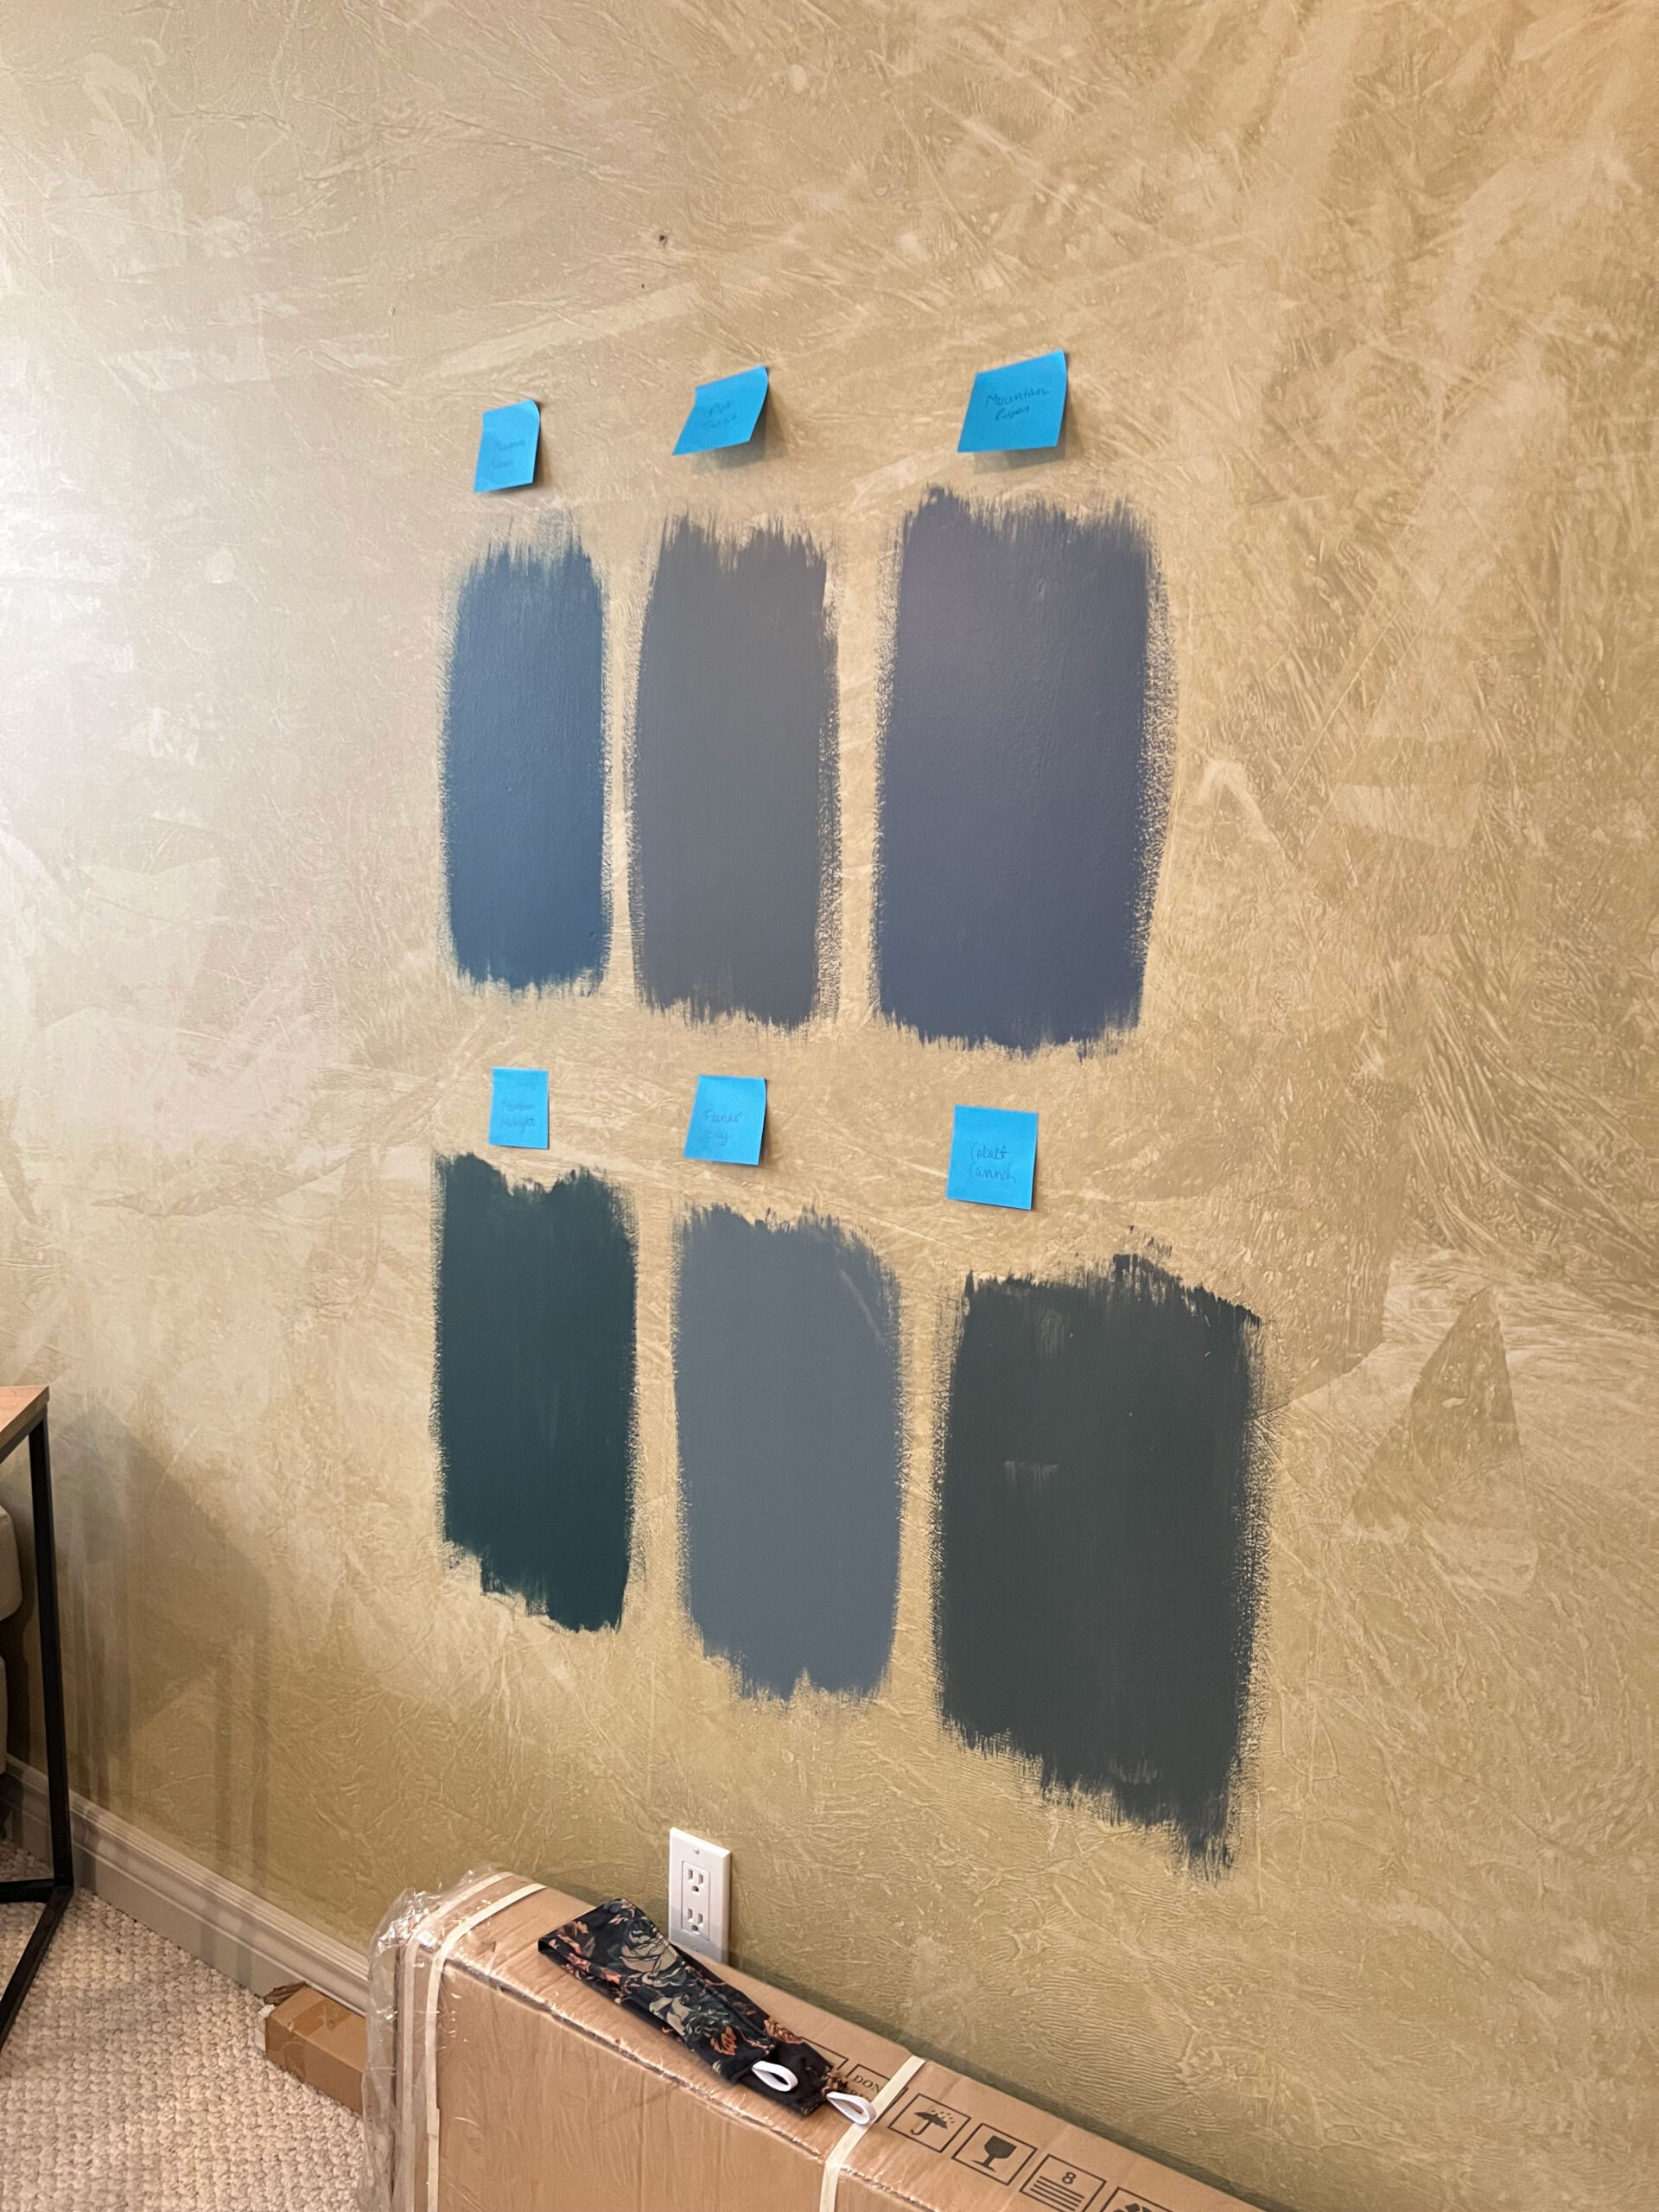
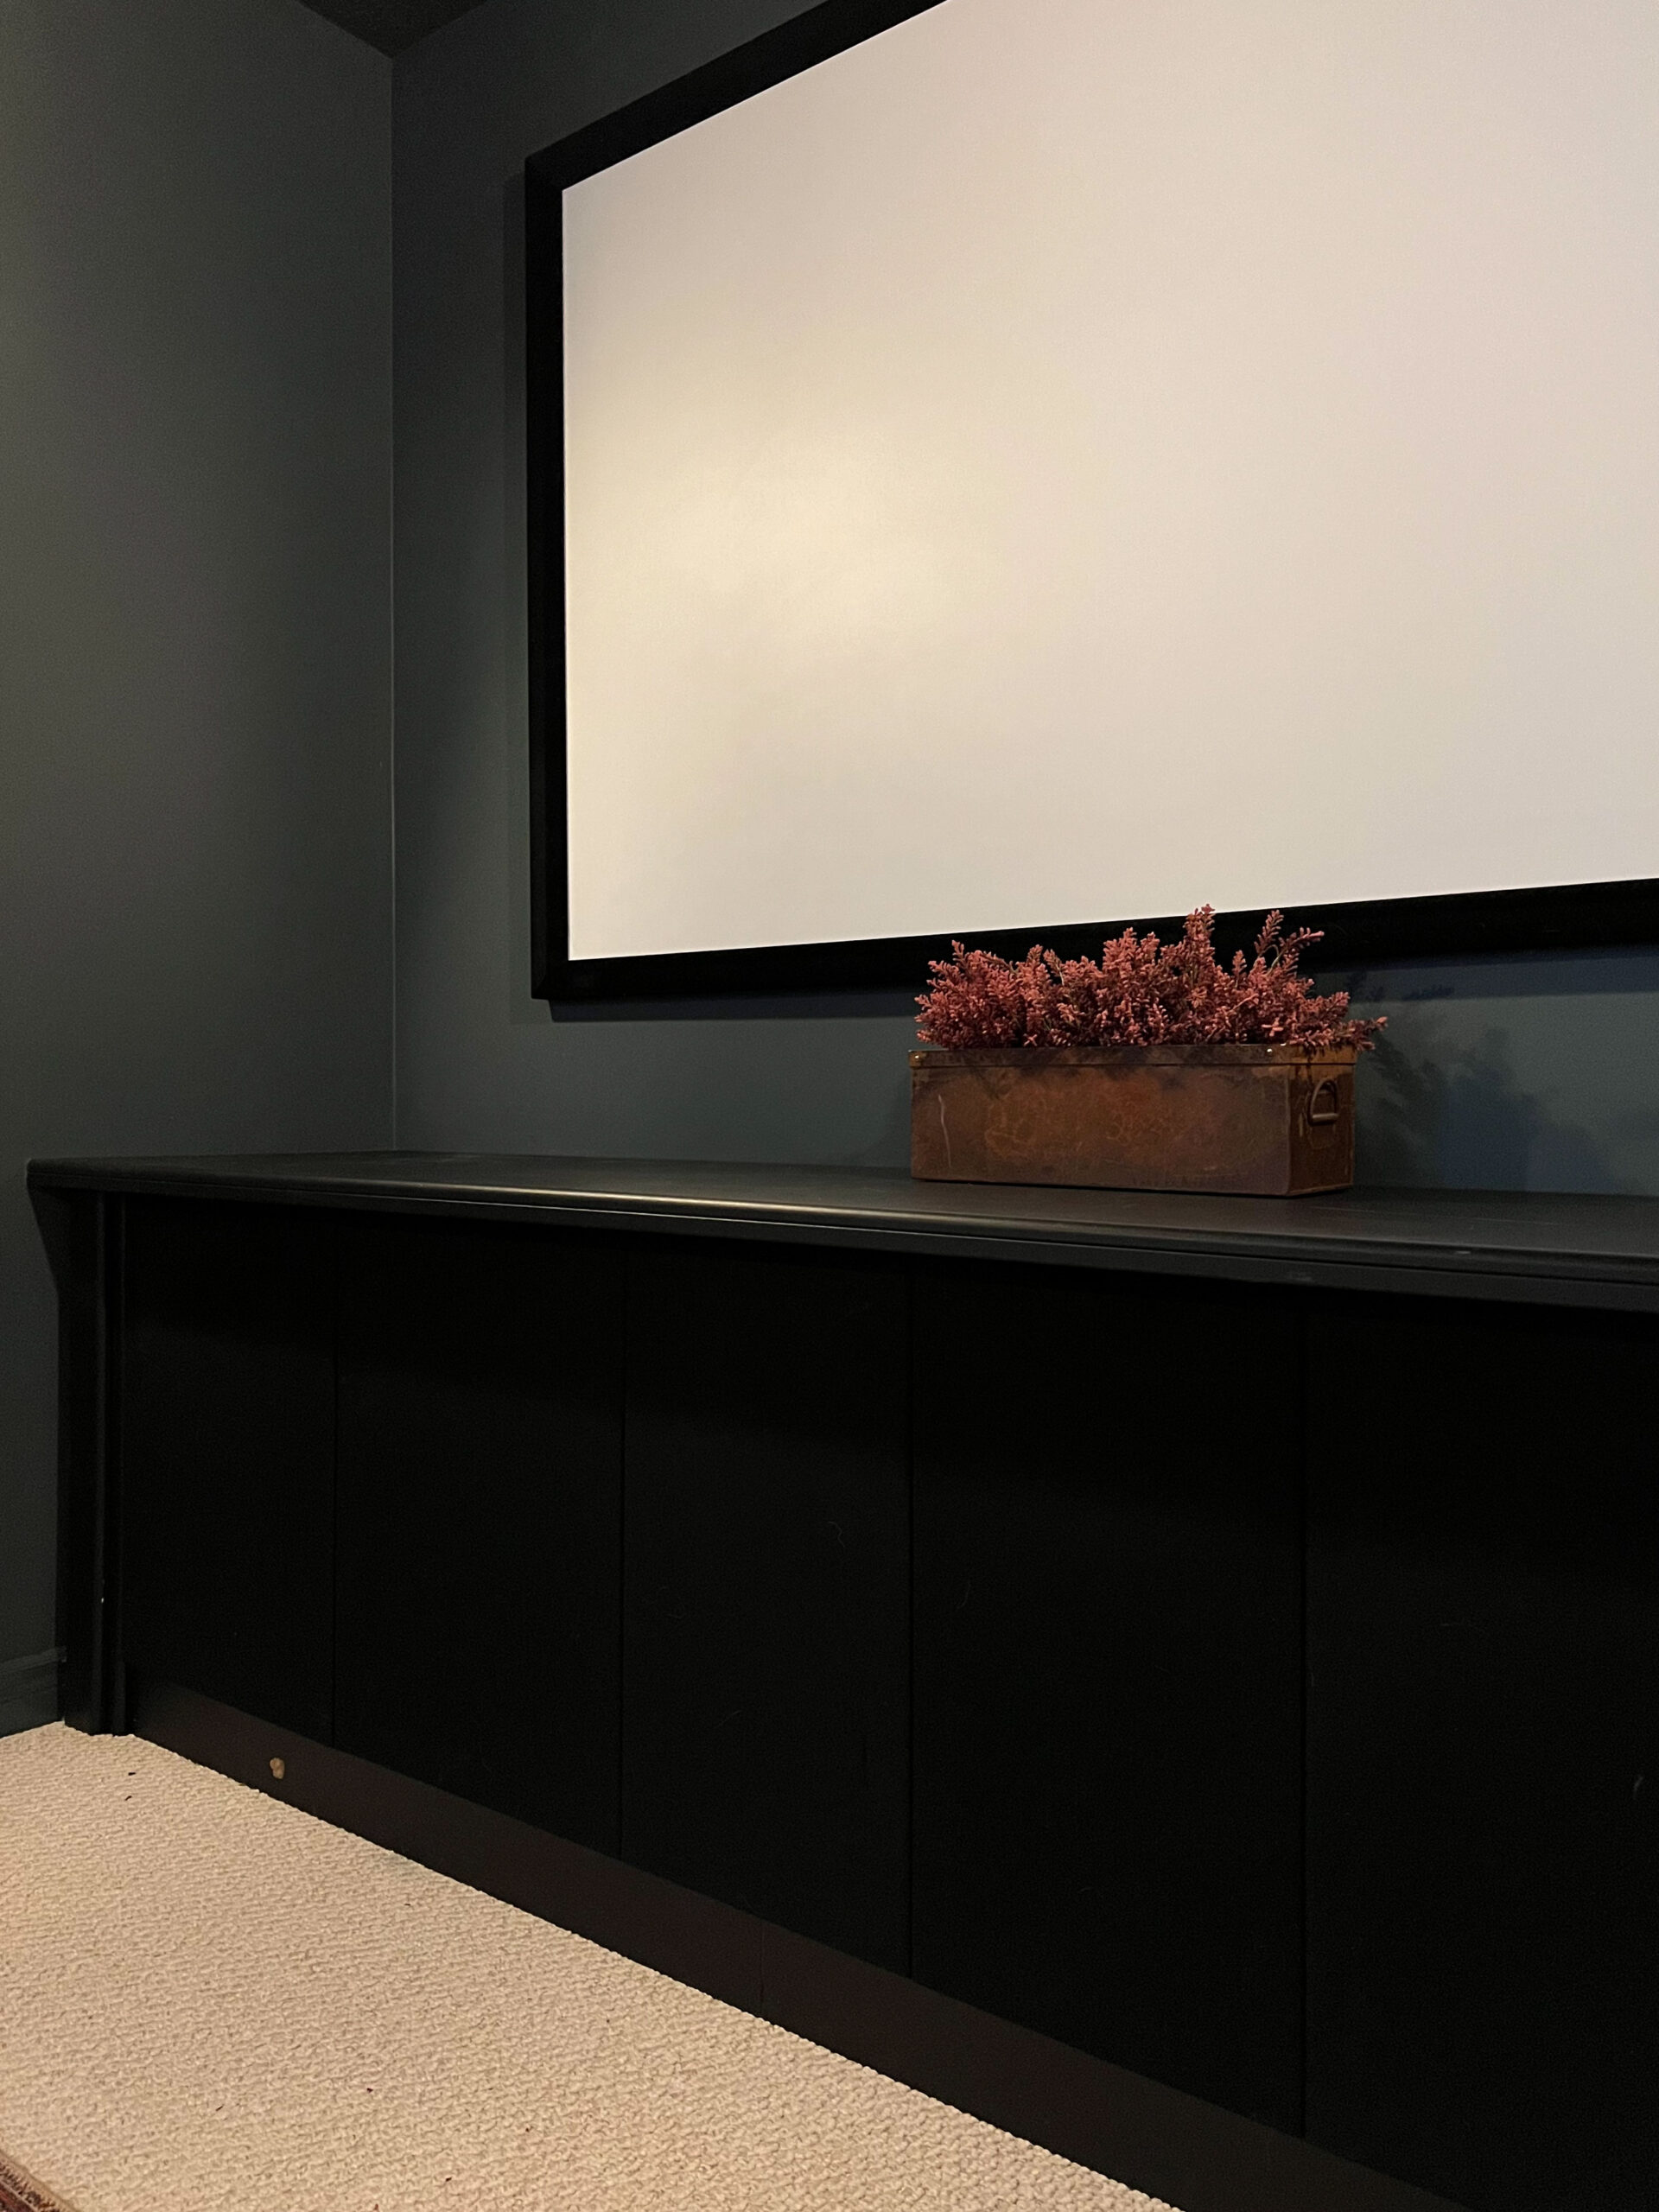
I decided to go all-in on the colour and paint the ceiling and baseboards too. I think the tonal baseboards with the walls work, or I could have also painted them black to match the cabinets. The only thing that would have not worked is leaving them white!!
Curtains
We really needed to block that sun that was coming in from the adjacent room. One day I would love to add a door instead of the current arched opening (but that would not fall within the quick or budget friendly category!)
The old owner had curtains across this opening which were too short and too narrow and so they were never closed completely. I found some new blackout curtains on Amazon. They actually inspired the paint colour somewhat, as they had some lovely blue and pink flowers and a black background. Since I had some black cabinetry that was staying, I thought they would tie in nicely.

I bought 4 panels (there were 2 in each package) and sewed them together to make two wide panels, and hemmed them to fit. Or rather, I invited my mom over to “help” me with that haha.
I hung the curtains on a curtain track to make sure it was easy to draw them open and closed since we would be doing that a lot! If you have been following me for a while, you know I love a good curtain track when you really want to be able to maneuver those curtains easily! I also used them in two of my bathrooms for the shower curtain! In retrospect, I probably could have painted the track to help it blend in, so I will probably do some sort of valence when I revisit this room to hide it better.
Seating
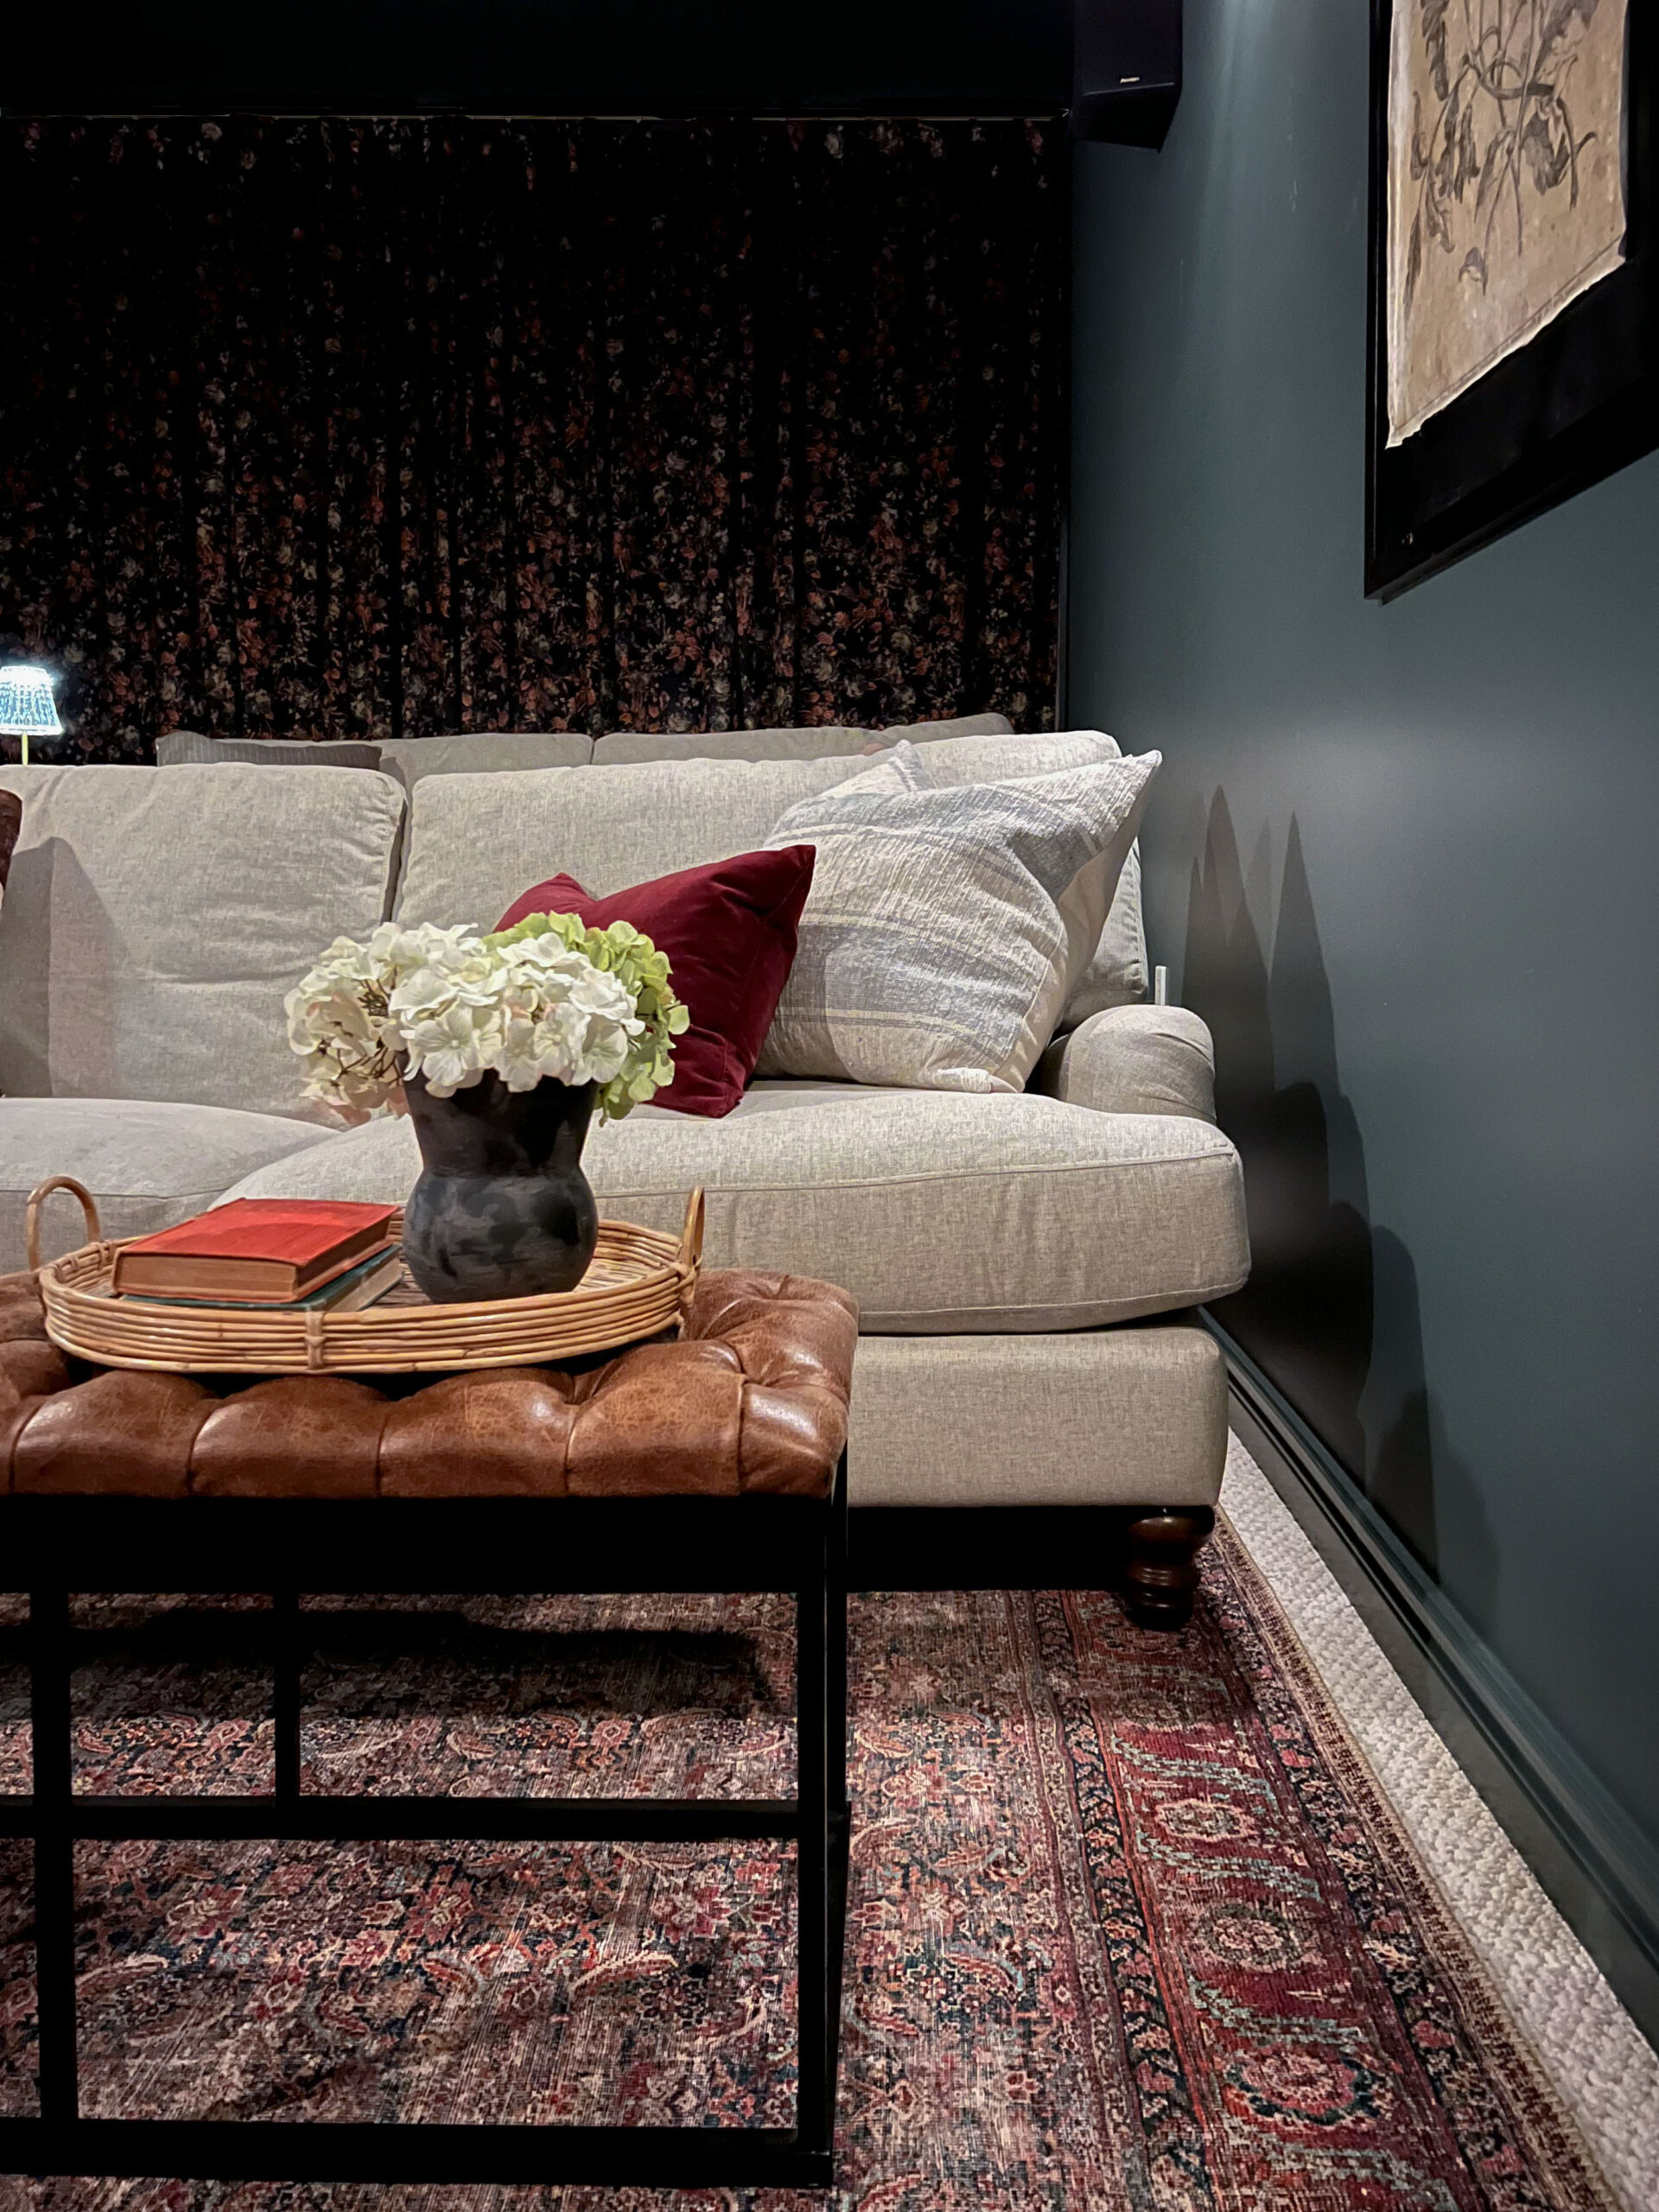
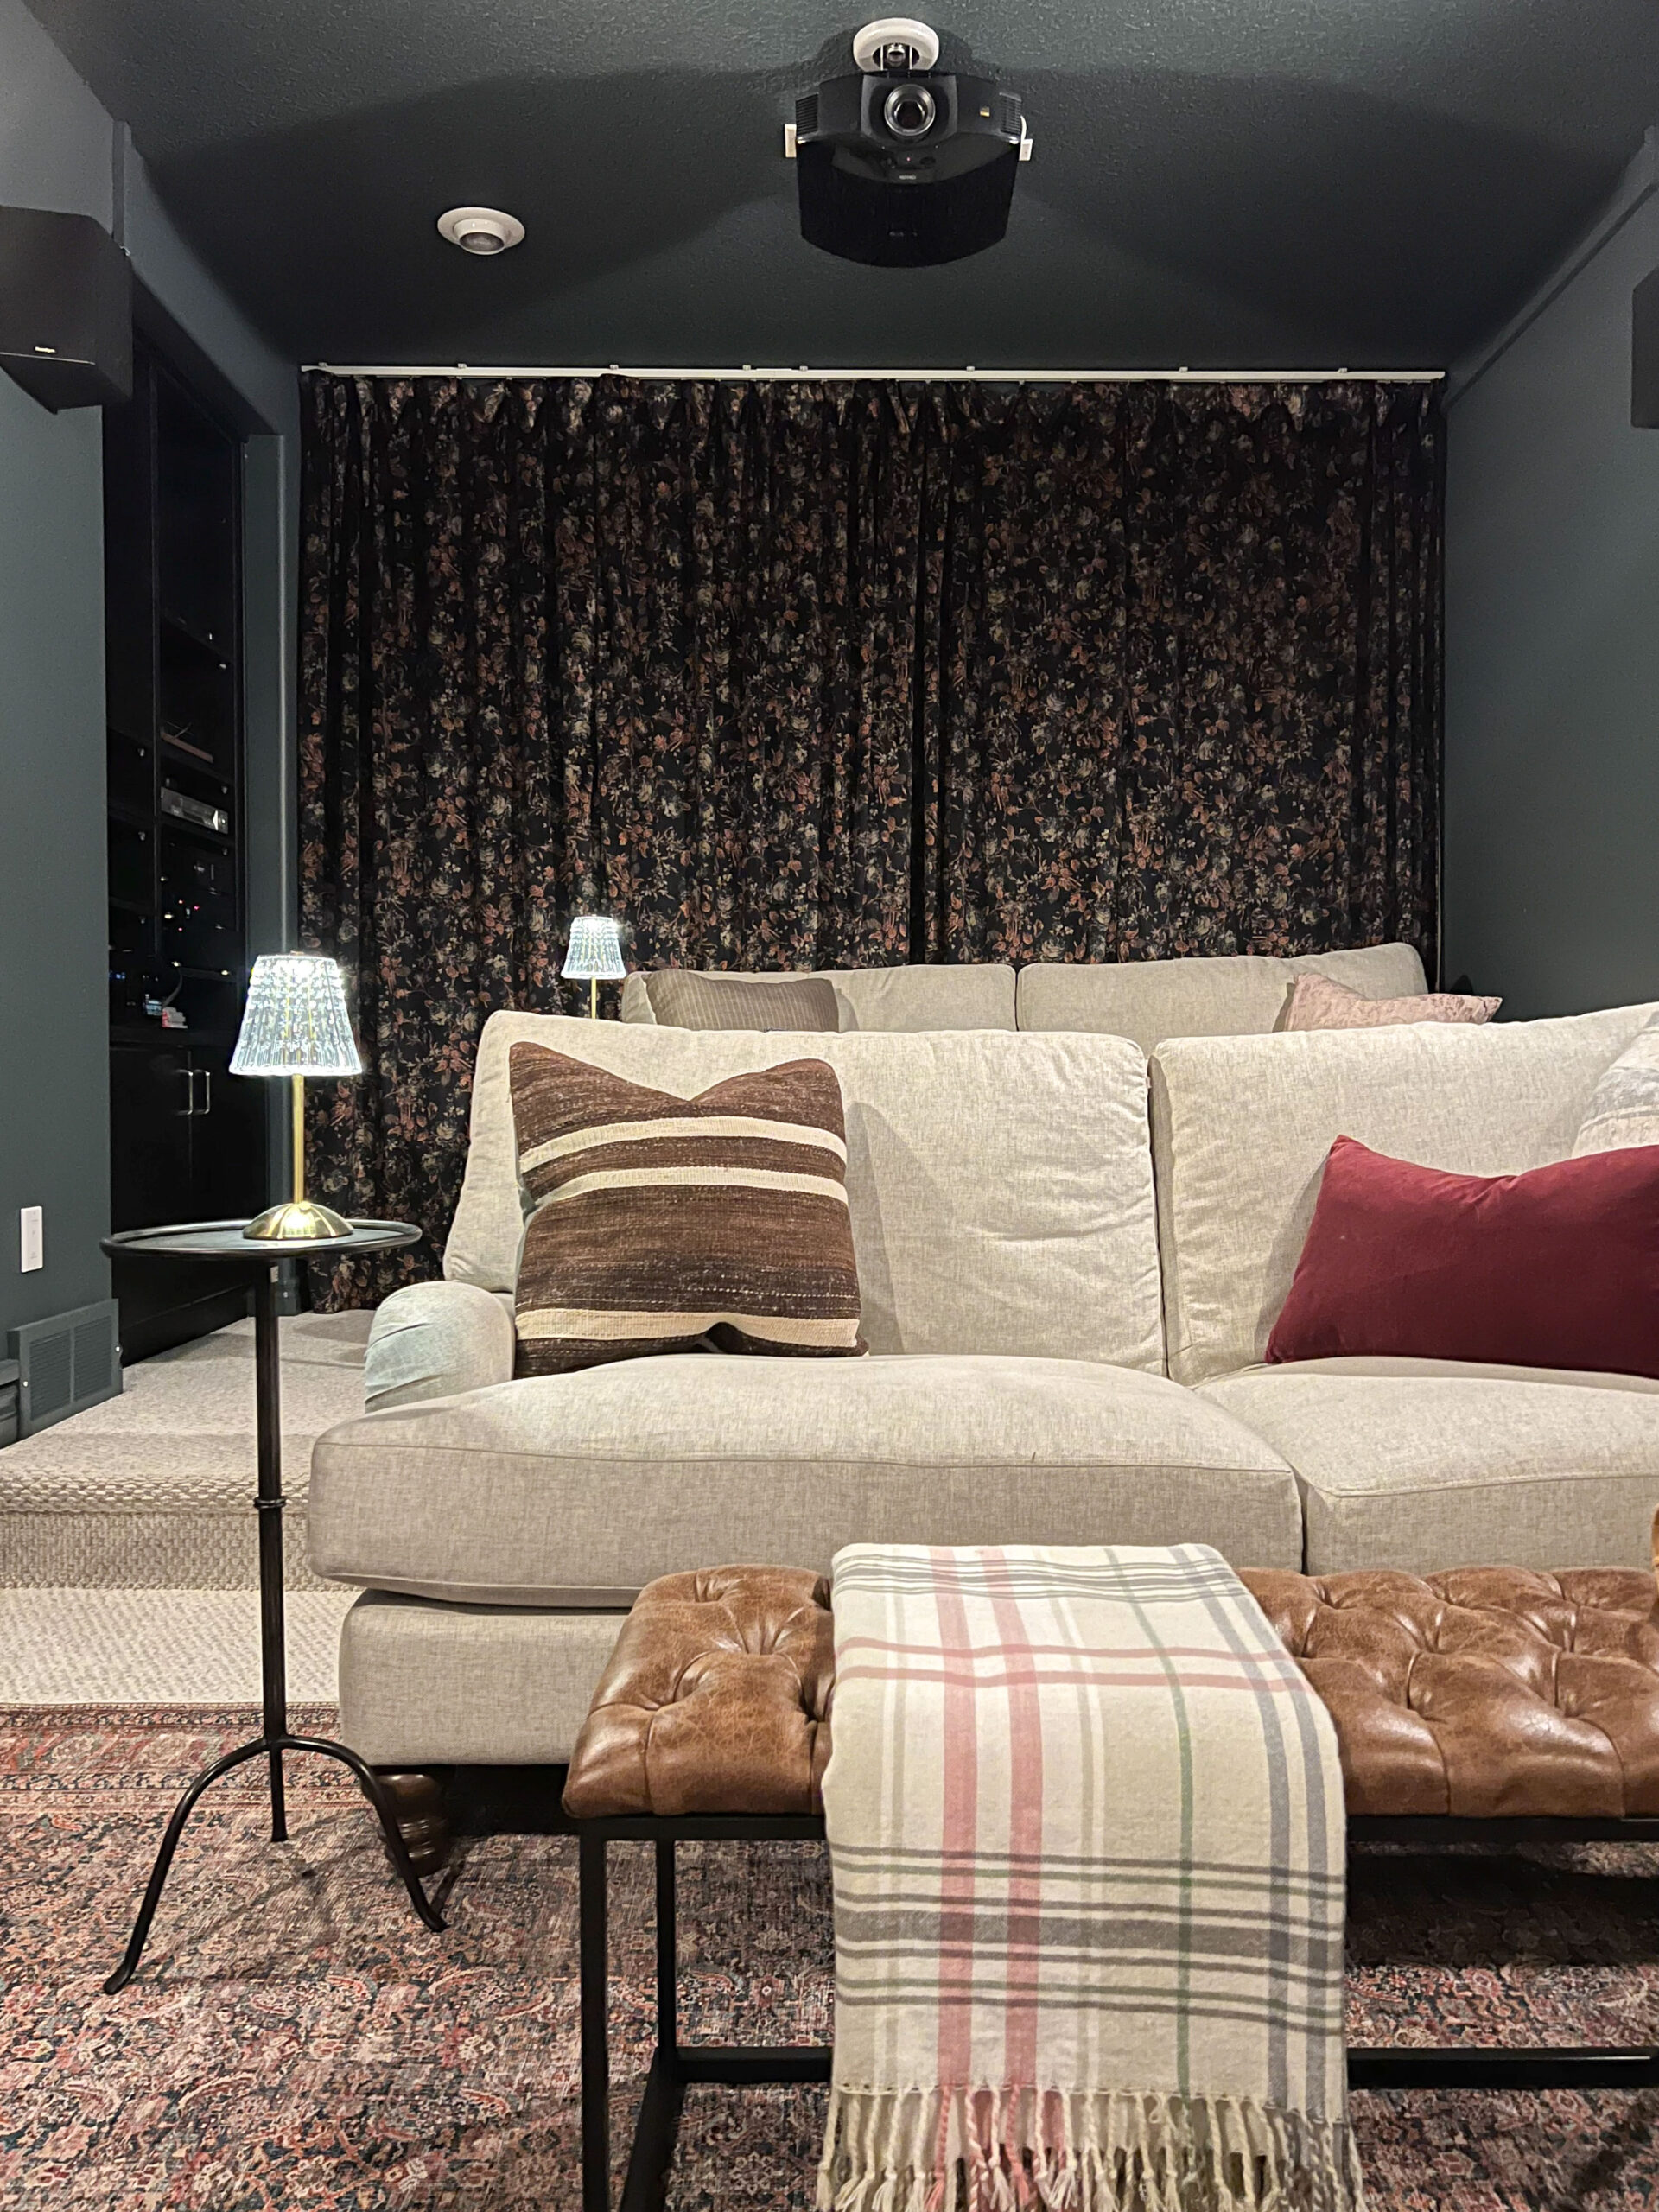
A lot of home theater design involves layers of stadium seating in front of each other, but that is neither our style, nor was it in the budget to replace all the furniture, When we moved in, we ended up putting the two matching couches from our old living room in here, one on each tier.
It was such good news that we had two of the same couches and that they fit in here so nicely. The couches we bought on Wayfair years ago and are still our most comfortable sofas! They have held up wonderfully, and are such a classic English roll arm shape. So placing one on each of the tiers was a no-brainer.
If you are looking at creating a theatre room with seating stacked in front of one another like this, creating a step for the back seats is really not that difficult. Framing out a step (ours is about 8″ tall) and covering it with some flooring or carpeting to add that extra height for the back row really does make a big difference in your view!

Lighting
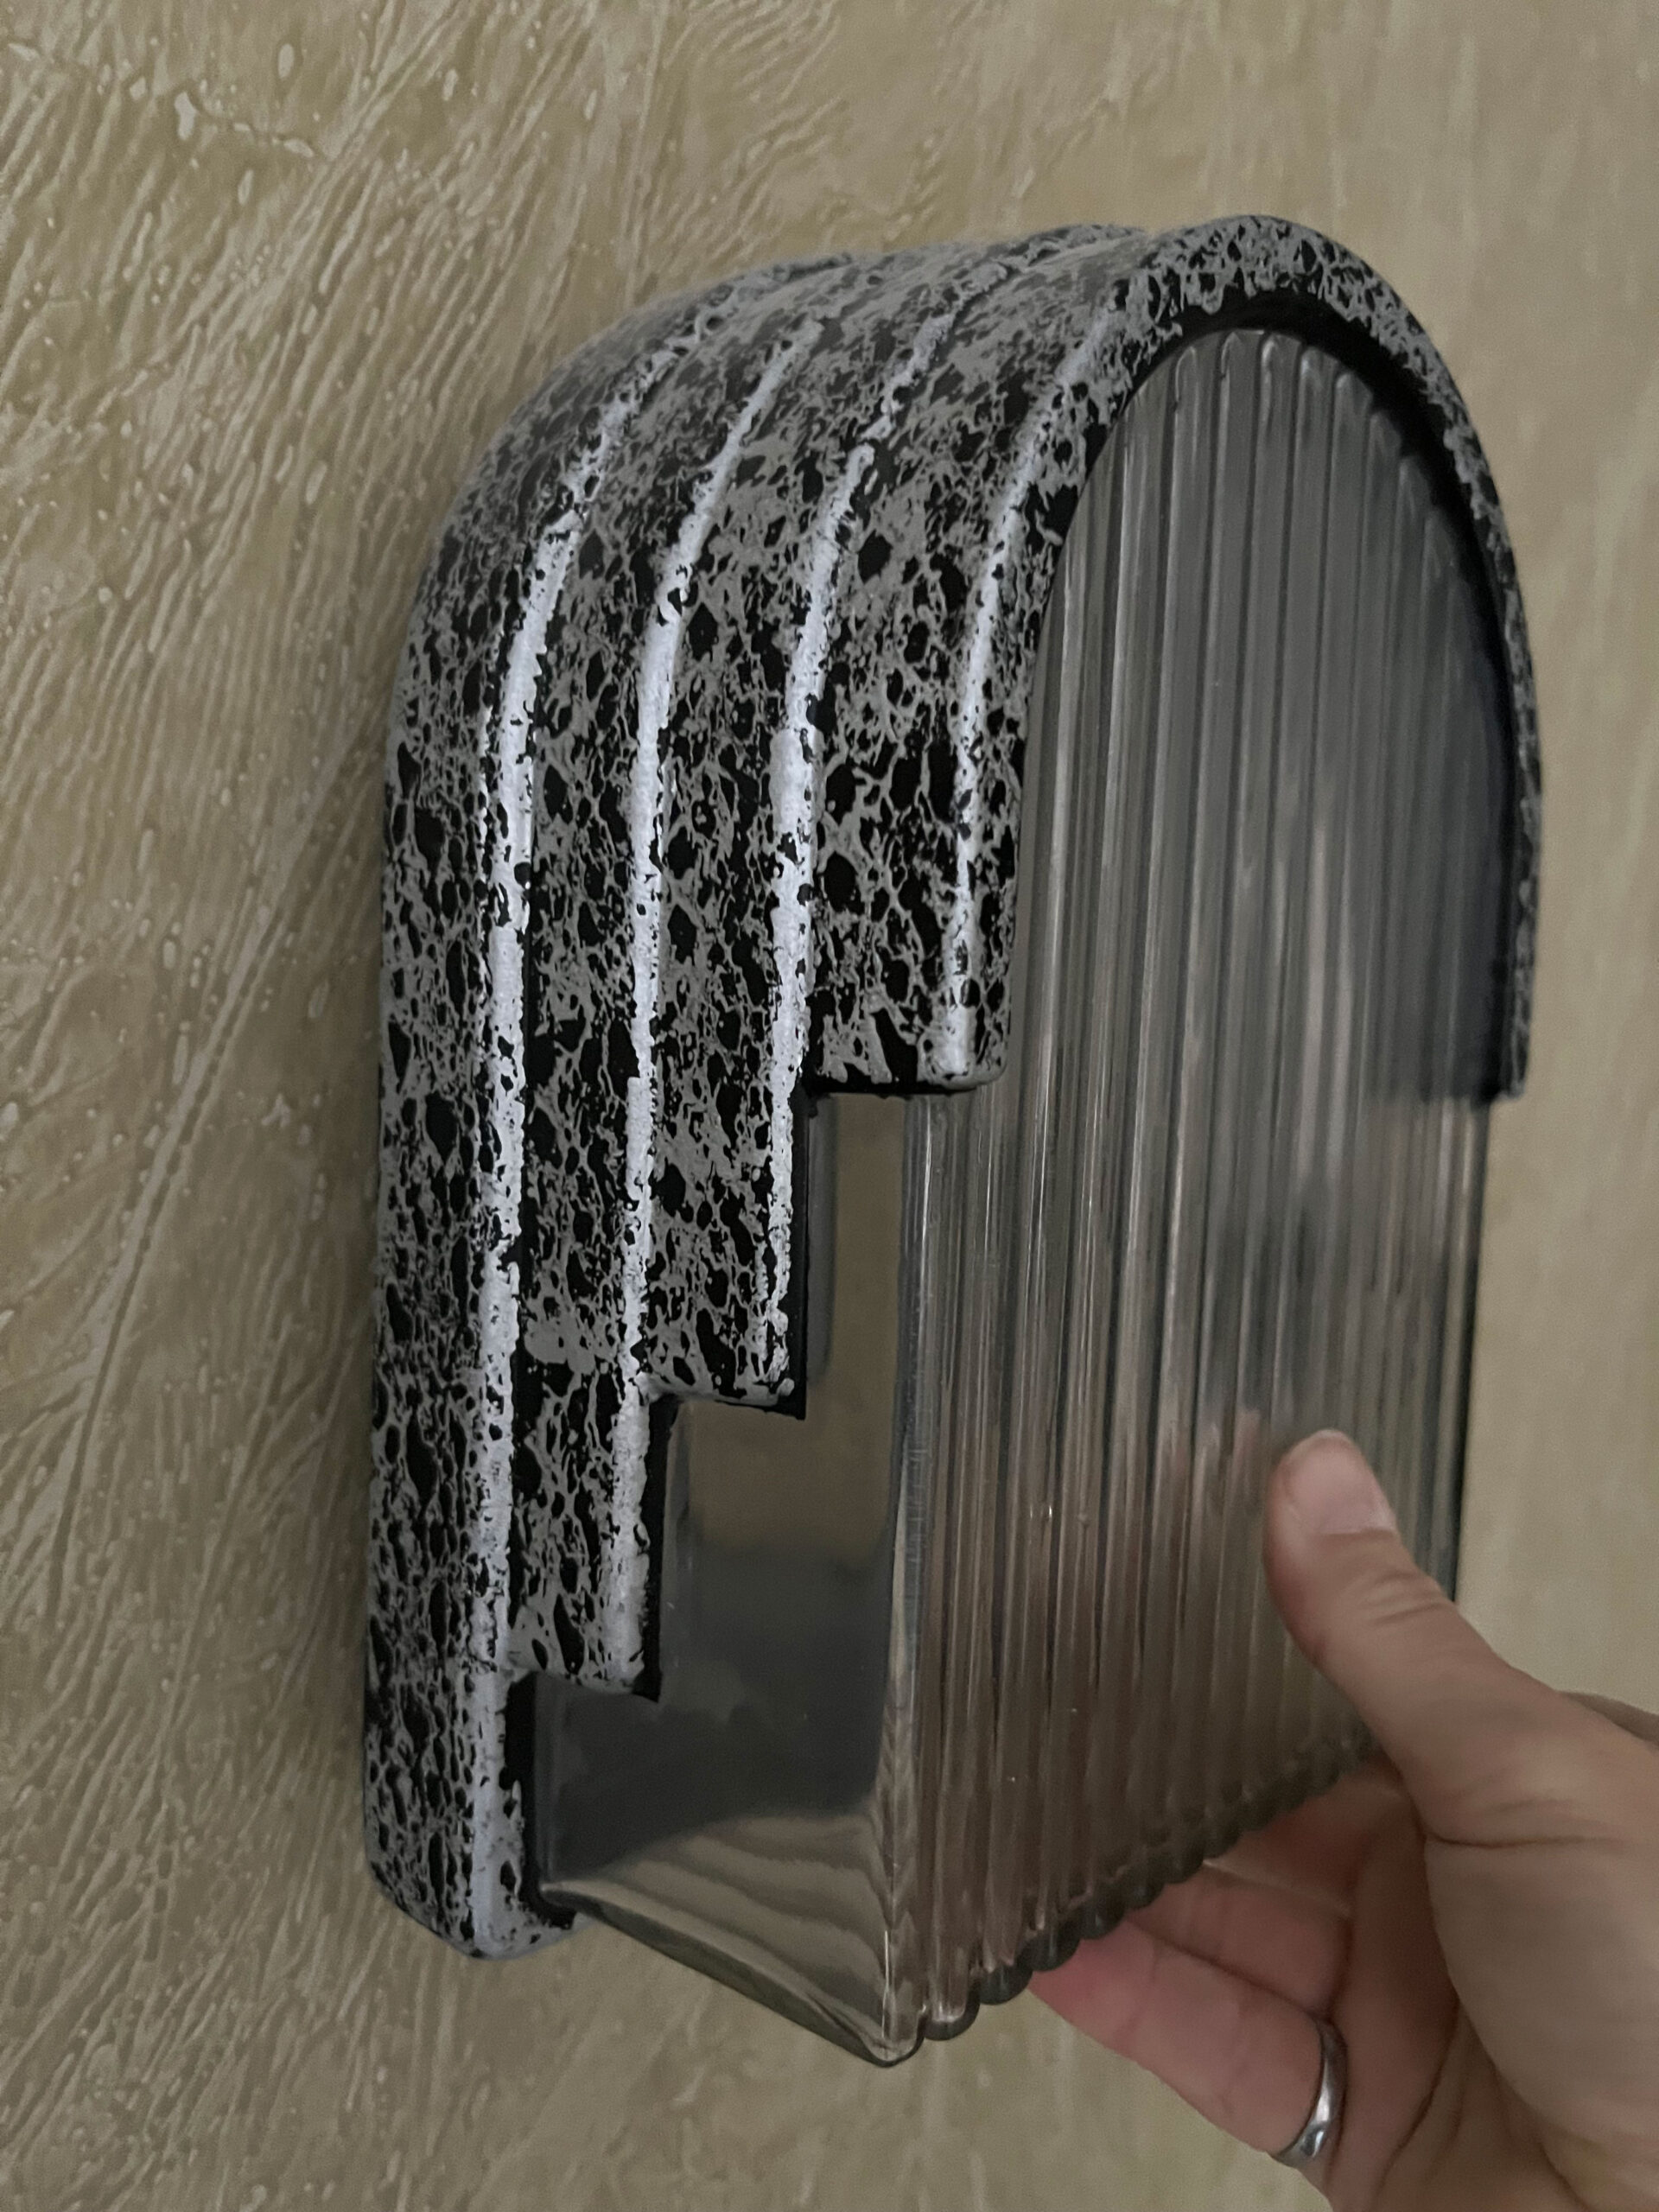
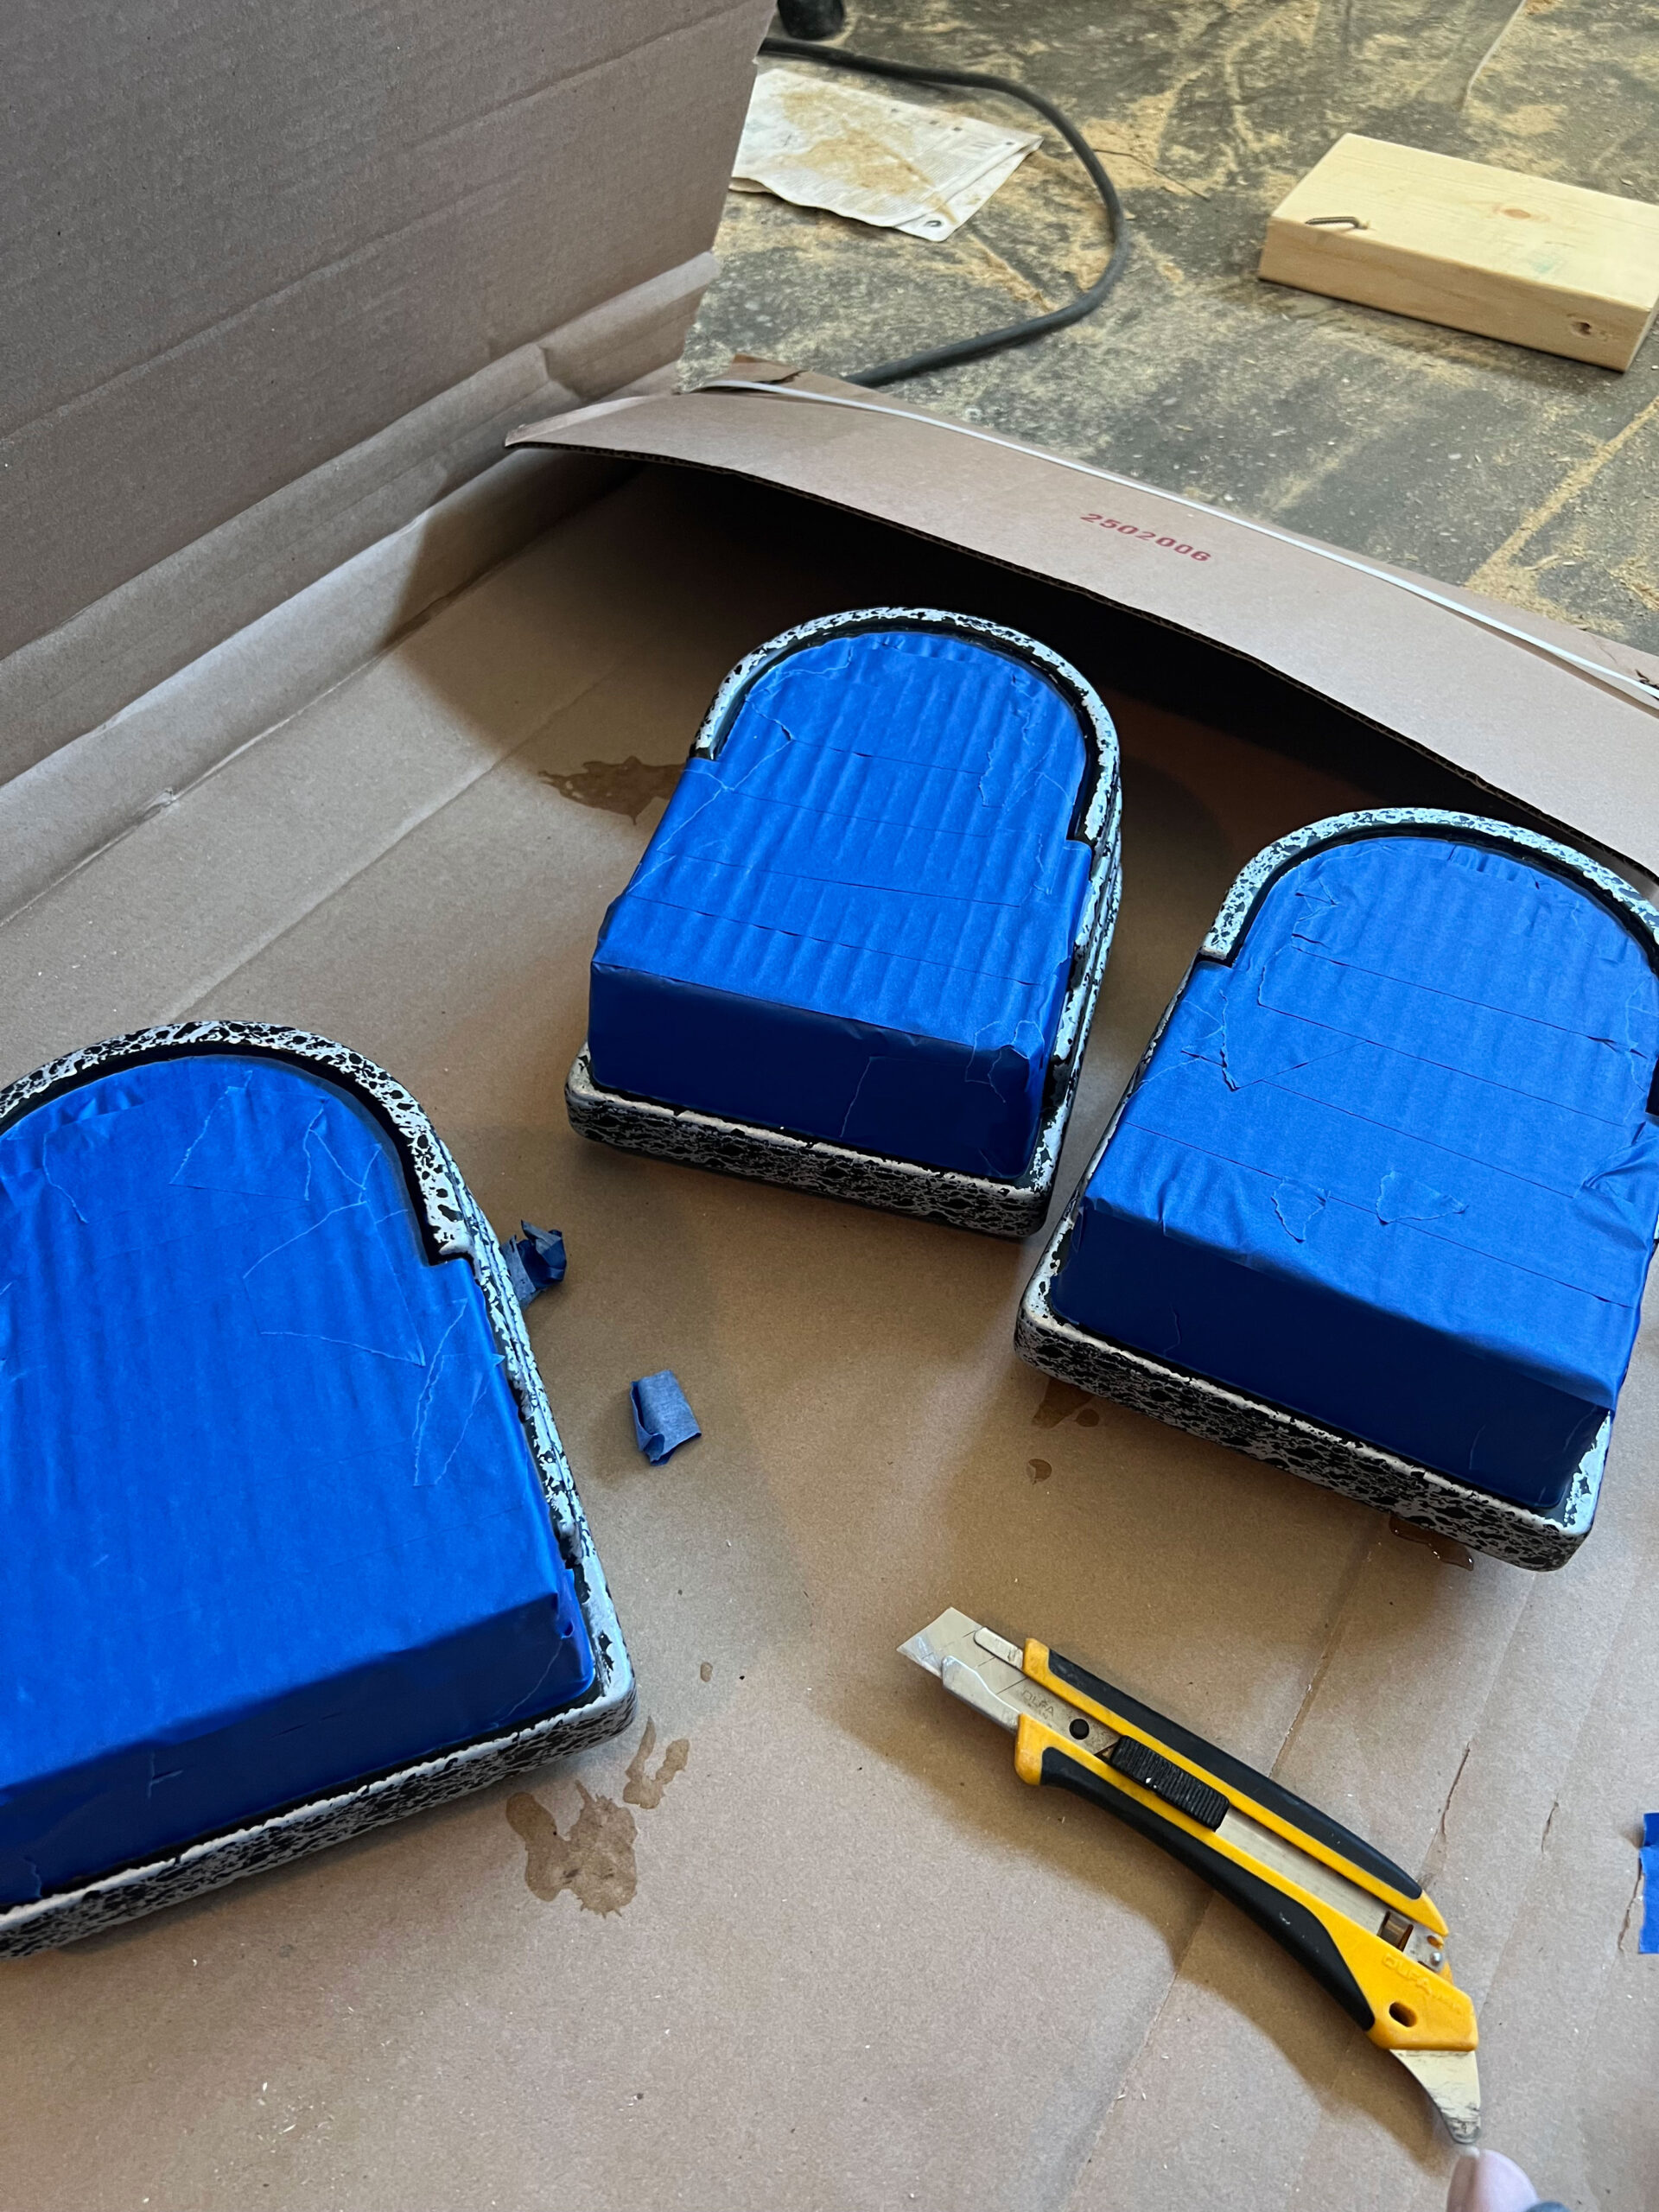
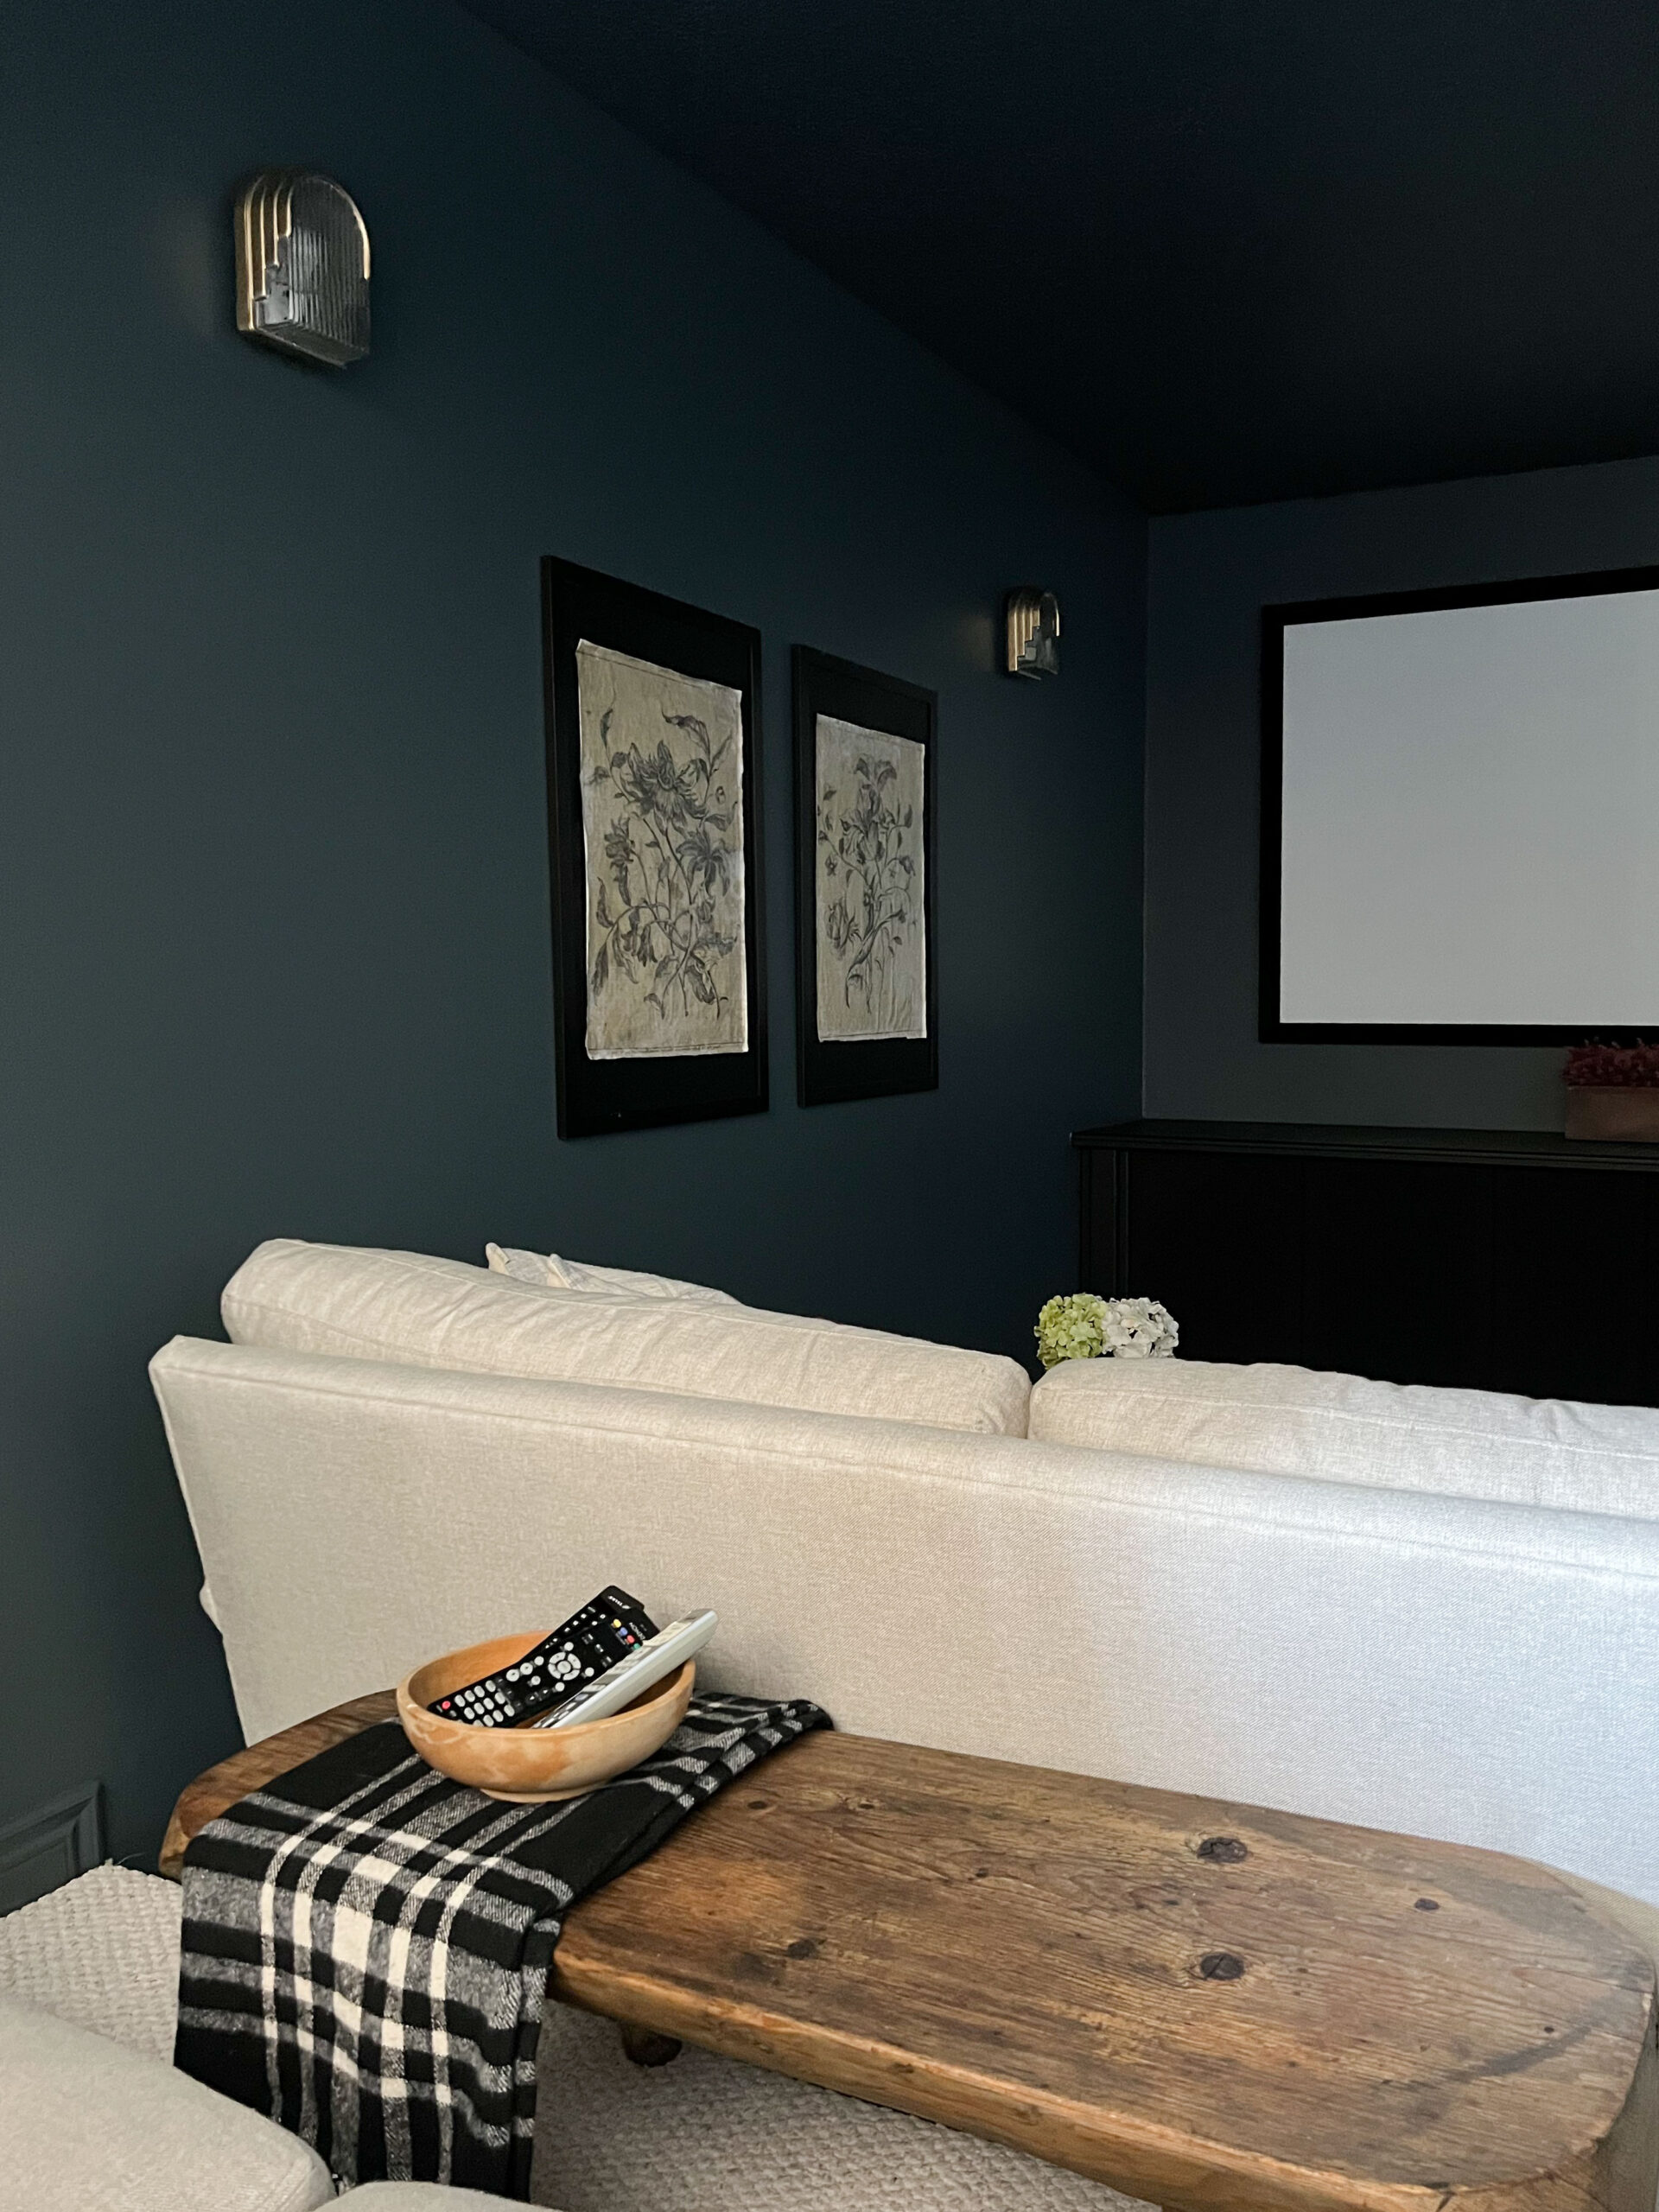
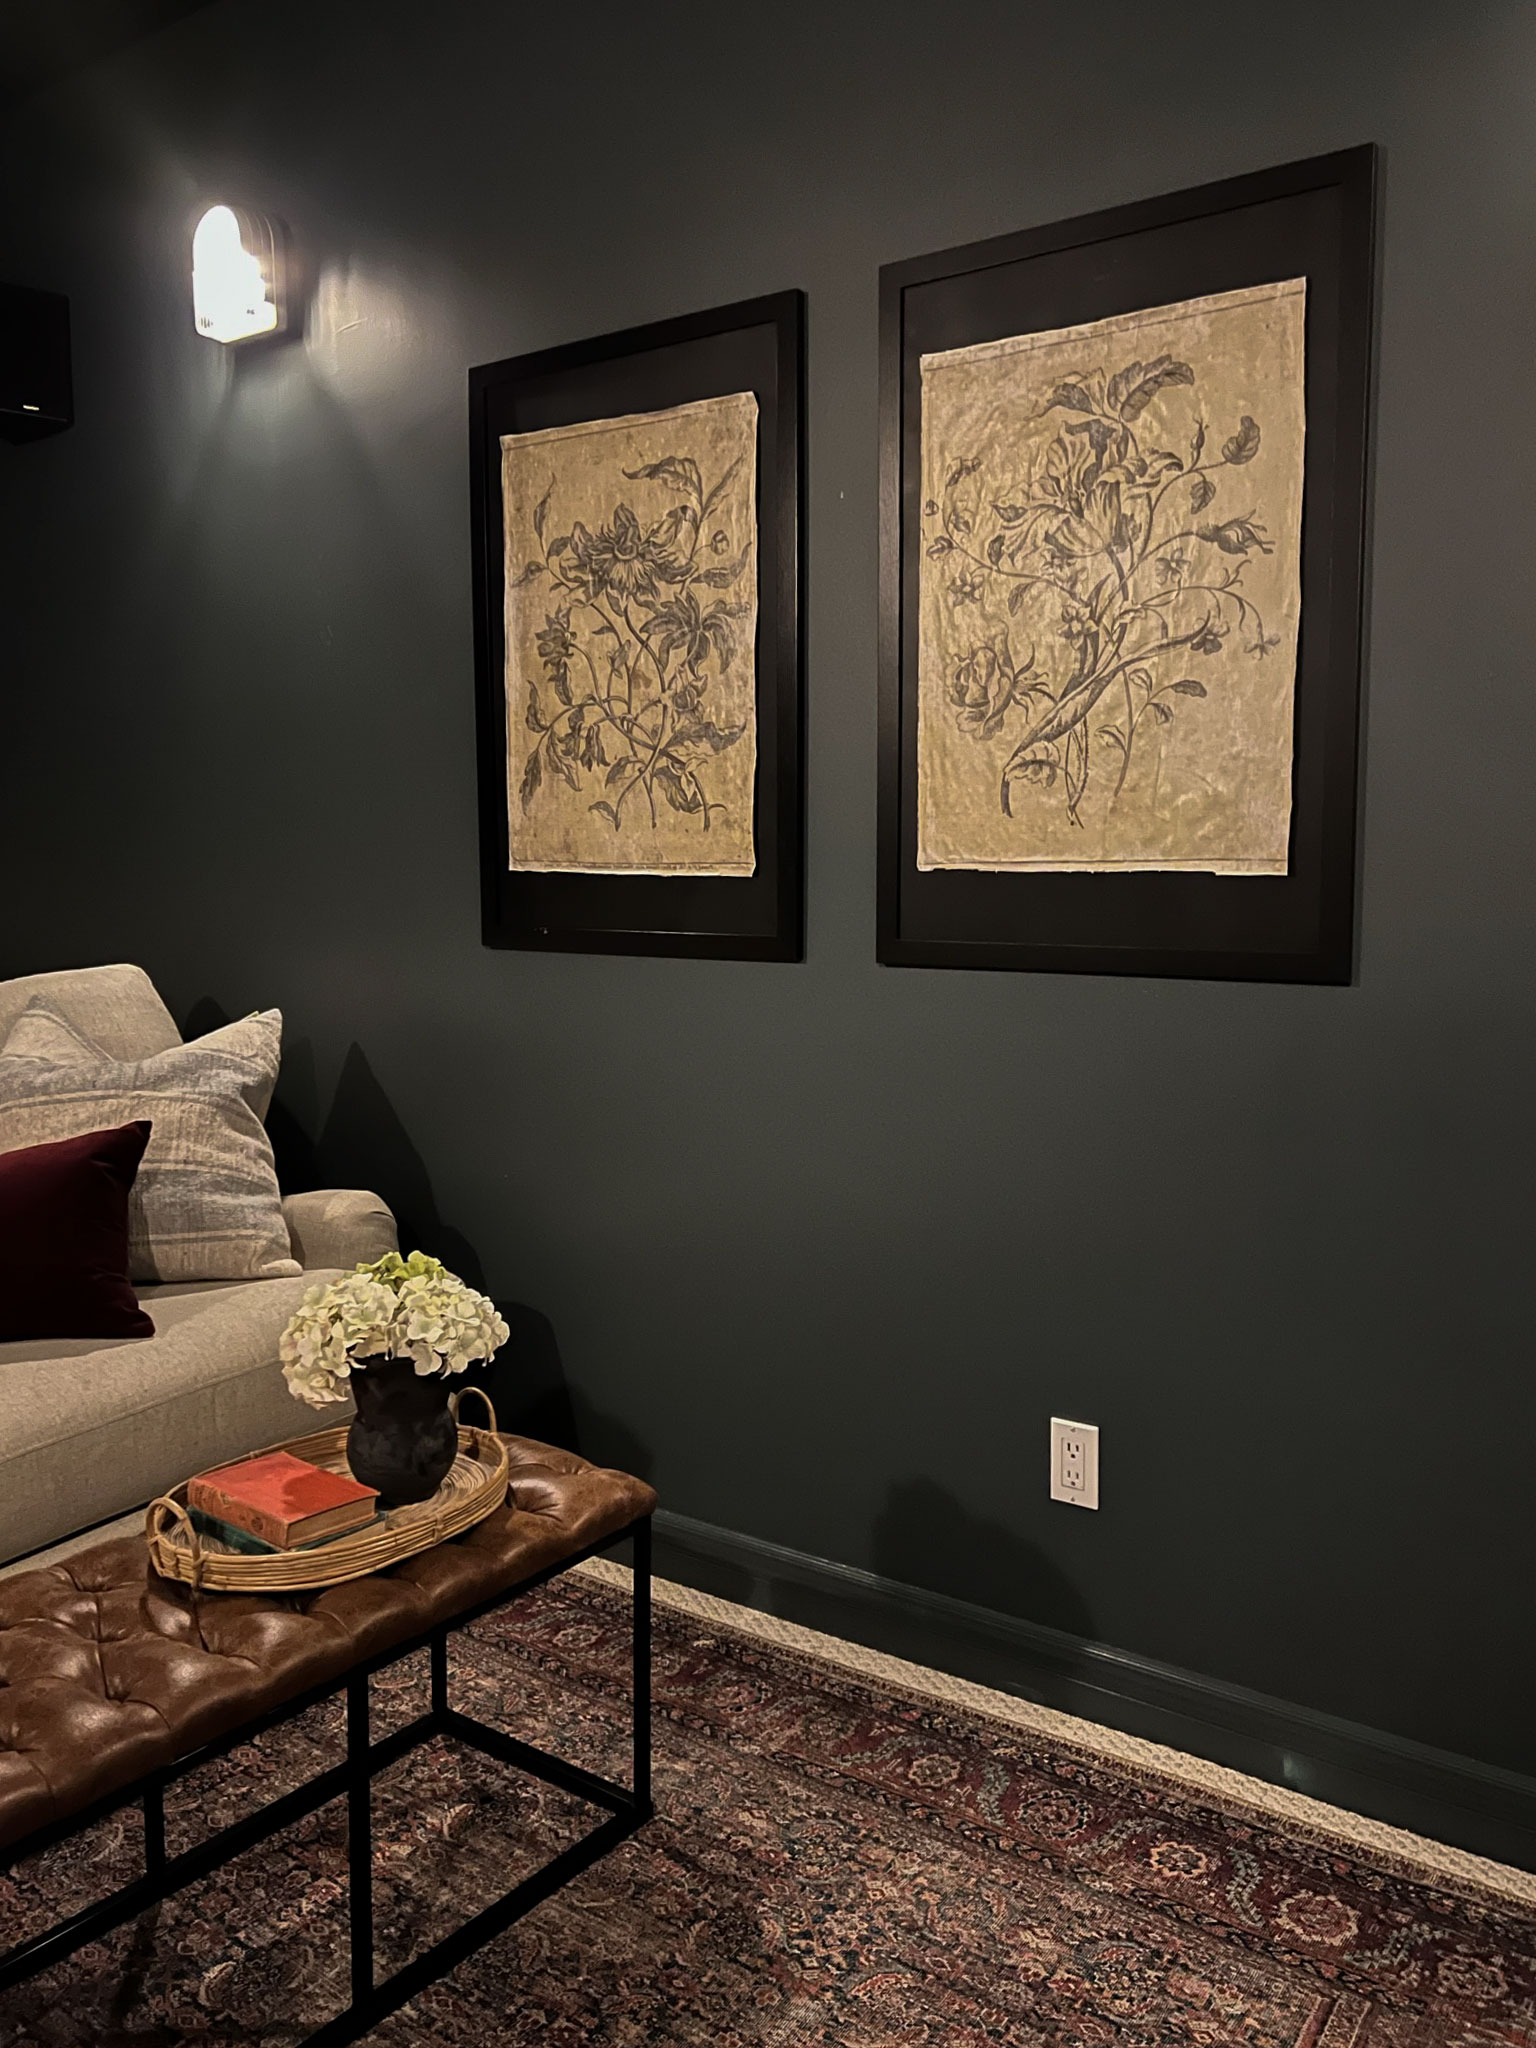
There were 4 sconces on the walls which were ribbed glass with a speckled, painted finish. Although they were a little strange the shape was good and I liked the ribbed glass, so I just took them down and painted the speckled part using my favourite gold spray paint.
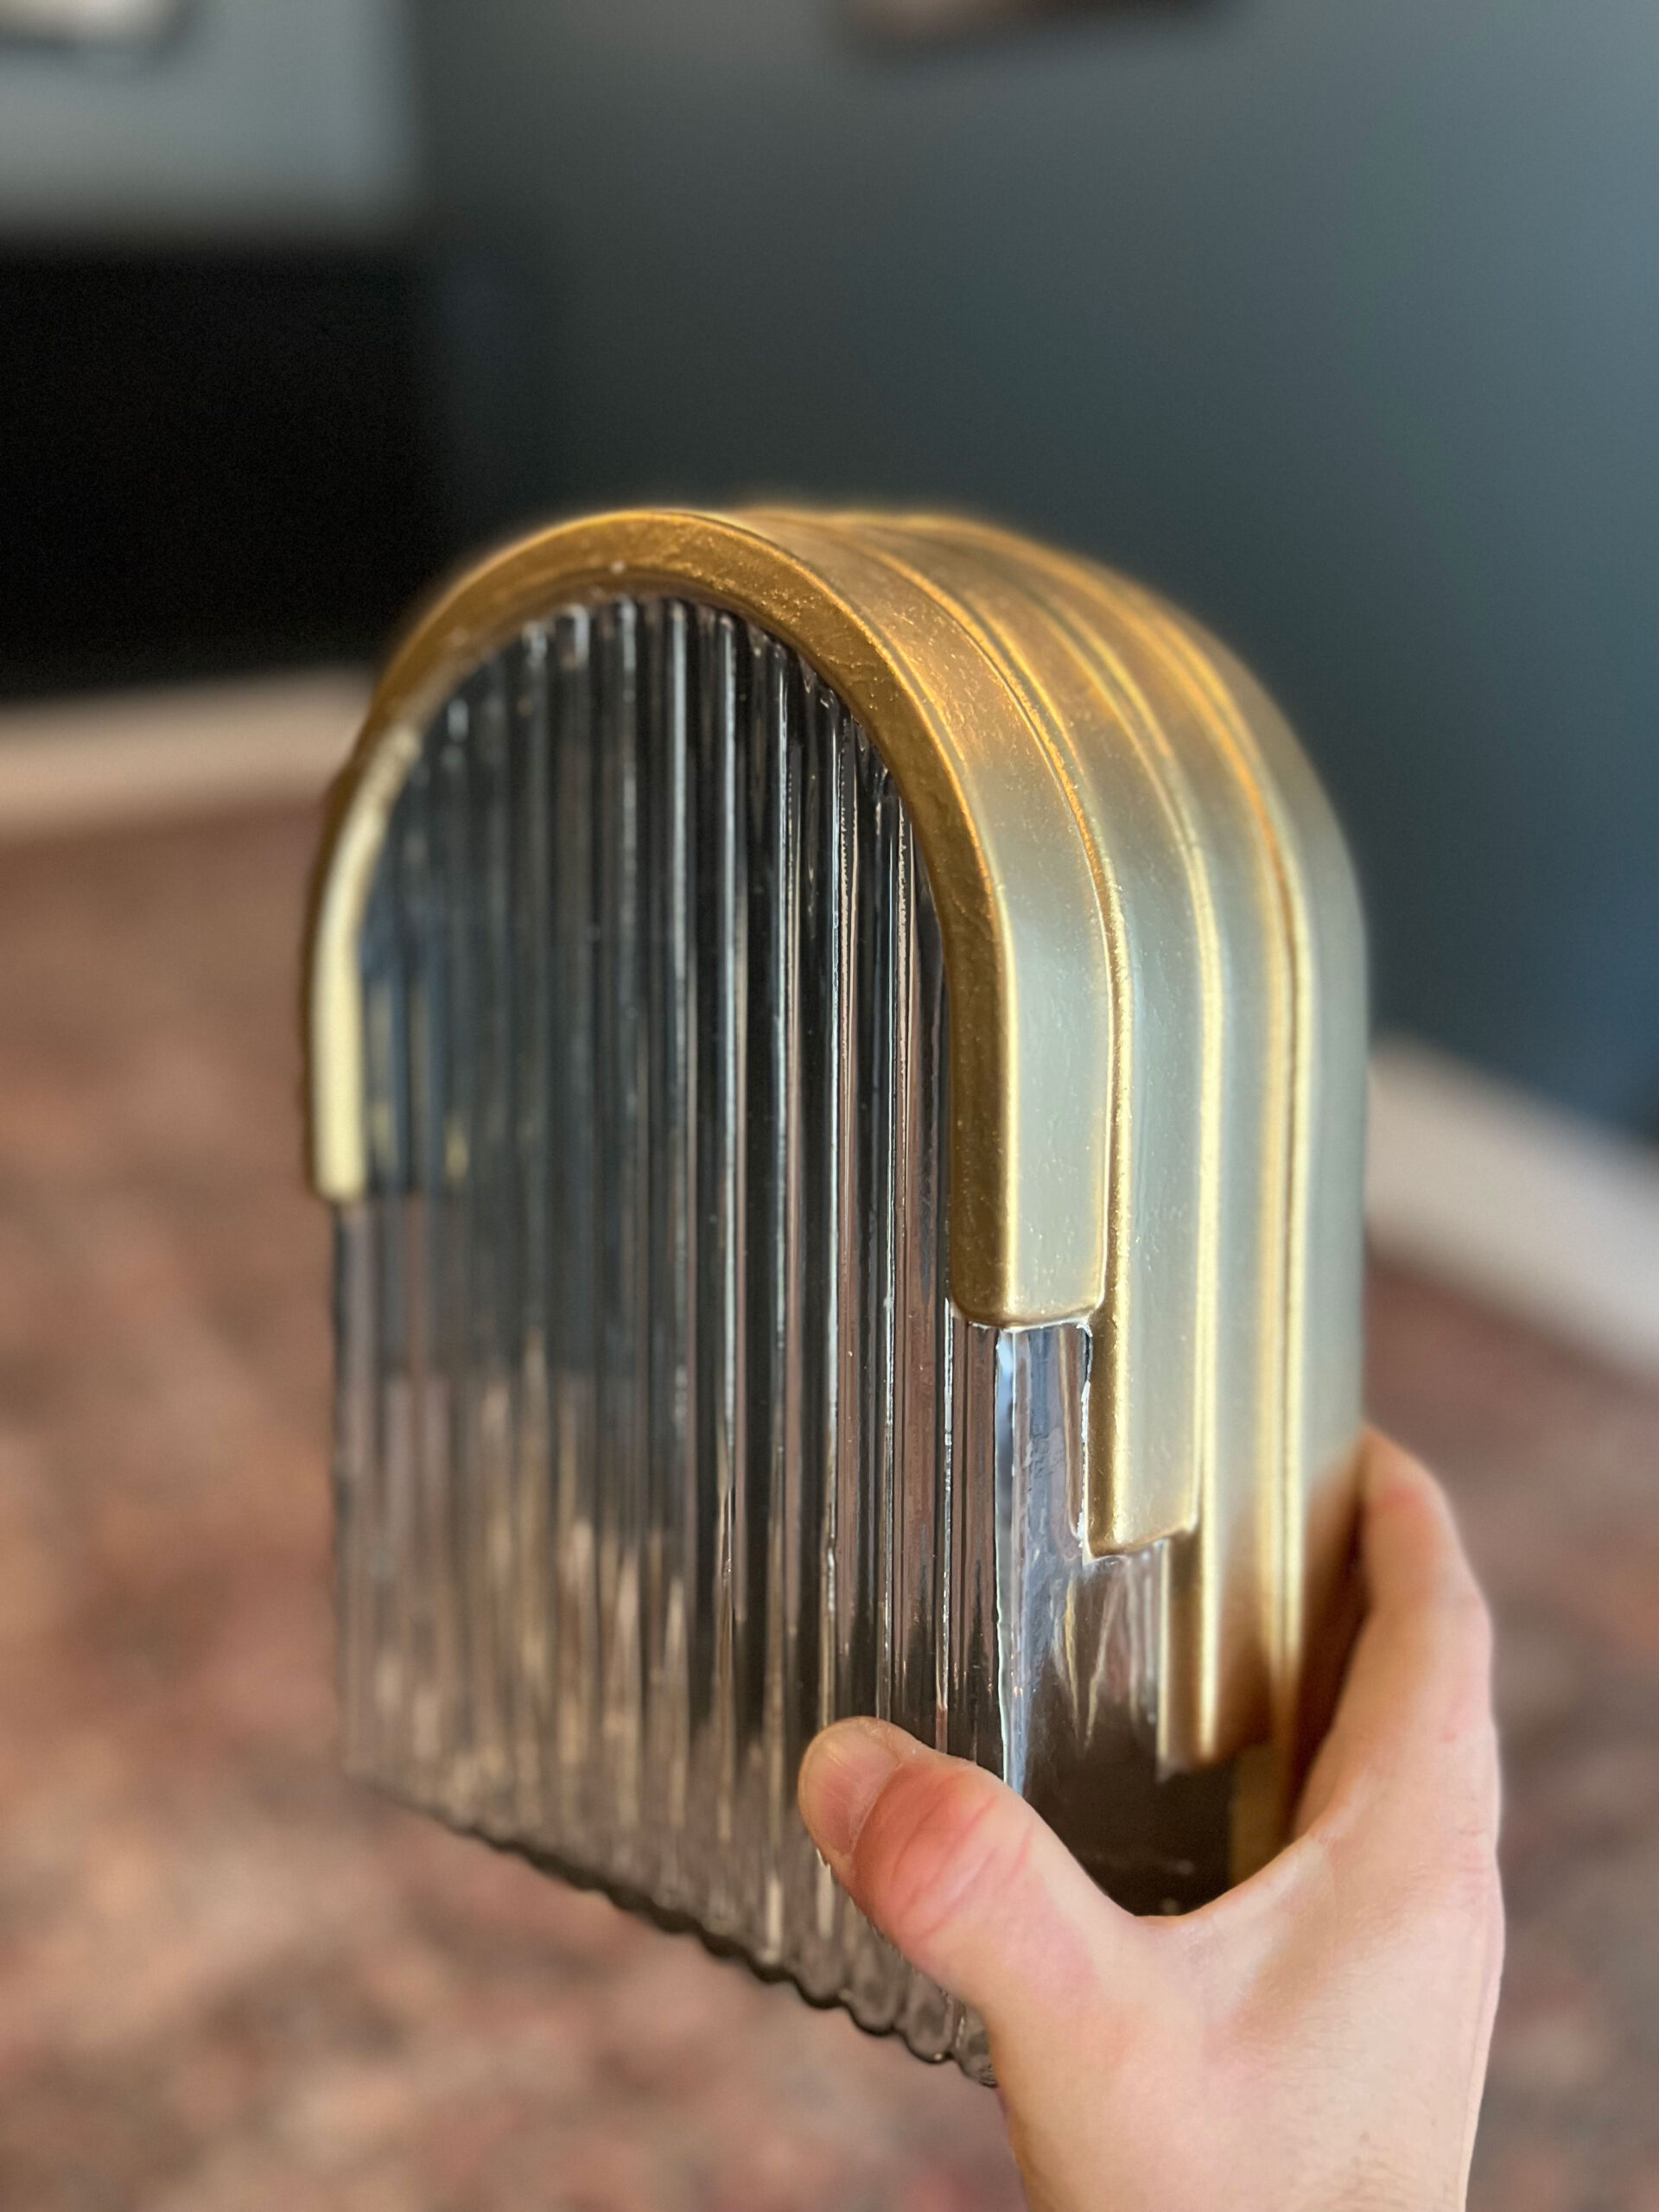
Those sconces are already installed on a dimmer, which is essential in my opinion in a home cinema. Having the opportunity to lower the lighting really helps set the mood (and see the screen!)
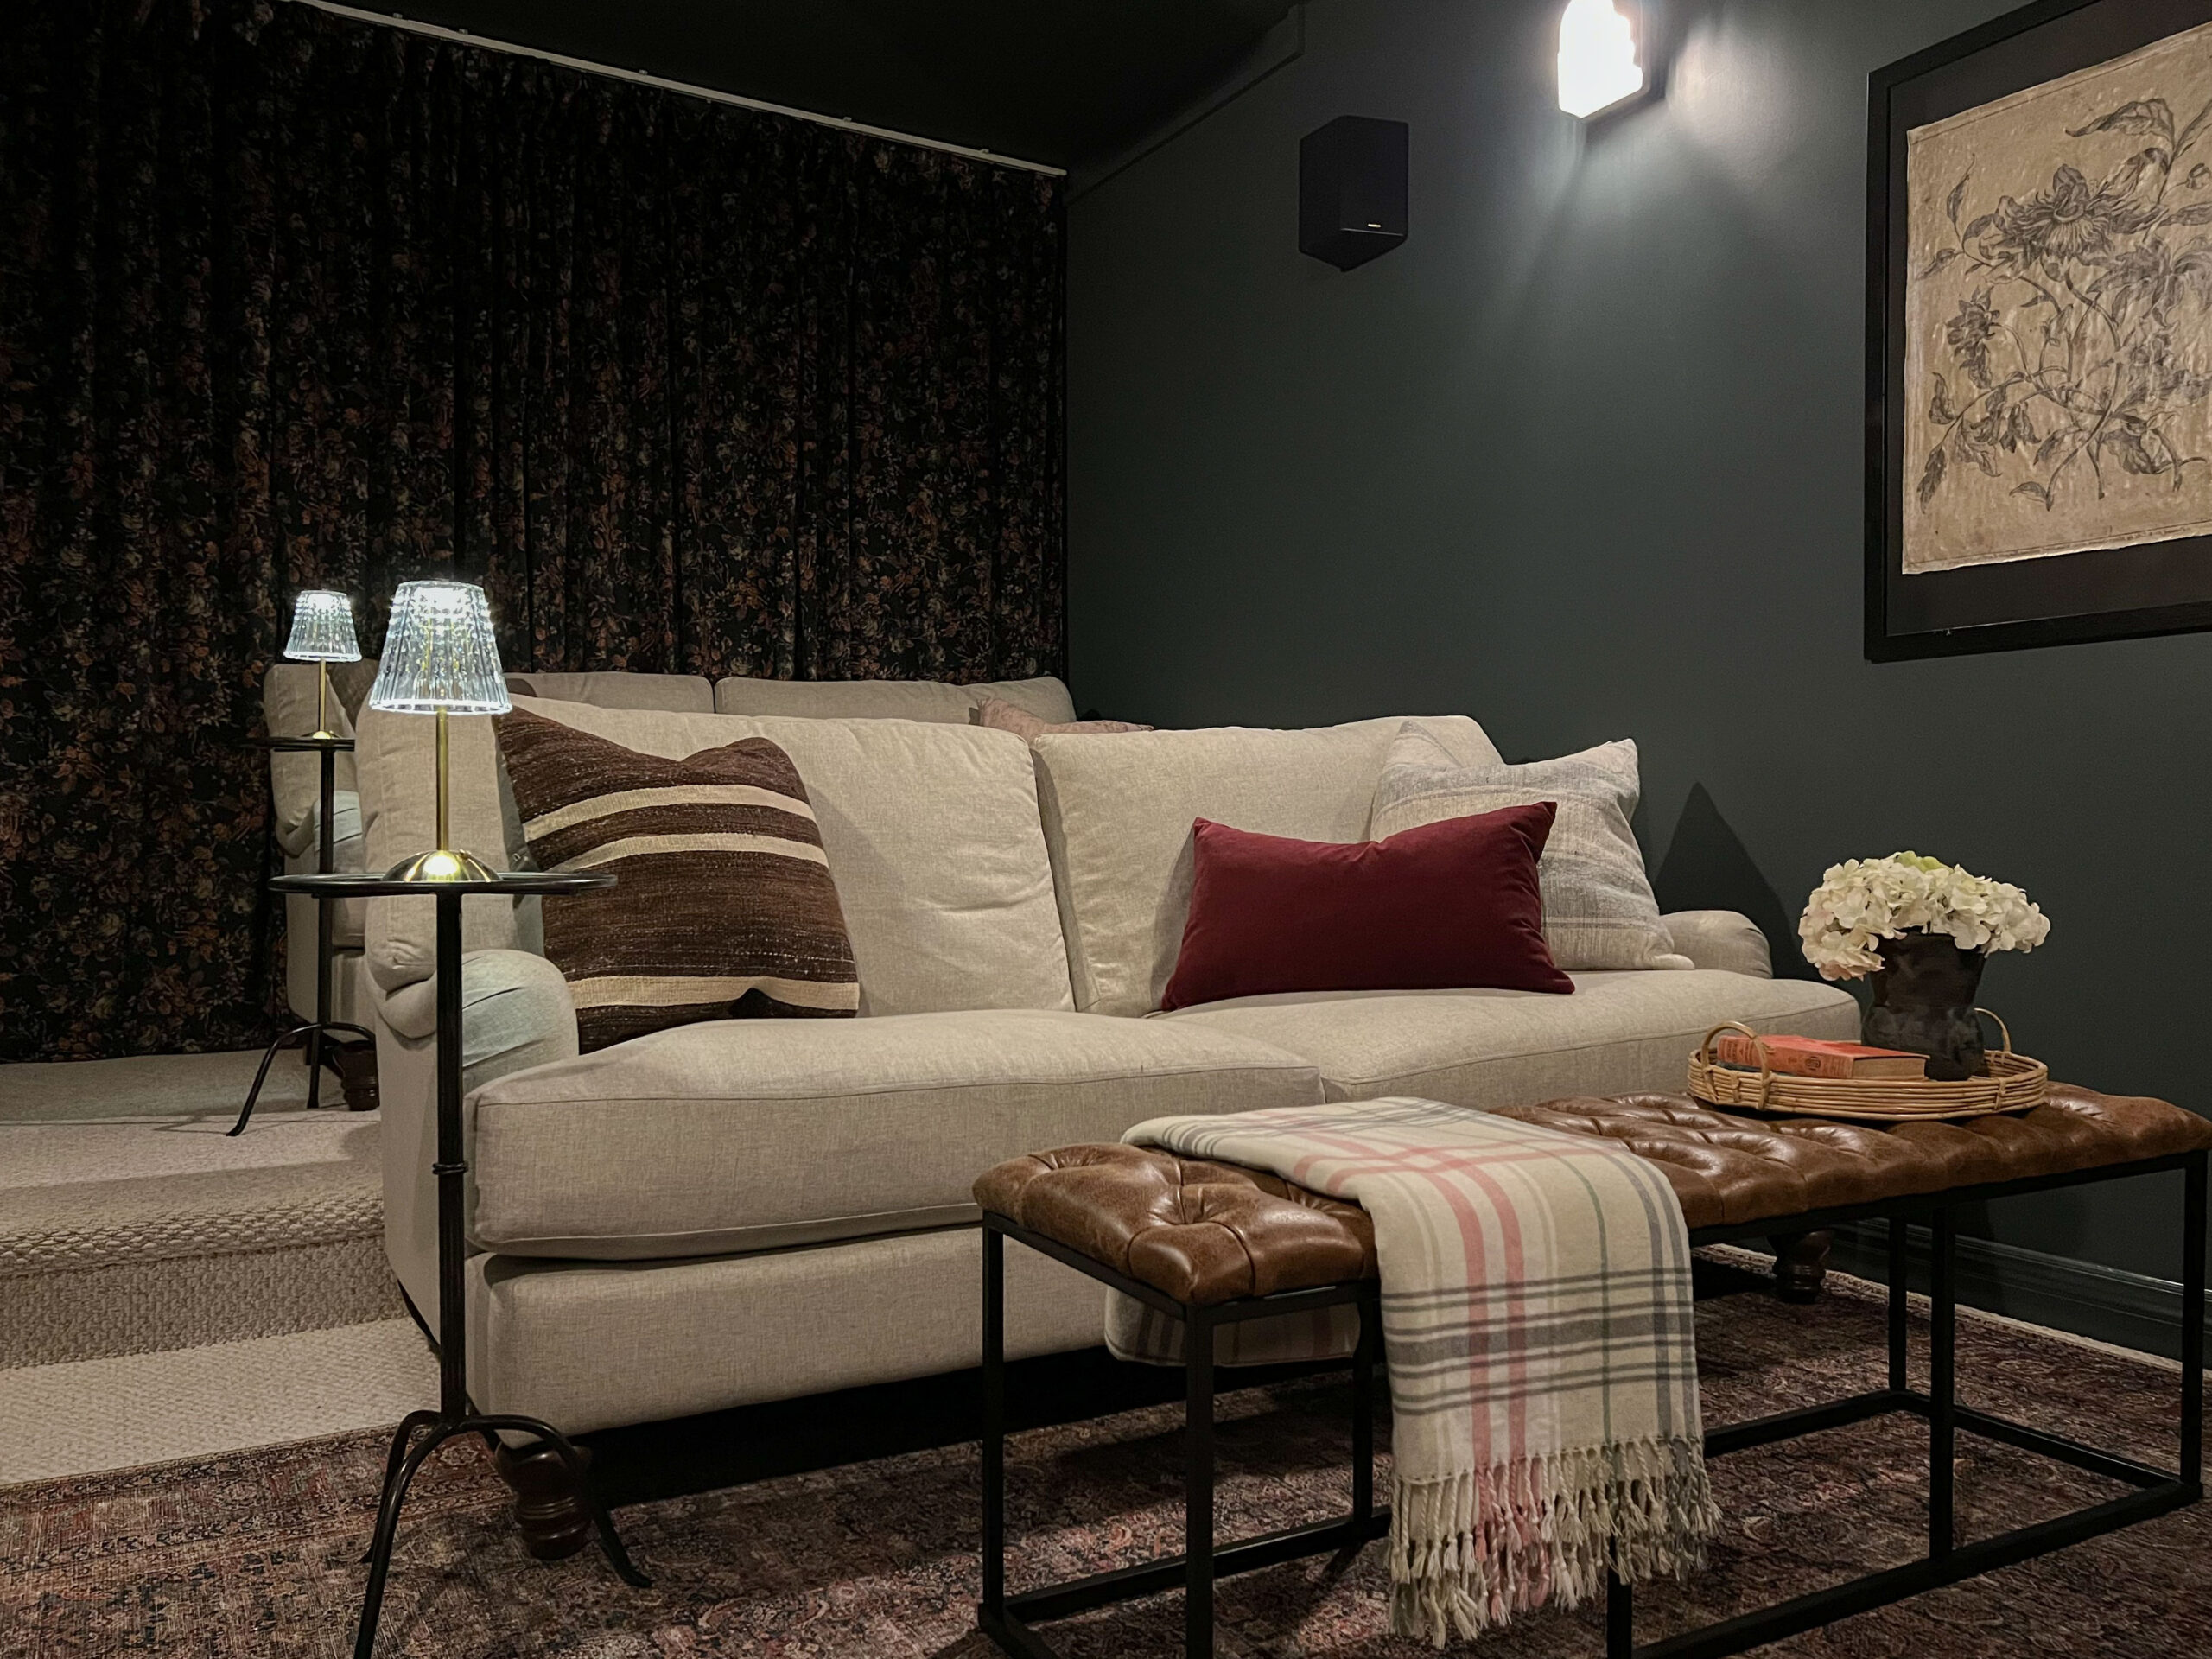
We generally turn off all of the ambient lighting when we are in that room but then its so dark, you can’t see your popcorn or find the right button to push on the remote. So I decided to buy a couple of little battery-operated lamps to have handy to switch on as you need it, without getting up to hit the lights. They are just the cutest and give off just the right mood!

Tables
We also needed a place to put that lighting, to place a drink, and a bowl of popcorn, of course. I grabbed a couple of these little cocktail tables and put them on the side of the couches further from the wall. They are light and easy to move around so you can place them wherever you need them.
Then, because I was using what I already had, I put a leather upholstered bench in front of one sofa to put your feet up on, and an old antique bench I’ve had for years in front of the other sofa. Feet can officially be propped!
The old bench was really weathered and rustic and while the benches are very different stylistically, I thought they could tie together a bit better than they did. I took a bit of Linseed Oil that I had in my garage and oiled the bench to enhance it’s natural colour. It is much more brown now and a lot closer to the colour of the leather bench so I feel like they tie together a lot better!
Rug
The rug was also something I had on hand. I bought the rug for my guest room makeover last year, but since then my son moved back into that room and it has been in our storage room ever since.
This room is carpeted and also has a step down for the two levels, so it’s probably not really a place one would think to put a rug and I don’t think I would have bought one for this room. However, I had the rug so I decided to try it and I LOVE it! The colour is so good with the new wall colour.
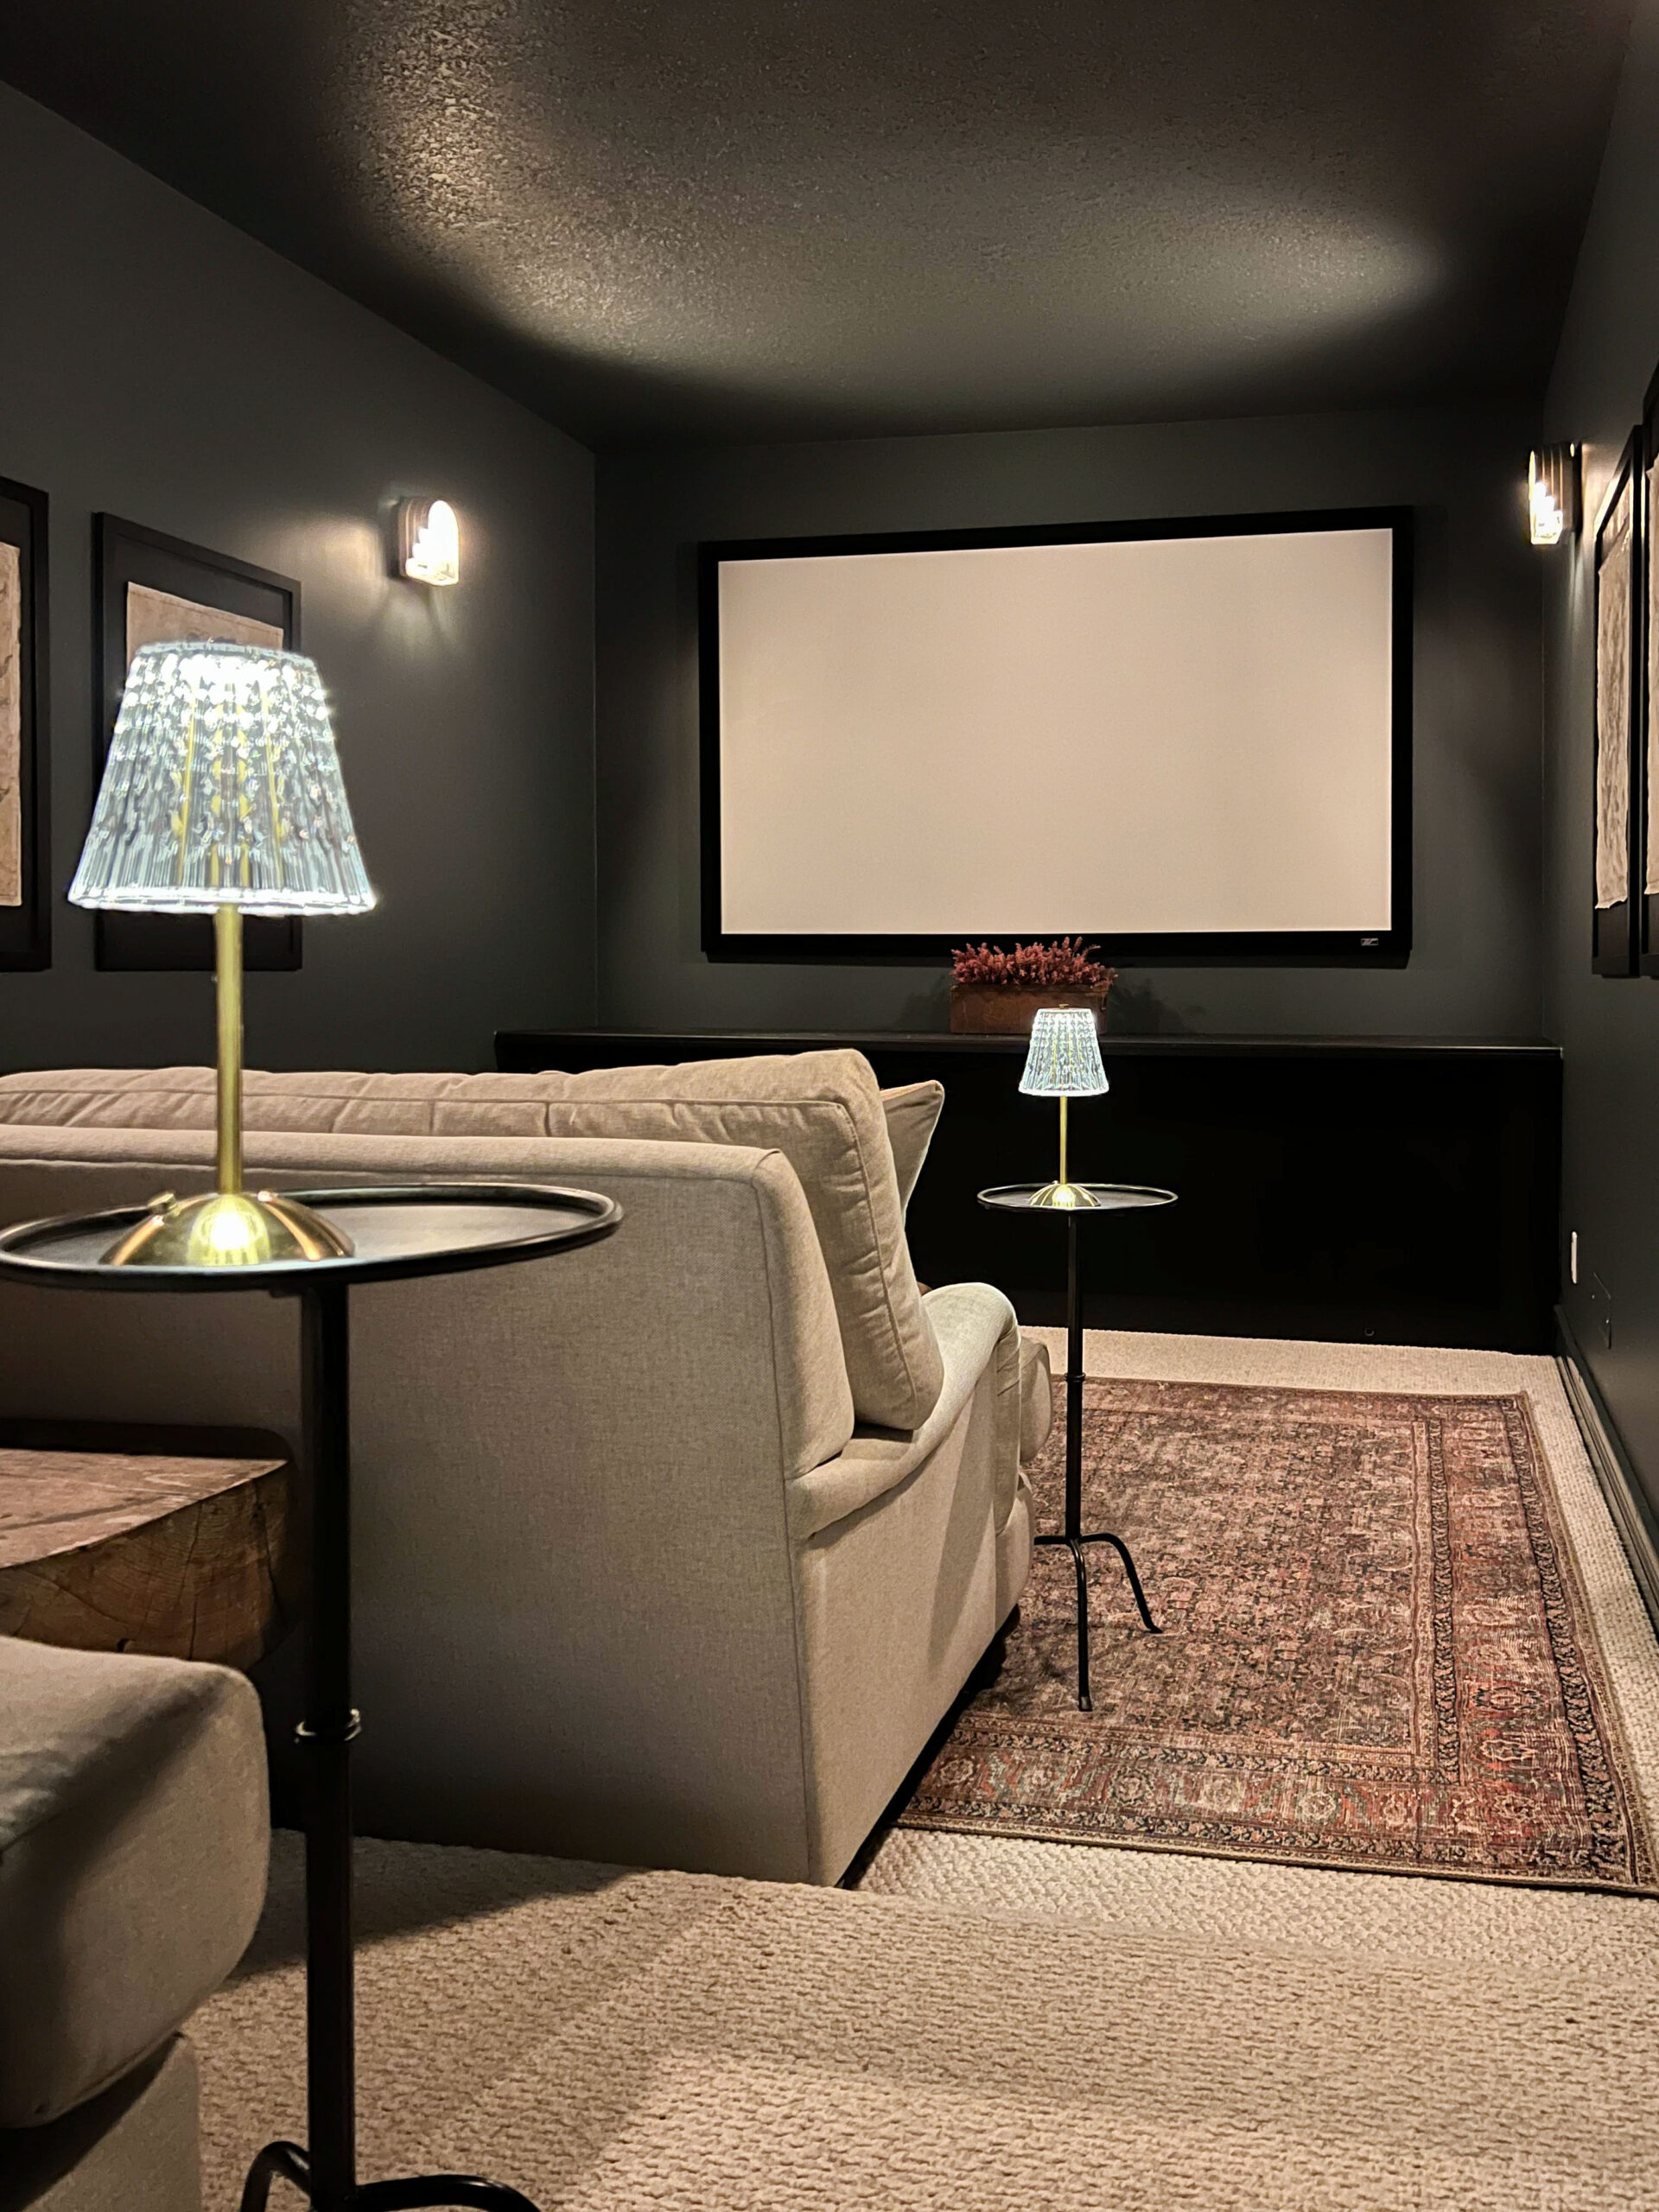
Since the couches needed to be squished up to one wall in order to have a walkway on one side, I turned the rug sideways so that it almost goes wall to wall. This is not the way you would normally place a rug, normally you would try to have a more even amount of the existing flooring on all sides. But turning the rug allowed us to keep the rug under the furniture (a must!) as well as have some of the rug on the walkway. I think it works!
If you are ever wondering how you can add a little personality to a space, consider a rug! This one is really affordable and low pile so it’s perfect for layering on top of the existing carpet.
Art for the Media Room Makeover on a Budget
The previous art we have had in here (vintage movie posters) I’ve had for years in our old family room and so I decided to change them up with a little DIY. I repurposed the existing frames and made some DIY tapestries for this space. I love how they turned out! You can read all about how I made those here!
Before and After of the Media Room Makeover
This really is quite a dramatic before and after considering it was a quick and budget friendly makeover! The few items I bought for this space were limited to items that would really make the room more functional. Paint and the dark walls were really the star of this makeover!


Sources
Sources for this room are included below.
Paint: Valspar Cobalt Cannon (Eggshell on walls and ceiling, Semi-gloss on trim)
Art (DIY)
Future Plans
This movie room was meant to be a quick makeover, and it was! It certainly is very nice as it is, but I do have a few more things I was thinking that I didn’t have time for this go around.
The built ins at the front of the room and on the side that hold the sound system could use a little update. I would like to change out the doors at the front of the room which are currently covered in speaker fabric, maybe for something a little more my style. (Raffia cloth? Some gathered fabric? I have some ideas!)
The built-ins on the side wall are always kind of a mess so they could benefit from some doors as well.
Wouldn’t a little wall molding be awesome in here? Perhaps some fabric-covered acoustical panels?
And while the curtains are good for now to block the light, they do feel a little make-shift to me. I think the best option would be to fill in the whole archway with a wall and a door. The back of the couch is always going to block most of that archway anyway. A wall would also block a lot more sound when some people in my house are blasting the latest action flick!
So let’s call this movie room 1.0, and perhaps I will come back to it someday!
Such an amazing transformation! This makes me want a media room, which I would have never thought of before!
Hi Erin,
I love what you’ve done. And the color you chose for the room is perfect. I bet it’s fun to watch a movie on the big screen. I can smell the popcorn.😋
I love this so much! It’s so cozy with the double sofas. The rug and curtains make the room 👌
Looks so cozy, and inviting. That wall colour is so great – reads different every time I look at it and i really like that you painted the ceiling. It really makes it feel like a different room.
Thank you Amanda!
Thanks so much Mary!
Thanks Margaret! We were lucky we already had a pair of matching sofas!
Thank you Leslie! Painting the ceiling made all the difference!
This is so beautiful, as always! Love it all!
Looks perfect ERIN, can’t wait to see it!
Thanks Elaine!
Thank you Brooke!
Hi Erin,
I just discovered your blog and what a treasure trove! I feel like I’ve hit the jackpot. And as a fellow Canadian I laughed so hard at your Debbie Travis’ Painted House reference. I’m guilty of doing a few walls up DT style in the 90s.
I was wondering if you remember the names of the two sofas in this post? The link just takes me to a mayfair splash page and I given that they have had up so well for you, I would love to know which ones you bought. Thanks!
I am sorry about that, I just updated the link. Let me know if this doesn’t work for you!
Love how cosy and functional you have made this. can I ask what sie your room is please?
It’s about 10′ x 20′!