
Tips for Installing Large Format Tile
I am working through installing large format tile in my basement right now and I am beyond excited with how it is coming out! I am no stranger to installing floor tiles, but this is my first time installing these larger tiles. I researched and put my findings to use, and everything is turning out great! I thought I would share how to install large-format tiles in a blog post in case you think big tiles are in your future!
This post may contain affiliate links. That means if you purchase anything from these links I earn a small commission, at no extra cost to you! This helps support my blog, so thank you!
Table of Contents
- First of All – Why use a Large Tile?
- How to Install Large Format Tile – Tools and Supplies
- Before you Tile, Prep Your Floors!
- How to Install Large Format Tile – Installation Tips
- Step by Step for How to Install Large Format Tile
- You Might Also Like:
This post may contain affiliate links. That means if you purchase anything from these links I earn a small commission, at no extra cost to you! This helps support my blog, so thank you!
First of All – Why use a Large Tile?
I talked a little about this in my last post about the basement design. I wanted hard flooring in this living room and bar area in my basement, but I did not want a wood or wood-look floor.
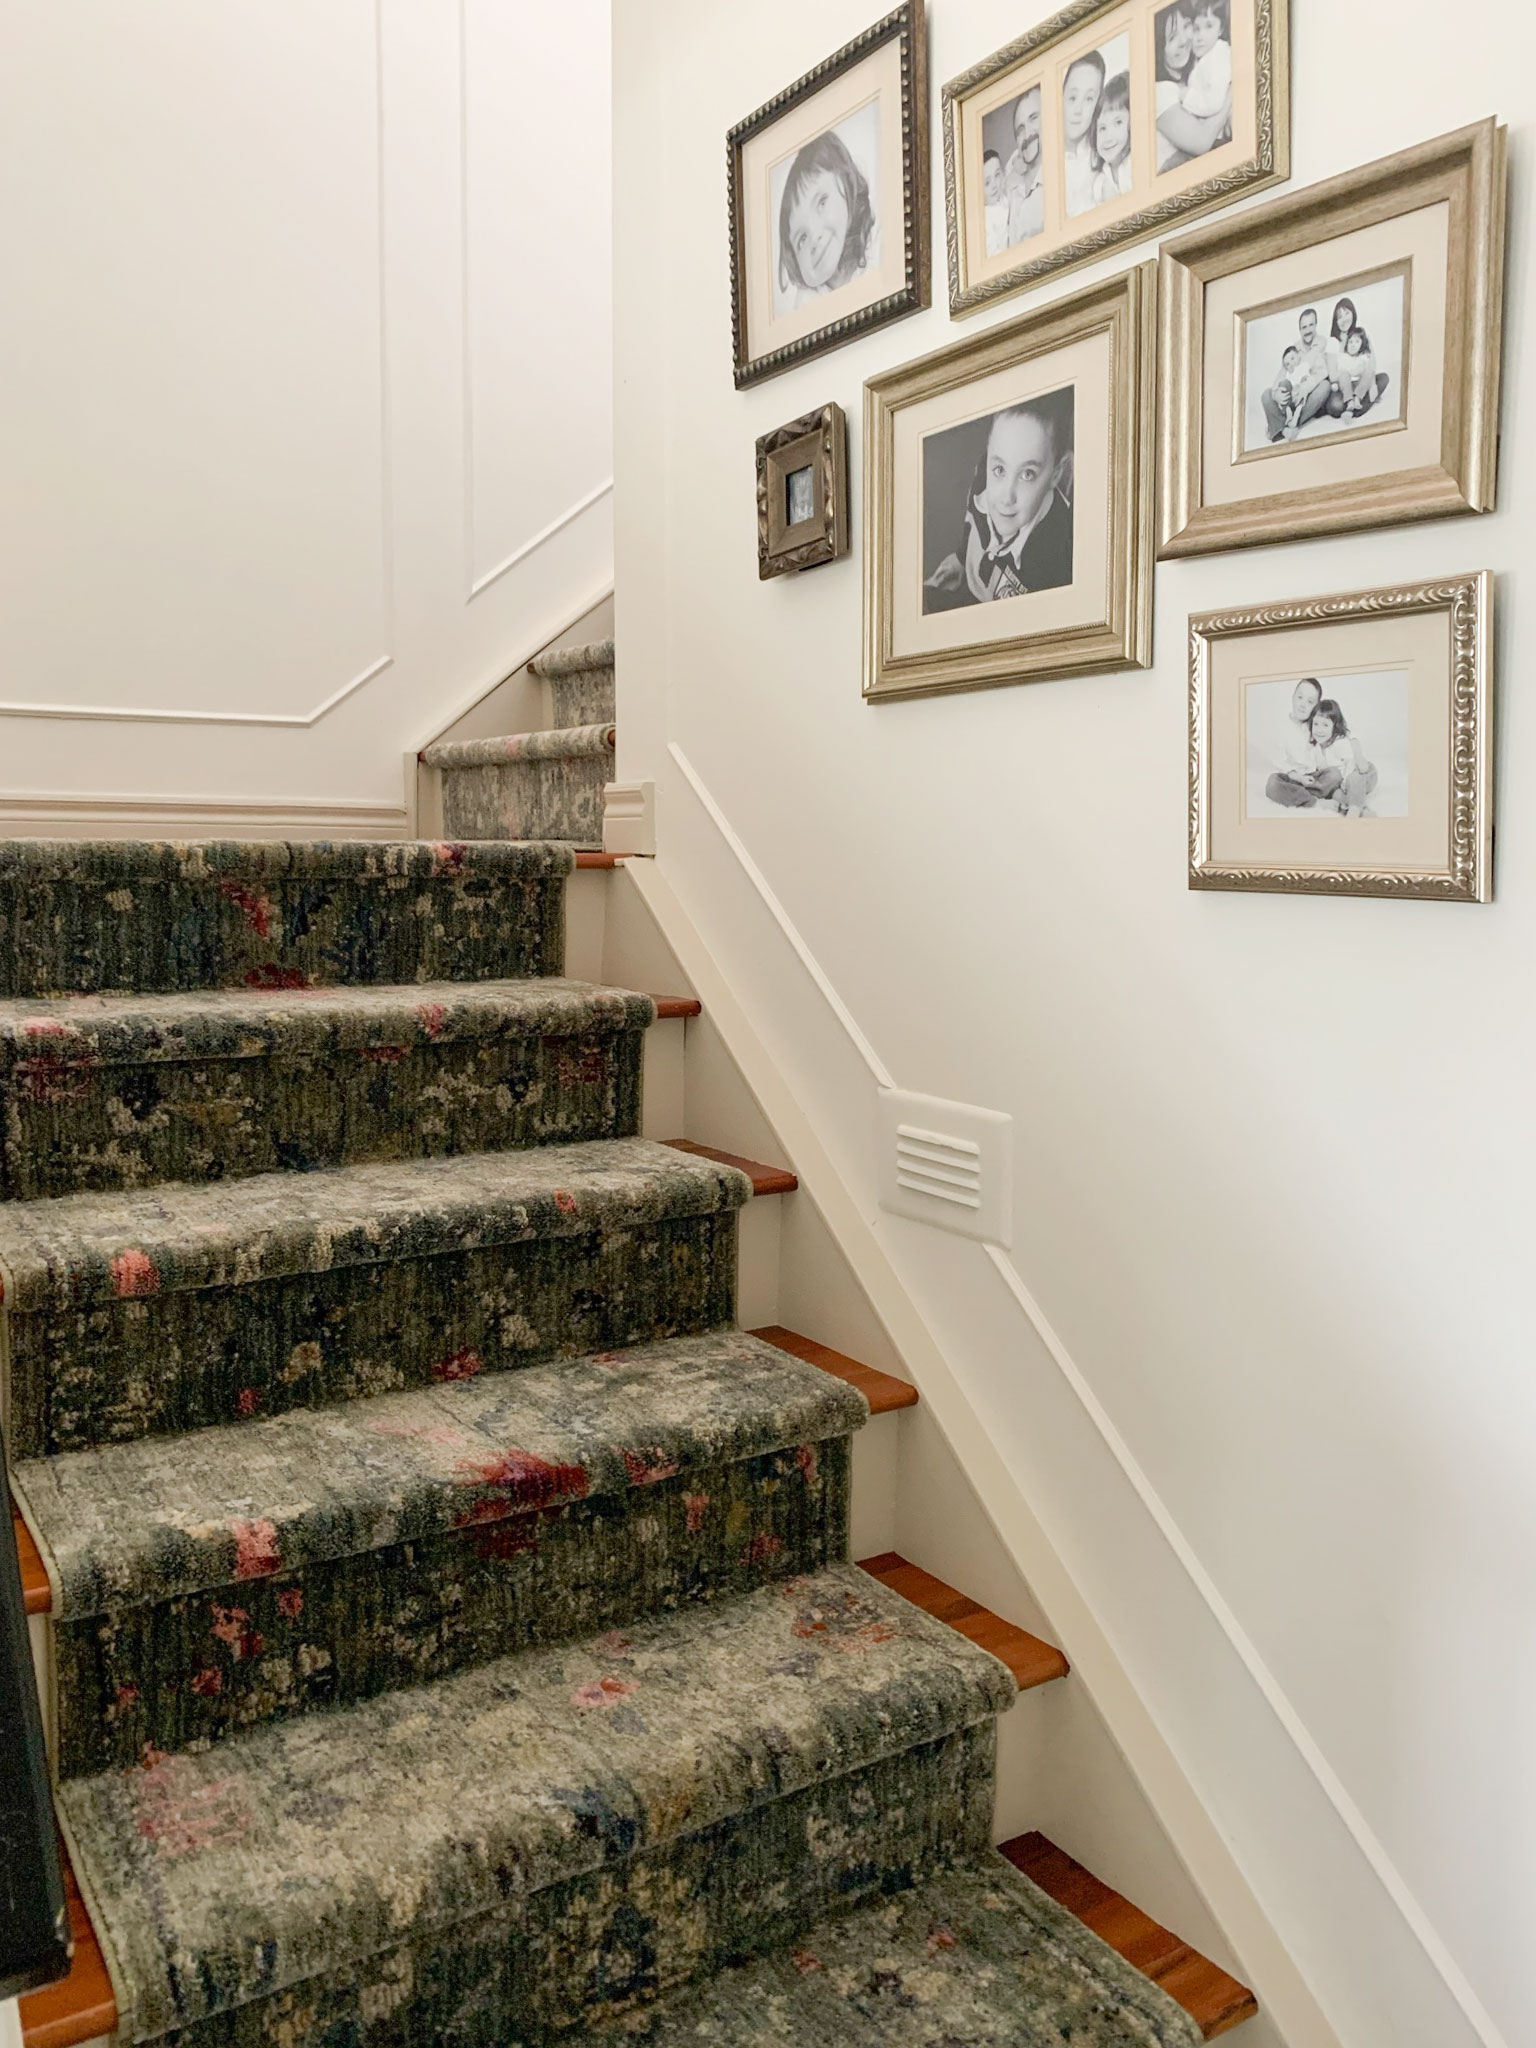
I have hardwood coming down my stairs and I don’t like the hardwood enough to match it (plus, you can’t install real hardwood in a basement) but I thought if I changed to a different wood-look it would look odd.
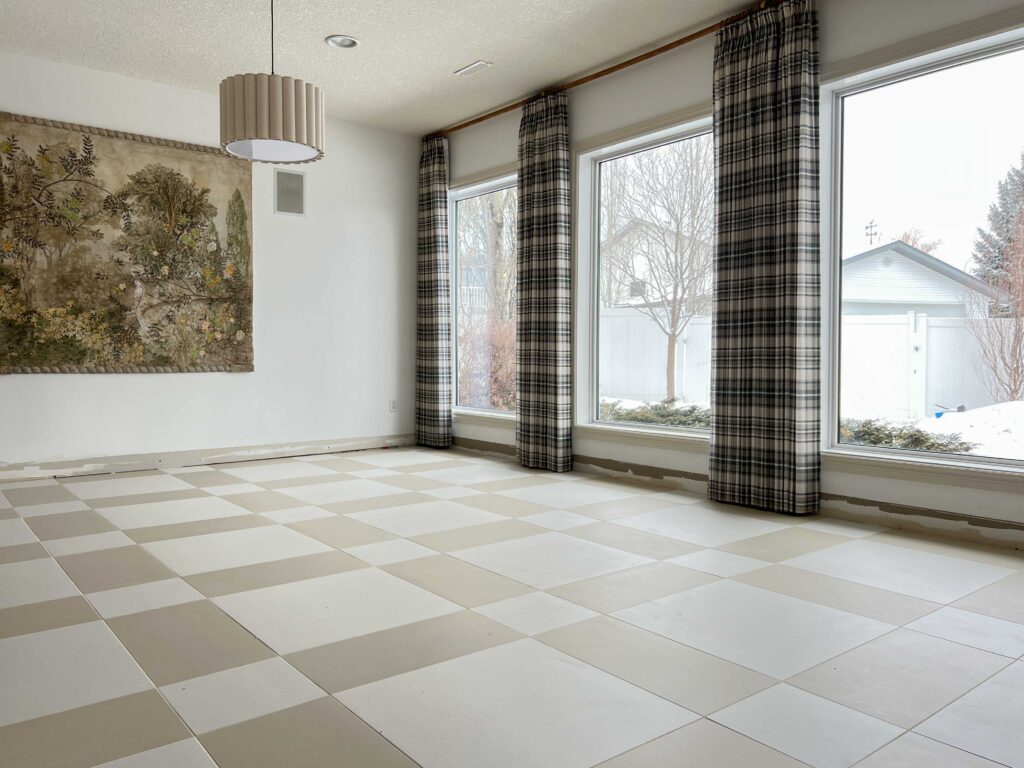
I started playing around with the idea of tile and thought a lot about what type of tile would make sense in a large living space. I thought that anything that was too small might look too much like a kitchen or bathroom. Plus, this is a big space and I think that the bigger the space, the bigger the tile should be.
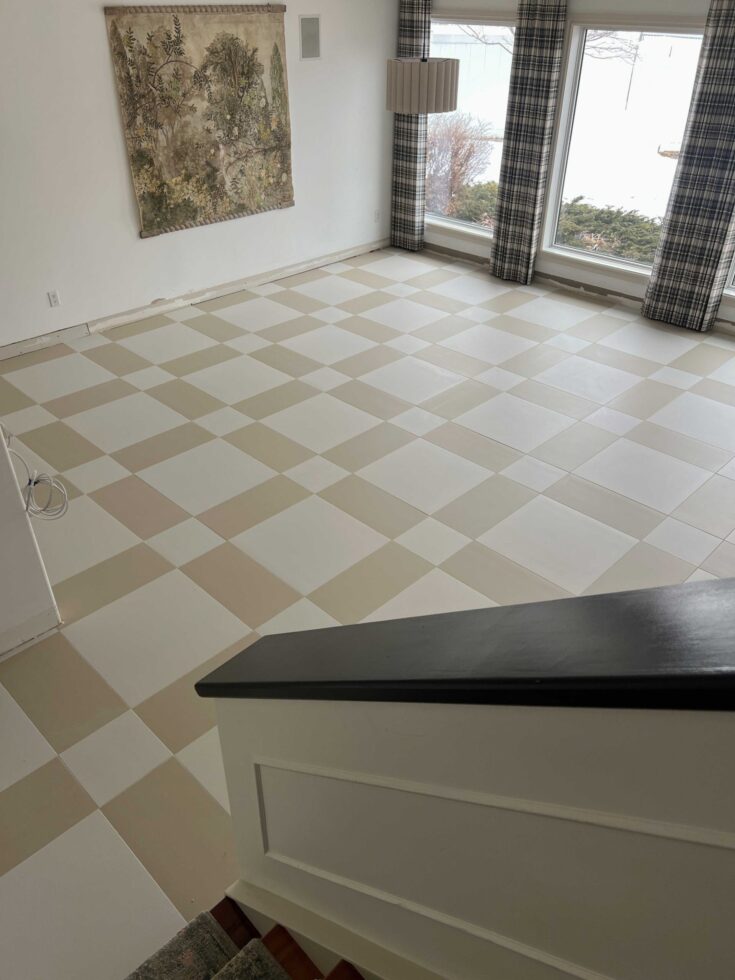
I started thinking about a different tile pattern that I could create using large-format porcelain tiles. I thought that by using an inexpensive basic tile in different shapes and colours, I could create something interesting, affordable, and high-end looking for my basement! I really think it was the best choice for my project.

My basement has underfloor heating installed in the slab, so I was not worried about the tile feeling cold. However, if you don’t have underfloor heating, that could be a concern when installing tile in a lower level on concrete.
The tiles I used are from Olympia (Regal Series) in Shell White and Cream. They come in a wide range of colors, are a great quality tile, and a good choice for doing something like this!
How to Install Large Format Tile – Tools and Supplies
Having the right tools and the right equipment for a project is always a good idea for the most successful installations. Below are some recommended tools and supplies, but keep in mind that your exact requirements might vary depending on the type of tile and type of substrate you are putting it on!
- Tile
- Thin Set Mortar (Be sure to check that you purchase the right mortar for your specific tile type, substrate type, and for large format tiles. It will say on the bag what the mortar is suitable for (ie – for placing on concrete/ plywood, for porcelain or real stone, etc.), and for large format) (Tip! If you are going to be using light coloured grout, find a mortar that is white or light coloured to reduce the chances of some of that mortar showing through the grout!)
- Trowel (I used a 1/4″ square notch trowel for my 24×24″ tiles)
- Tile wet saw (This is the one we have and love!)
- Buckets and sponges
- Kneepads (!!)
- Laser level (not necessary, but recommended)
- Levelling Spacers, and Wedges
- Spacer Installation Tool
- Additional Spacers
- Grout Float
- Grout
Before you Tile, Prep Your Floors!
We removed carpet from our basement so the first thing we needed to do is make sure the floor was really clean. We used some scrapers and a power hammer drill with a scraper chisel bit to remove all of the remnants of the old floor. We were able to get everything clean, but if you have any bumps or high spots you need to get that level. You can use scrapers or angle grinders to remove any high spots for proper substrate preparation.

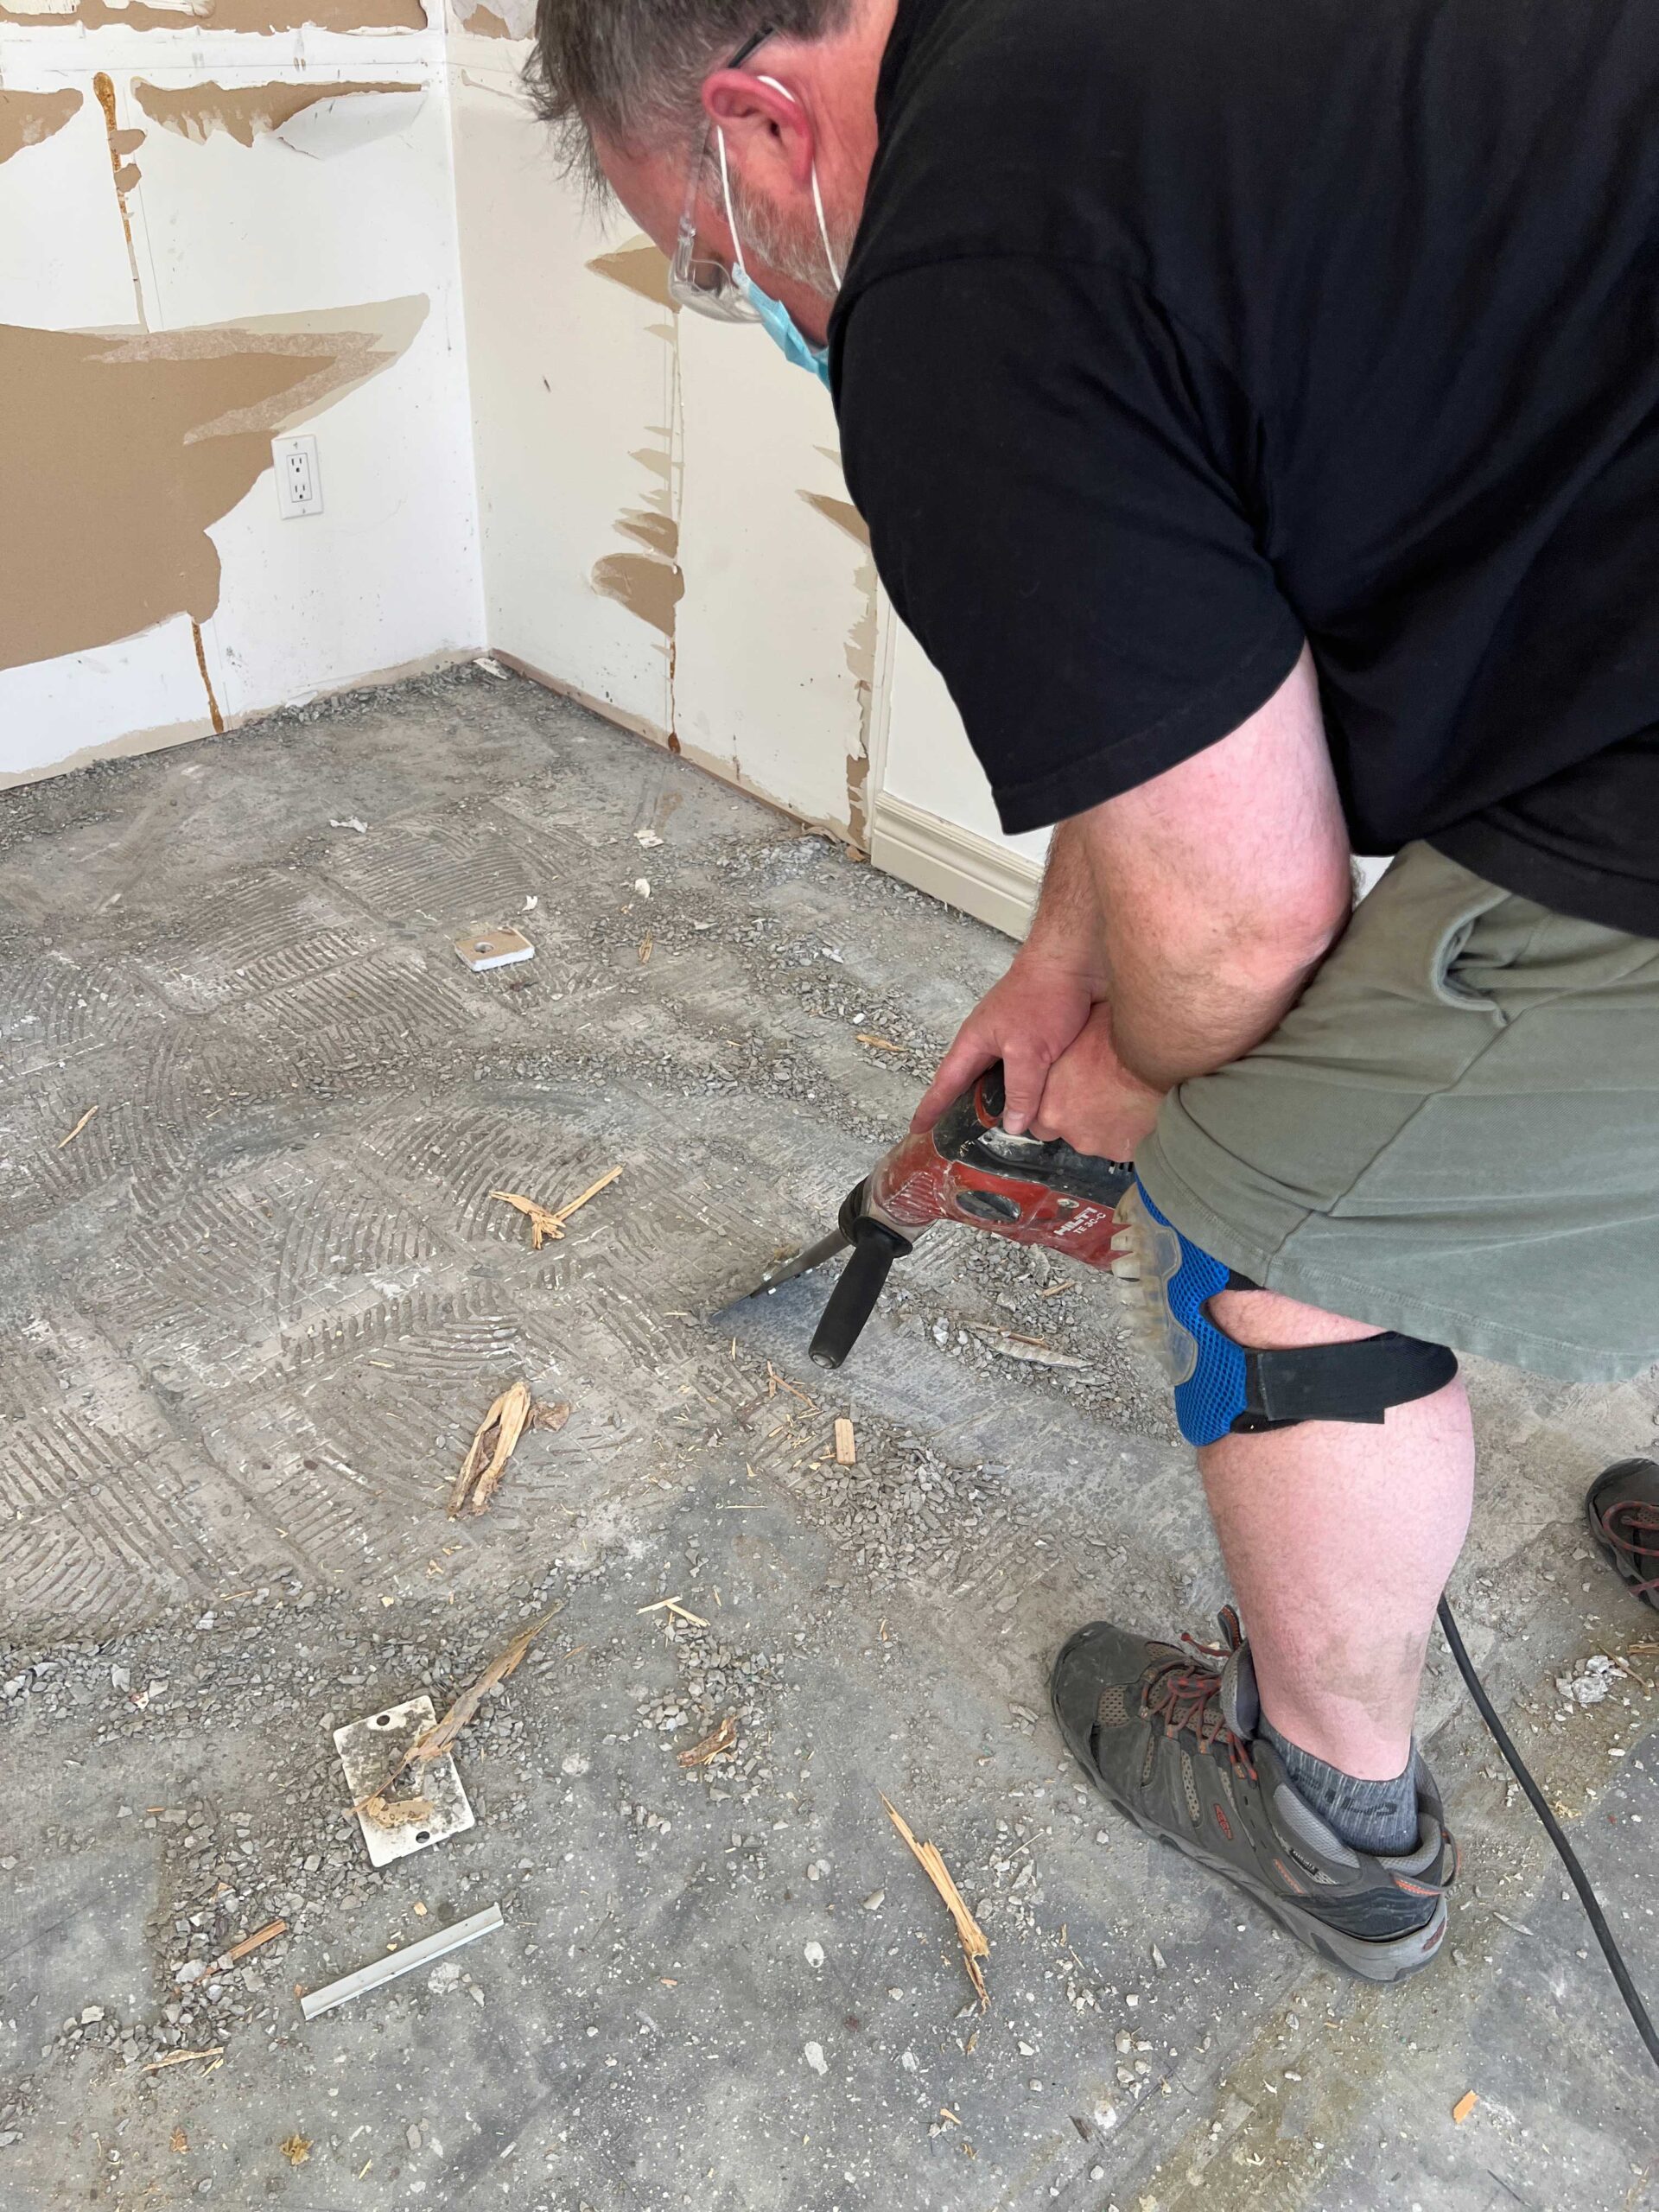
Next, we had a look at our concrete floor to see how flat they were. Our concrete was extremely flat and level so we did not have to do anything to it. If you have dips in your floor, you might want to consider installing a self-leveling floor first before tiling.
Large format tiles (and all tile, really!) need a strong substrate to sit on that is not going to flex or move at all. In our basement, concrete was great for that. If you have a wood subfloor, you may have to reinforce your floor or install an uncoupling membrane to make sure your tile does not move and flex with the floor.

Paying particular attention to a well-prepared floor will make your installation process go a lot smoother.
Before you begin, think about how you want to lay out your tile to ensure that the tile looks balanced in the room. Once you have decided where to start, use your laser level to mark a line to follow with the first row. I talk more about that in this post.
How to Install Large Format Tile – Installation Tips
I have done a few posts on how to tile. I have a post on how to tile a bathroom, my top tips for installing floor tile, how to tile over tile, how to install a backsplash tile, and tips for mosaic tile. I would recommend you check them out, as there are a lot of tips on how to lay out your tile, how to transition to other flooring types, etc!
But first, here are my top tips of things to do for large tiles that are a little different than other tiles.
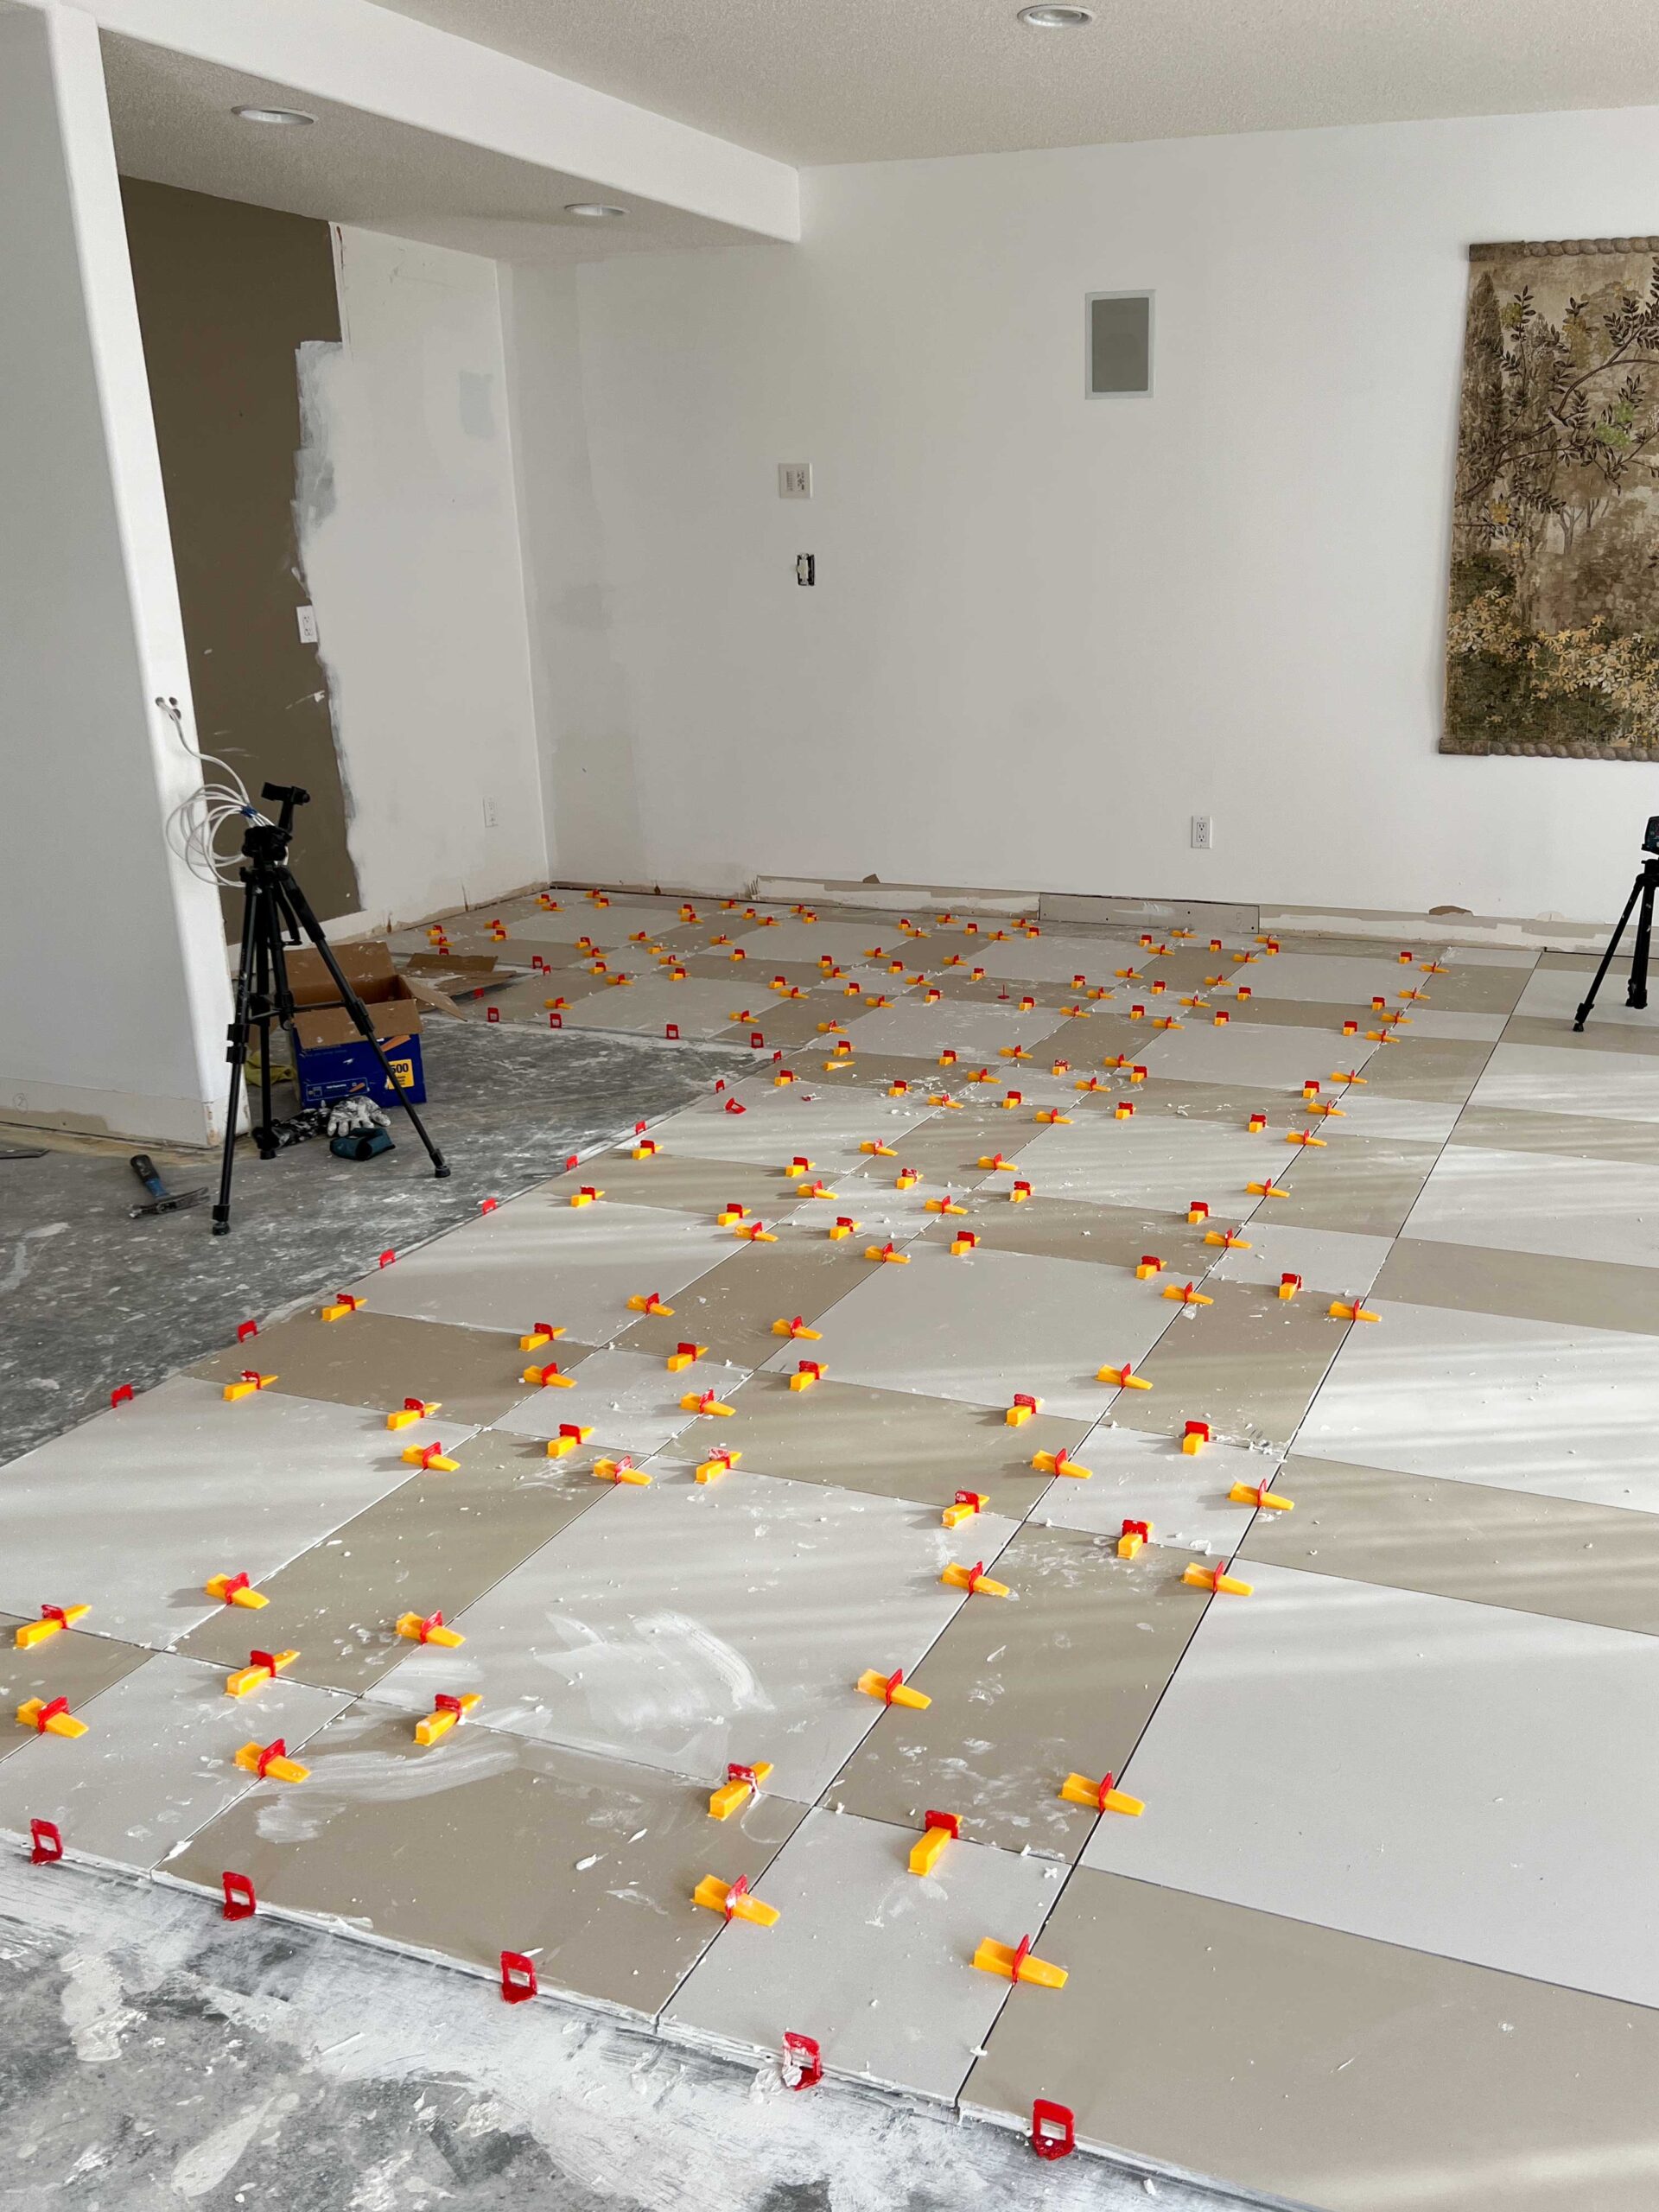
How to Install Large Format Tile – Tip 1 – Use a Leveling System!
Levelling spacers are basically a tile spacer that also acts as a leveler to make sure that the tops of the tiles are even with one another – so you don’t end up with a toe-stubber! With smaller tiles, you can usually do this manually because the tiles are smaller and you can be careful not to push them down too much or you can lift them and add a little extra mortar when needed.

The larger tiles (anything over 12 x24) are much harder to do that with. You have to level them across such a large area that it is very difficult to do without some sort of help.
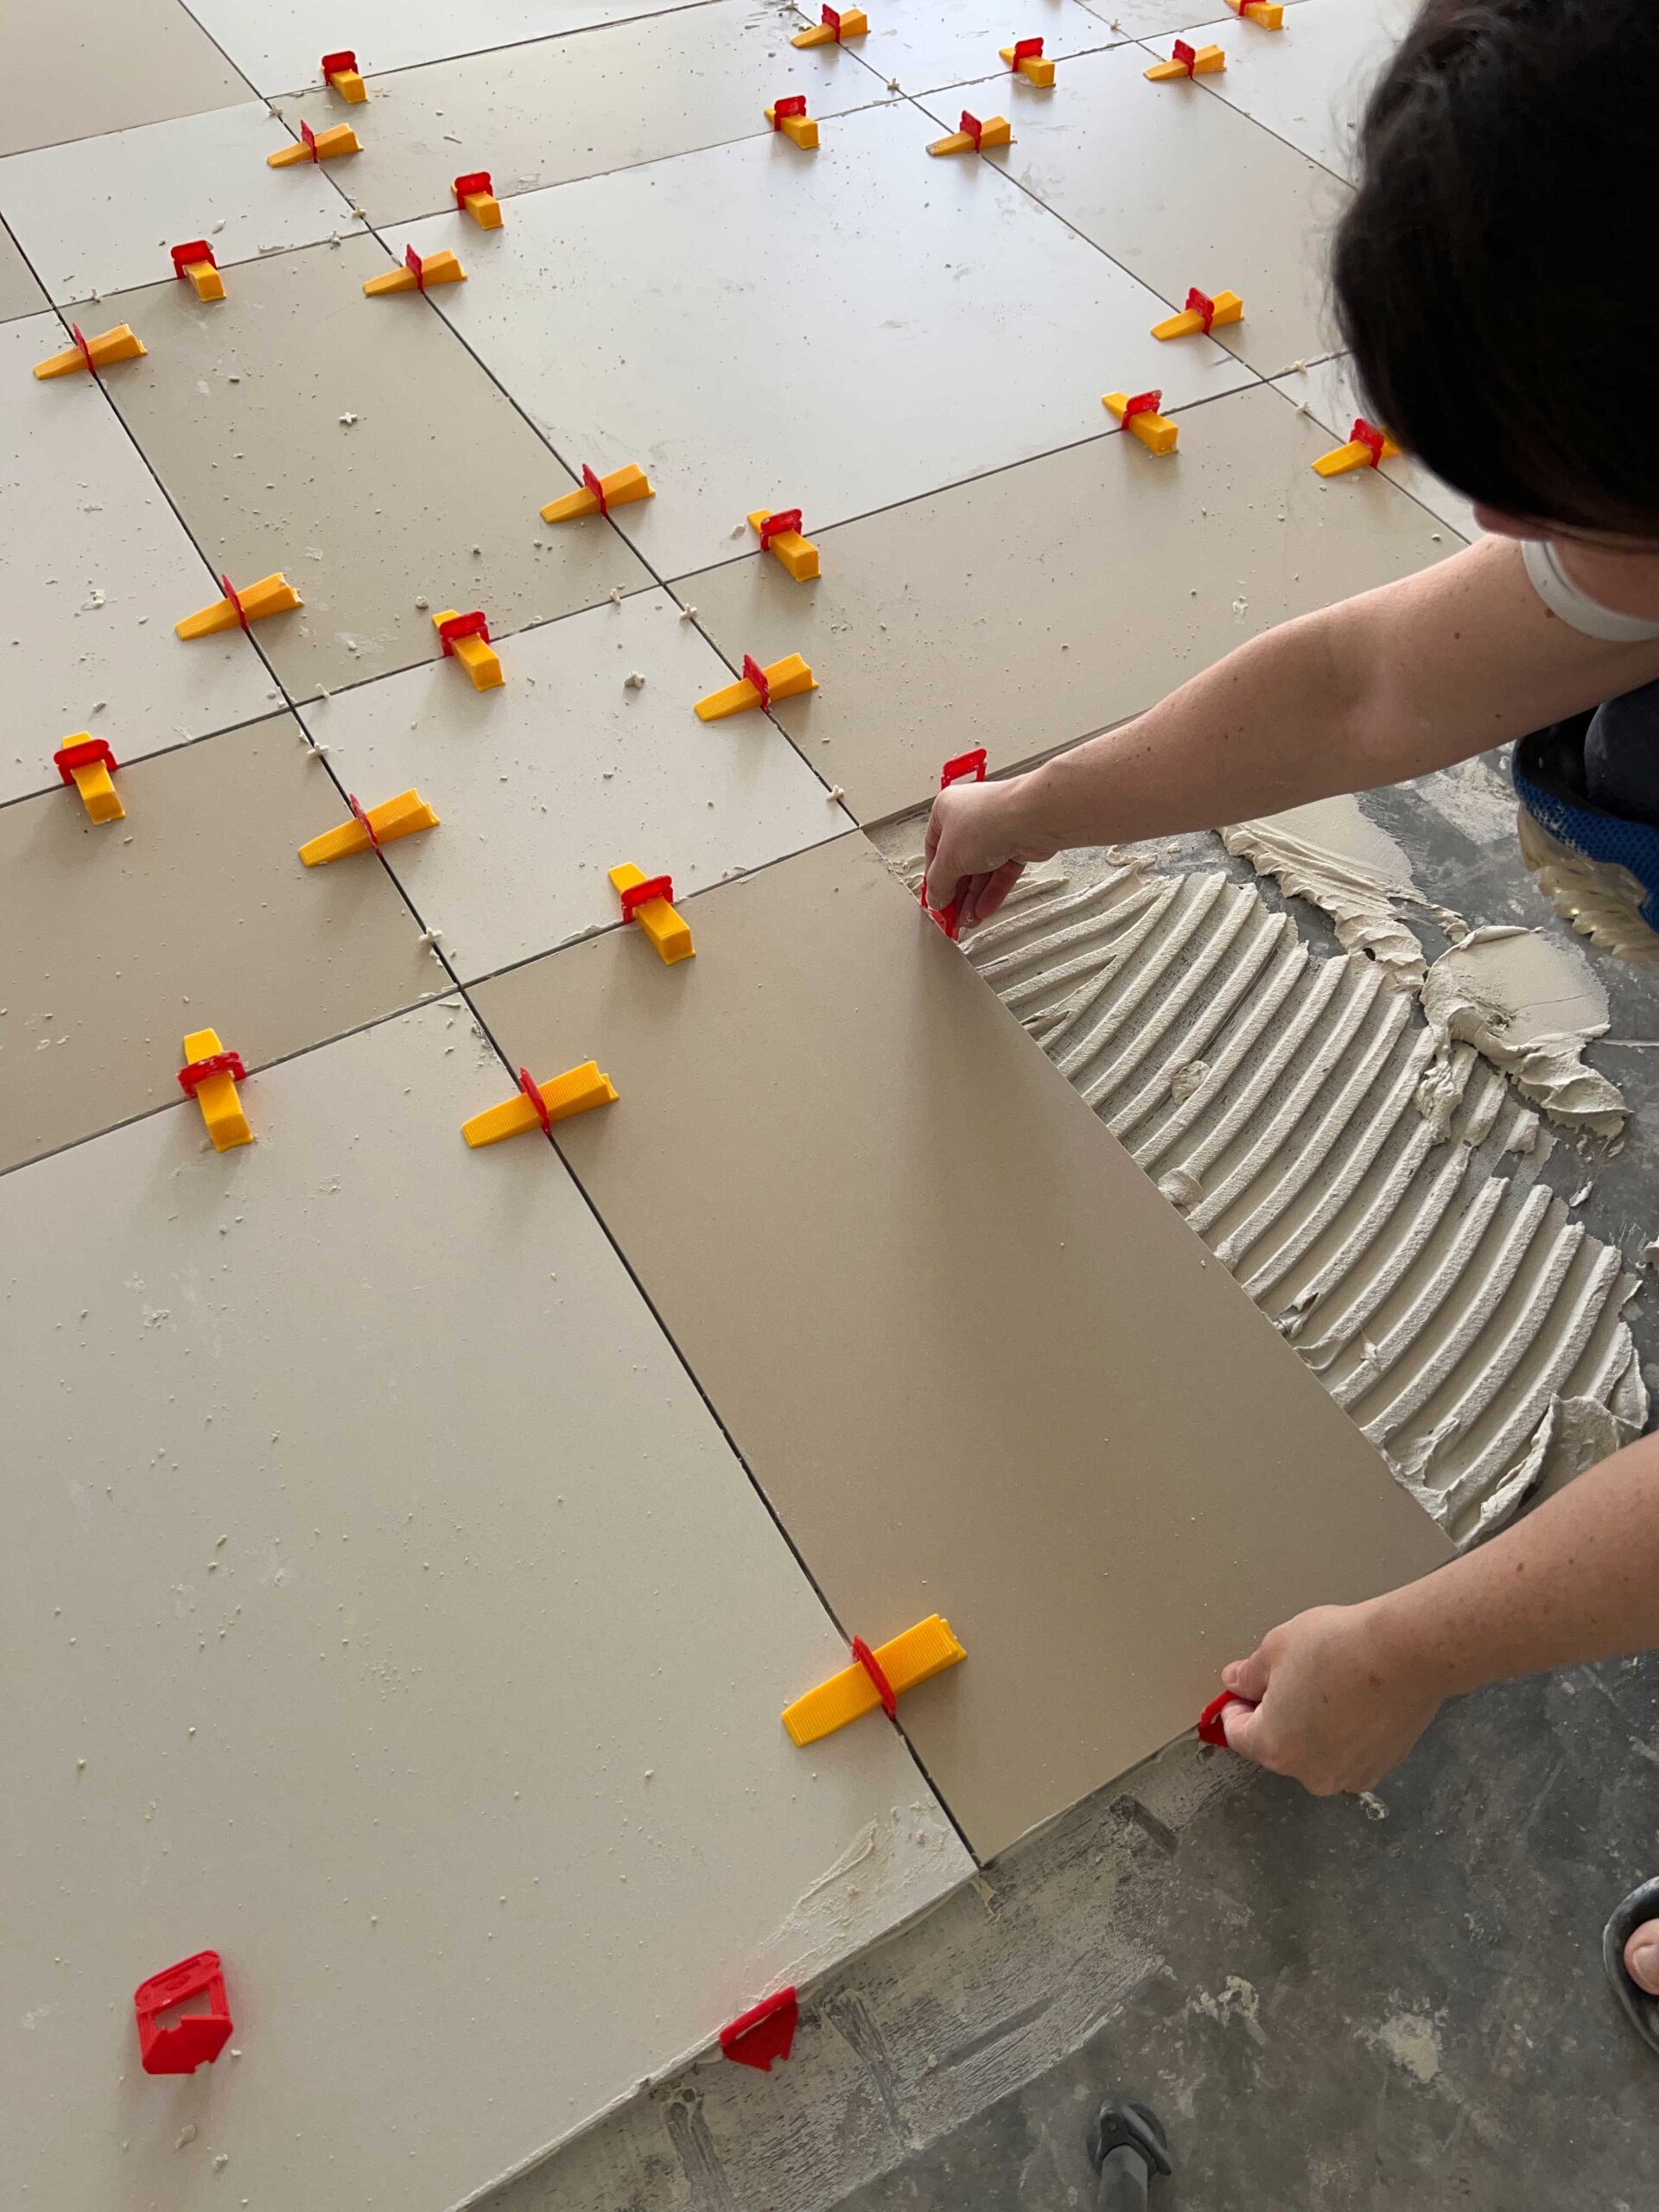
The levelling spacers are a T-shape that sits on the floor and sticks up and has a little loop in it. Once you have your tiles in place, you push a wedge into the levelling spacer and they pull the back of the tile level with each other, which in turn makes the top of the tiles level with each other.
I have not used these before and I have to say they are a game changer when installing large-size tiles! I would use them with any tile size 12″ or larger.
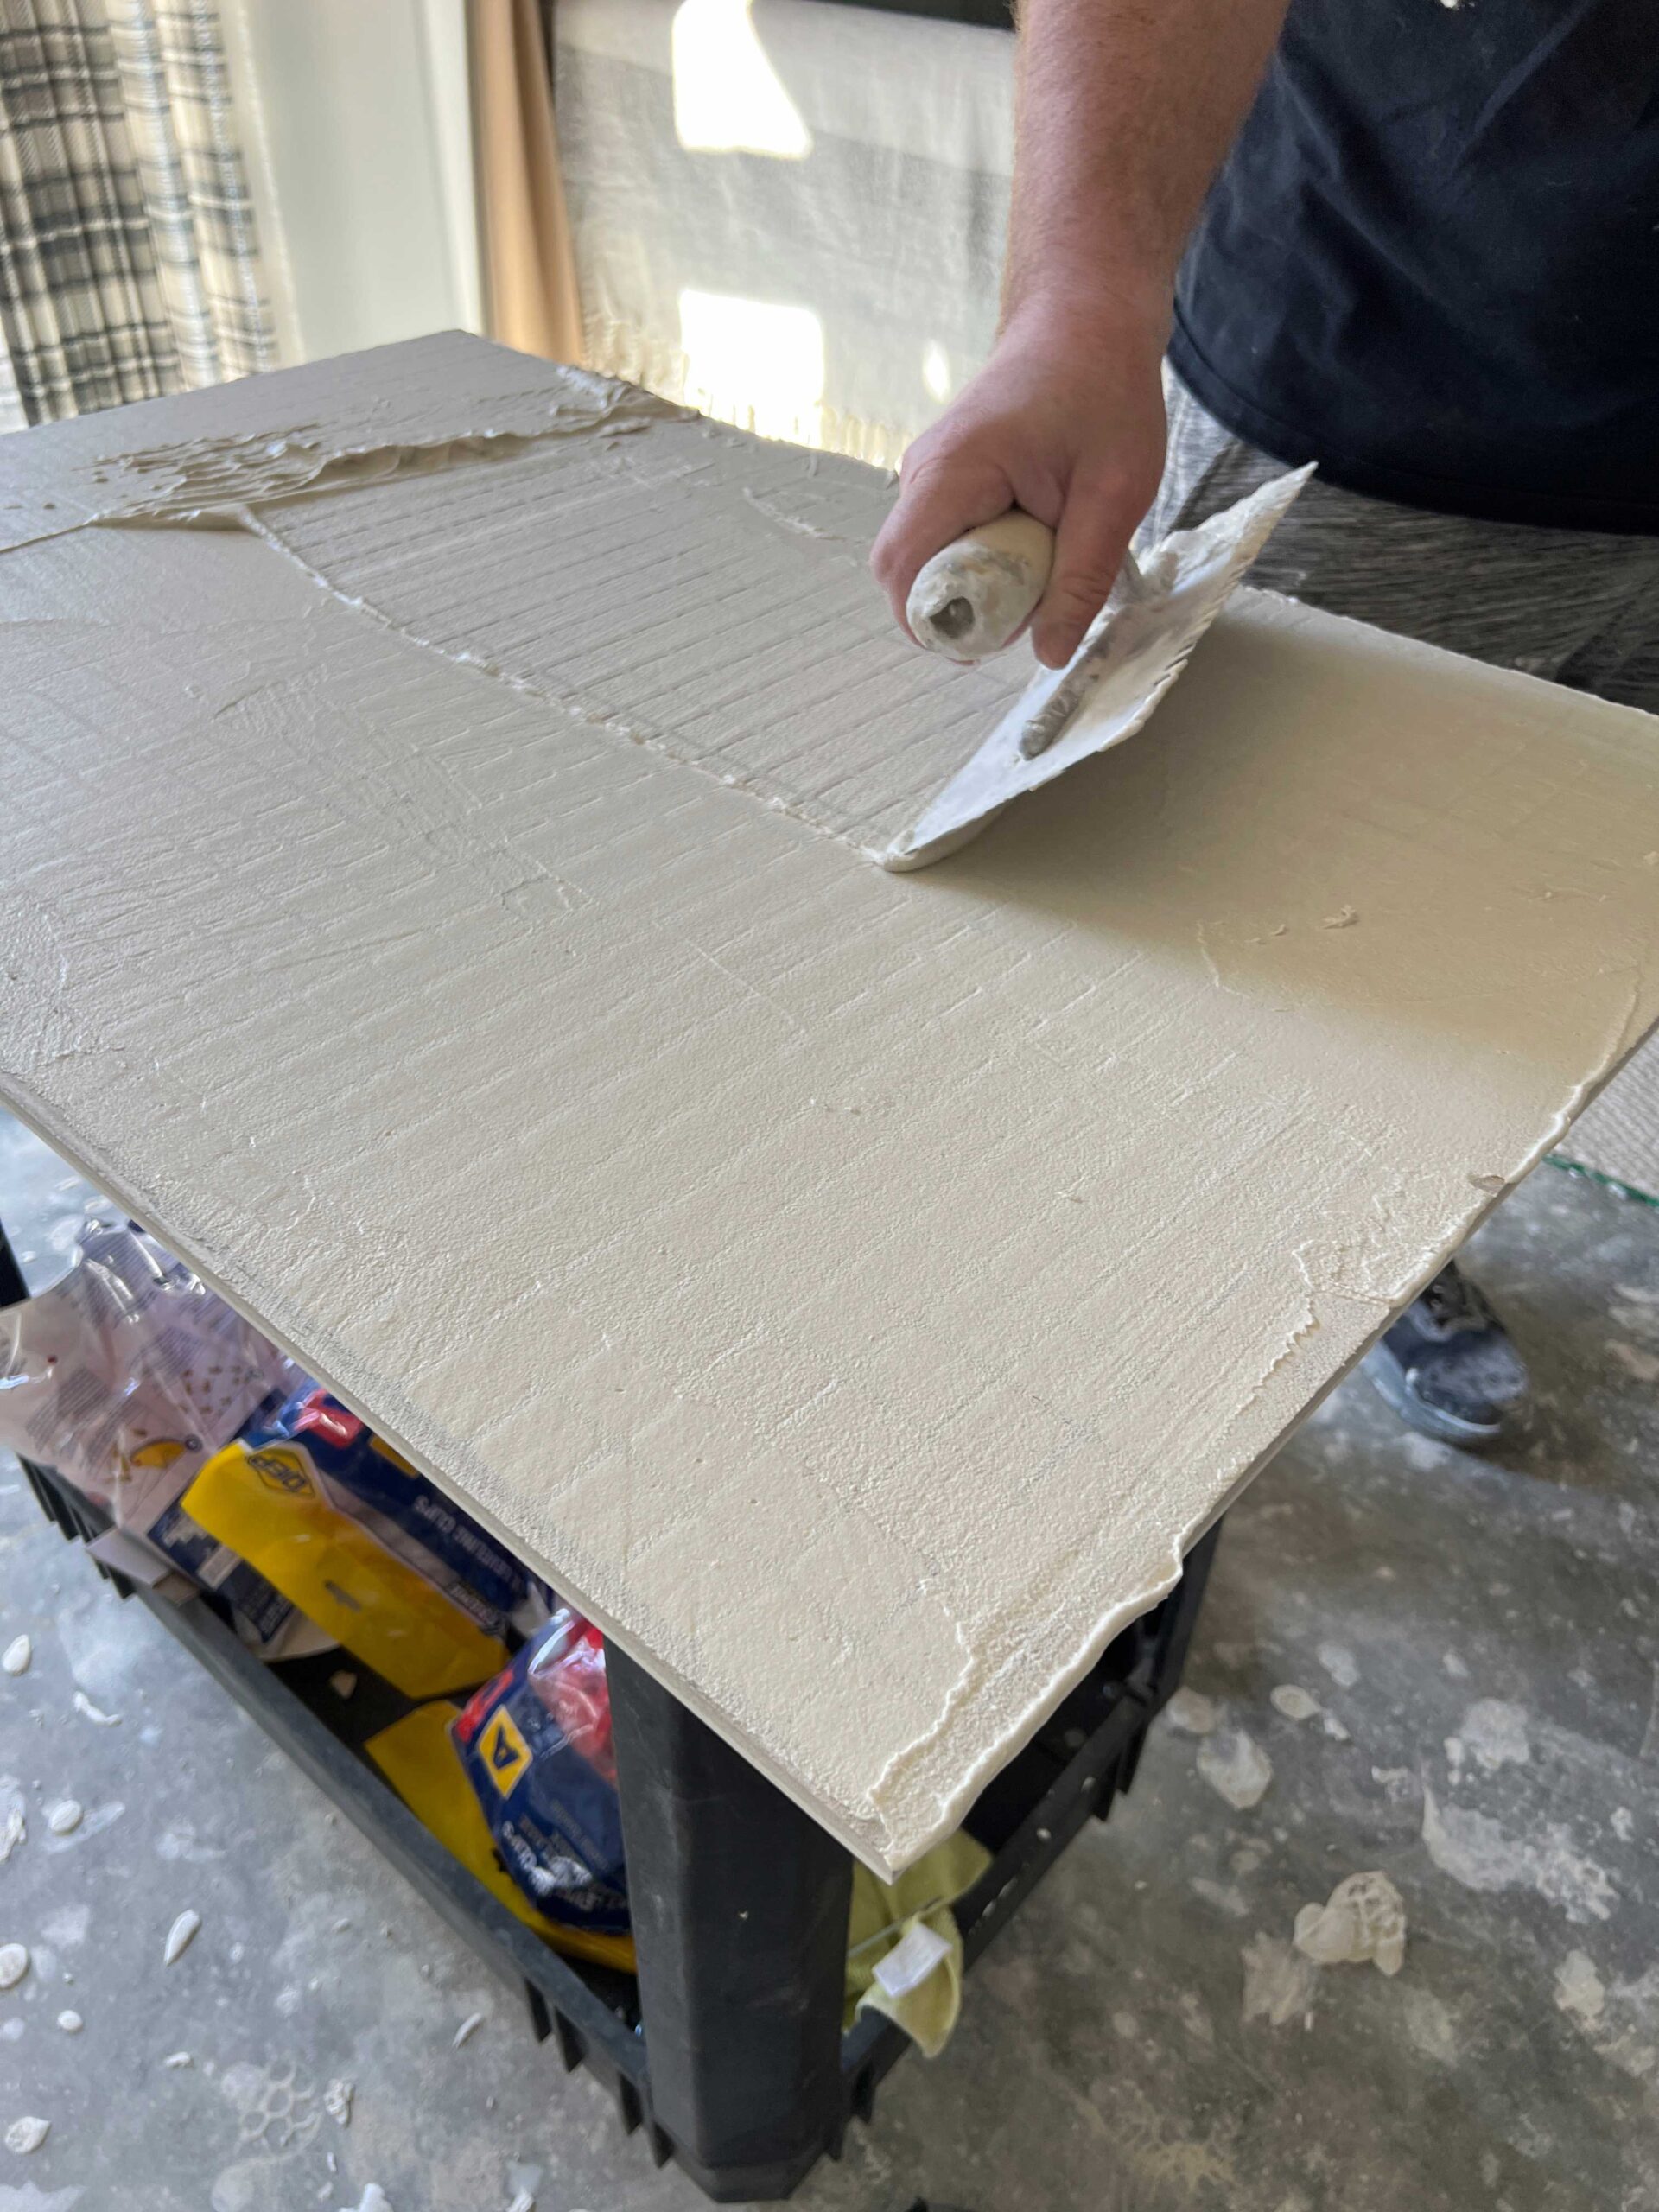
How to Install Large Format Tile – Tip 2 – Backbutter Baby
With smaller standard tiles, back buttering is not always necessary. (Back-buttering is just the process of spreading mortar on the back of the tile, like buttering a piece of bread).
With large format tiles, it’s essential! You really need to make sure that the heavier tile has uniform contact with the floor and the mortar for proper bonding. Otherwise, you may end up with tiles that are not adhered.
When I was cleaning tile I came across one tile that had a bit of a hollow sound to it. We ended up prying it up to see why, and it turns out that tile was not back-buttered and there was not proper coverage with the mortar creating a hollow feeling. I have no doubt if we didn’t find that tile and fix it, it would have eventually cracked.
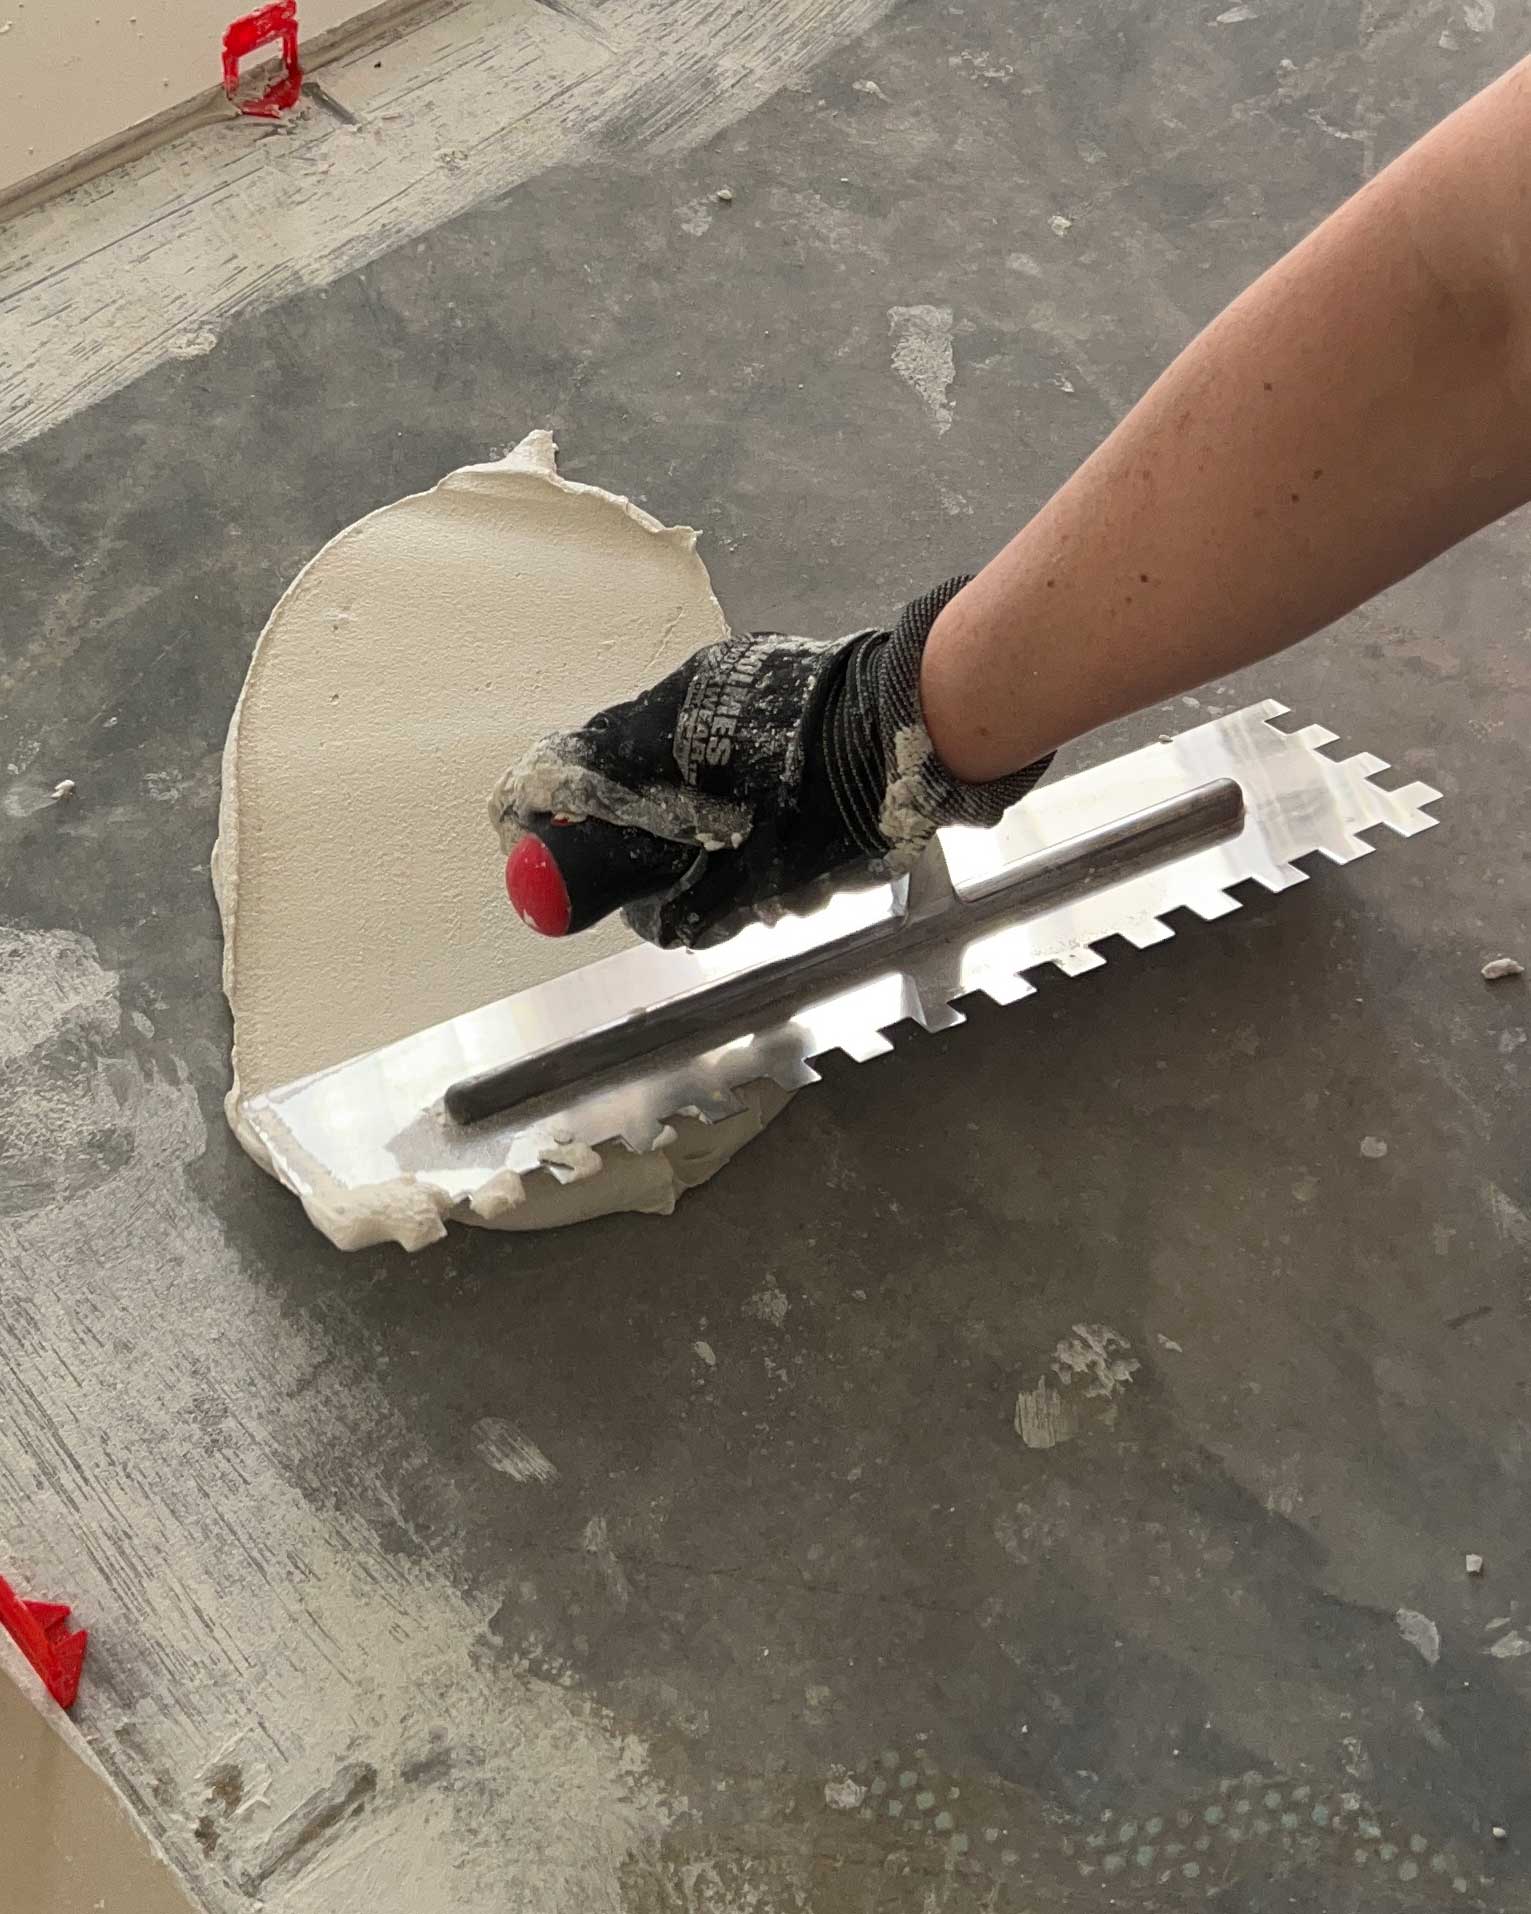
How to Install Large Format Tile – Tip 3 – Use the right trowel size
In general, the larger the tile the larger the trowel! If you have a large format tile you are probably going to need to use a 1/4″ notched trowel. That means that the “notches” are 1/4″ deep. This is much bigger than you would use for a small tile. Having the right size trowel ensures that you get uniform coverage and good mortar contact on your tile. I found this handy article on choosing the right trowel size!
Step by Step for How to Install Large Format Tile
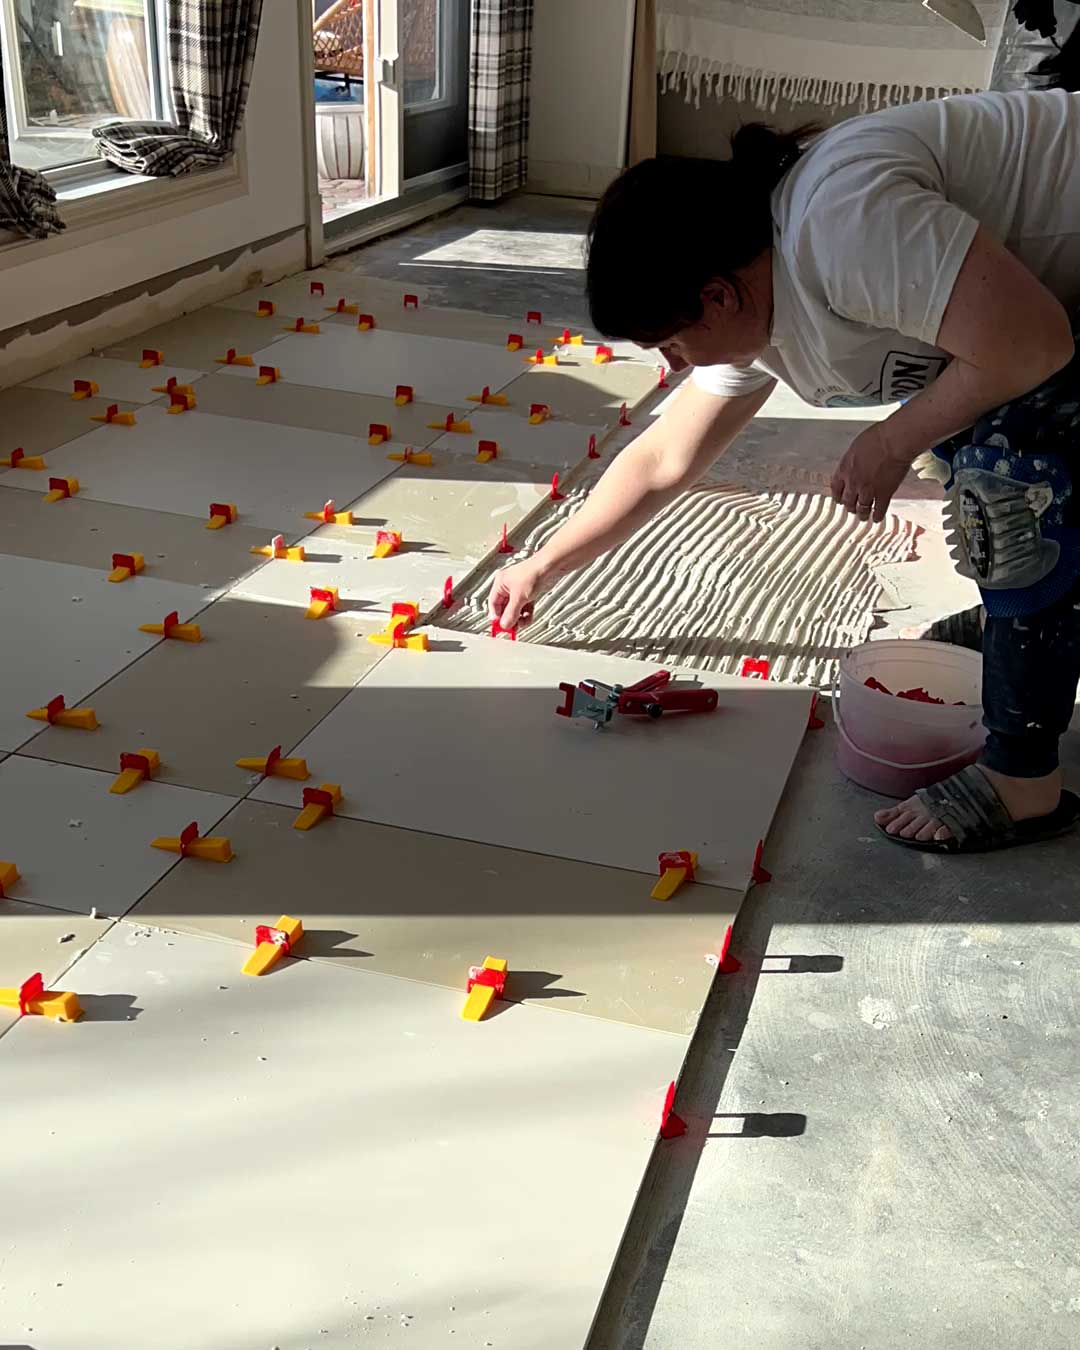
Step 1 – Spread the Mortar
Spread a thick layer of mortar over the area you are about to tile. With these larger tiles, I only spread enough mortar to place one or two tiles at a time, or I had trouble reaching across them.
Use the flat side of the trowel to smooth it out.
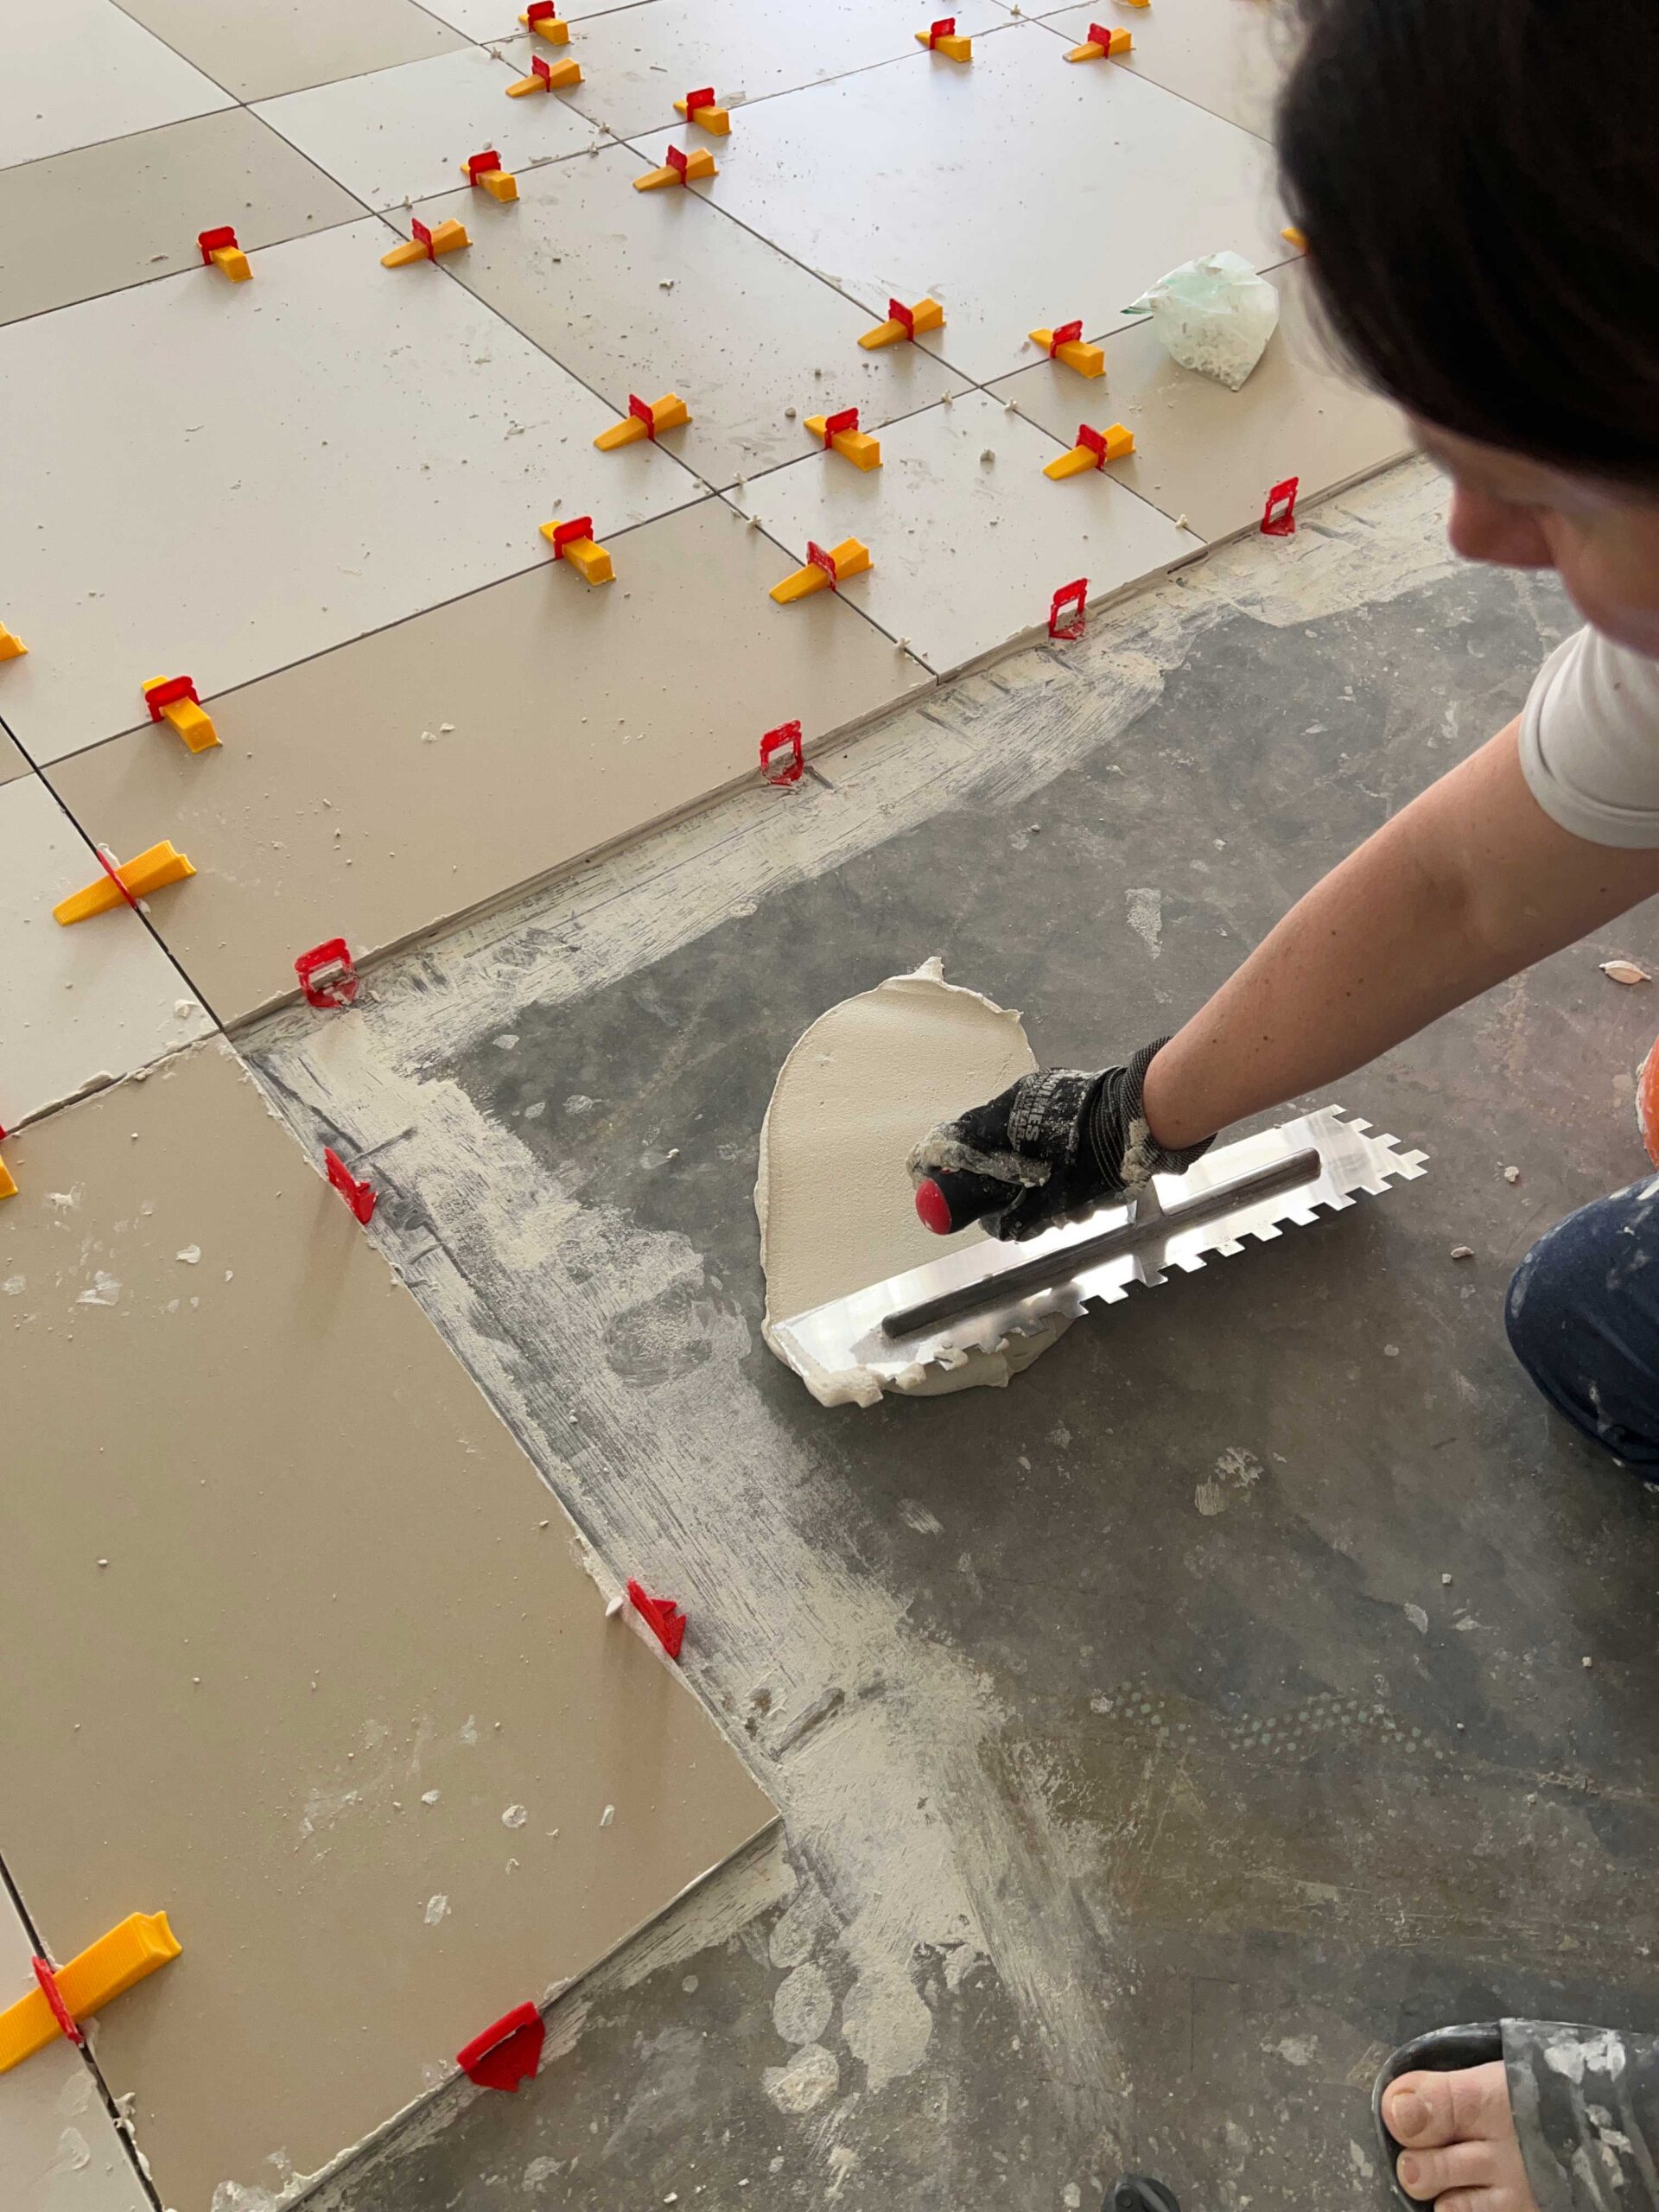
Next, use the square notch trowel to create the notches or channels in the mortar and to remove excess. Hold the trowel at a 45-degree angle as you pull it across the floor.


Step 2 – Backbutter
Next, use the flat side of the trowel again and add mortar to the back of the tile.
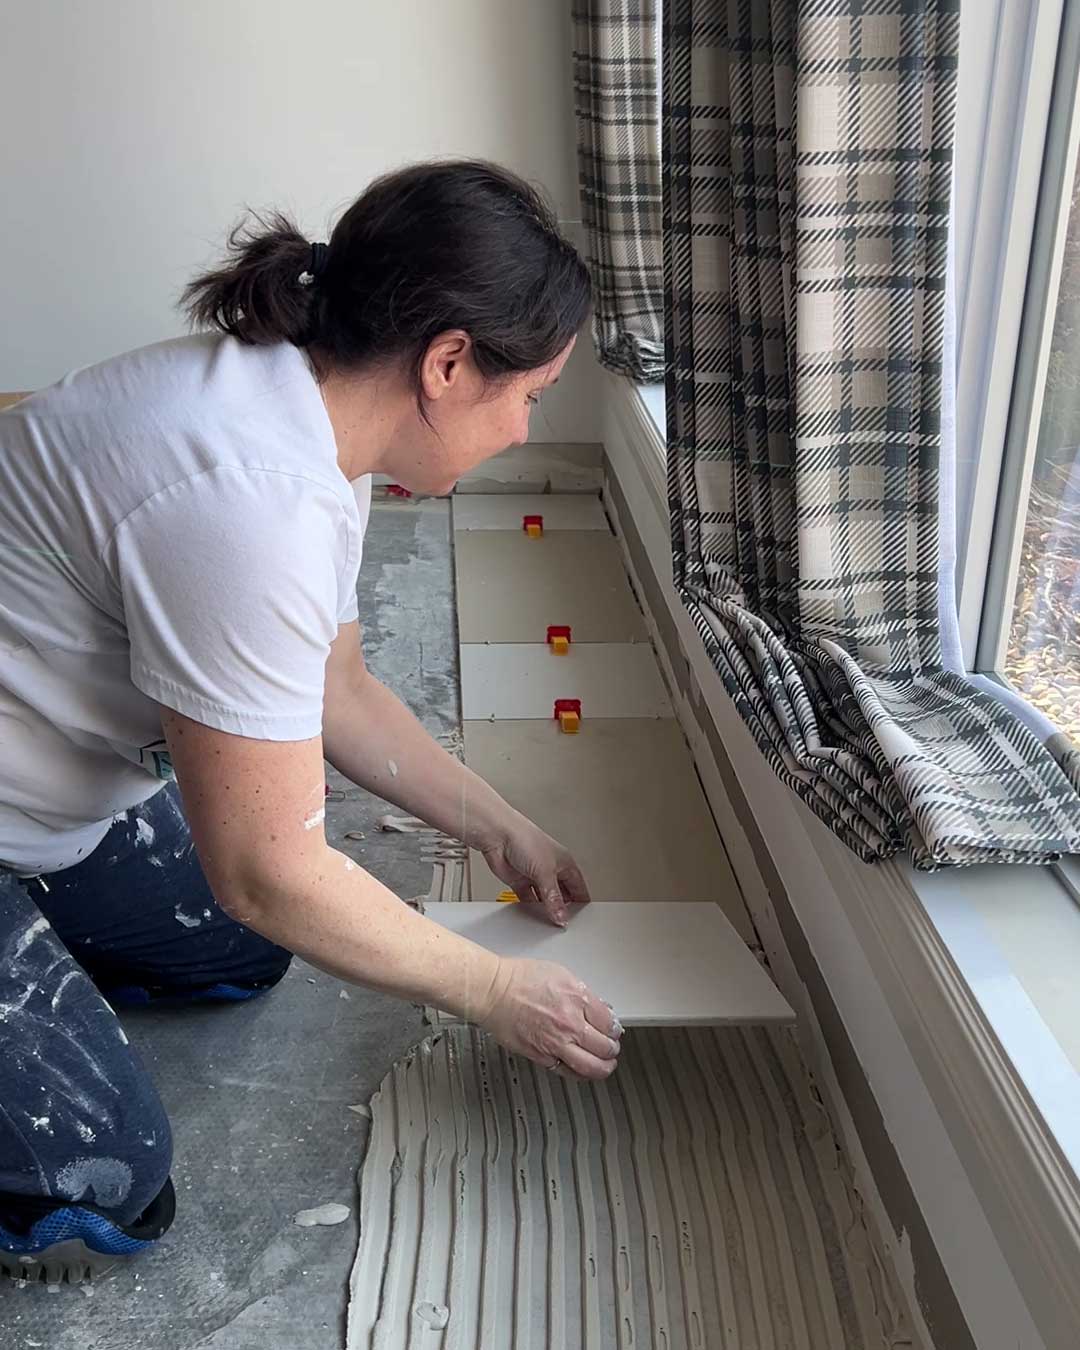
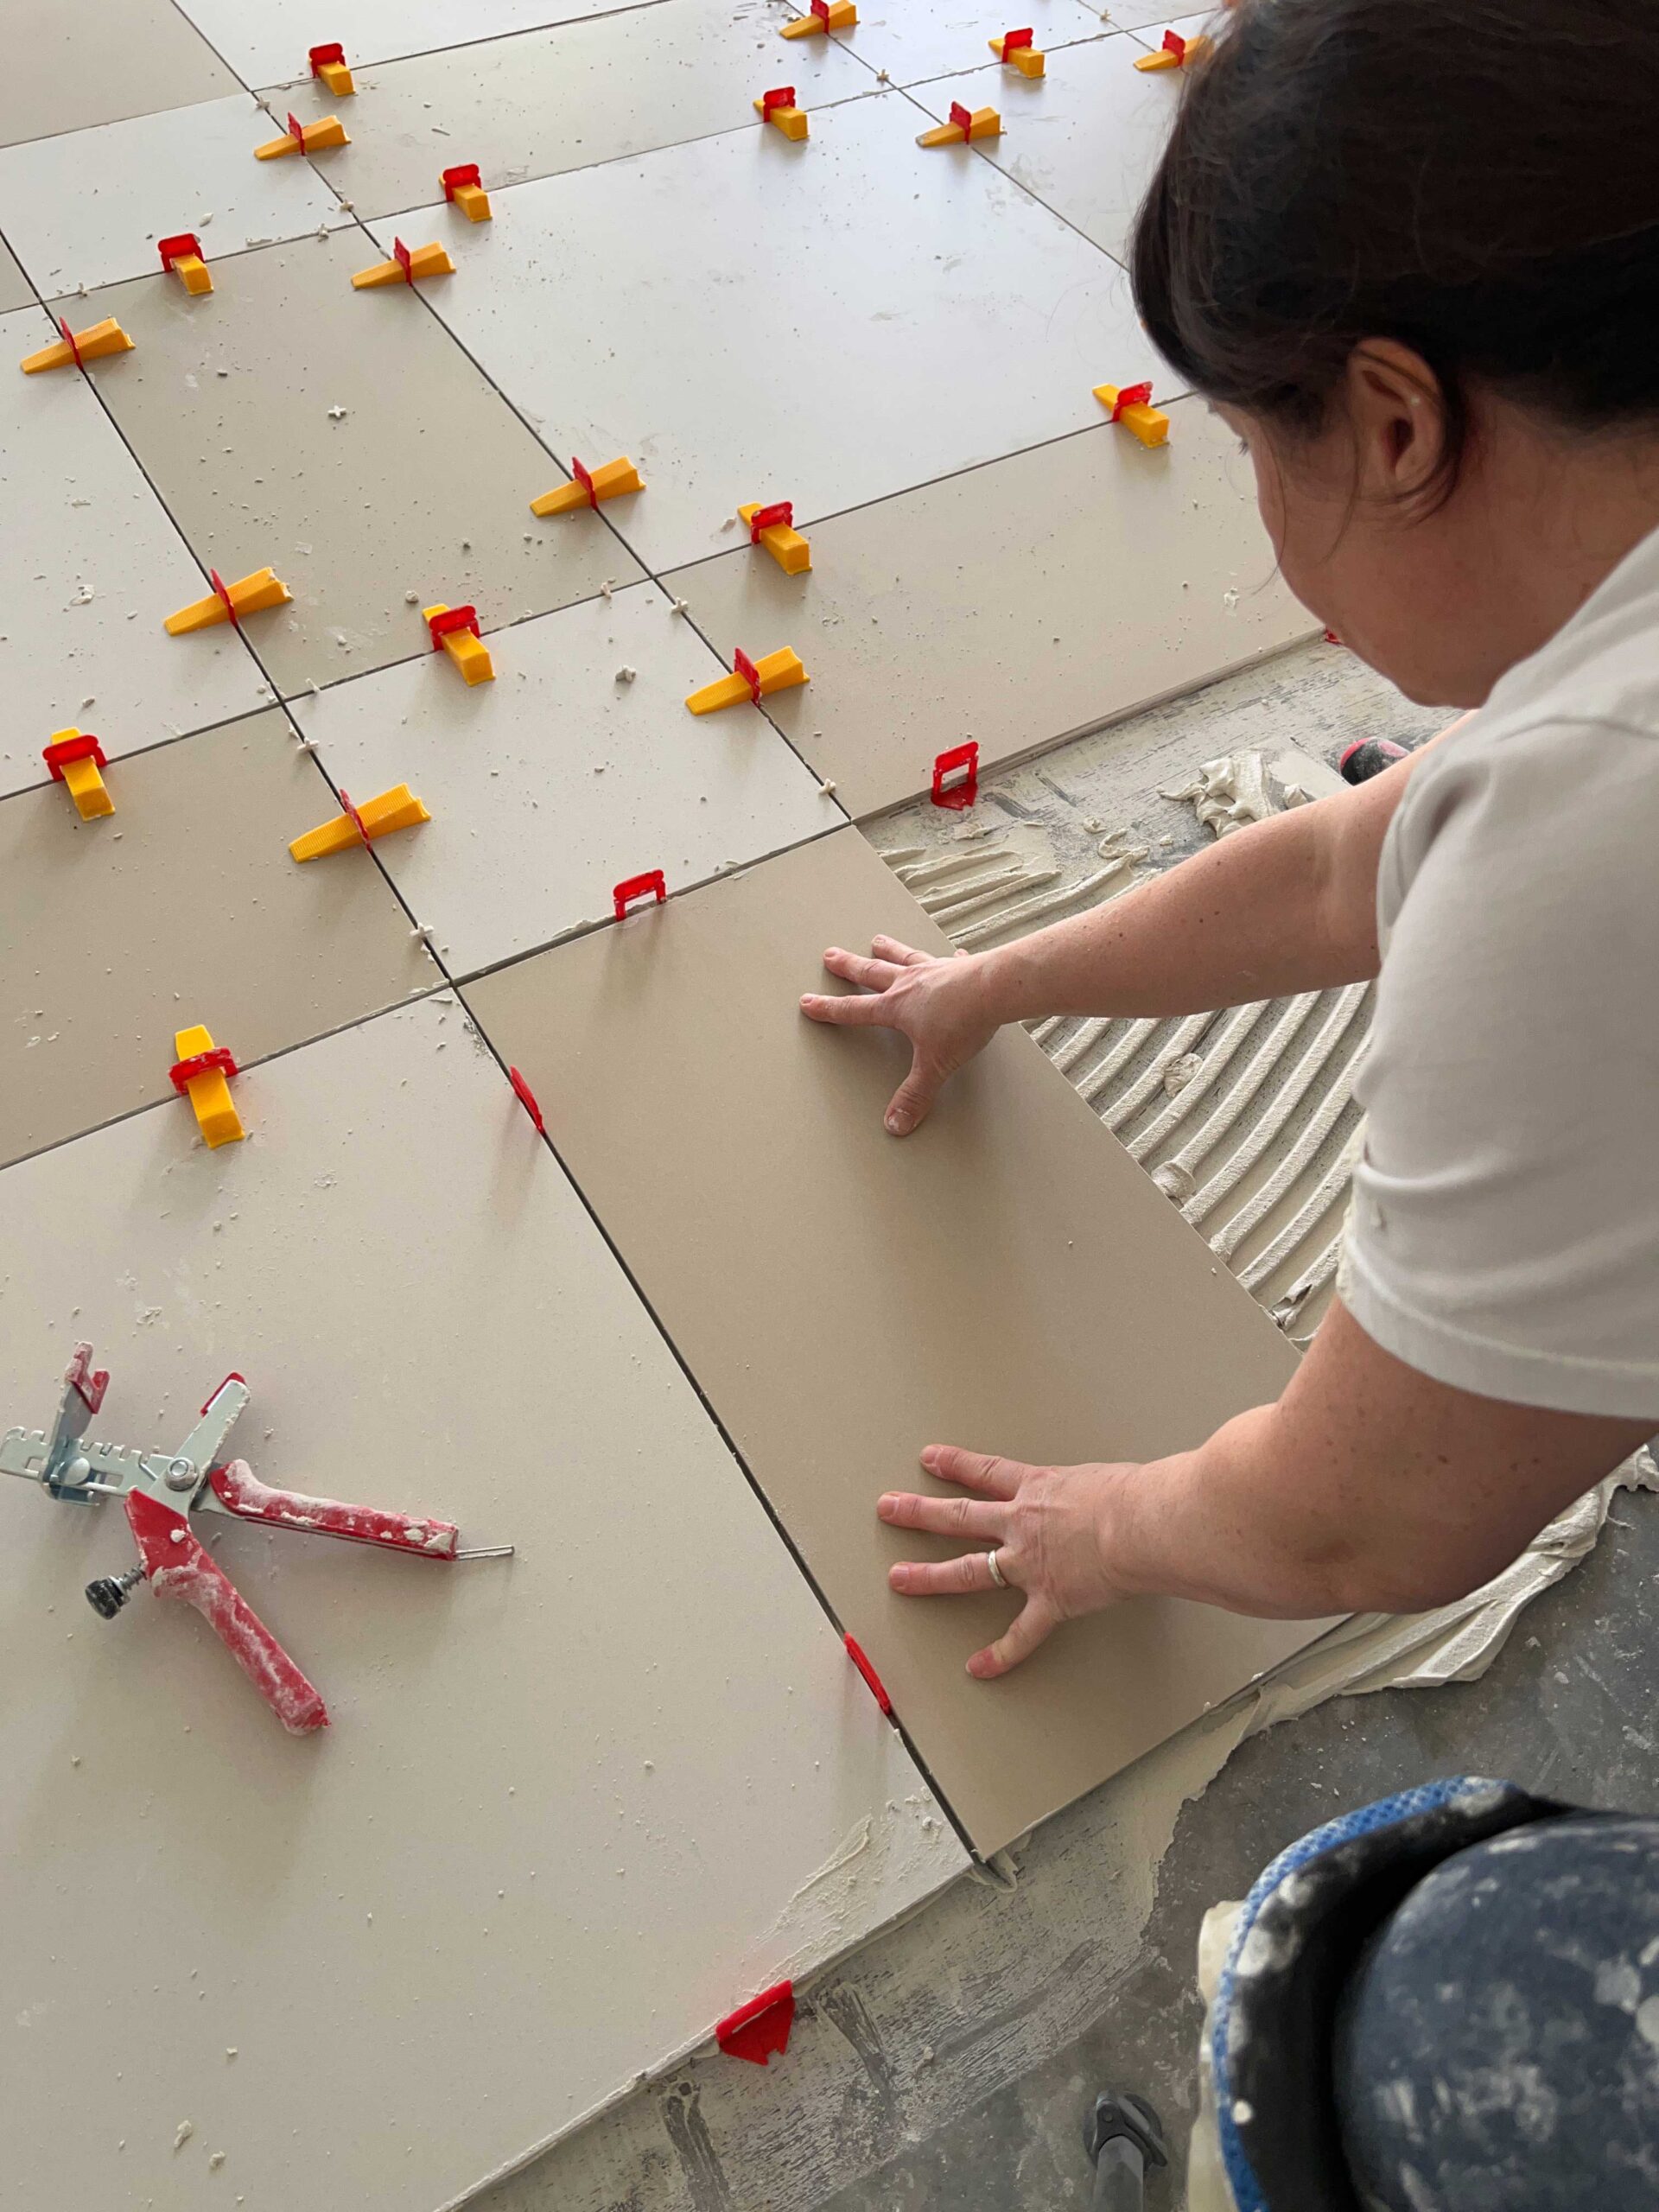
Step 3 – Place the Tile
Place the tile into the mortar bed, push down gently, and give it a little wiggle. This is to make sure that you’ve made good contact.

If you are new to tiling and aren’t sure if it is stuck, try to pull one up! It should be VERY hard to do. That’s how you know that you are doing a good job!
Line up that first tile using the laser level you set up to guide you on that first row. Making sure your first row is extremely straight is critical! You can use a chalk line to mark straight lines on the floor or a laser level.
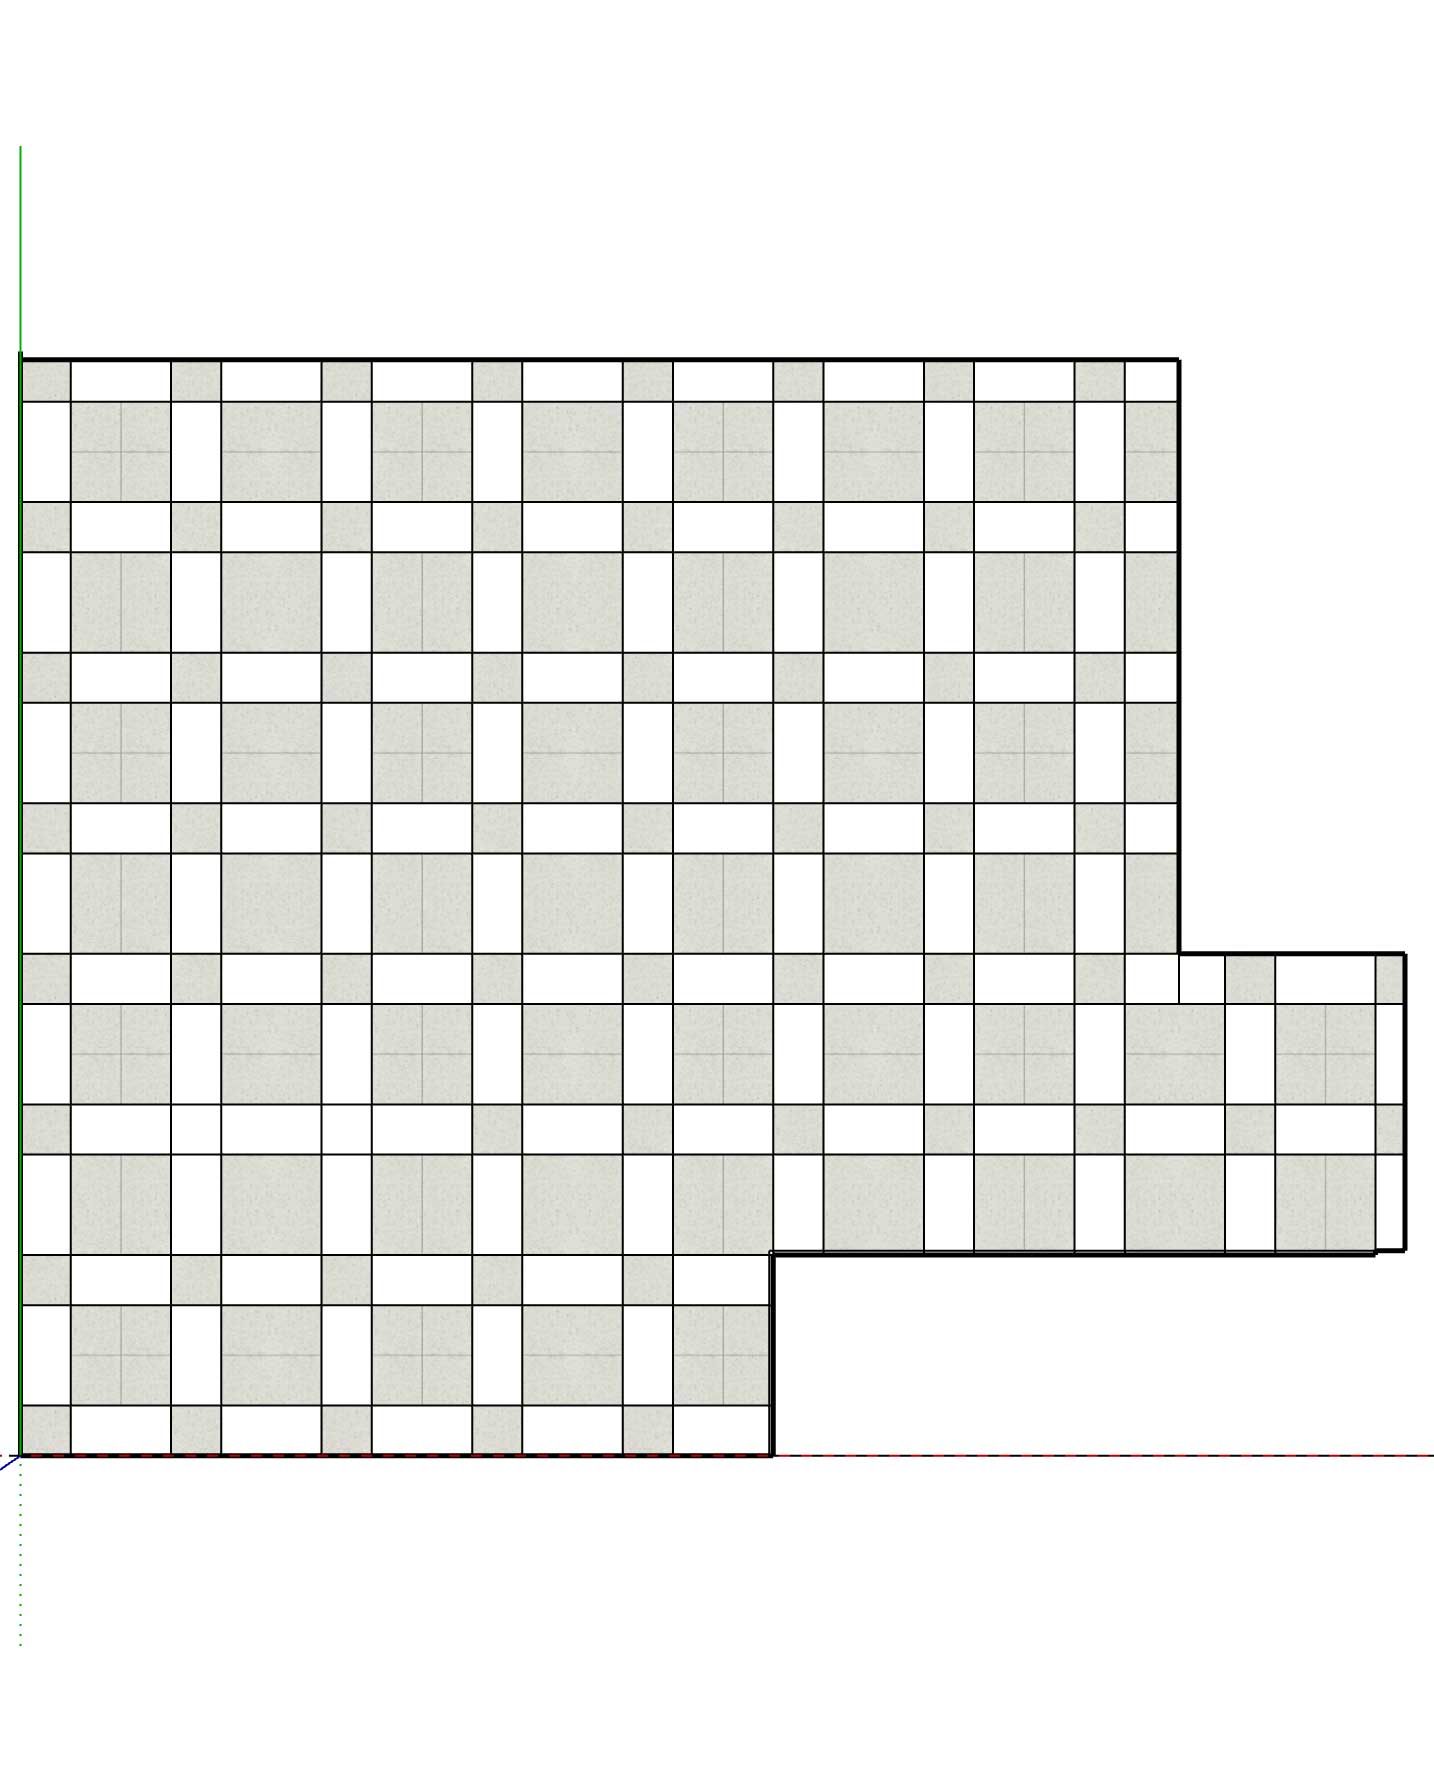
We also planned our entire installation by drawing all of tiles out to scale in the room in Sketchup. You don’t have to go to that extreme, but you should at least make sure that you plan your installation so you know you won’t end up with a full tile on one side and sliver on the other!
Step 4 – Add the spacers
If you are using the levelling spacers like I am, they are placed now with one side under the edge of the tile. For the larger tiles, I used two on each side.
Tip: I liked to scrape the floor to remove the mortar in a little area before adding the spacers. If there is too much mortar that squishes up between the tiles at the spacer locations, they can get stuck in there and they are difficult to remove.
Step 5 – Add the next Tile
Add the next tile in the same manner. Push the tile up tight to the spacers.
Step 6 – Add the Levelling wedges
Push the wedges into the spacers using the spacer tool. You can push them in by hand but I found it much easier with the tool! Don’t overtighten or they break (ask me how I know that!)
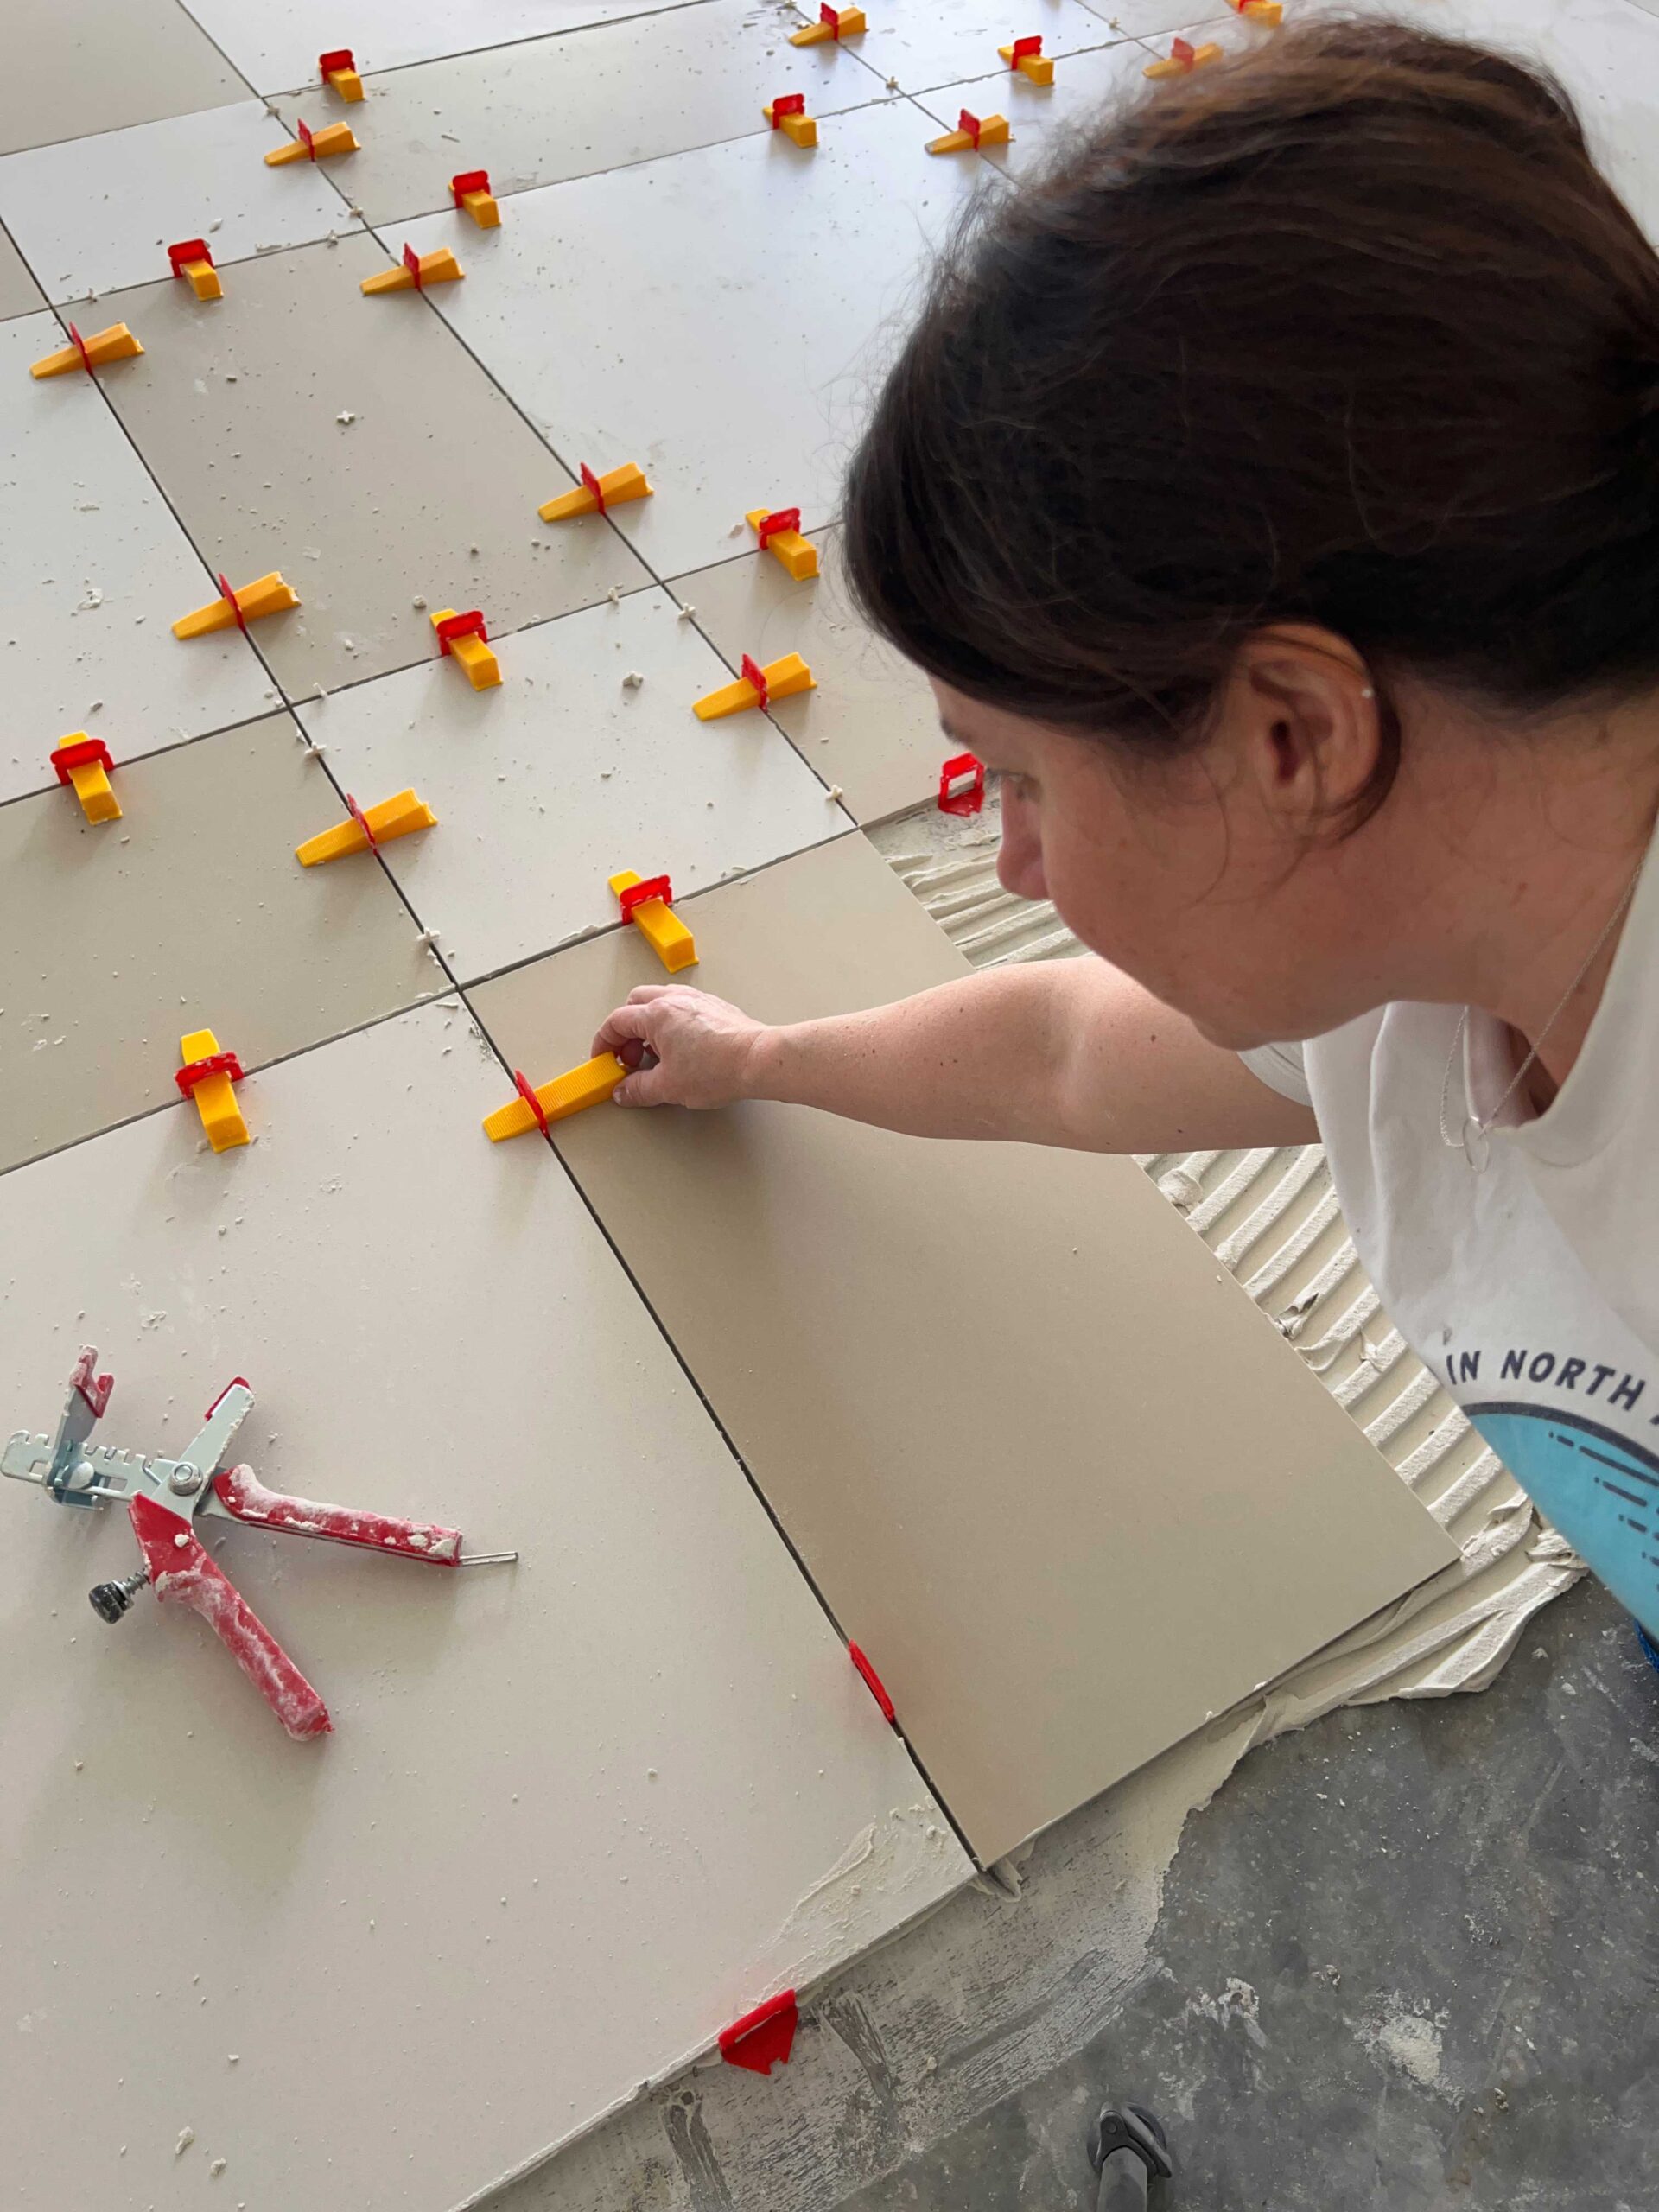
The levelling spacers should pull the tops of the tile level with each other to eliminate that tripping hazard.

Step 7 – Readjust
After the levelling wedges were pulled tight, I found that the spacing sometimes got messed up. They are pretty hard to move once the levelling wedges are tight, so what we found worked best was to hit the side of the tile with a rubber mallet.

Before you move on to the next tile, take a minute to clean out the spaces with an old toothbrush! A follower suggested that on Instagram and it is such a good hack! Any mortar you can remove when it is wet is always so much easier. You can take a minute to wipe the tile down with a damp sponge too (although mortar on the surface is easy to clean up the next day so don’t sweat that too much.)
Step 8 – Remove Spacers
The next day, once you can walk on it, remove the spacers. You can remove them by hitting them from the side with a rubber mallet.

The odd spacer does not break off low enough because it is embedded in too much mortar, and you have to dig it out of there with a screwdriver or pliers.
If there are any high spots in the mortar in the grout joints, clean those out with a screwdriver or grout removal tool. You don’t want those to peek through your grout.
Step 9 – Grout
I’ve talked about grouting before so I won’t go into it too much again. The nice thing about these large-format porcelain tiles is that there are fewer grout joints. Otherwise, grouting large format tiles is the same as any other tile.


That’s all there is to it! Installing tile is not that hard if you follow the steps and take your time!

I am so very pleased with how this floor turned out! It has so much interest with the different colours and shapes but yet it is not an overwhelming pattern. I am sure I will love this tile for many years to come!

Stay tuned, because the next step in this basement renovation is going to be installing cabinets in the bar area, and I can not wait! I hopt his gave you some tips and confidence on how to install large format tile!

How to Install Large Format Tiles
How to Install Large Format Tile
Materials
- Tile
- Mortar/ Thin Set Appropriate for your Tile and Substrate
- Grout
Tools
- Trowel (I used a 1/4" square notch trowel for my 24x24" tiles)
- Tile wet saw
- Buckets and sponges
- Kneepads
- Laser level or chalk line
- Levelling Spacers
- Spacer Installation Tool
- Additional Spacers
- Grout Float
Instructions
- Spread an even and thick layer of mortar using the flat side of the trowel
- Backbutter (or spread mortar on) the back of the tile you are about to install
- Set the tile into place. Make sure you are working off a straight line, and your tile is in line with the line you made using either a laser level or a chalk line.
- Add levelling spacers to all sides of the tile (unless it is up against a wall).
- Add the next tile next to the first. The levelling spacers will keep your grout line even, so make it tight to the spacer
- Add the levelling wedges to the spacers and push them in using the spacer tool.
- Double check that the tiles did not move. If they pulled apart a little, use a rubber mallet to knock the tile back into place, ensuring that it is tight to the spacer and in line with your laser or chalk line.
- Repeat steps for all tiles, cutting tiles as needed around obstacles and against walls.
- The next day, remove the spacers but hitting them with a rubber mallet from the side.
- Grout the large format tiles as you normally would
Notes
This is not a complete guide to installing tile, but are some tips specific to large format tile. More details on how to install tile can be found here.

It looks so fantastic! Great job and thanks for the step by step instructions.
Thank you!
A very ambitious project and it looks so good!
Hi Erin,
Your floor looks amazing! I hope your body has recovered.
Every picture of you bending over had me wincing.
Thank you so much!
I’ve lived through it, thank you Mary!