DIY Window Panes
I’m always looking for ways to add character and charm to my home and make the style of my house fit my personal style a little bit better. The one thing we love about our home is all the windows, this house is drenched in sunshine, especially in the latter half of the day. However, the old windows were just large expanses of glass so I searched around for an easy way to add our own window grids. I did a little research and found the easiest DIY window panes and they made such a difference!
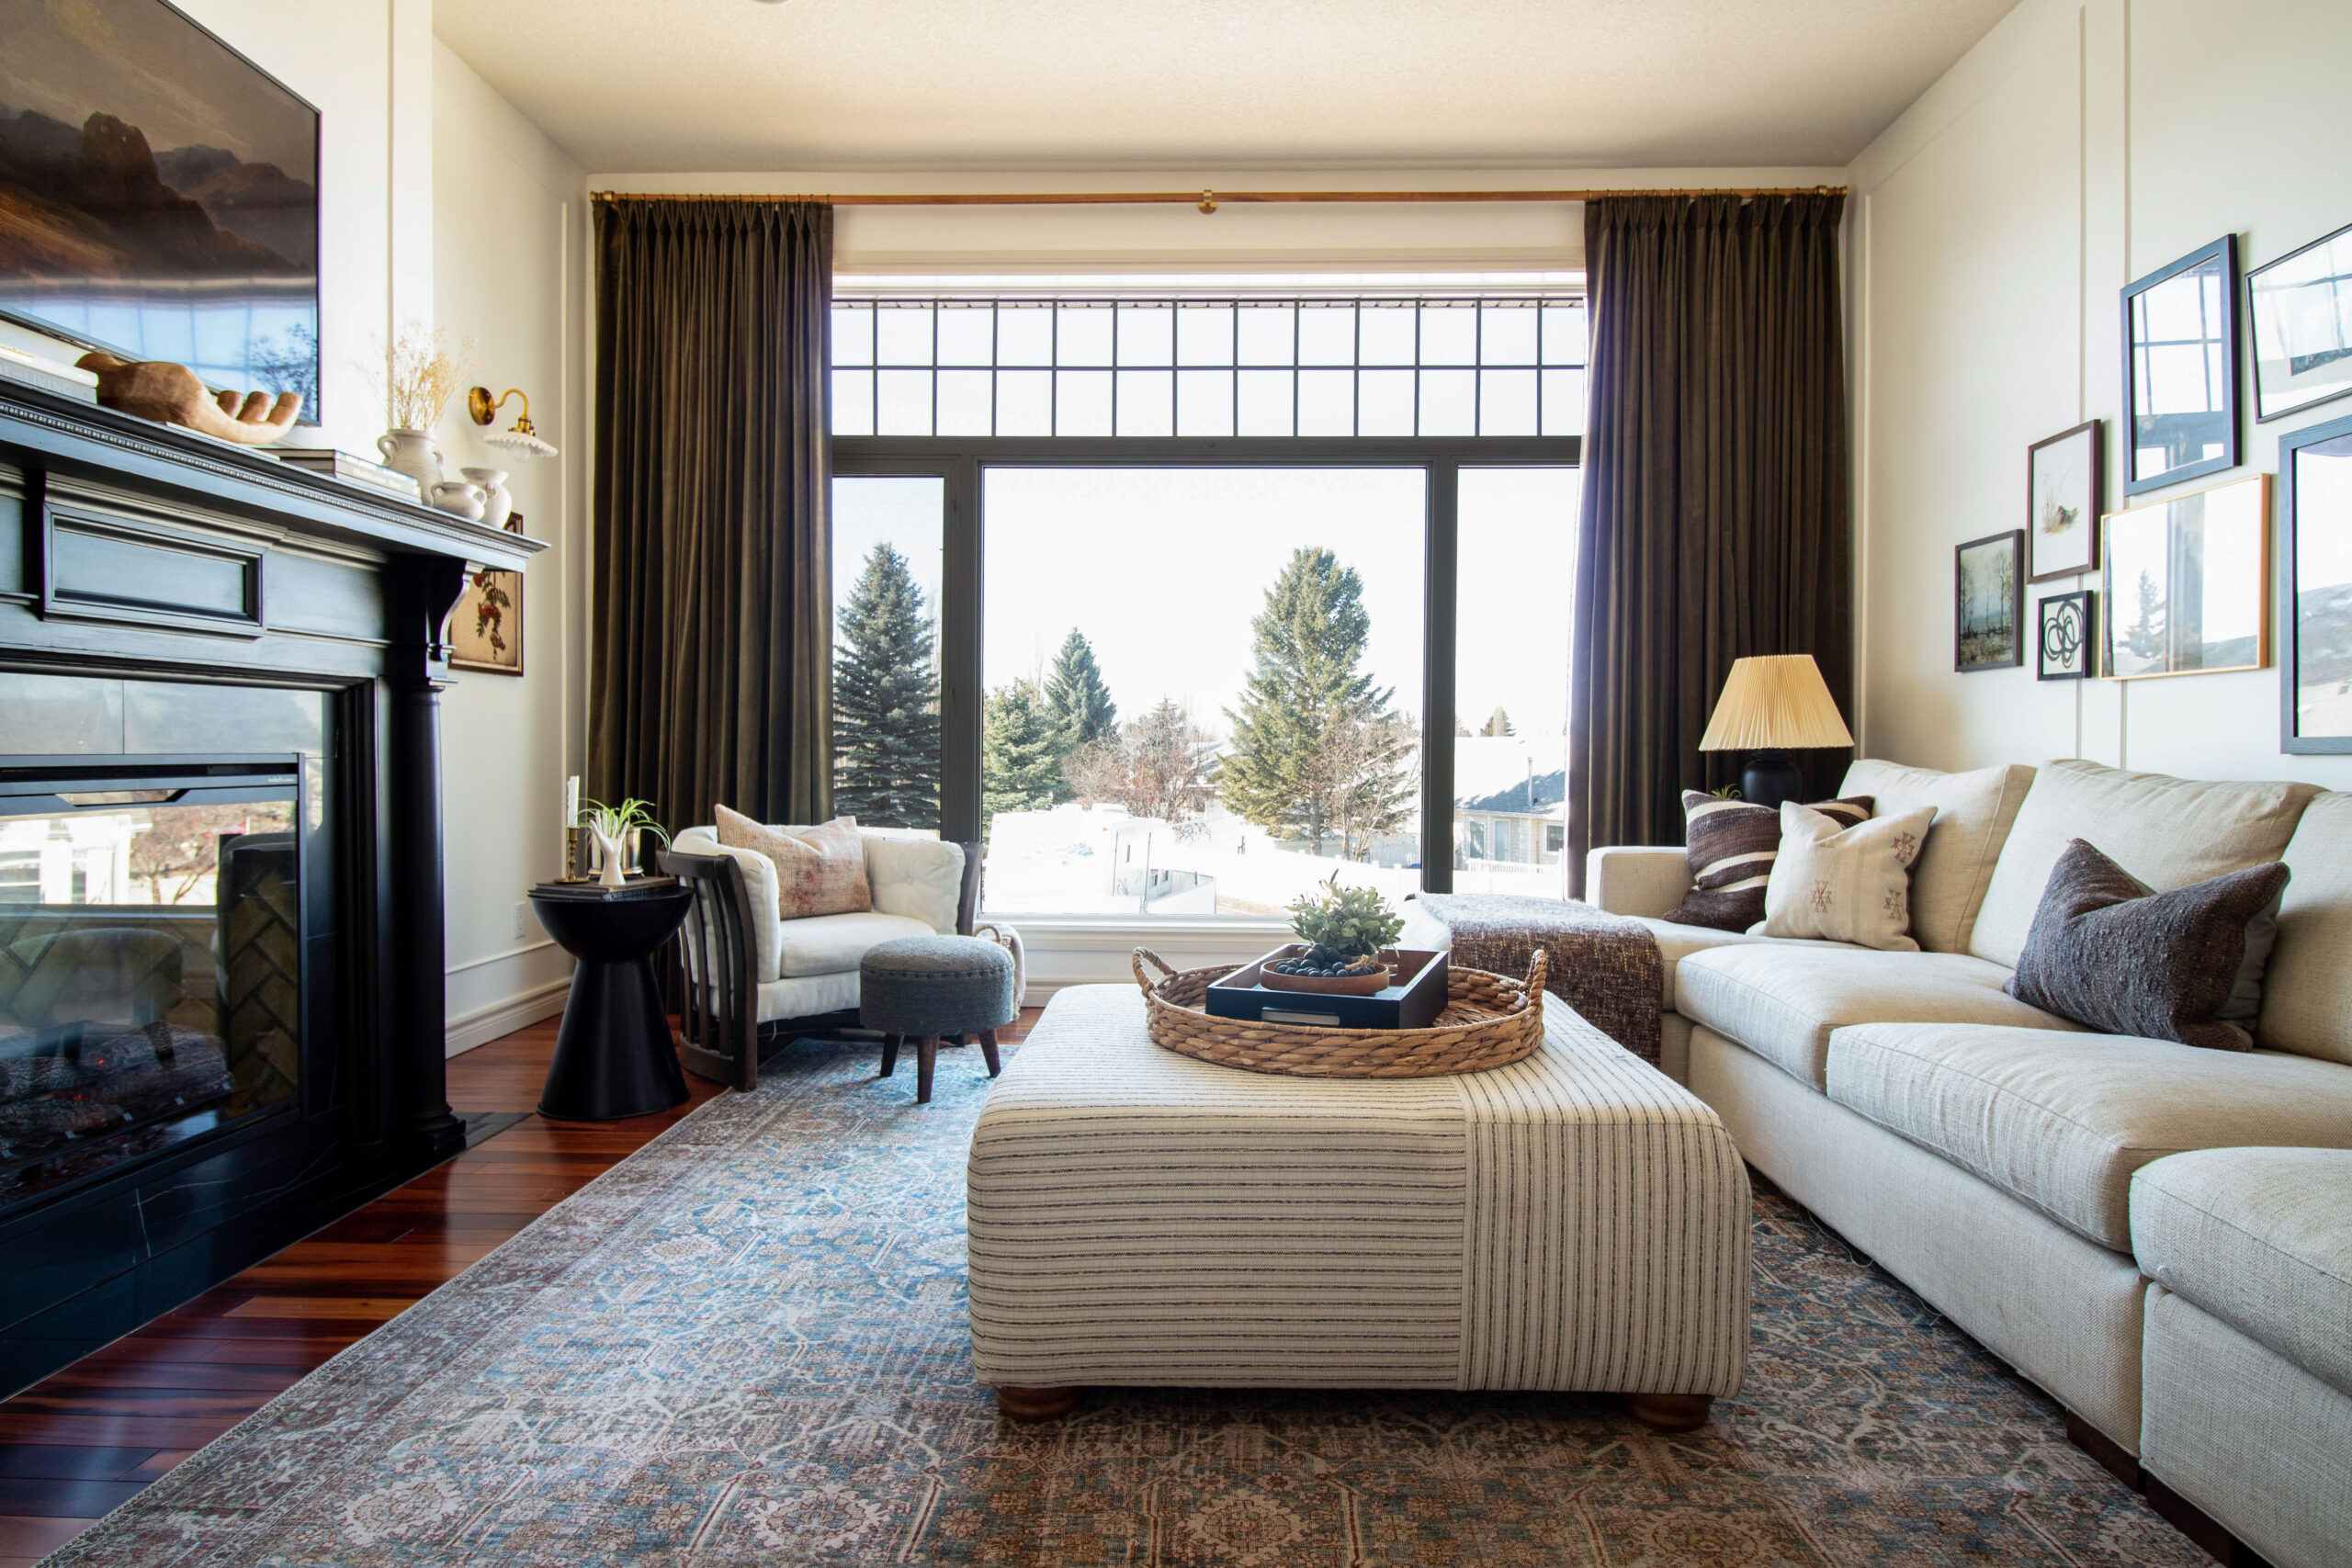
Table of Contents
- Other Ideas to DIY Window Panes
- How to Measure and Order the DIY Window Panes
- Shipping
- Assembly of the DIY Window Panes
- Installation of the DIY window panes
- Can you Paint New Panes?
- Can you put them all over the window? Where else could you use these?
- You Might Also Like
This post may contain affiliate links. That means if you purchase anything from these links I earn a small commission, at no extra cost to you! This helps support my blog, so thank you!
Other Ideas to DIY Window Panes
I started by doing a little research on different methods that people have used to create window panes the DIY way, and there were actually a lot of different ways to get the look of window panes. One thing a lot of people have done is use black tape or white electrical tape to create the look of different panes of glass. I considered this idea, but the only problem with that is that I thought it wouldn’t look super realistic from close-up.
I have also seen people DIY window mullions out of small pieces of trim. I think this way would be realistic enough and is a great idea, but also pretty labour-intensive. I couldn’t see that there was a great way to attach the trim together at the intersections for a really seamless look. I really wanted my window panes to look realistic. That’s when I came across New Panes.
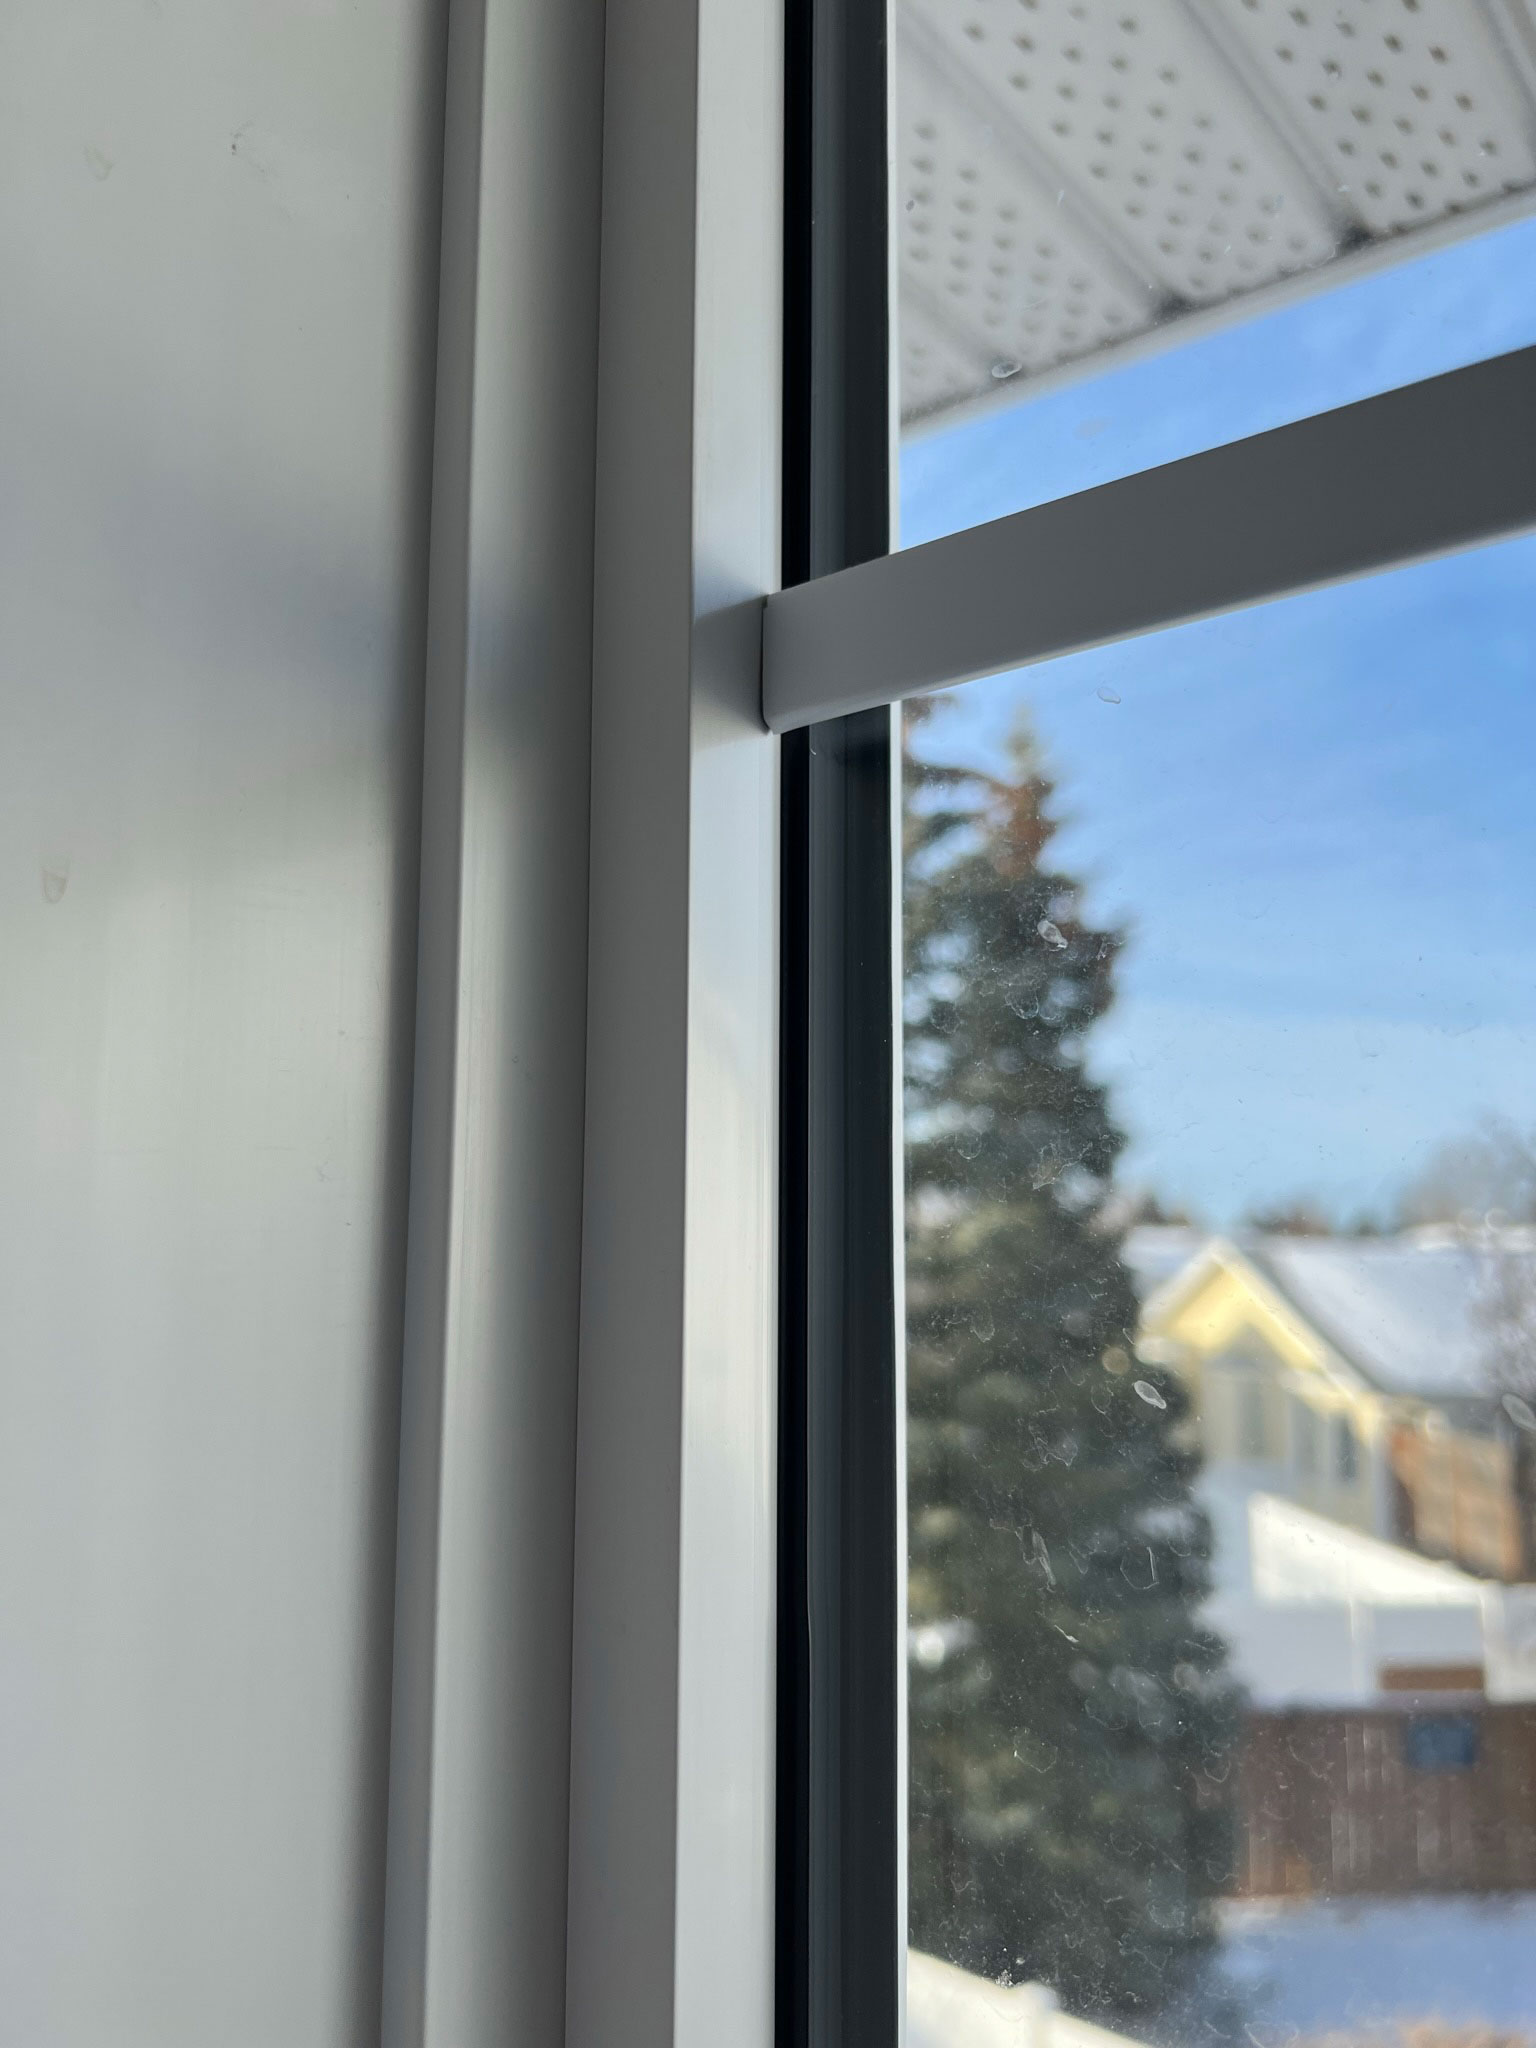
This post is not sponsored by New Panes but I really am impressed by their product! They sell plastic window pane DIY kits that you can customize to fit your older windows. They have little intersections where you attach the horizontal pieces and the vertical pieces together and then just use a little velcro double-sided tape to attach them to the window. Since my windows are vinyl windows, they really just look like the rest of the windows when I installed them. This is such an easy tutorial, you only need a pair of scissors and a measuring tape!
How to Measure and Order the DIY Window Panes
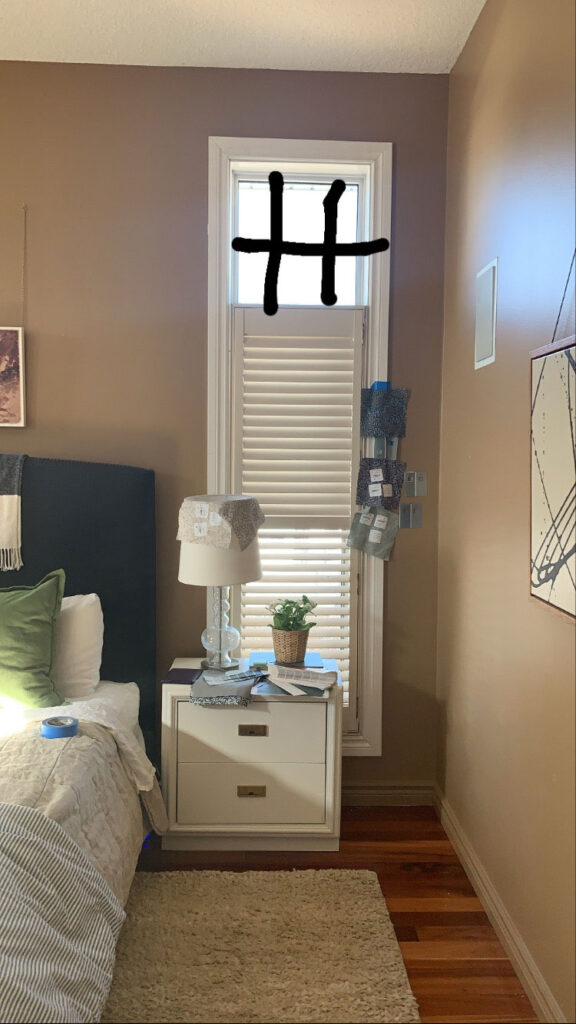
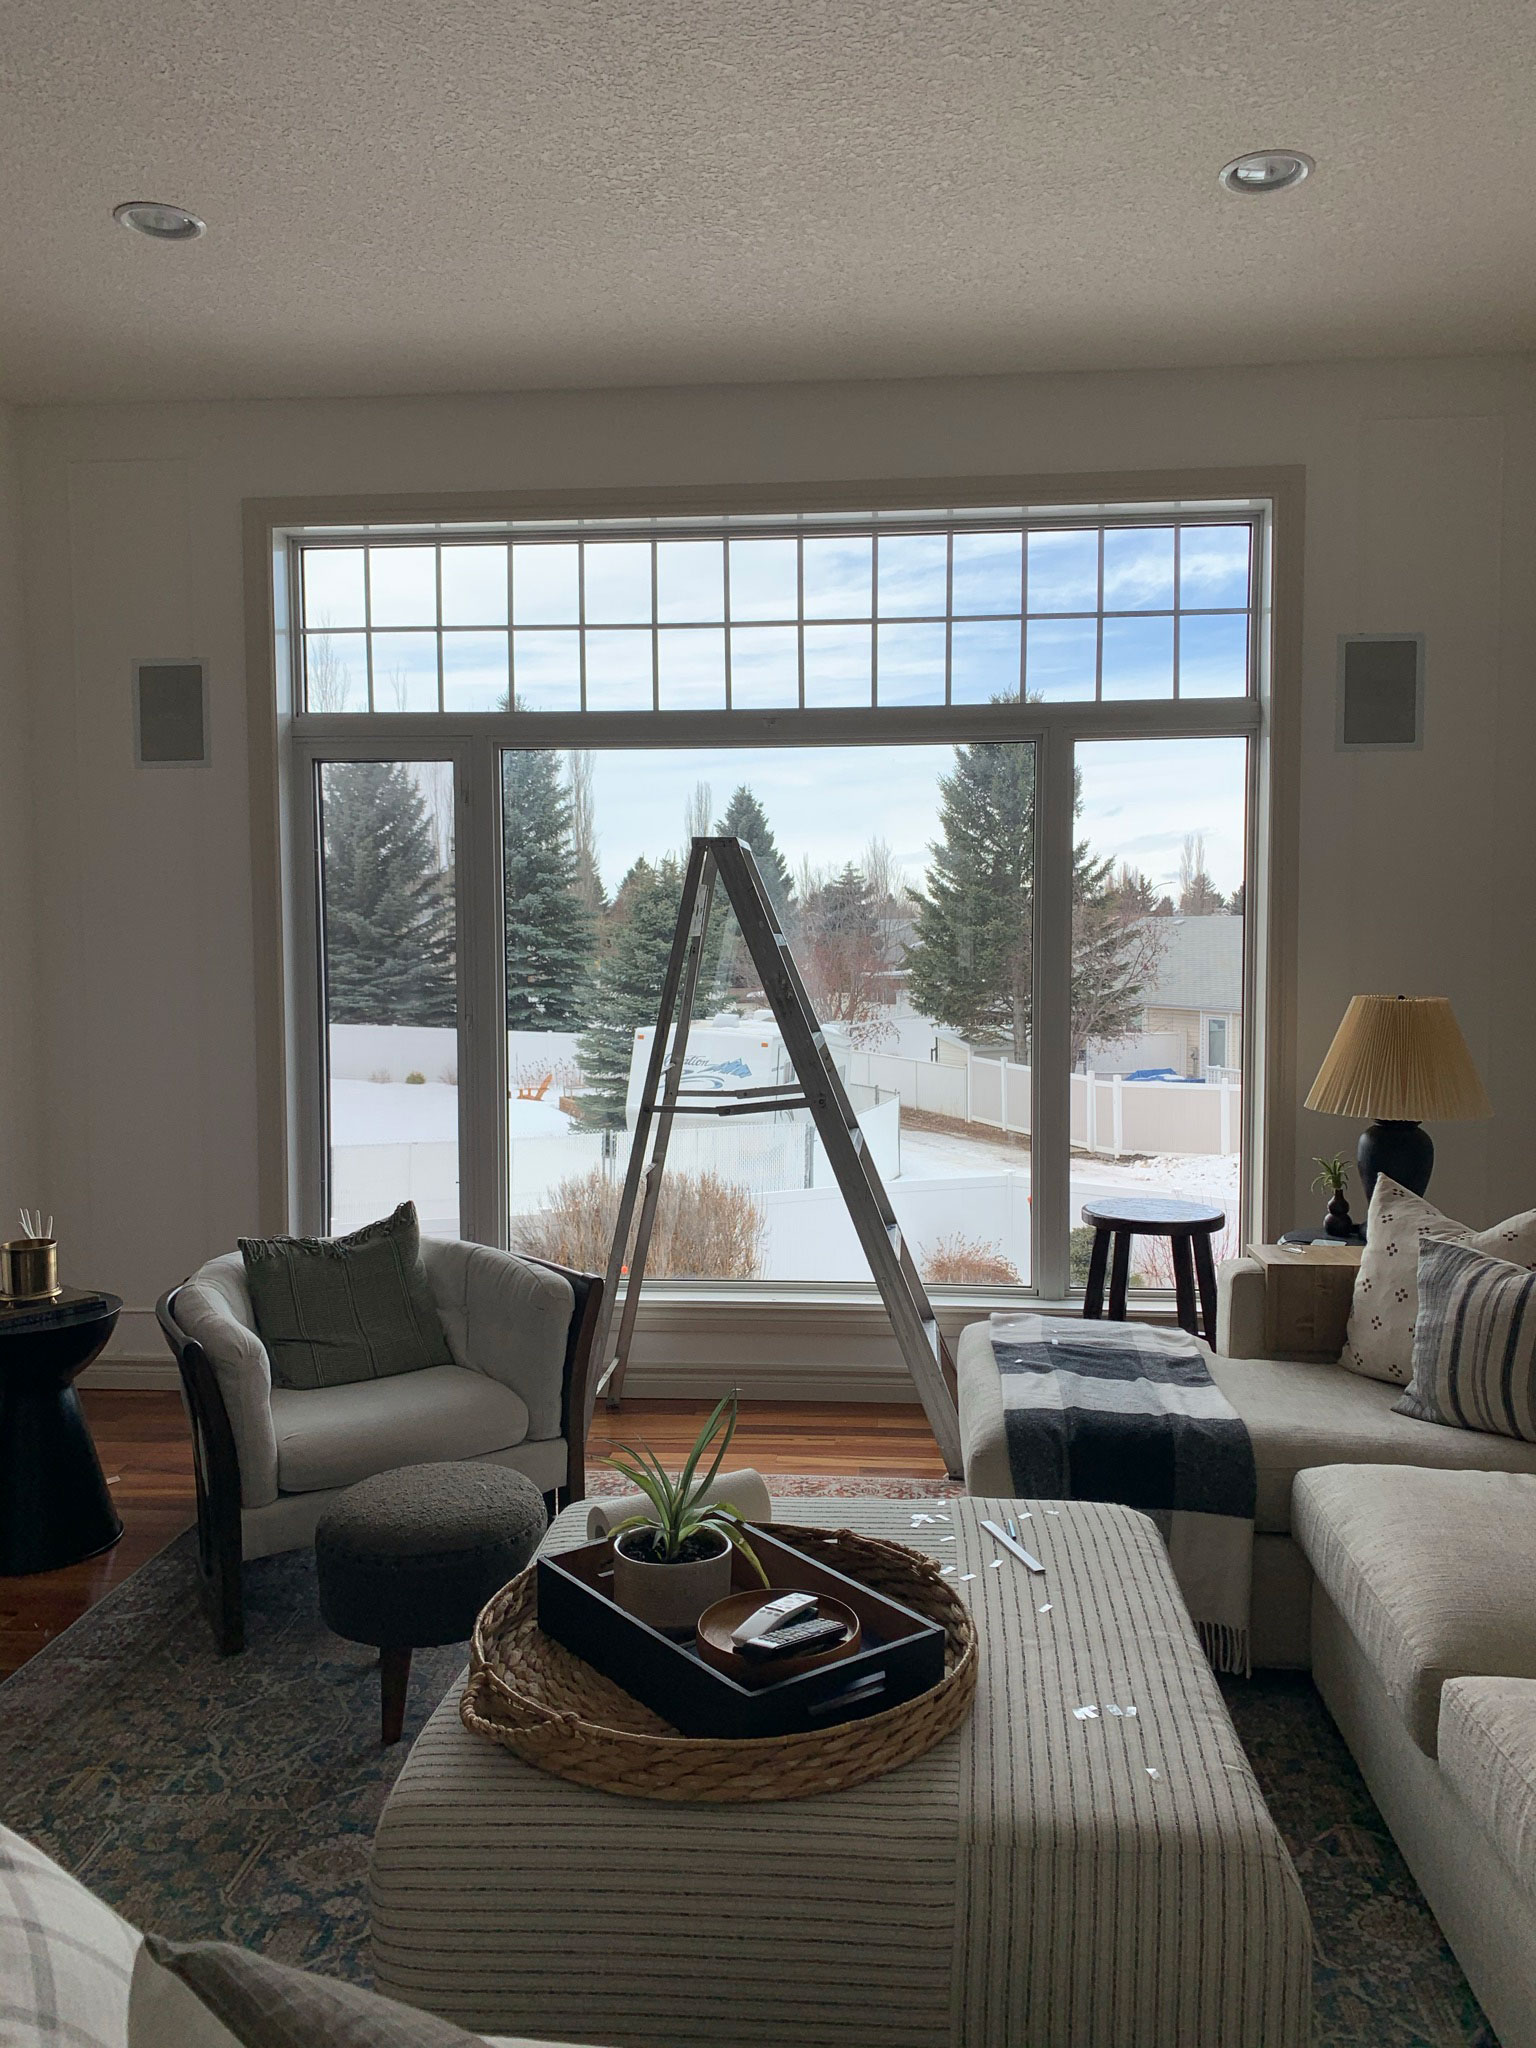
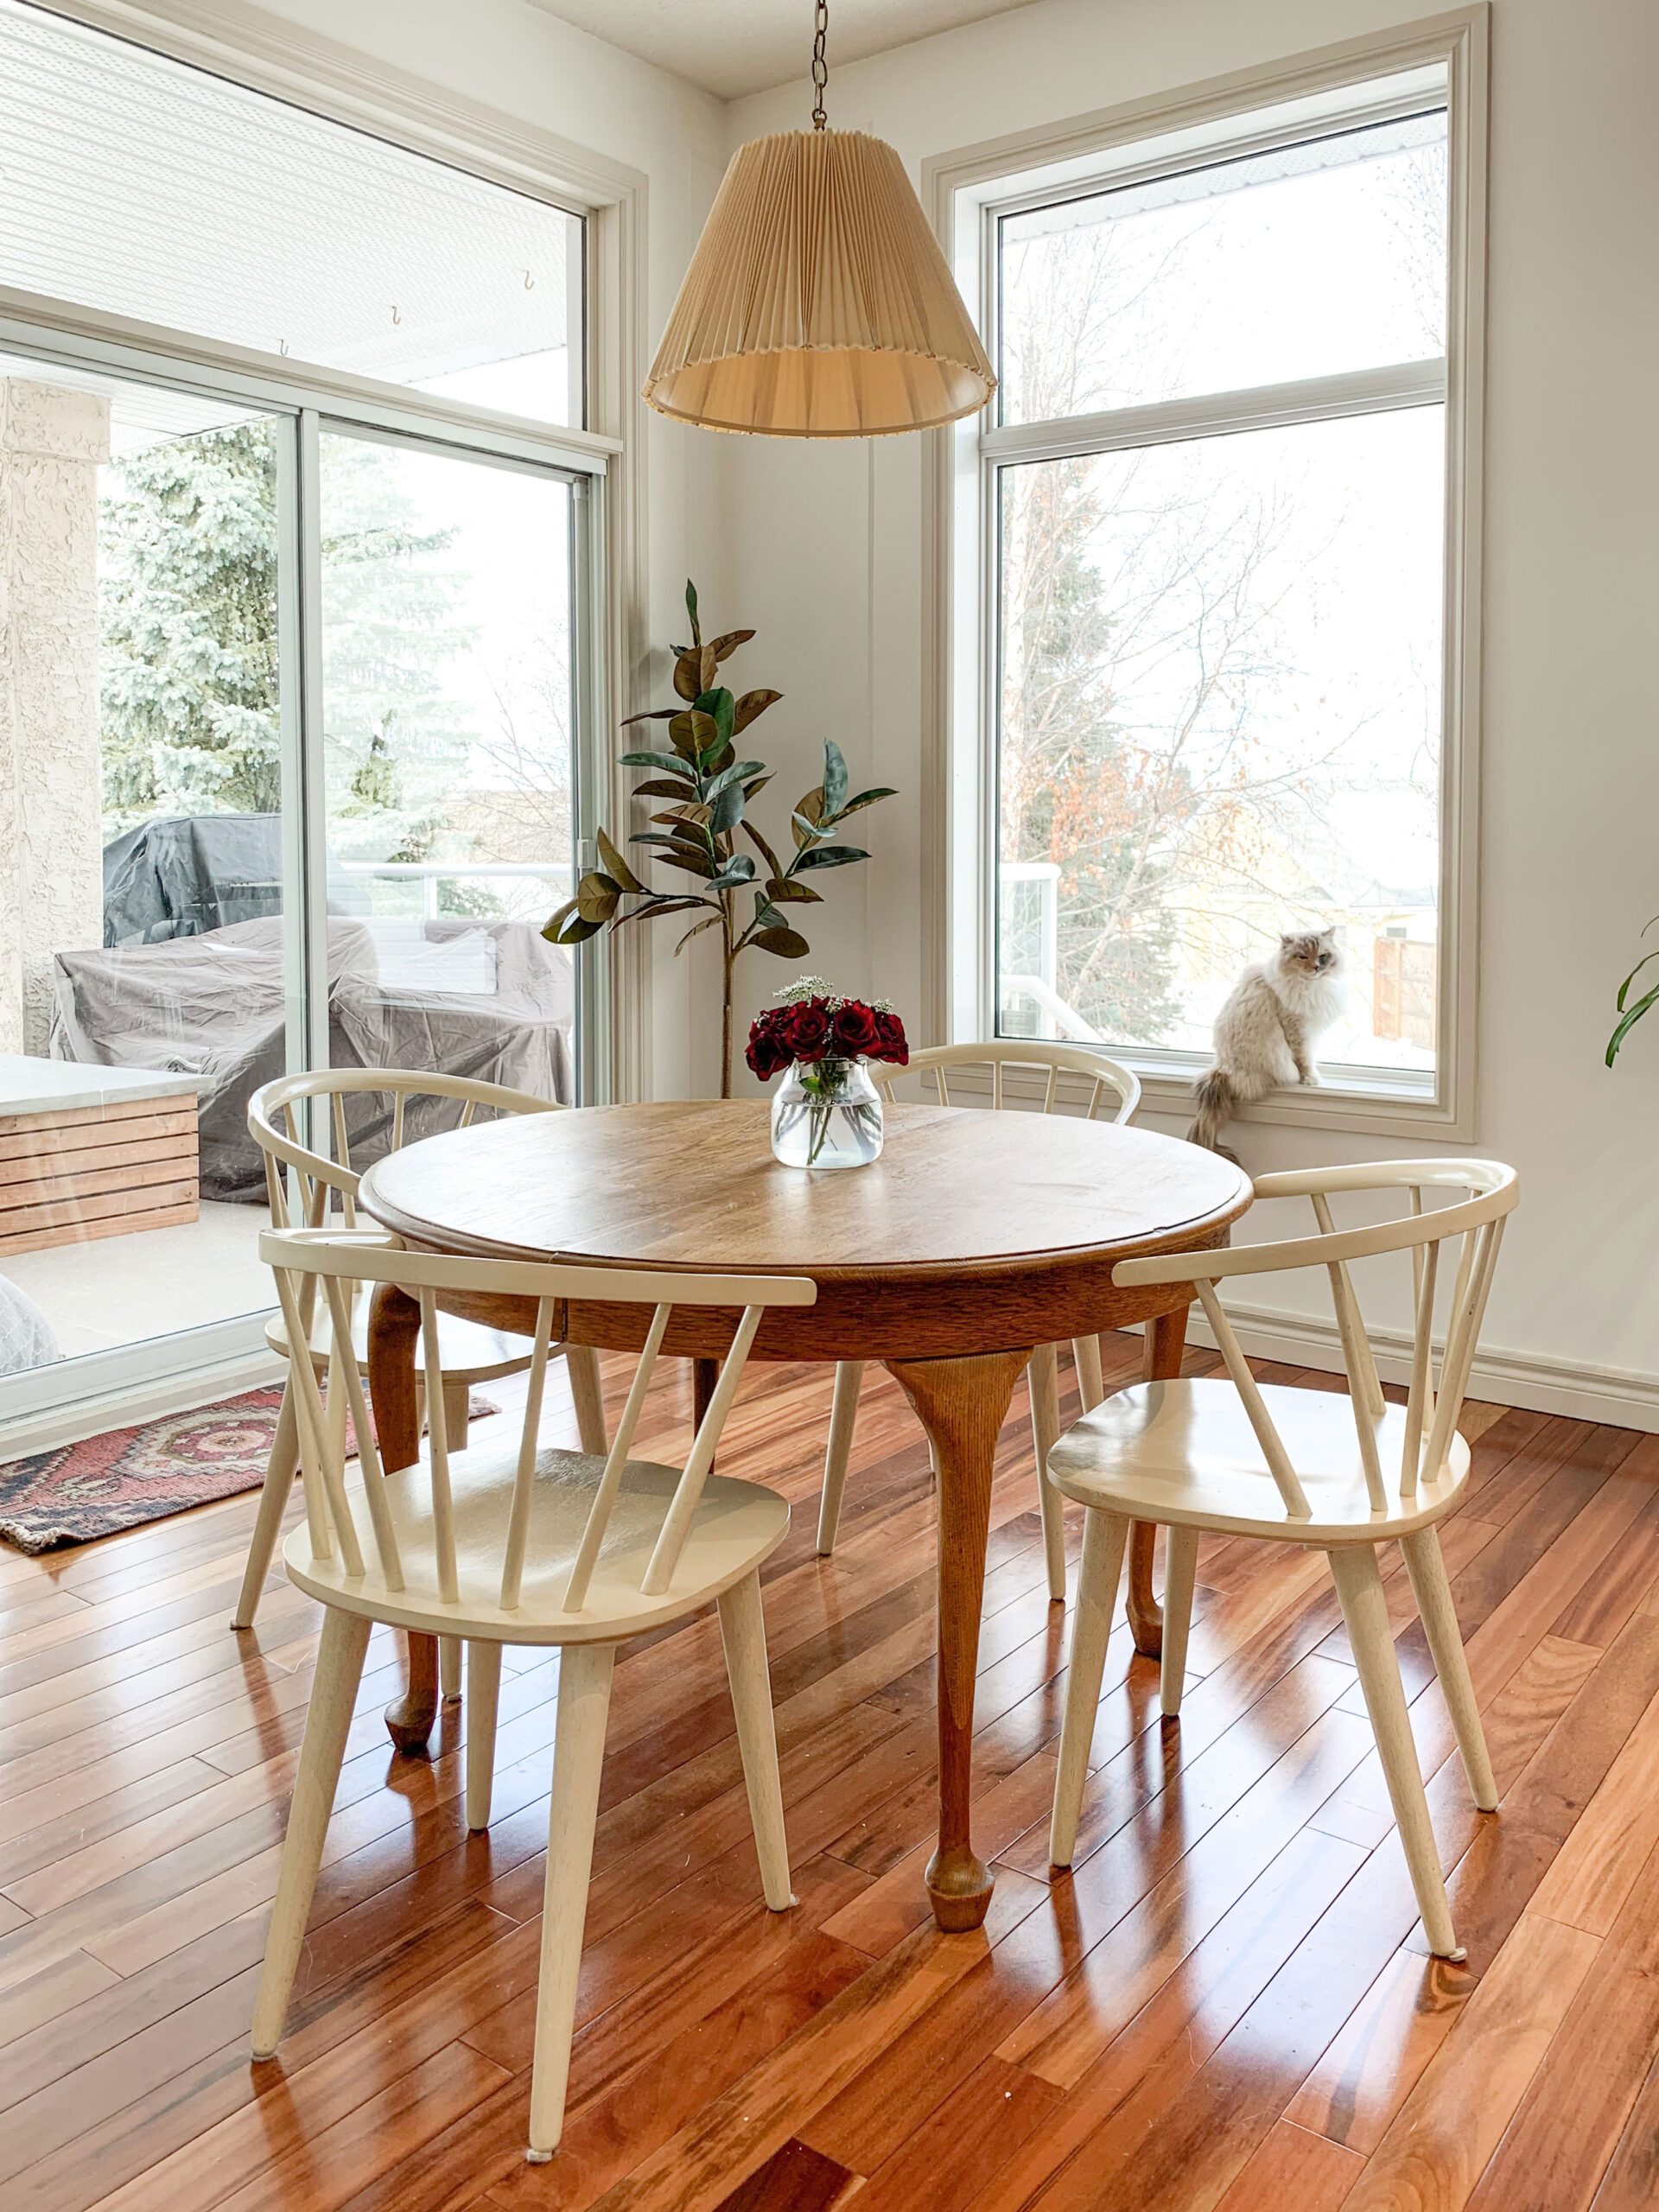
The first thing you are going to want to do is to decide where you would like the window panes. In my case, I have large windows with a top of the window with separated parts like a transom. I wasn’t sure if I wanted to cover the entire window or just the top, leaving the bottom of the window clear.
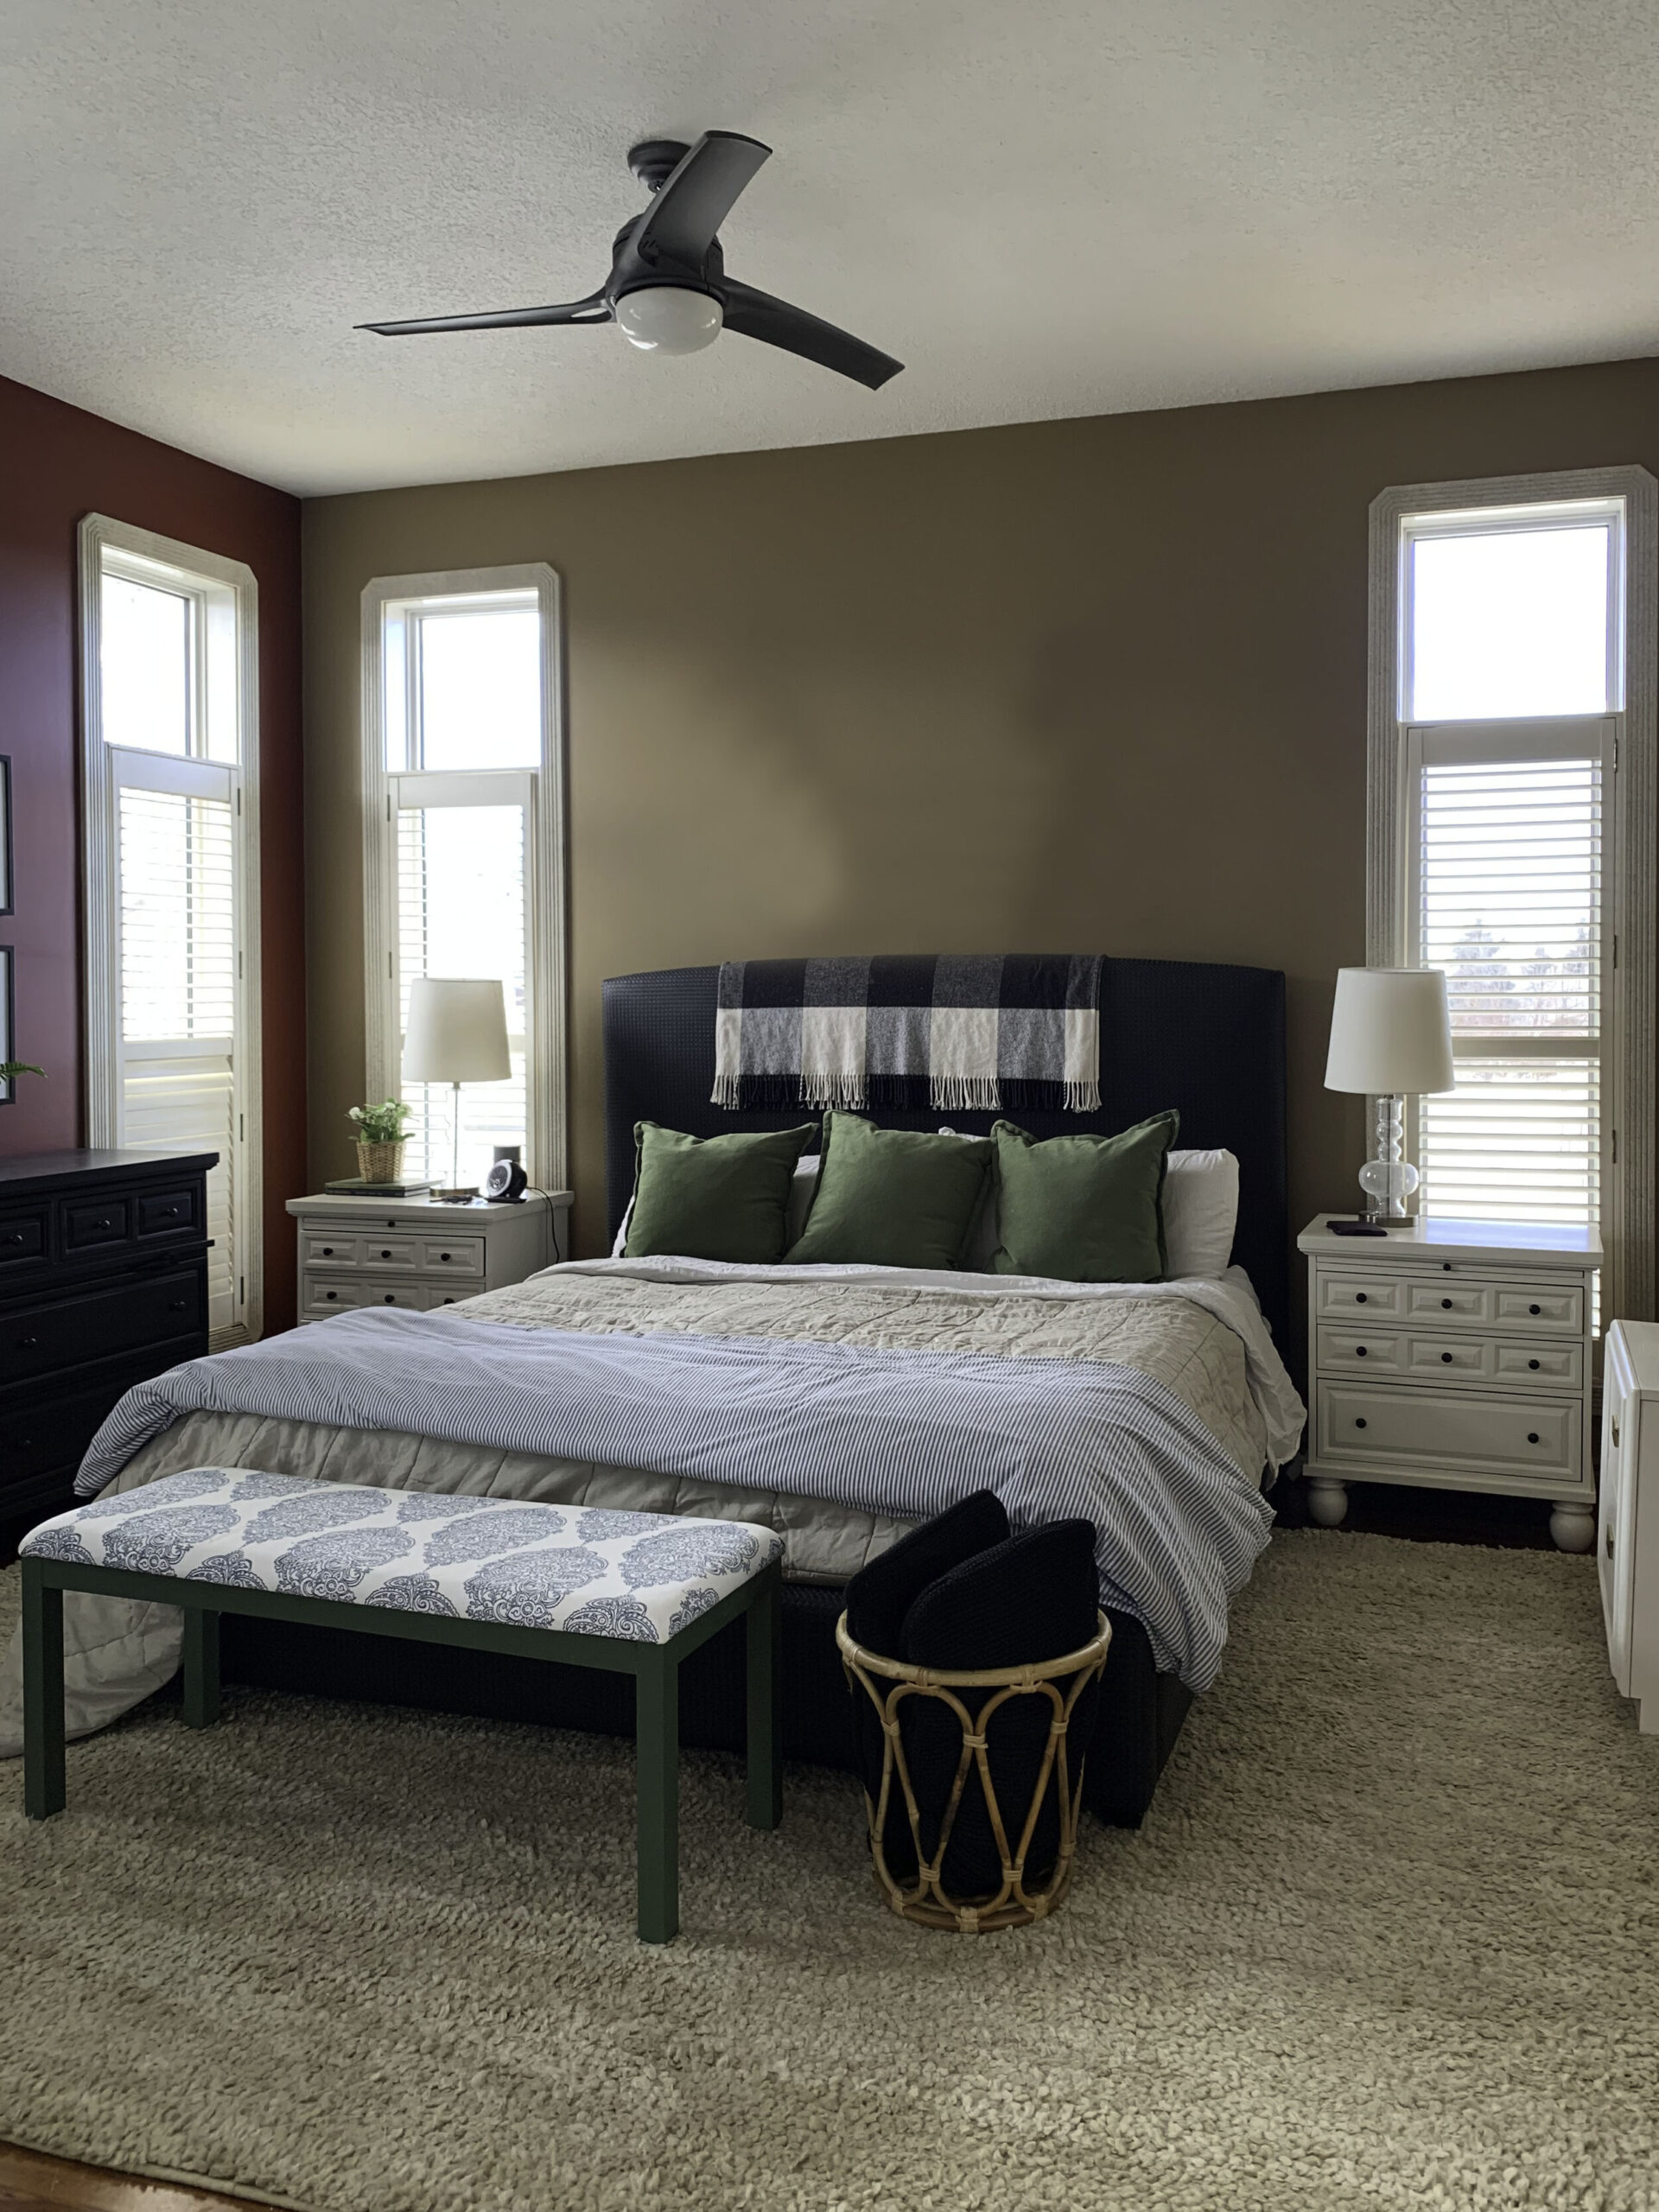
I had a look at a few inspirational photos on Pinterest but at the end of the day, I decided that the best way to picture it would be to just use painter’s tape to place on the window opening to see what I liked. In my bedroom, I just drew some super realistic sketches right on my phone!
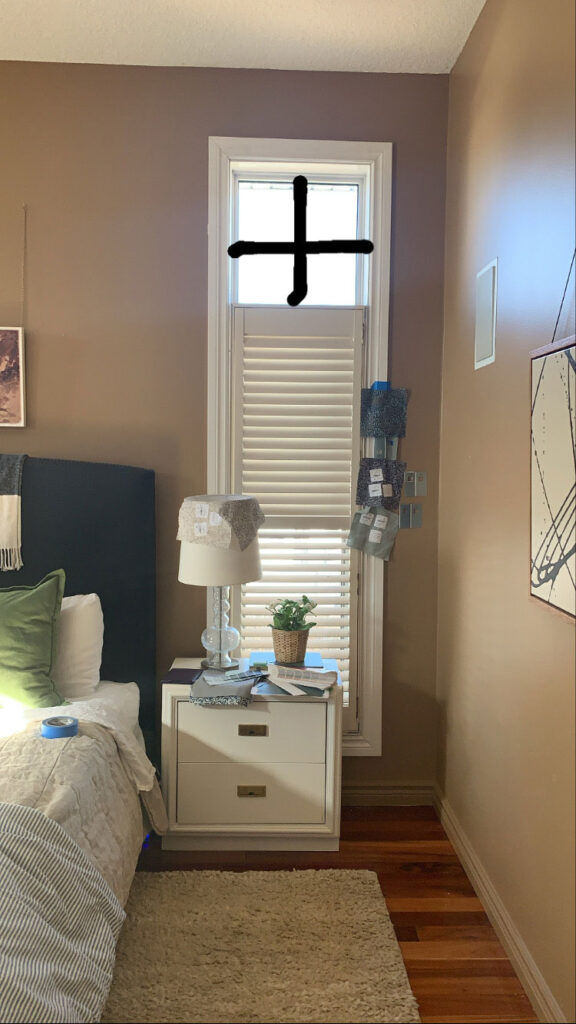
I decided that I liked the idea of just having the window panes on the top parts so the next step was to decide the size of each individual pane. On the New Panes Website, they have a super handy and informative calculator and tips for measuring, and they recommend that each pane is about the size of a piece of standard letter paper (like 8×10″), with the height being just a little taller than the width.
They also give you a choice on if you want a “surround” which is basically another piece that goes around the edges of the glass. I decided that my vinyl double-glazed windows had enough of a frame around the glass so I decided not to add anything there. Depending on your window, you may or may not want to add that.
I measured the inside of the frame (width) with a tape measure and decided how many “columns” I would need to get as close as possible to 8″ in width. Then, I measured the height and decided how many rows to get as close as possible to 10″. For my windows, mine ended up being about 7 x 9.5 inches.
Once you know how many rows and columns, and the width and height of the window you want to cover, all you need to do is pop those measurements into the handy calculator on New Panes website to get a full part list of what you need.
Shipping
New Panes ships quite reasonably to locations in the US (free shipping over $150) but it’s a little tougher to send to Canada. I contacted them through the contact form on their website to get a quote to ship to Canada. While the product is reasonably priced, the shipping is actually fairly high to ship to Canada by comparison.
However, after thinking about what it might take to DIY this I felt that it was still a great value even with shipping costs included. The folks at New Panes went out of their way to keep the costs down and recommended ordering a few extra pieces to be sure since shipping extra pieces was going to cost more than they were worth if I didn’t order enough.
Assembly of the DIY Window Panes
When the panes arrive they come as little connectors and then long plastic flat “tubes” that fit into the connectors. You will have to take the measurements that you calculated for your window glass and the sizes of the panes and cut the horizontal and vertical pieces accordingly. The Panes come with detailed instructions on what size to cut each of these for your desired pane size, which considers the width of the connectors.
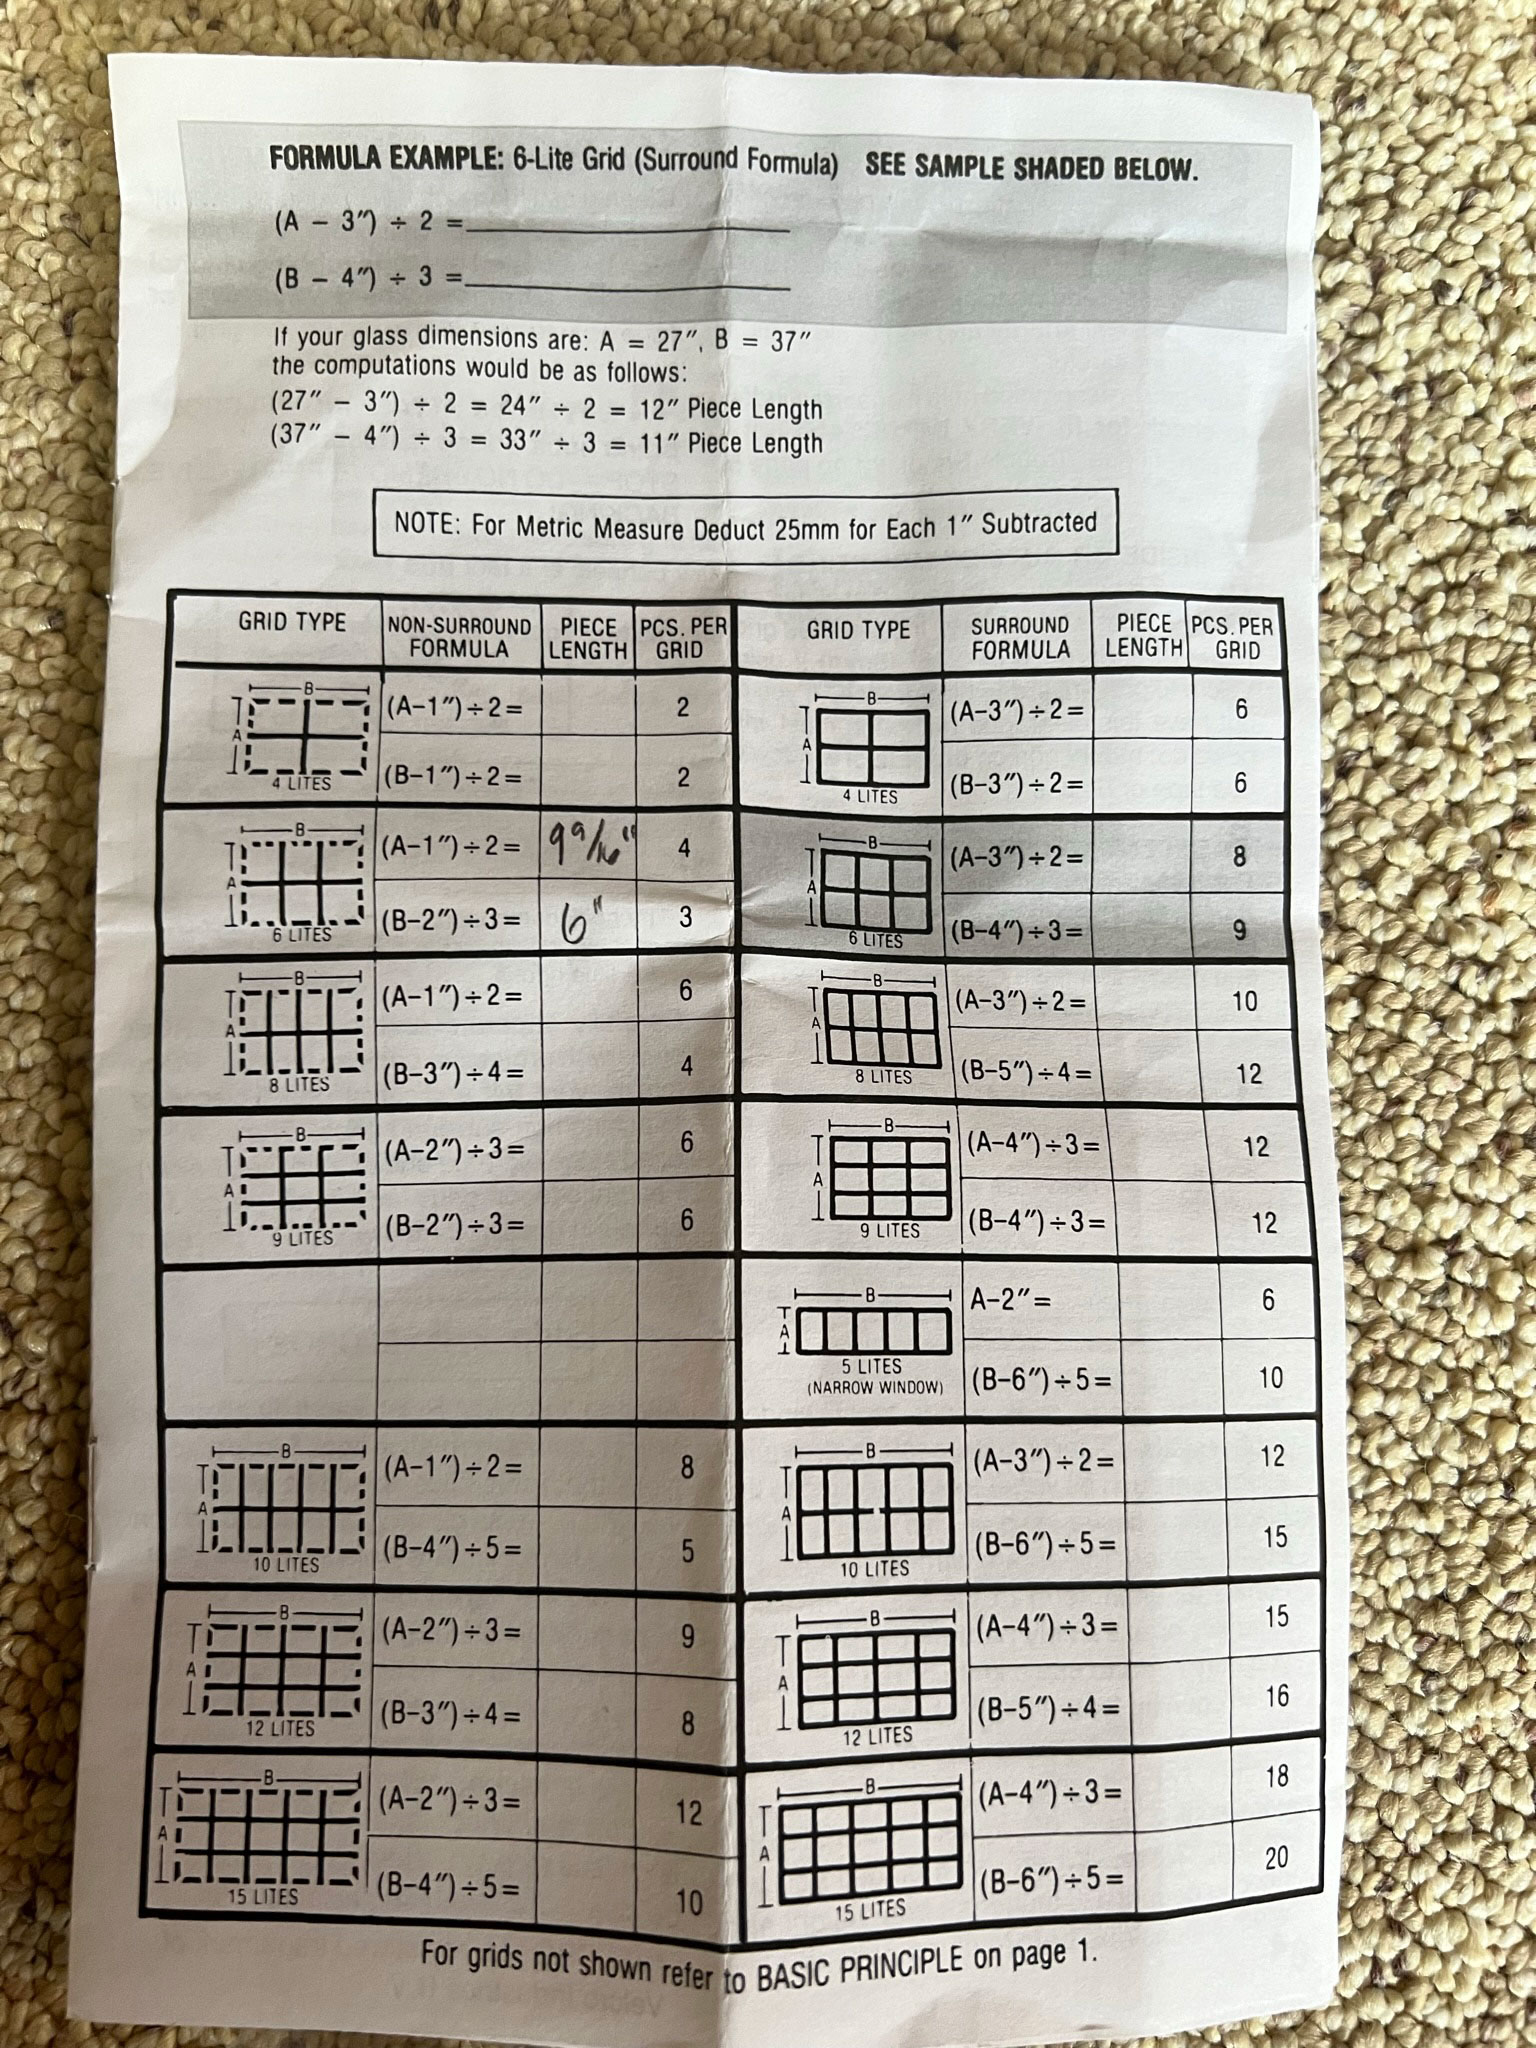
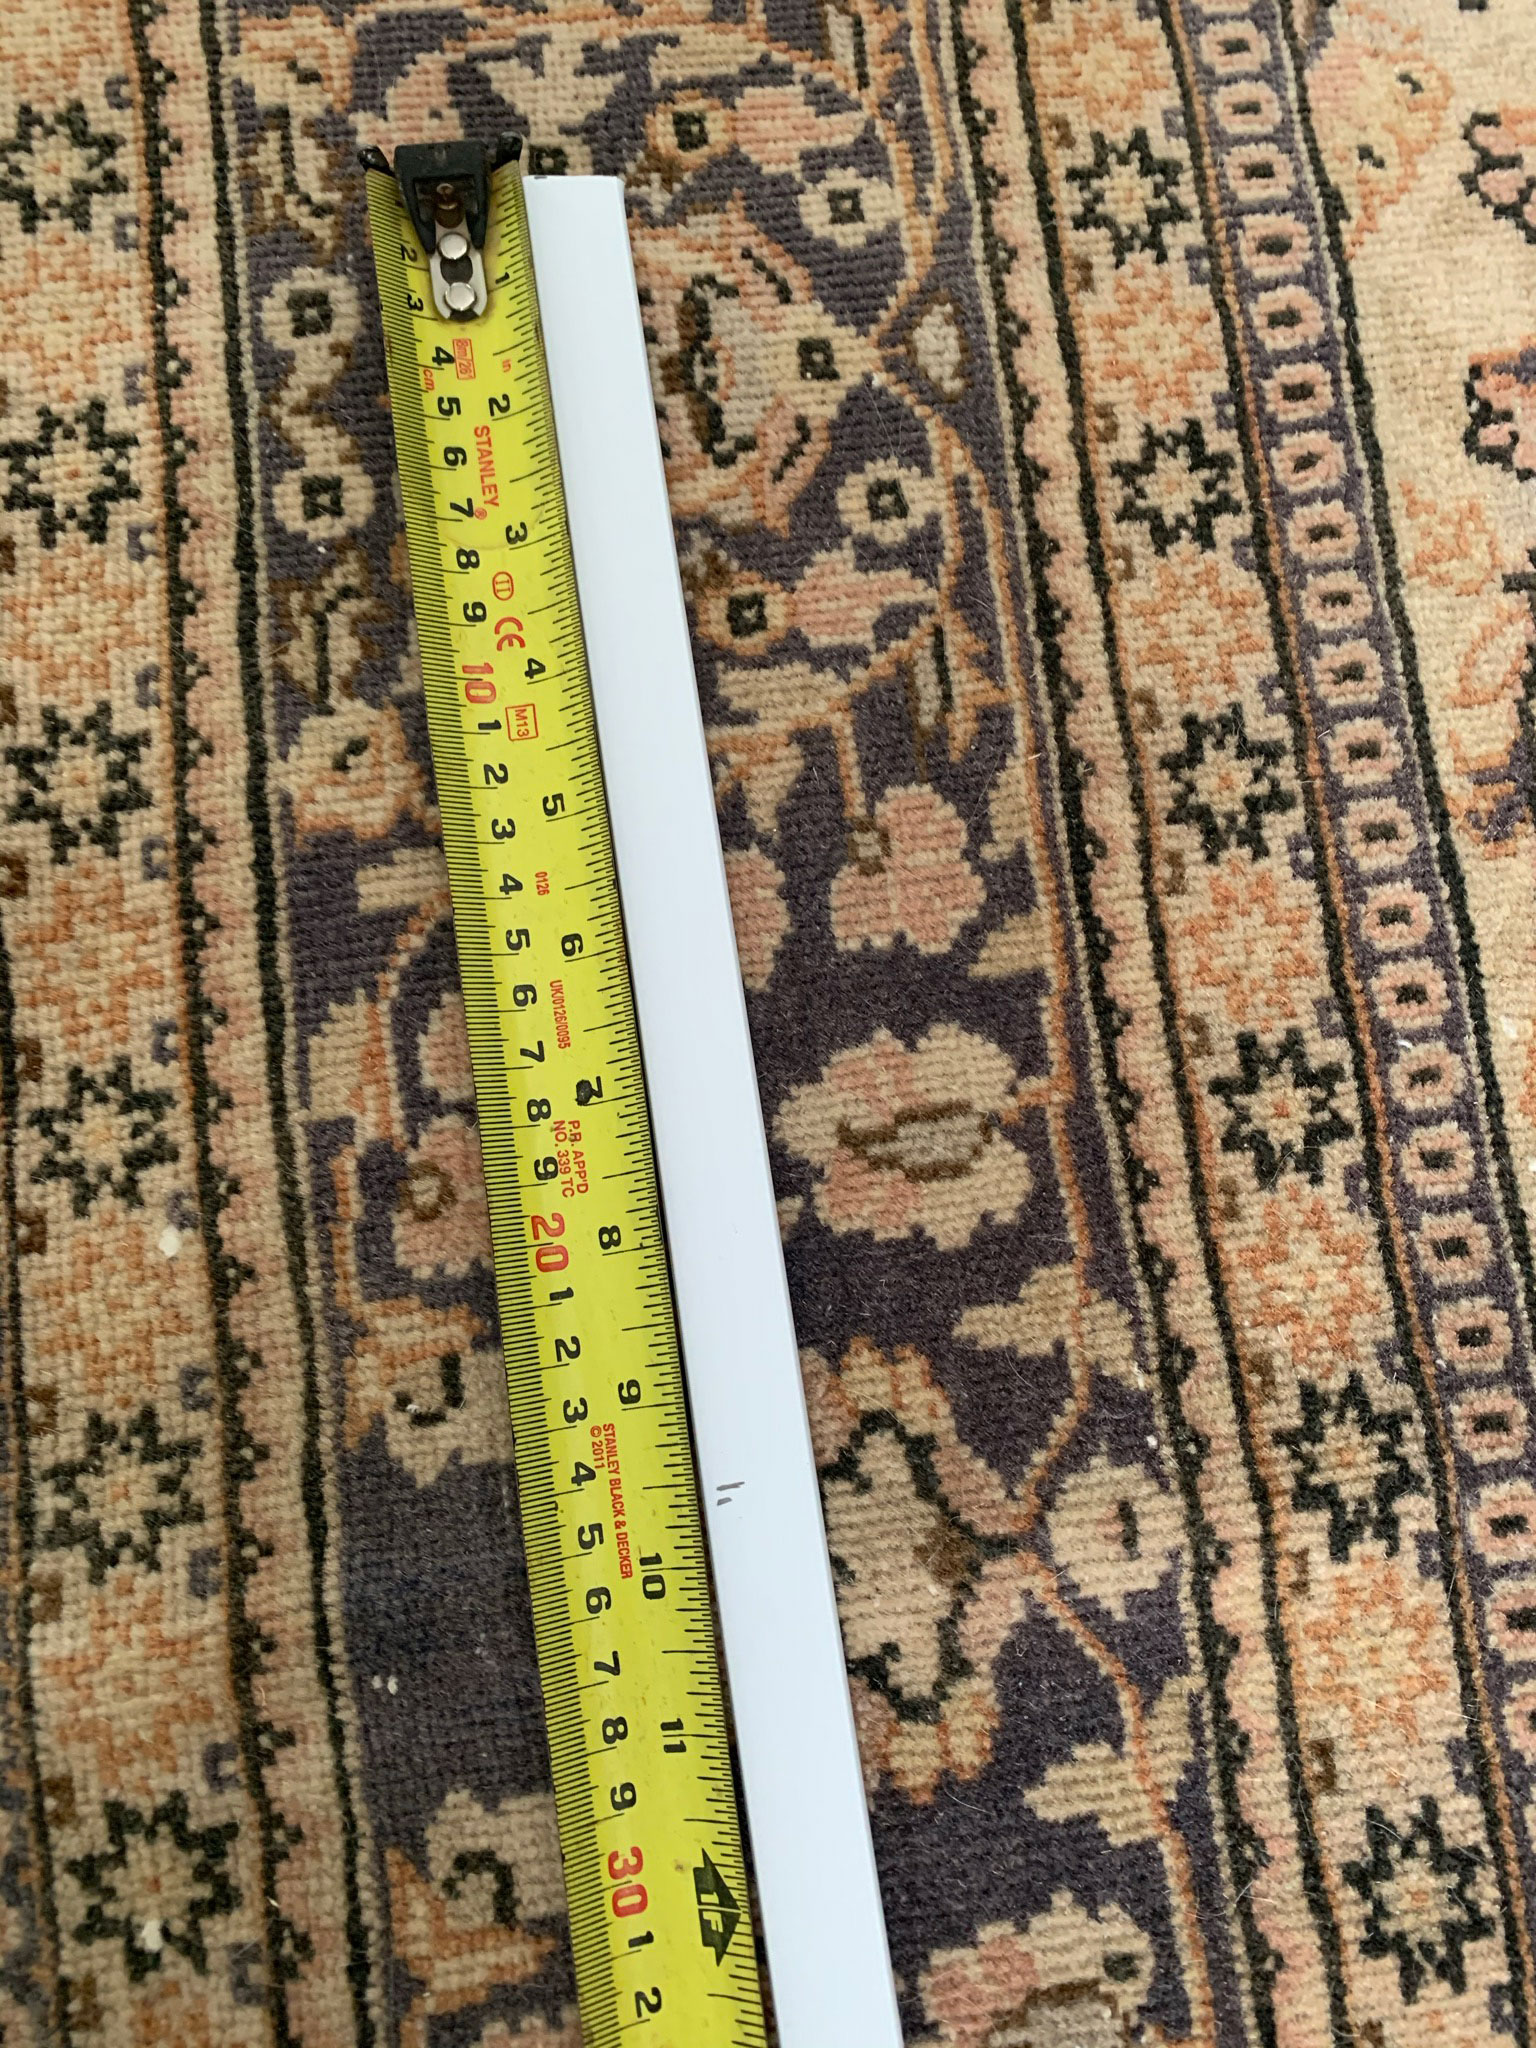
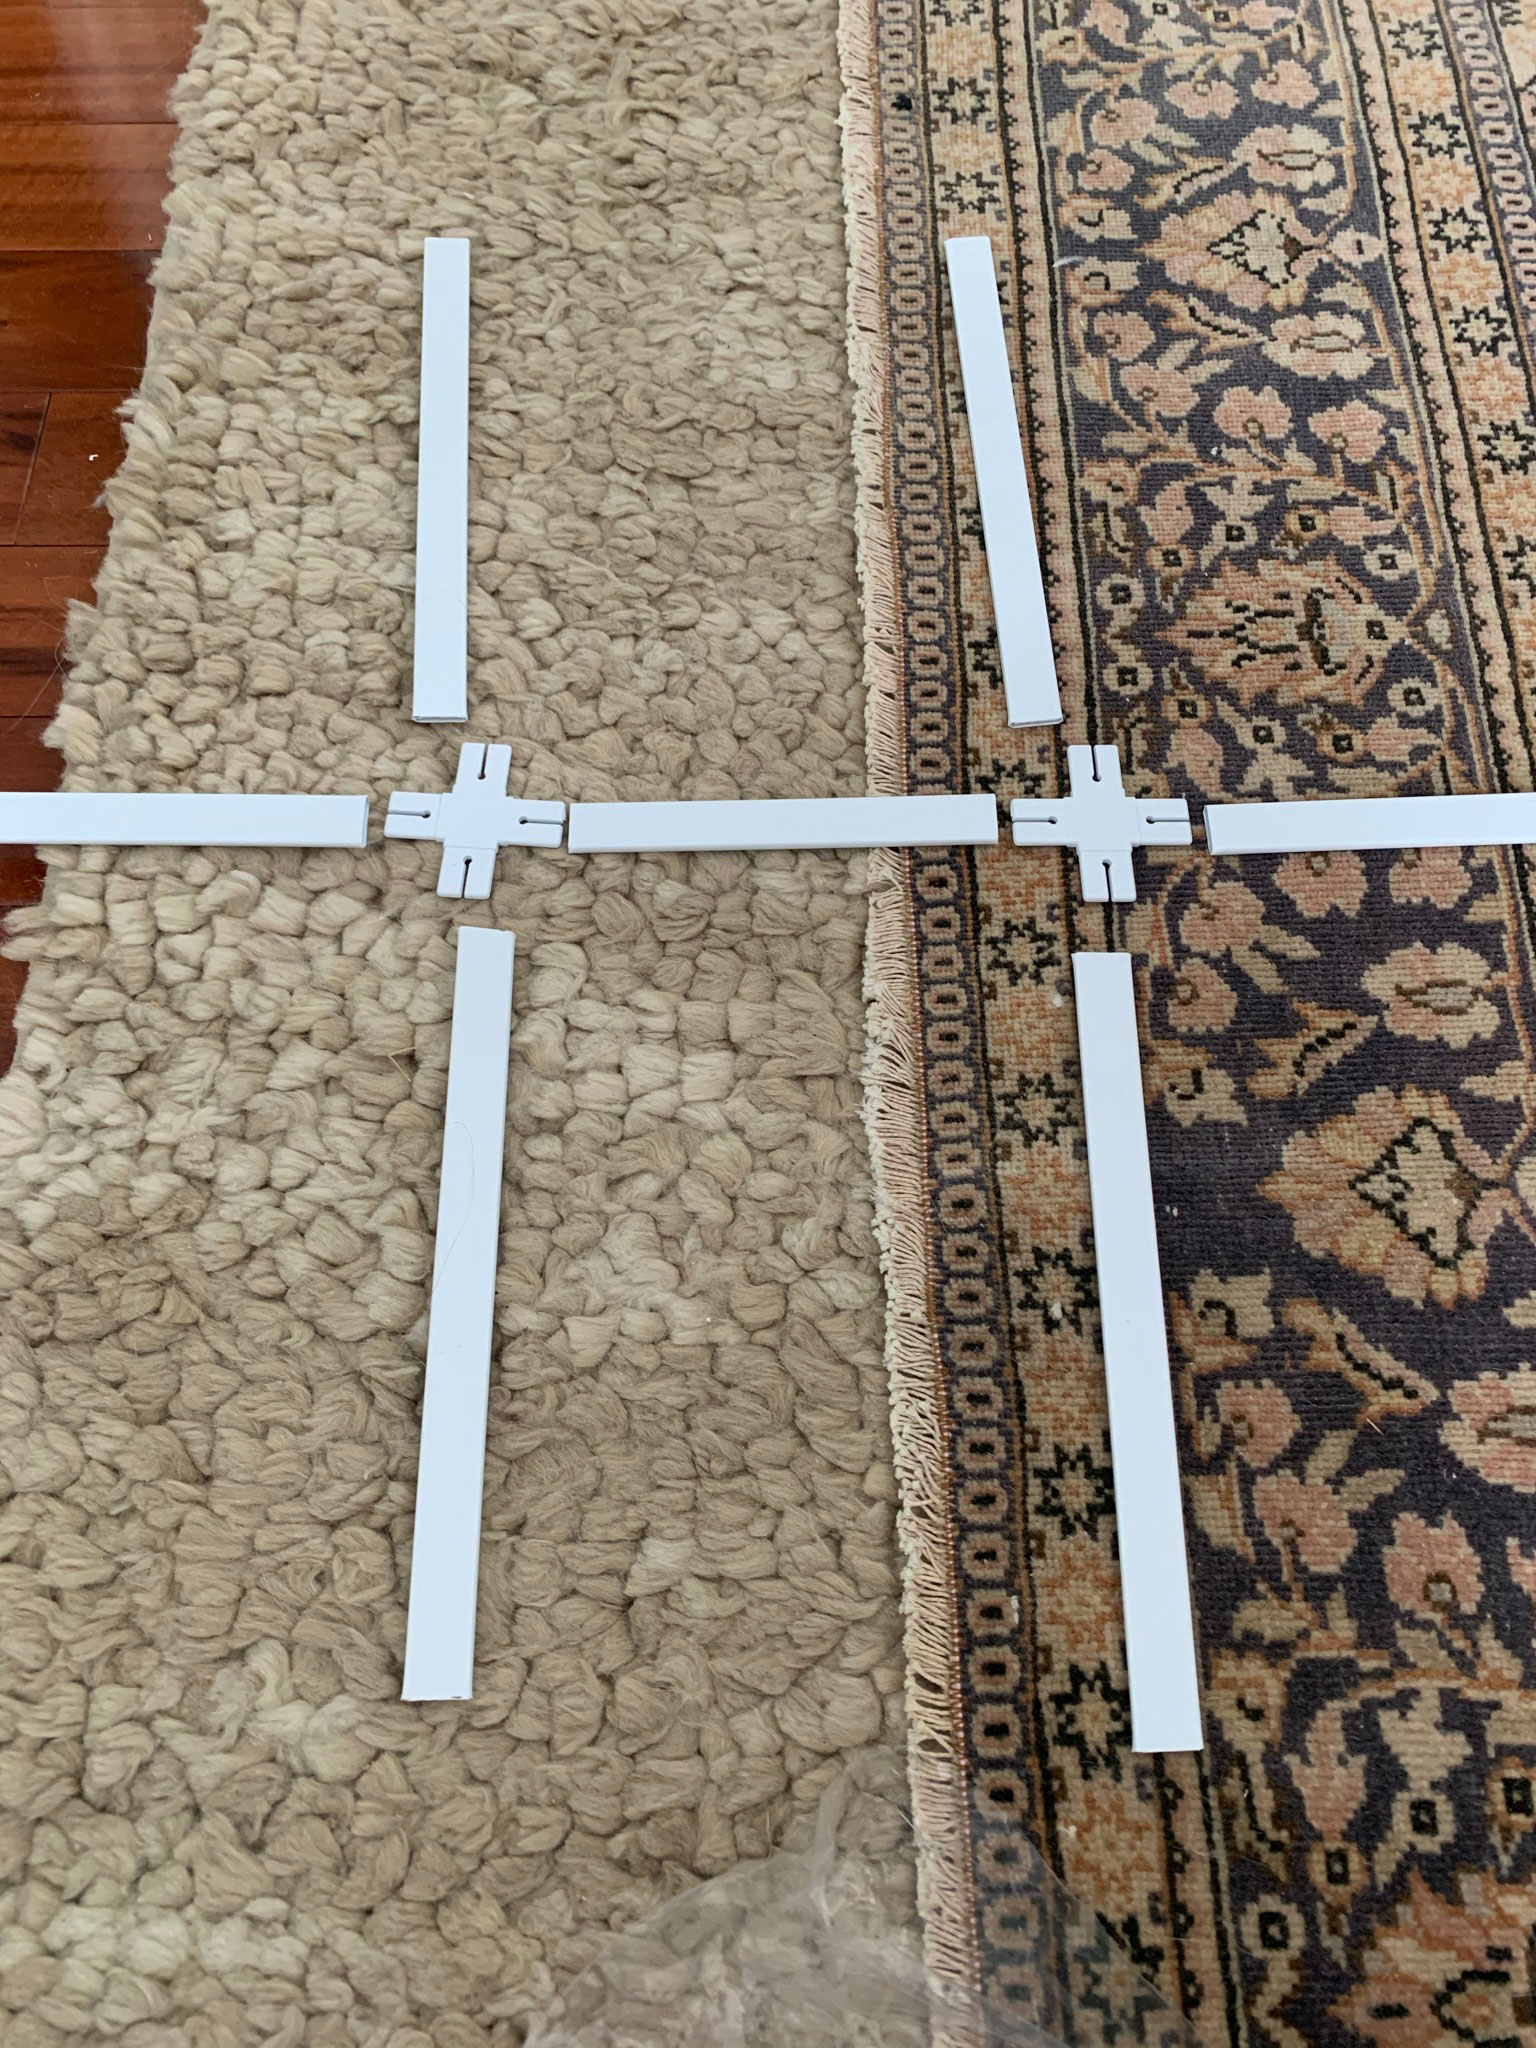
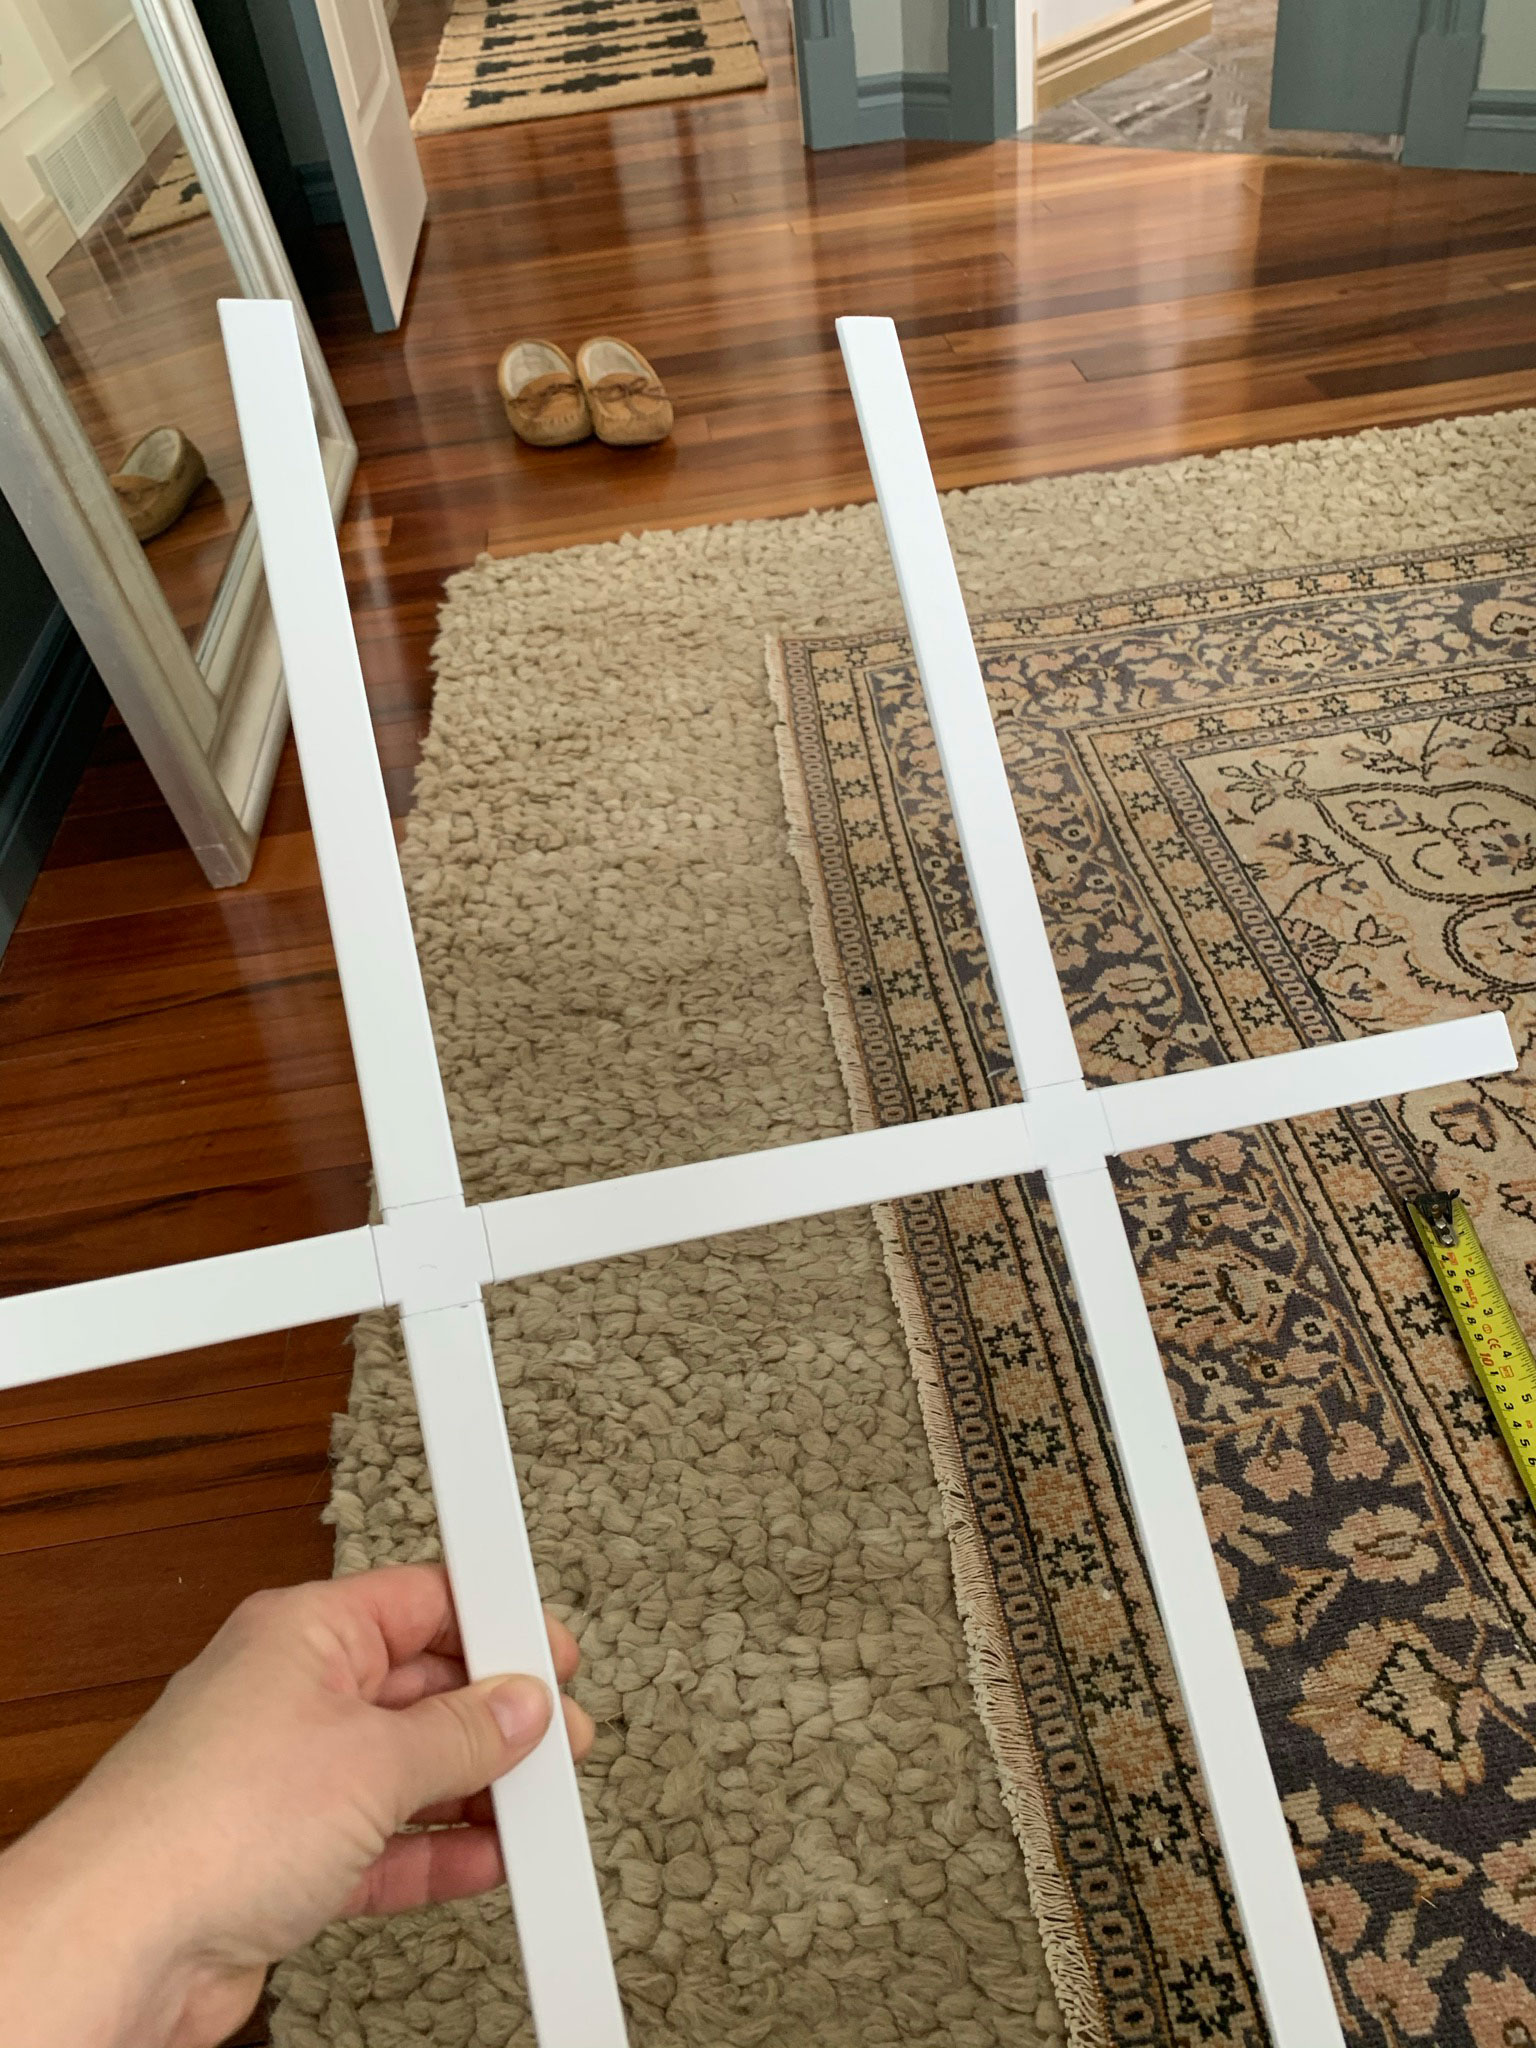
It is definitely a measure twice cut once situation, but once you are sure of the size you need, it’s just a matter of cutting the long pieces with a pair of scissors or a razor blade. Once the pieces are cut, you just fit them all together using the connectors to form a grid.
Installation of the DIY window panes
Once the large grid is cut, attaching them to the inside of the glass windows is easy. They have a few ways to attach but I opted to use the double-sided velcro tape. This means that I can easily take them down and put them back up whenever I want to clean the window instead of having to try to clean around them, cleaning the inside each of the glass panes.
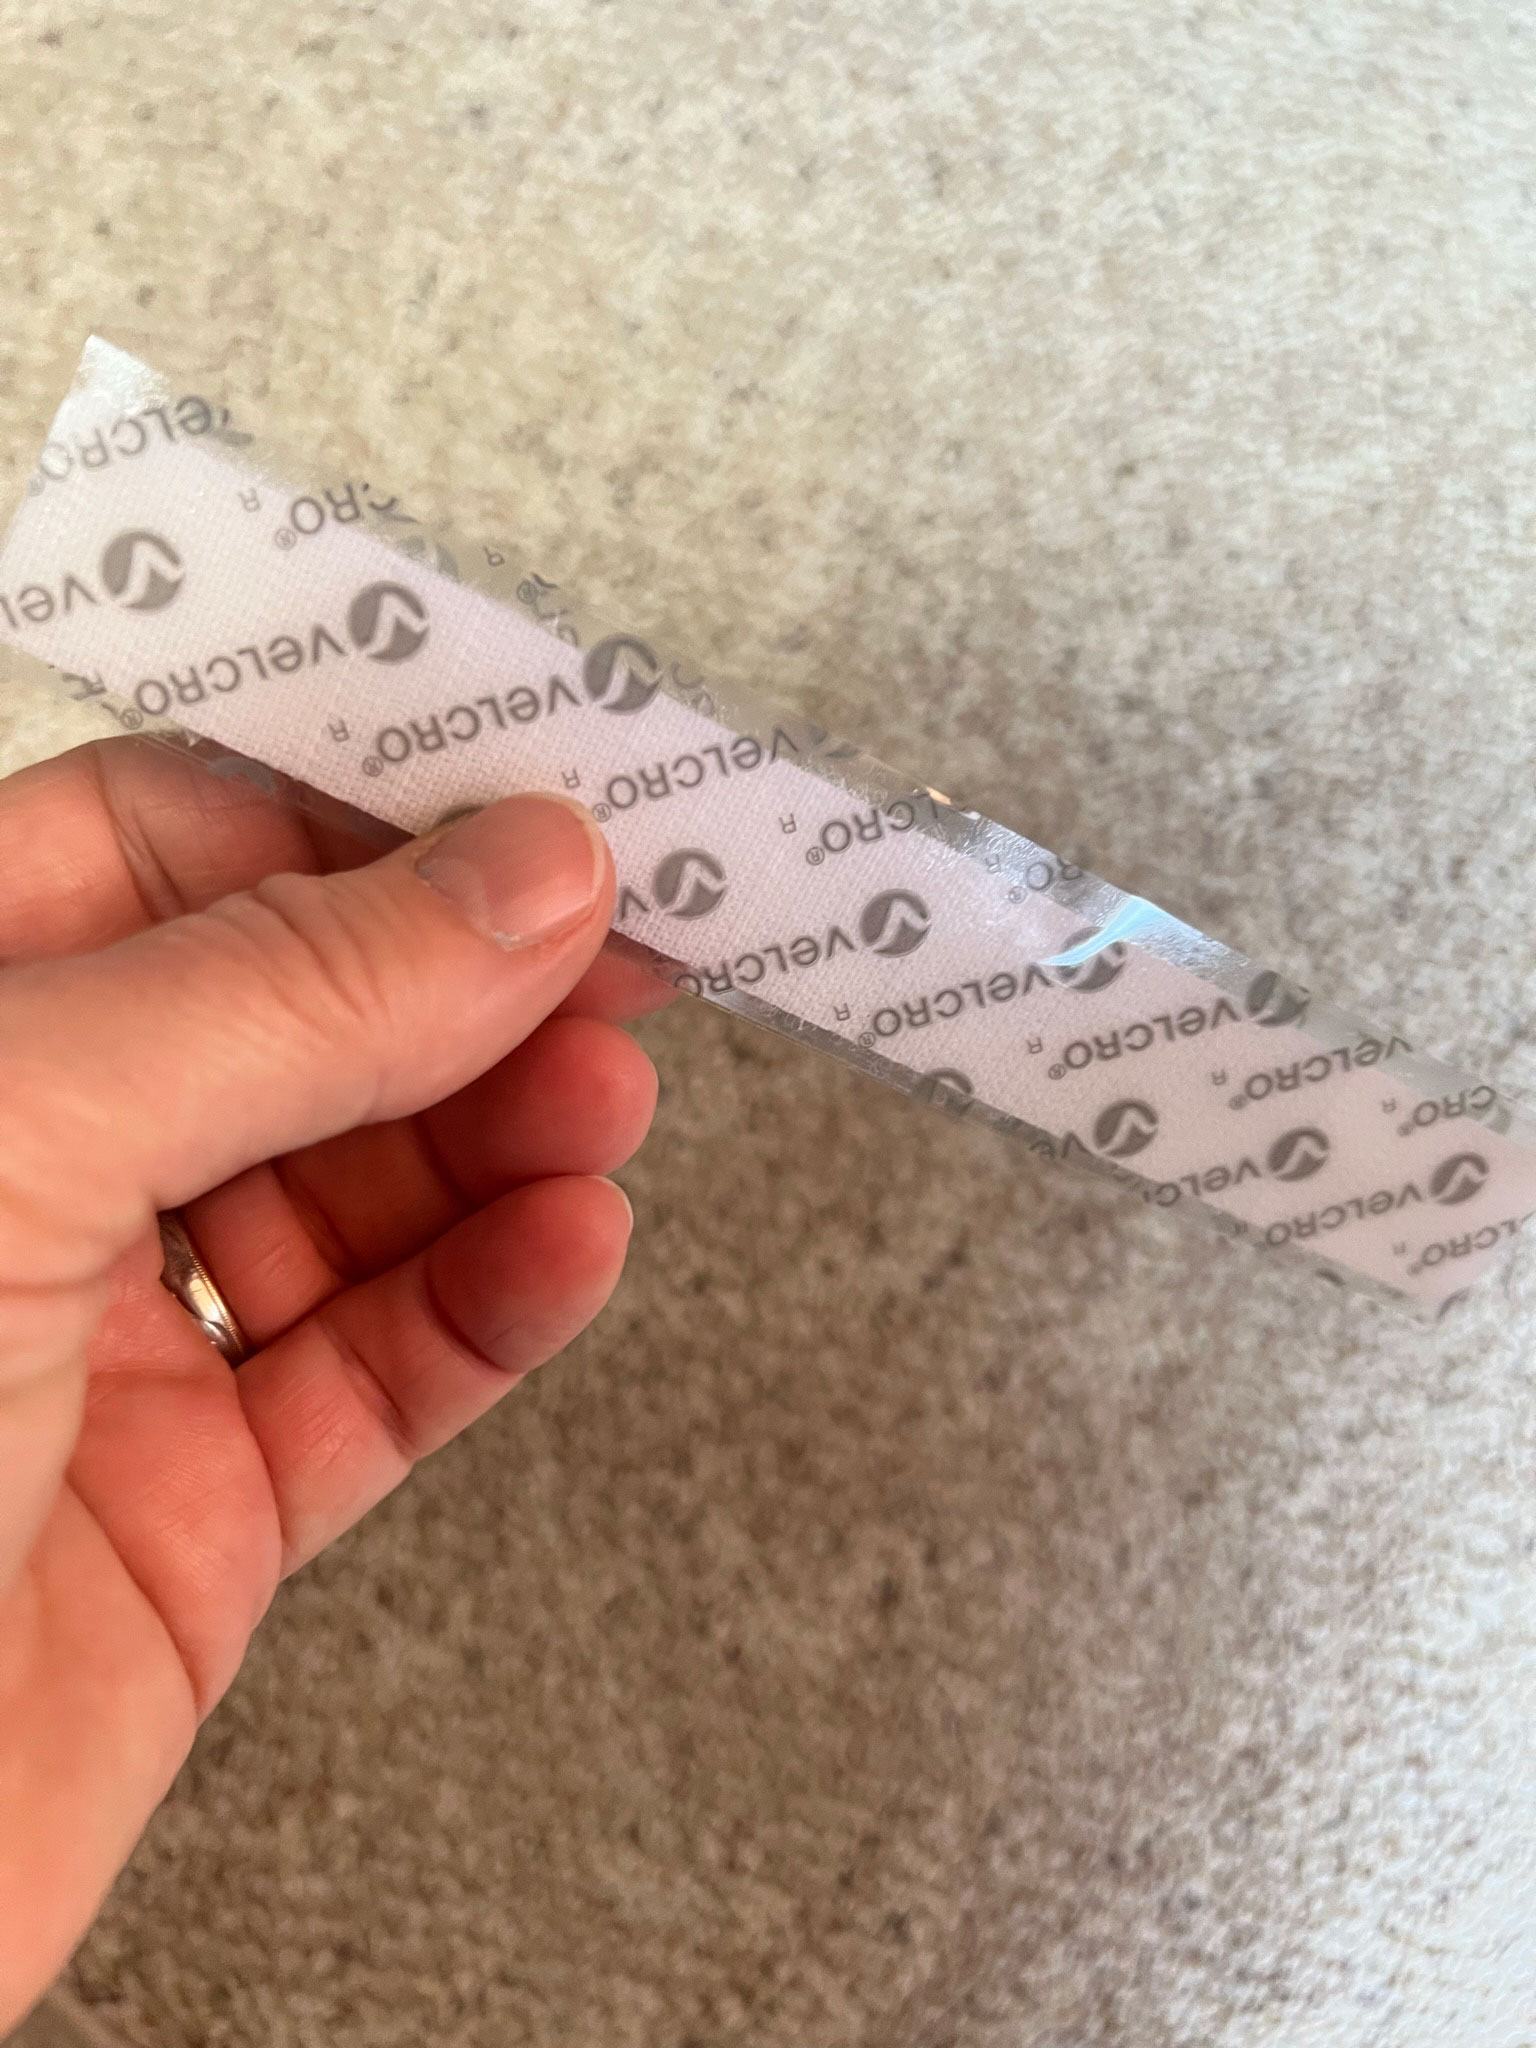
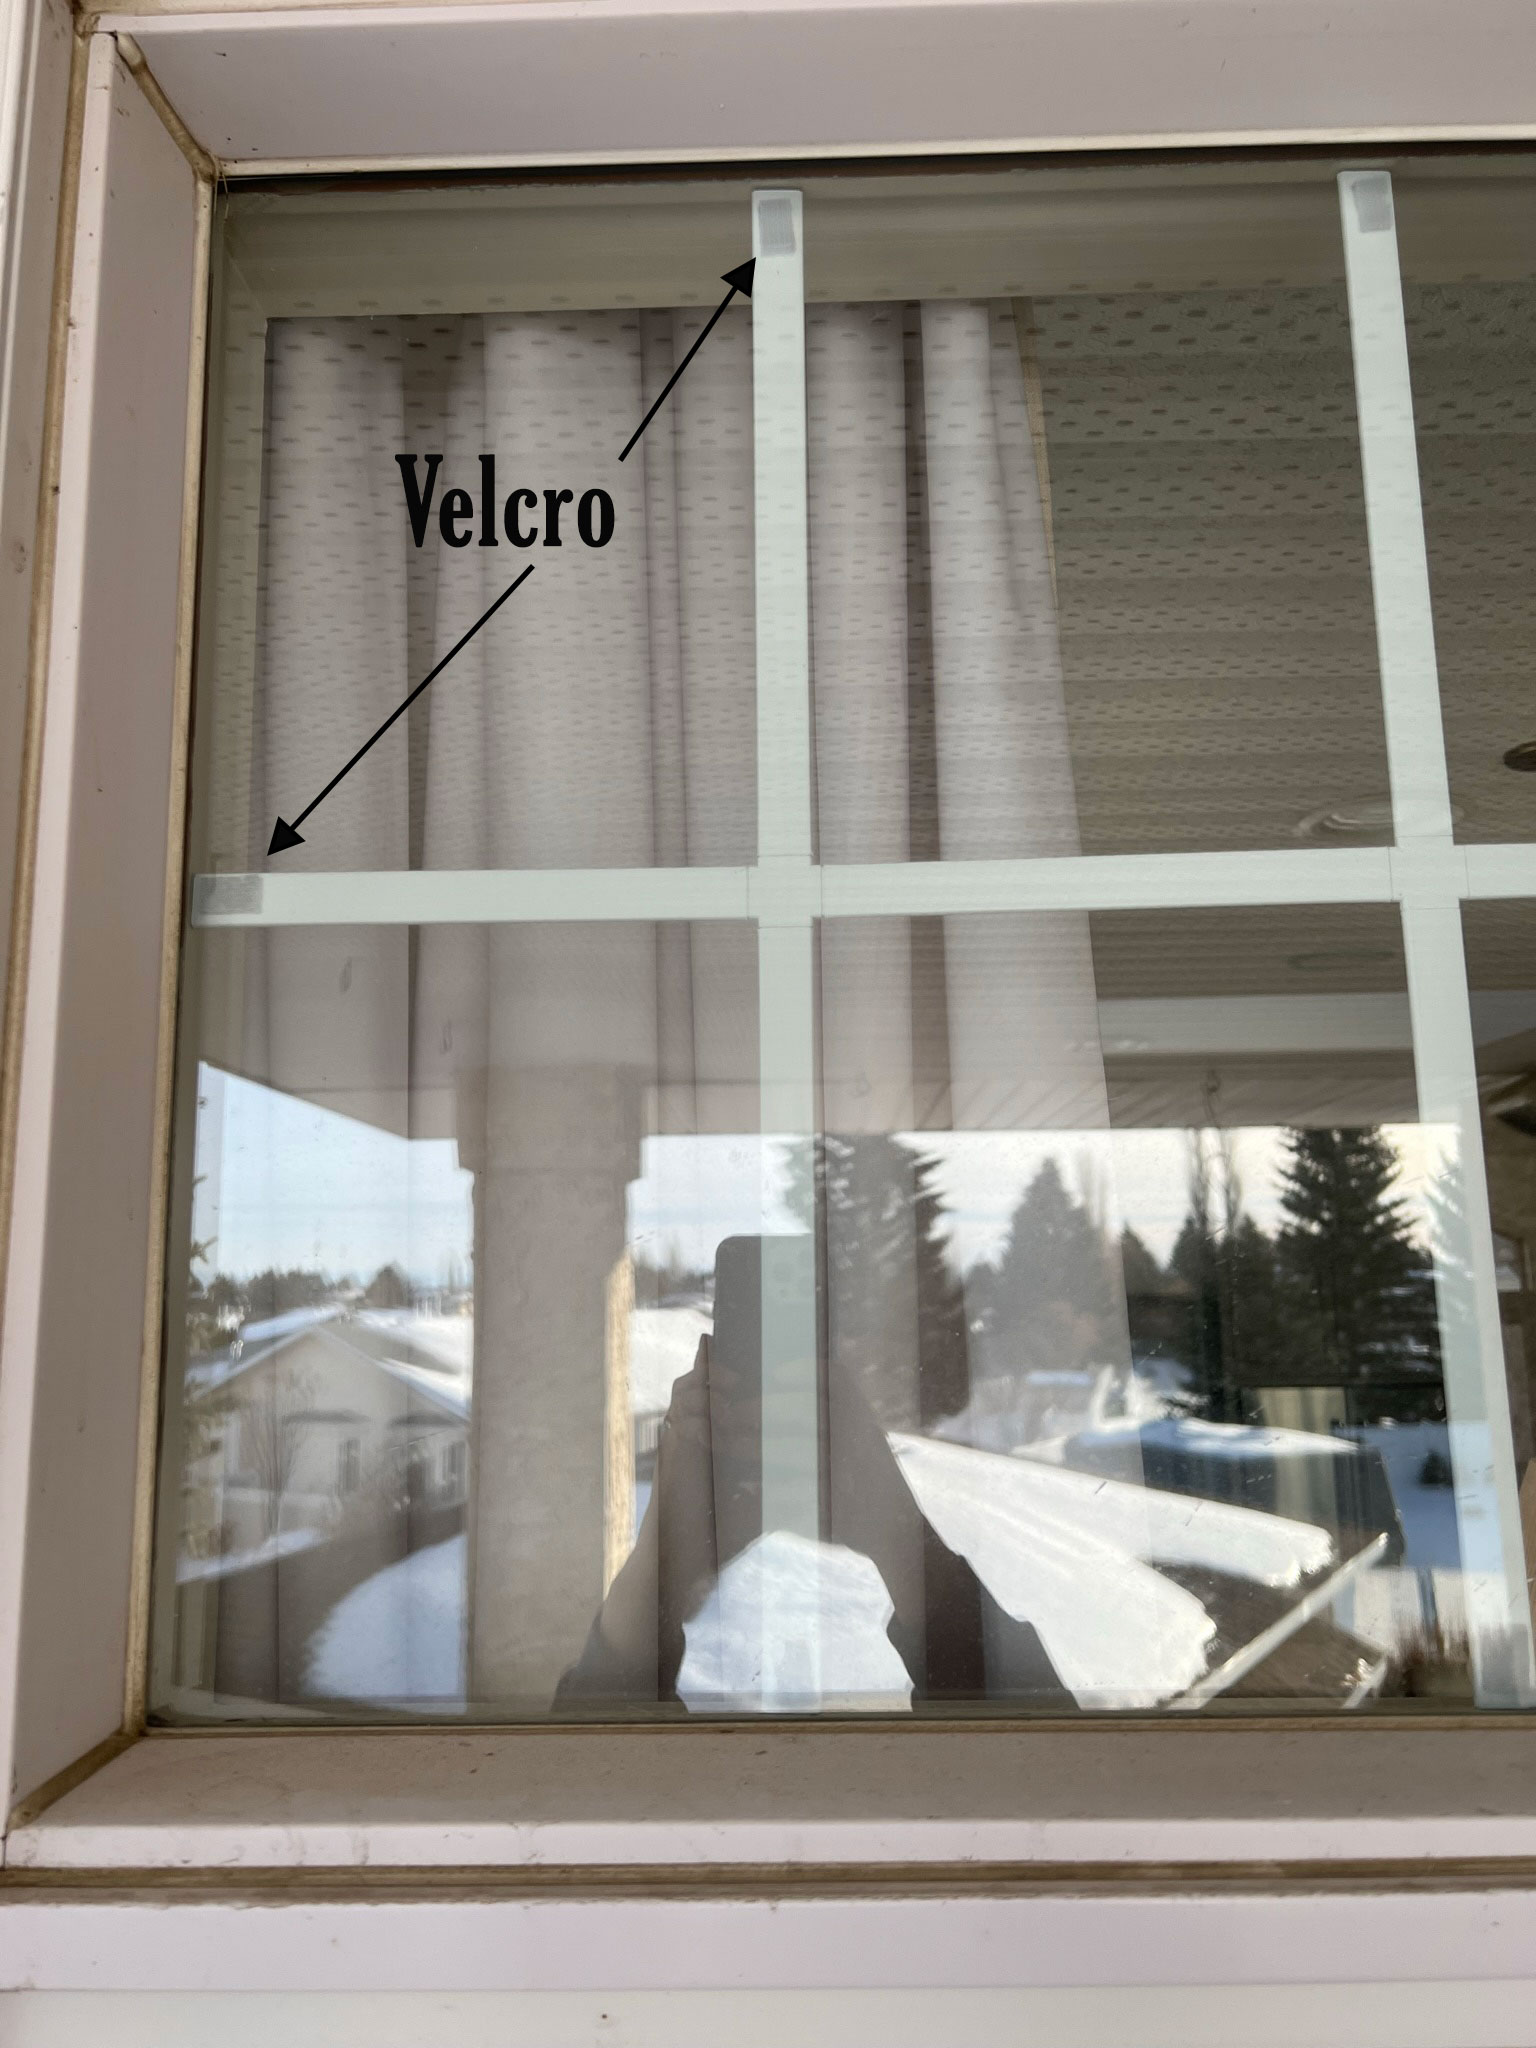
I cut tiny little pieces of the velcro and attached one side to the DIY window panes at the ends of the horizontal and vertical sections. Then it was just a matter of sticking them to the window!

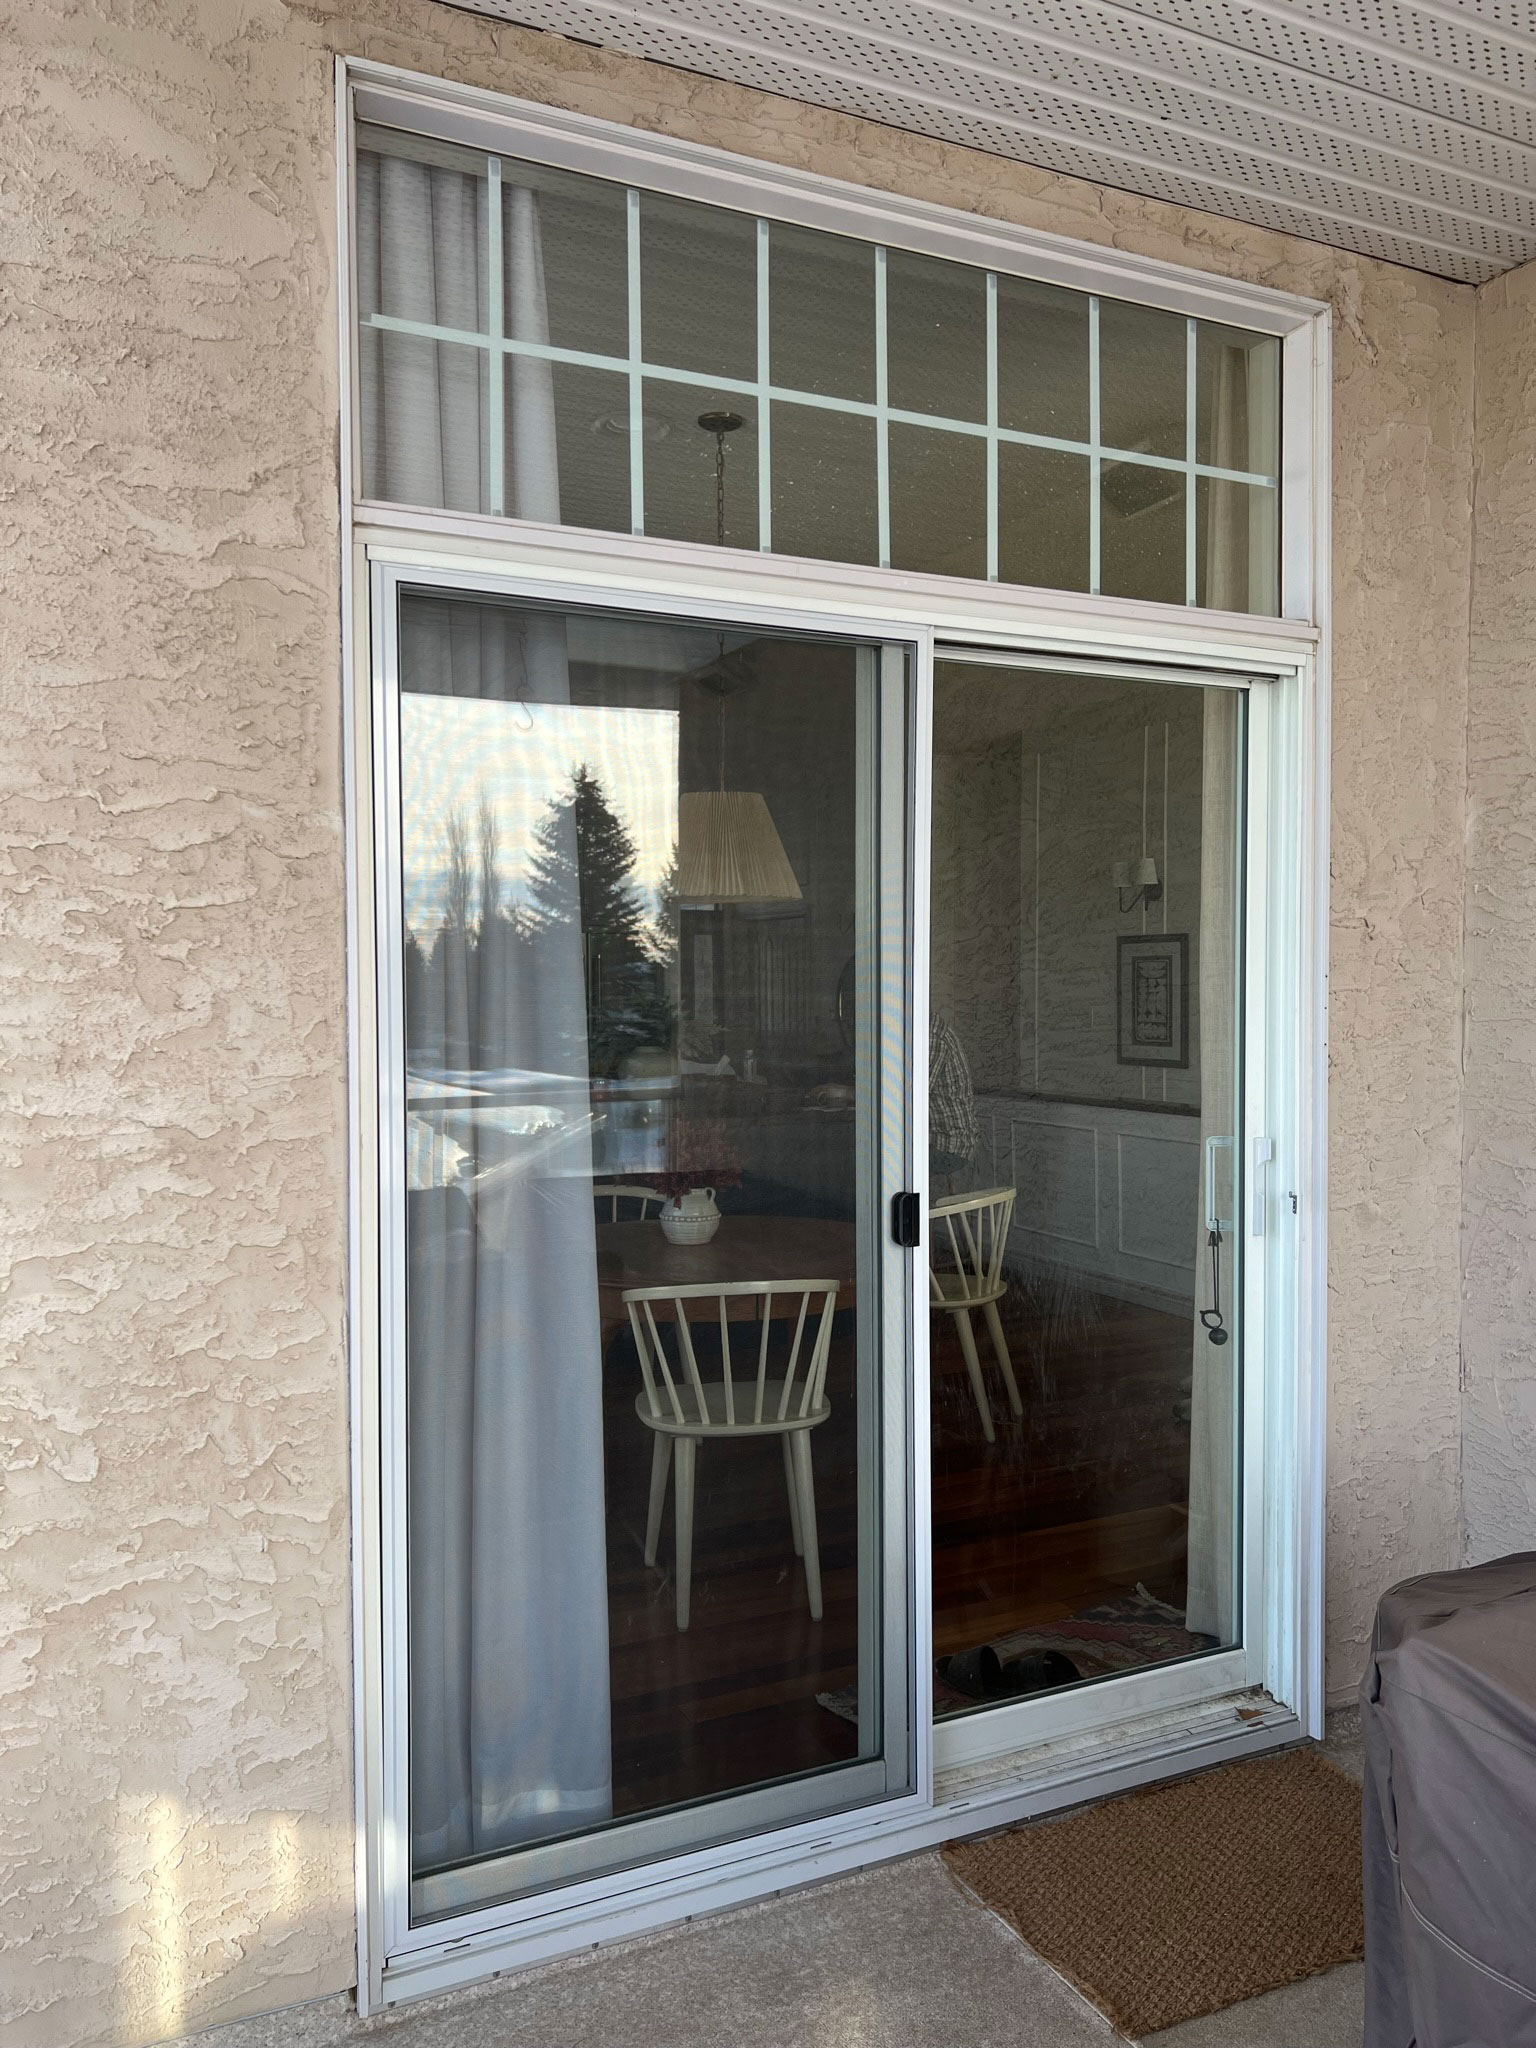
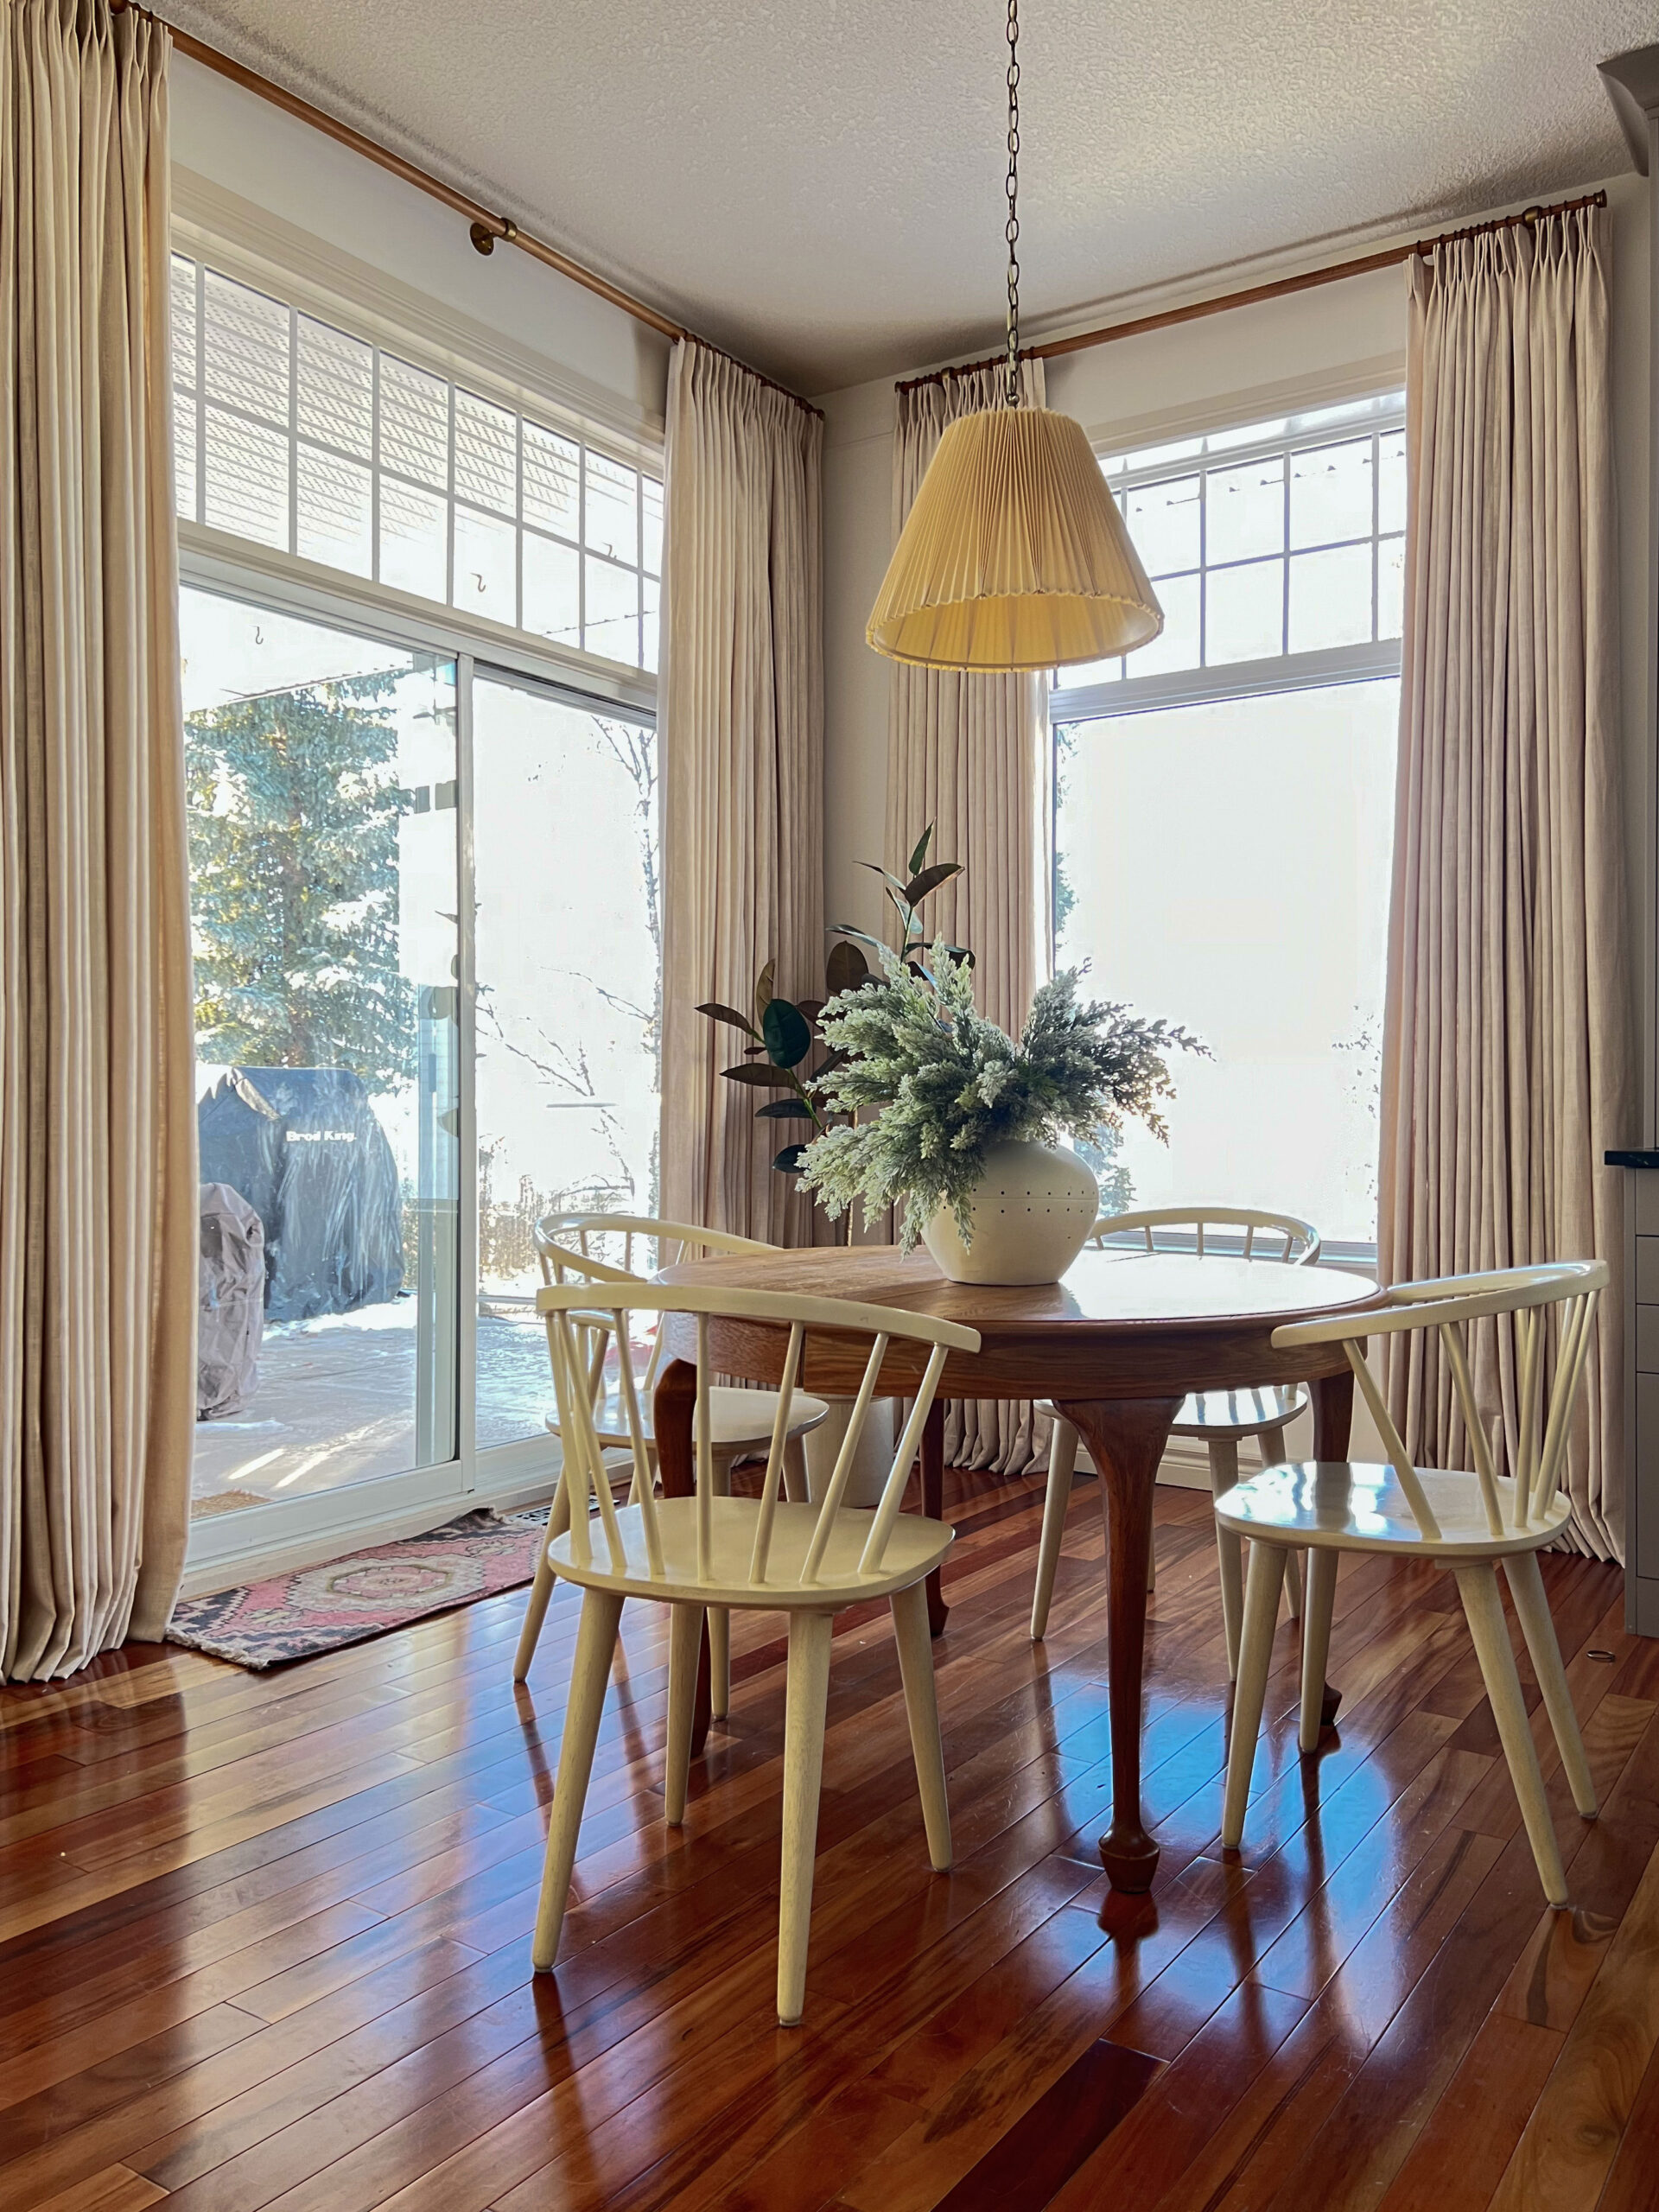
I was a little worried that the velcro would show from the opposite side of the window, but it is actually really difficult to see them unless you are really close up. Where my windows are located, really high up on the house, it’s impossible to see them.
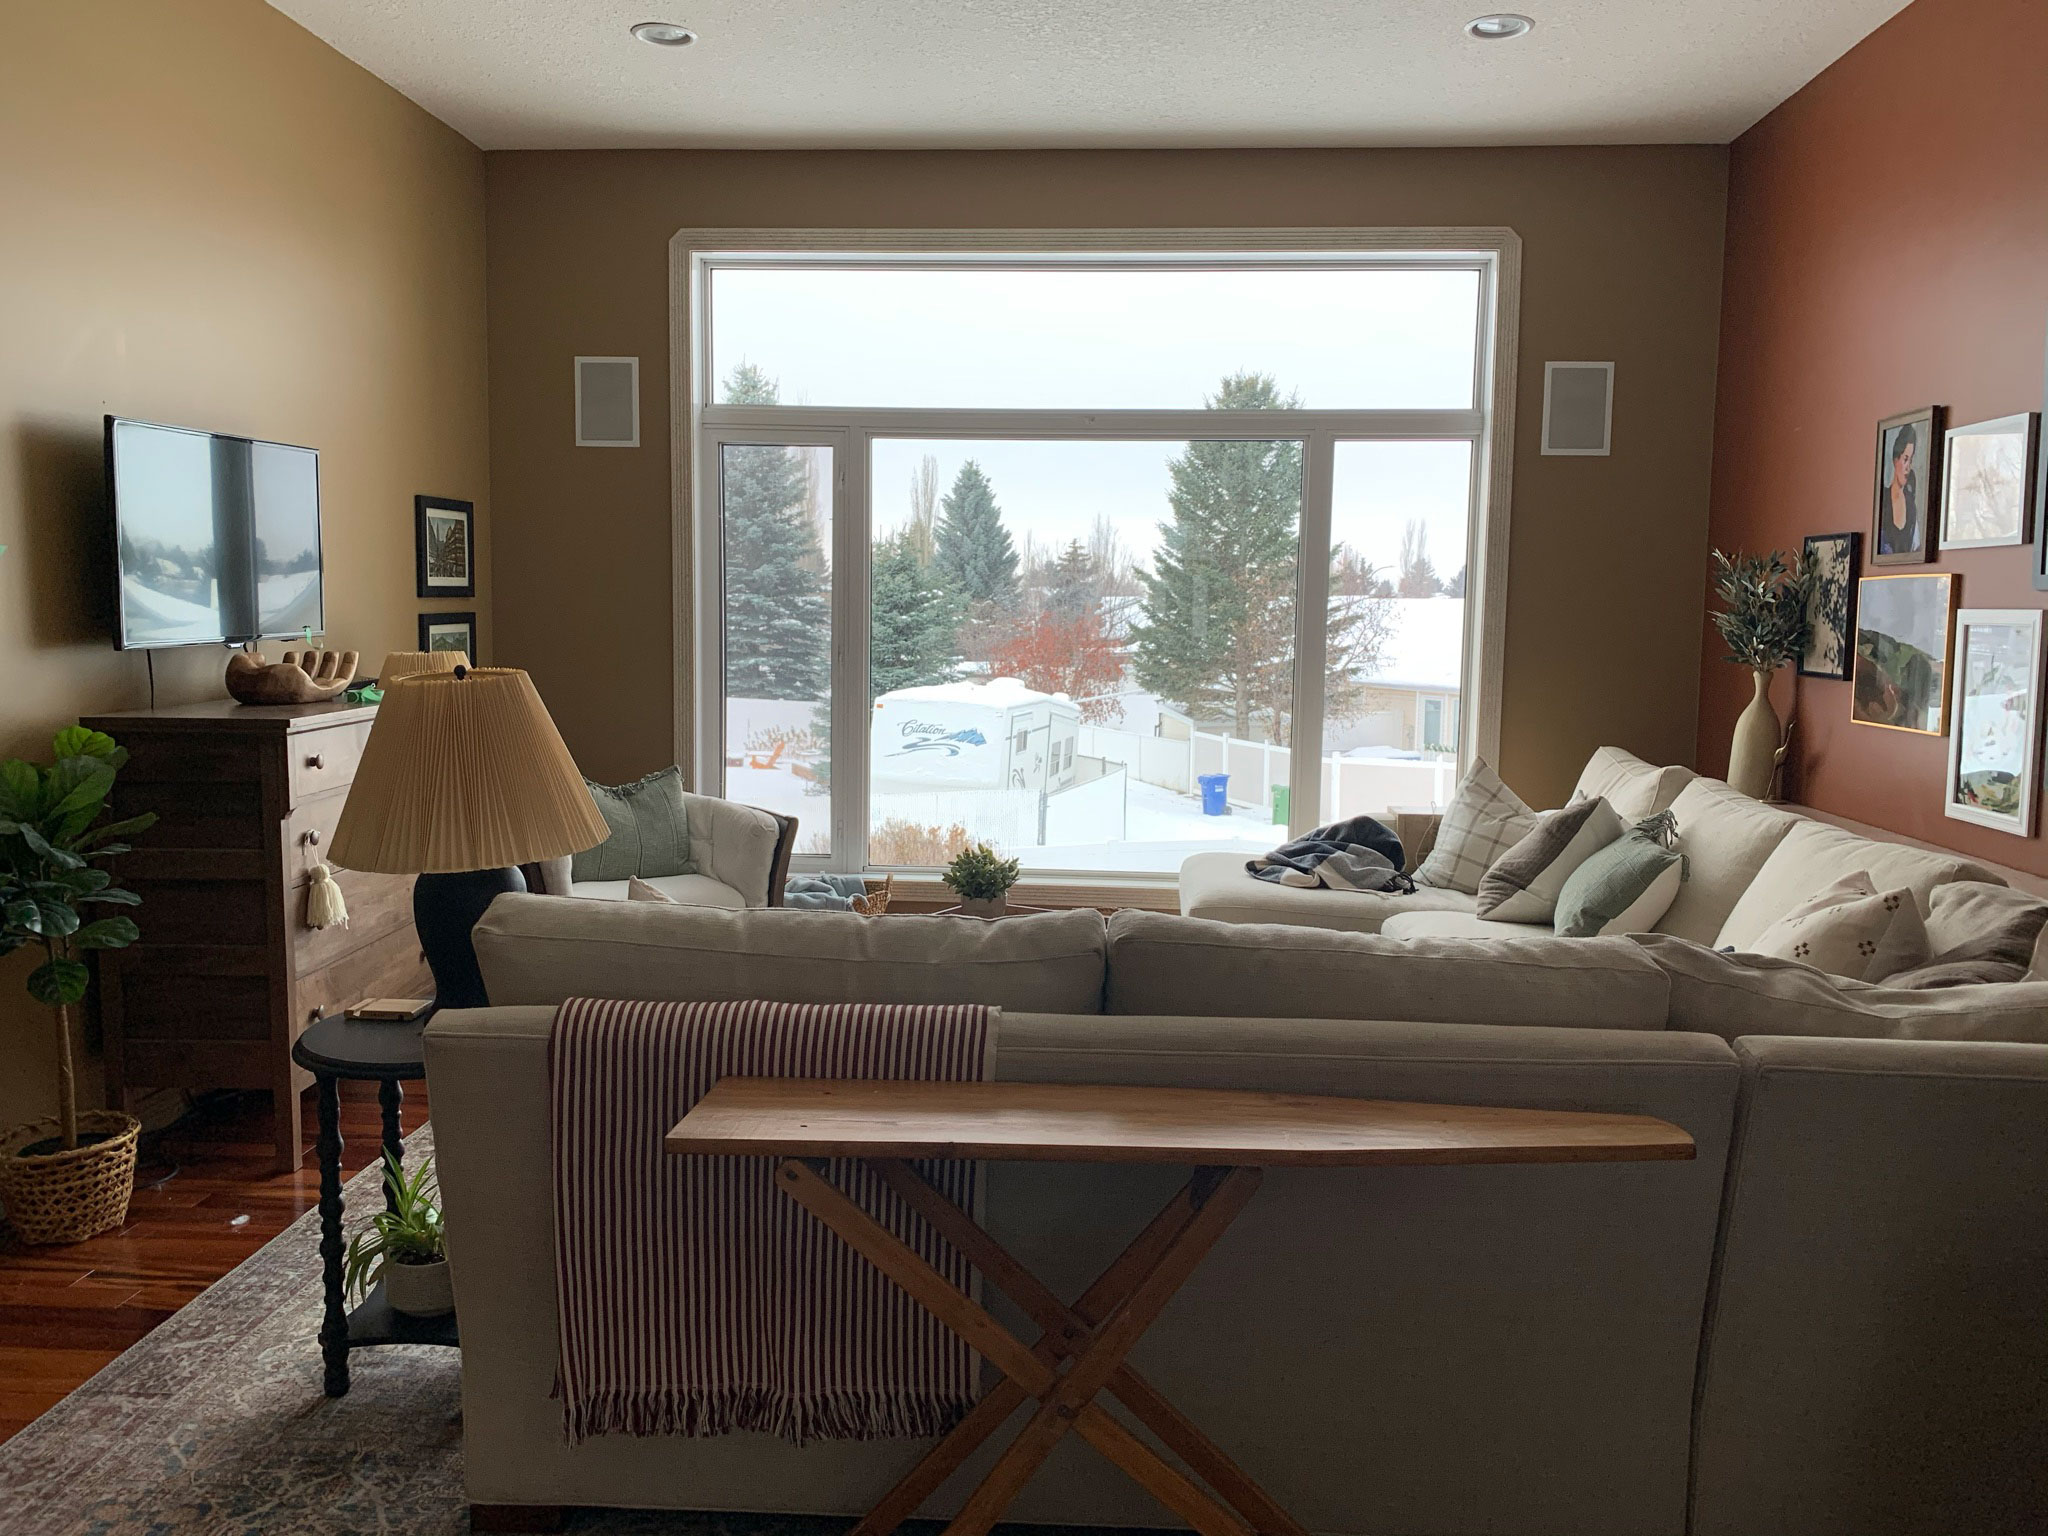
This is how they look from the inside! I first installed them in my living room and dining nook and later went on to order more for my bedroom. Now the street-side look from the back of the house is all consistent with panes on the top parts of all the windows. On the front of the house, the dining room already had white window panes between the layers of glass so this really did fit in well with the rest of the home’s style.
Can you Paint New Panes?
Full disclosure on this, I haven’t personally tried to paint New Panes but I don’t see why you couldn’t! A lot of people want the look of black windows and so with some proper prep work and primer, I think these could be painted using black paint. I would for sure use a spray primer for this, I would suggest this one (I talk all about my favourite primer in this post, and why you need to prime things like plastic!) and then hit them up with a little black spray paint. You would also want to paint your window frames black, and be careful if it’s an opening window because I am not sure how well a paint on a window slider, for example, might hold up.
Can you put them all over the window? Where else could you use these?
Yes! You can customize these to whatever size you like. New Panes also has kits for 6 ft patio doors which would make them look like a french door instead of a slider! Genius!
I also think these would work well on a shower door (on the outside) if you wanted the look of glass panes. Since they are removable for cleaning, why not? They are also not permanent, if you ever want to take them down in the future a little goof-off would remove any sticker residue.
I have talked a few times about simple ways to make a home cozier, more your style, and to update a 90’s home. The addition of these panes really made a huge difference to how the home felt and gave it a much more traditional feel to the modern windows. It was such an easy way to update these windows… without getting new windows!
You Might Also Like
- Updating our 90’s Home on a Budget
- 90’s Bathroom Makeover – The Kids Bath REVEAL!
- DIY Dowel Curtain Rod with Gold Brackets and End Caps
- Living Room Reveal!
- How to install a DIY Staircase Runner
- How to make a DIY Wall Tapestry using Mod Podge
- 4 DIY Light Fixtures that You Can Make for Your Home!
- DIY Halloween Decorations using Dollar Store Supplies


Erin,
Thank you so much for this info! I have been wanting to add panes to our large picture windows for some time now and considered the tape option but with the heat here was sure it would leave a residue. I’m definitely going to try this company instead. I came here for kitchen info, but left with so much more! Your blog is a wealth of information.
Oh my gosh thank you this comment made my day!! Good luck with your window panes!
This was really helpful Erin! Thank you!
Thank you Tiffany I’m glad it was helpful!
Awe thanks Erin! We appreciate you sharing us! Like others have said; your blog is a wealth of information!
-Bob @ http://www.newpanes.com
Thanks Bob! Love your product!
I love this! I want to build a transom window on an interior hallway but i think i want it to look like a vintage leaded window. Did you come across anything that looked like the?
I love that idea! I have not, but I’m sure if you get creative you will find something!